Study Buddy Tips

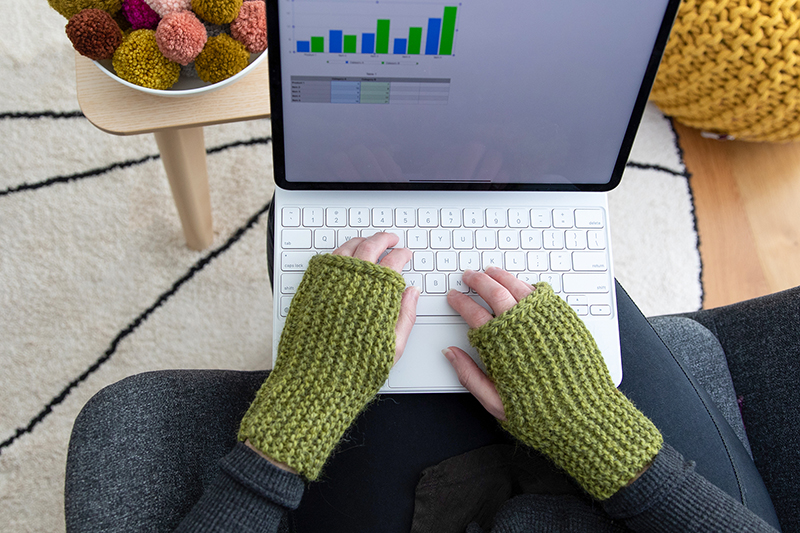
My Study Buddy Mitts pattern is a great way to ‘study-up’ on some advanced-beginner knitting techniques in a quick, easy project. Below are tips and tutorials to help you make your own pair!
Technique Tutorials
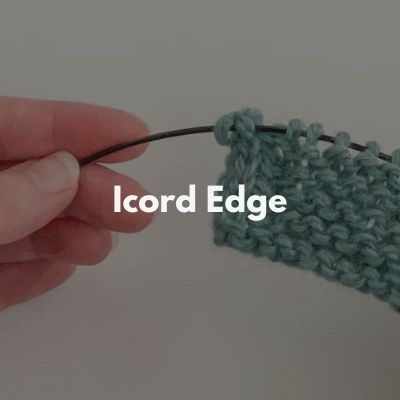
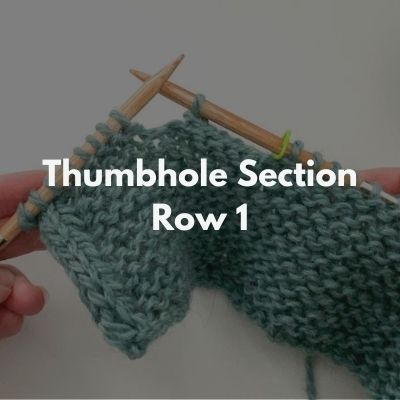
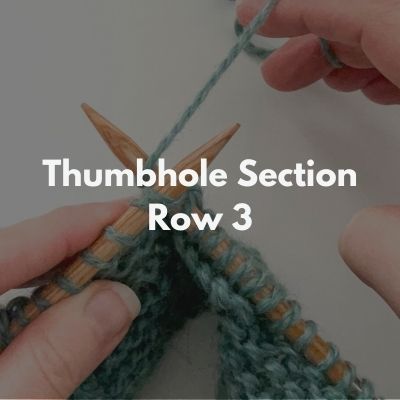
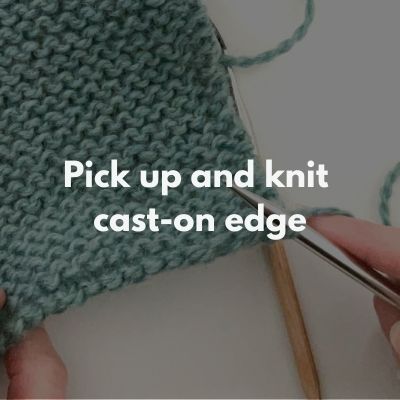
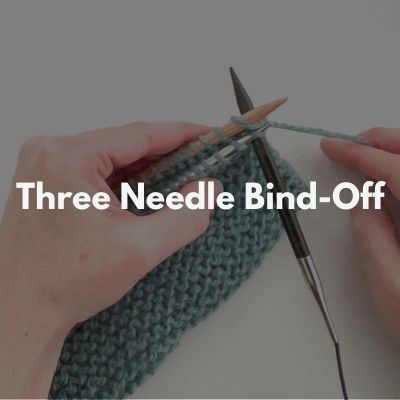
I’ve created photo tutorials for each of the techniques used, broken out by section in the pattern. Click below to view the tutorials for each of the following sections: casting-on, icord edge (“sl2 pwise wyif”), rows 1-3 of thumbhole shaping section, picking up cast-on edge stitches and three needle bind-off.


How to Adjust Size
Fingerless mitts are pretty versatile when it comes to sizing as they stretch easily and so one size can fit many different size hands. In Study Buddy Mitts, I provide 2 size options (S/M and L/XL). I recommend for your first pair that you pick one of these sizes, and then decide if you want to make adjustments after that. Below are some basic adjustments you can make should you want to resize them a bit:
Make them Wider:
This is the easiest adjustment! To make it wider, you will just want to repeat rows 1-2 in section 1 and section 3 more times than that specified in the pattern. Just make sure to add the same number of rows to section 3 as you did in section 1. When working in garter stitch, each ridge you see if equal to 2 rows. So you just need to decide how many additional ridges you want on either side of the thumbhole.
Make them Longer:
The length of the mitt is decided by your cast-on amount. So if you want to make them longer, you need to decide that right away. And then you need to decide if you want the extra length below the thumb or above the thumb:
If you want the extra length below the thumb (so between the thumb opening and the wrist):
- First figure out how much length and then multiply that by the stitch gauge of 3.75. So let’s say you want an extra 3/4″ in length here. That multiplied by 3.75 = 2.8, so rounded up is 3. That means you want to cast-on 3 additional stitches.
- Then in Section 2, Row 1, Step 1, where it says to “knit 14” you will add your 3 stitches here – so you’ll instead “knit 17”.
If you want the extra length above the thumb (so between the thumb opening and the finger tips):
- First figure out how much length and then multiply that by the stitch gauge of 3.75. So let’s say you want an extra 1/2″ in length here. That multiplied by 3.75 = 1.875, so rounded up is 2. That means you want to cast-on 2 additional stitches.
- Then in Section 2, Row 1, Step 3, after you bind-off for your thumb, you will add your 2 stitches to the amount you need to knit to the end.
I hope these tips and tutorials are helpful as you make your own pair of Study Buddy Mitts! Feel free to reach out if you have any follow-up questions.