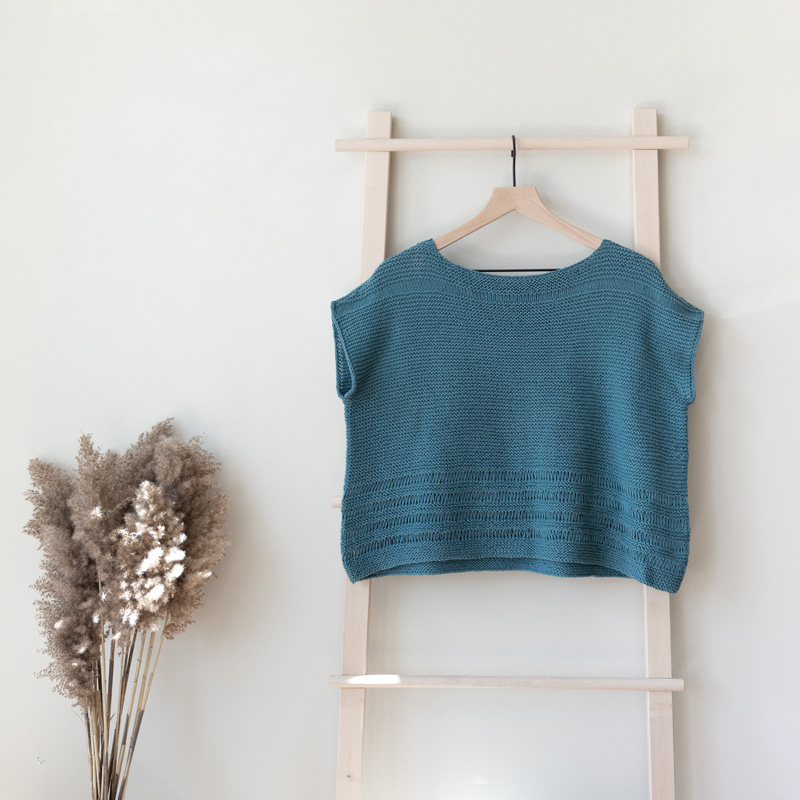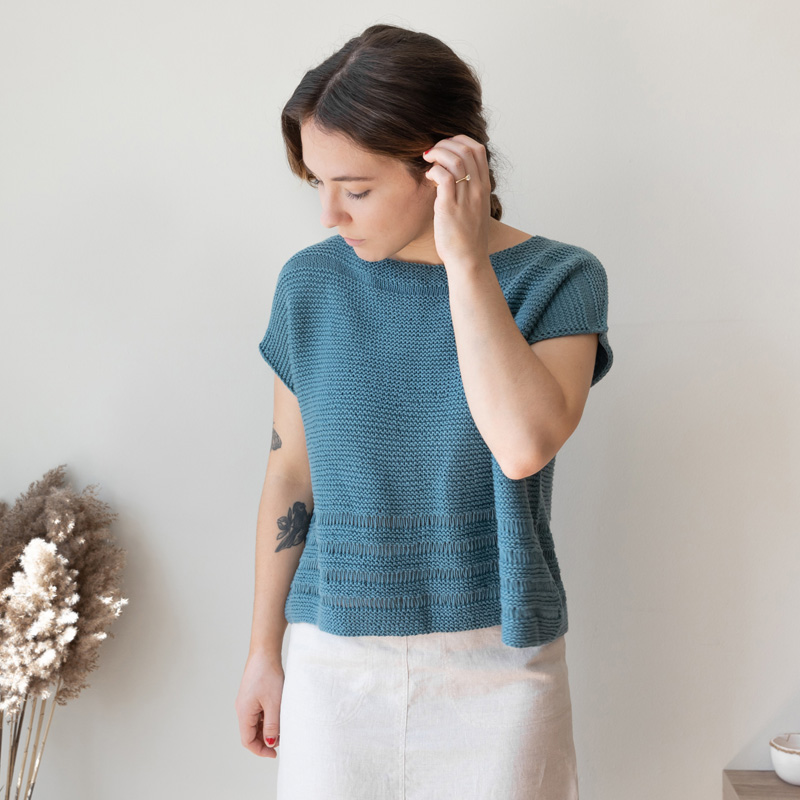
Here’s the Azul cotton tee, knit up in DK-weight 100% cotton yarn. It’s all about simplicity with this piece, with a few little details to keep things interesting.

I’ve outlined some of the details of this design below:
Sizing
- The sample the model is wearing is the 46.75″ size (the second size option). She is wearing it with approx. 12″ of positive ease (meaning the finished measurement of the tee is 12″ larger than her actual bust).
- I recommend picking a size that is around 8-12″ larger than your actual bust measurement, depending on preferred fit. I’d take into account how you typically like to wear your tops. If you like them boxy, oversized and drapey, go with 12″ of positive ease. If you like things a bit more fitted then closer to 8″ (or a little less). When in doubt, measure a top that you love the fit of for reference.
Yarn
- Azul is knit in Willet which is a DK-weight cotton yarn. The color shown is Meridian.
- The gauge is 19.5 sts = 4″, so it’s worked in a looser-than-typical DK gauge. So you could consider a light worsted-weight yarn for this piece as well.
- Knitting with cotton or linen will keep this tee nice and drapey – great for summer! You could knit it in wool though if you prefer, it will just hav a little less drape to it.
Techniques
- I would consider this piece an advanced beginner level. Simple stitches, very simple construction, with just a few little details thrown in there for interest.
- It’s worked in Garter Stitch in the round, which means you knit 1 round then purl 1 round (unlike Garter Stitch flat where you knit every row).
- The bottom portion features some rows of drop stitches – if you’ve never made them before they are quite easy! Here’s a tutorial about them.
- When the front and back are separated at the underarms, you create the sleeves by casting on 4 stitches at each side using the cable cast-on method. You can watch my video here if you need help with this technique – it’s for a different pattern but the technique used is the same (also, if you want tips on lengthening your sleeves, read the next section!):
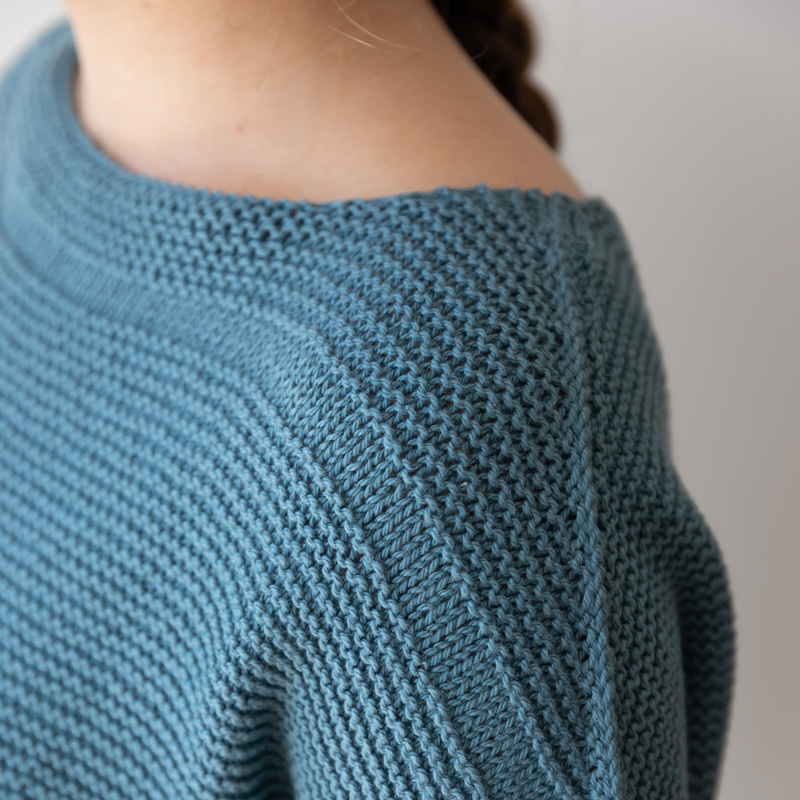
- The front and back shoulders are joined together using the three needle bind-off technique. In Azul, I made it an ‘exposed’ seam, for a little visual interest. The way that is created is by working the three needle bind-off with the WS’s together (so the RS of the work facing you) – typically it’s done opposite (the RS’s are together and the WS is facing you). In my demo here, I do it in the traditional manner, so when working it in this piece, just know this difference.
Sloped Bind-Off
The neckline technique involves a sloped bind-off. I’ve received some inquiries about this technique, and so to clarify this section, I have expanded the instructions of this section of the pattern below. Hopefully this helps clear up any potential confusion! And for a video tutorial of the sloped BO, you can click here. It’s for my Azalea top but the technique is similar.
Begin Neck Shaping:
- Next row short row 3a: (RS) Make double st, knit to 2 (2, 2, 3, 3, 3, 3) sts before last double st, turn;
- Next short row 3b: (WS) make double st, knit to neck m, remove m, BO all sts to next m, removing marker to BO last st, knit to 2 (2, 2, 3, 3, 3, 3) sts before last double st, turn.
- Next row short row 4a: (RS) Make double st, knit to last st before left neck edge, sl 1 wyib, then drop yarn. Then on right neck edge side, sl 2 wyib, insert left needle into 1st slipped stitch on right needle and lift it up and over the 2nd slipped stitch (1 st bound-off), then join a new ball of yarn and BO 1 more stitch (like a typical bind-off), then knit to 2 (2, 2, 2, 3, 3, 3) sts before last double st, turn;
- Next short row 4b (WS) Make double st, knit to last st, sl 1 wyif, drop yarn; Then on left neck edge side, sl 2 sts wyif, insert left needle into 1st slipped stitch on right needle and lift it up and over the 2nd slipped stitch (1 st bound-off), then BO 1 more stitch (like a typical bind-off), knit to 2 (2, 2, 2, 3, 3, 3) sts before last double st, turn— 36 (41, 47, 53, 58, 64, 70) sts rem for each side.
- Next row short row 5a: (RS) Make double st, knit to last st, sl 1 wyib, drop yarn; Then on right neck edge side, sl 2 wyib, insert left needle into 1st slipped stitch on right needle and lift it up and over the 2nd slipped stitch (1 st bound-off), then knit to 2 (2, 2, 2, 3, 3, 3) sts before last double st, turn;
- Next row short row 5b (WS) Make double st, knit to end; Then on left neck edge side, sl 2 wyif, insert left needle into 1st slipped stitch on right needle and lift it up and over the 2nd slipped stitch (1 st bound-off), then knit to 2 (2, 2, 2, 3, 3, 3) sts before last double st, turn—35 (40, 46, 52, 57, 63, 69) sts rem for each side.
- Next row short row 6a: (RS) Make double st, knit to end; on Right neck edge side, knit to 2 (2, 2, 2, 2, 2, 3) sts before last double st, turn;
- Next row short row 6b (WS) make double st, knit to end; on Left neck edge side, knit to 2 (2, 2, 2, 2, 2, 3) sts before last double st, turn.
- Repeat rows 6a and 6b: 2 more times
How to lengthen the sleeves
I’ve received some inquiries about my advice for lengthening the sleeves a little. So below are some tips I have if you are interested in doing this!
- The little sleeves in this piece are created after the “Separate Front and Back” section. After you work these, you’ll be instructed to cast-on 4 stitches at each side – so this creates a sleeve that is approx 3/4″. To make them longer, you can cast-on more stitches at each side. The number of additional stitches just depends on how much longer you want to make them.
- So by adding additional stitches, it also means that your stitch counts in a couple of areas will be a little different:
- Front: in the “Begin Stockinette” section, in the last row where it says “place markers”, you’re instructed to knit a certain number of stitches before placing your first marker for the neck. Add to this number the additional stitches you cast-on.
- Back: in the last row before “Shoulder Shaping” where it says “place markers”, repeat the same as above – add in your additional sleeve stitches to the stitch count before you place your first neck marker.
- Note: depending on how much additional length you’ve added, you may need more yarn. Just something to keep in mind!
Ready to cast-on your own Azul? You can purchase it on Ravelry


