One of the most popular types of knitting increases is the “m1” (make 1). It’s a type of knitting increase where you create a new stitch in-between 2 existing stitches. You’ll find it listed as either “m1-R” (make 1 right-leaning) or “m1-L” (make 1 left-leaning). The stitch you create with this increase leans in a particular direction depending on how it’s worked (hence the right-leaning and left-leaning). Why are they so popular? Here are just a few reasons:
- Unlike a “kfb” (knit front & back), the stitch you create from a m1 lays flat (whereas a kfb creates a little bump in the fabric). This makes it a great increase for stockinette stitch fabric.
- Also unlike a “kfb” where you create a stitch from an existing stitch, a m1 allows you to create a stitch from nothing and so this allows for more flexibility in terms of where a designer can place them.
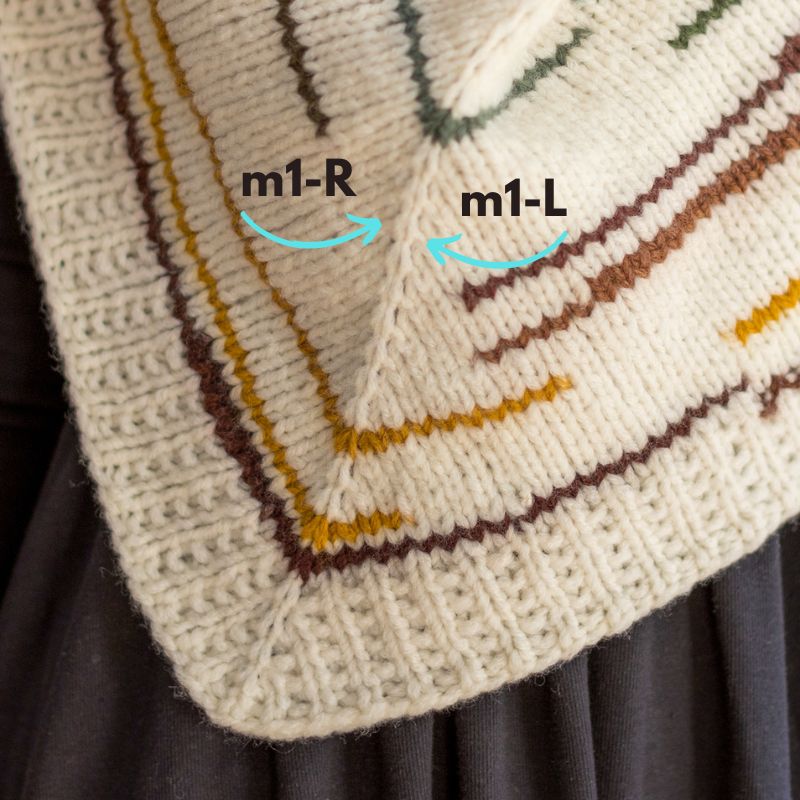
- It creates a subtle decorative element because the stitch you create either leans right or left, and they work well as a pair (working a m1-R on one side and a m1-L on the other). Below is an example of paired m1-R and m1-L increases that I used in my Airplane Mode scarf. I have a center stitch and on either side I had worked m1-R and m1-L increases (to grow the scarf out):
How do you work a m1-R or m1-L?
You create a m1-R or m1-L by using your left needle tip to pick up the strand in-between your 2 needle tips (so in-between the last stitches on your left and right needles) and then knitting it with your right needle. To create a m1-R, you pick up the strand from back to front and then knit into the front of it and to create a m1-L you pick up the strand from front to back and then knit into the back of it. Watch my video tutorial below to see exactly what I mean (and keep reading to view my 5 helpful tips!):
My 5 Helpful Tips for m1 increases
These 5 tips are things that have been helpful to me and my students over the years, and can hopefully help you too!
Tip #1: Torque the strand on the left needle to create slack
This is my most important tip! As I show in my video above, it’s very helpful to create some slack in the strand after you’ve picked it up in order to then knit that stitch more easily. In a m1-R you pick up the strand with your left needle from back to front and then you need to knit into the front of it. But getting the right needle tip into the front of this stitch can sometimes be tricky, depending on the yarn, needle and tension.
So I find it super helpful to utilize my left fingers and torque (i.e, twist/rotate) the stitch forward a bit on the left needle to create some slack in the front of that strand. By doing this, there’s now plenty of space for the right needle tip to enter the front of that stitch so you can knit it. And same goes for a m1-L where you need to knit into the back of the stitch – you can torque the stitch to the back with your left fingers and this creates slack in the back of the stitch which then allows you to easily insert the right needle.
Tip #2: If you forget which direction to pick-up the strand from, think of this phrase
I can’t remember exactly where I first learned this, but it’s a well-known technique for remembering the difference between m1-R (right) and m1-L (left). If you just think of the phrase “I left through the front door, I’ll be right back”, it reminds you that left = front and right = back. So when working a m1-R, you pick up the strand starting from the back. And when working a m1-L, you pick up the strand starting from the front.
Tip #3: If you forget which direction to knit the strand from, remember that it’s the opposite of how you picked it up.
So if you picked-up the strand from the back (for a m1-R), then you’ll knit into the front of the strand (so the opposite of the strand pick up direction). And if you picked-up the strand from the front (for a m1-L), then you’ll knit into the back of it.
Tip #4: Write it out at the top of your pattern
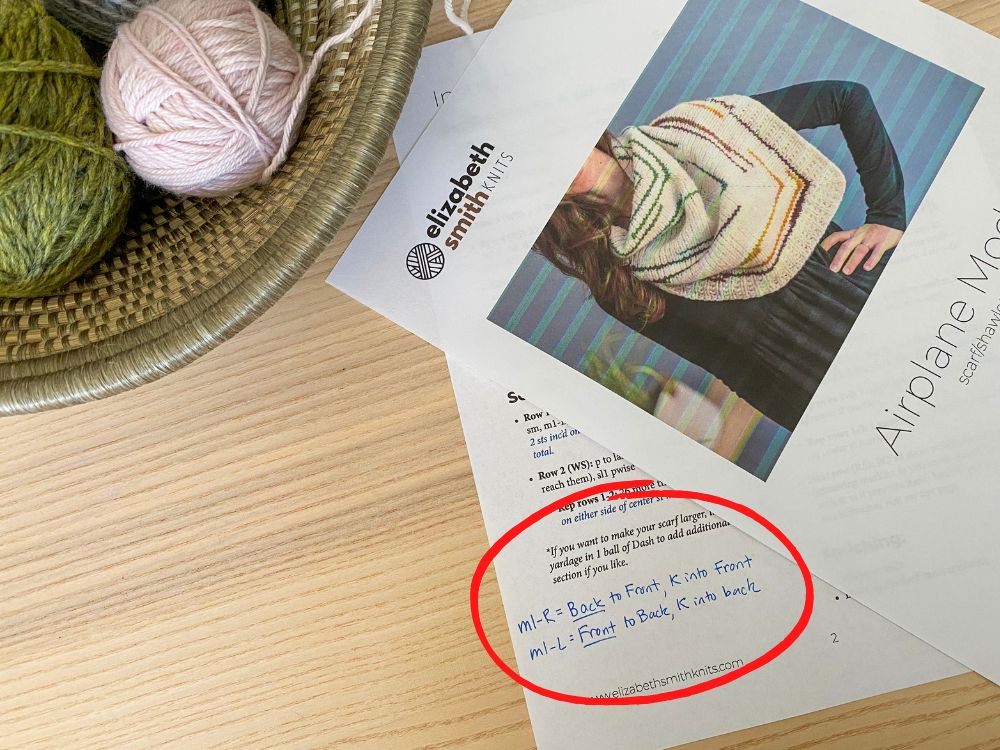
In my early knitting days, I would just write out the definition of m1-R and m1-L at the top of the pattern page I was working from. So when I needed a quick reminder, I just looked down! Here’s an example:
Tip #5: If R or L is not listed, you can use either
You may encounter a pattern where it just abbreviates this increase as “m1” with no “R” or “L” listed. So in these cases, which type of m1 do you work? Unless otherwise stated, in these circumstances you typically can just work whichever type of m1 you prefer. I have read in the past that the default is m1-R but I’ve also read that it doesn’t matter. So you may see conflicting advice on this, but my take is that if a pattern doesn’t specify, then the direction of the “lean” must not be too important.
I hope some of these tips may be helpful the next time you encounter m1 increases in your knitting project! A great pattern to practice on is my Airplane Mode scarf – click here for all the pattern details.


