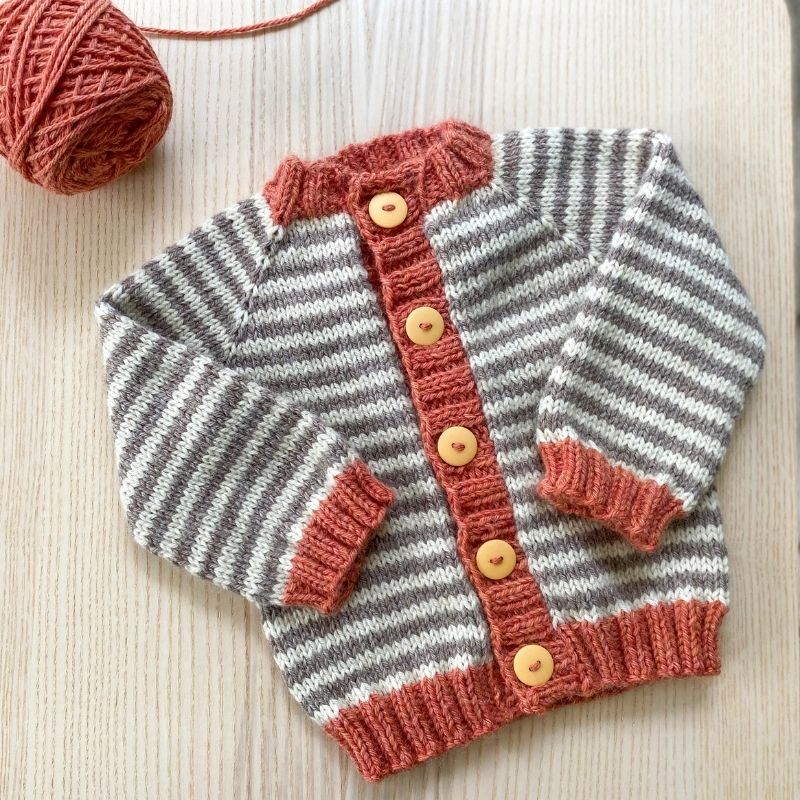
I thought I would put together a photo tutorial to show you how I attach buttons to my knits, using my Little Coffee Bean pattern as the example (this version, knit by my friend and tech editor Karen, uses 3-colors instead of just 2 and I just love it!). This is one of those techniques that, if you were to Google it, you’d find a bunch of different methods – so the techniques I show you below are not the only way to do it. It’s just the way I have found works for me, and maybe it will work for you too!
By the way, the buttons I am using are from Purl Soho and they are my favorite! It’s hard to find simple buttons in plain, modern colors but Purl Soho has them and in multiple sizes too! I use the 3/4 size (and I often use that size for worsted and bulky-weight knits).
Prep the yarn and needle you’ll use to attach buttons
In the above example, we used worsted-weight yarn (Berroco Vintage), so with this medium-weight yarn I felt that it wasn’t too thick and would work fine as is. But if I were using a bulky-weight yarn, I’d probably consider un-plying it and using only a few plies as my working yarn. To see this in-action, you can check out the video I had done for my Audrey’s Cardigan KAL here. Also, because traditional tapestry needles won’t fit through my button holes, I used a smaller tapestry needle set I purchased at my LYS – here’s a link to see it.
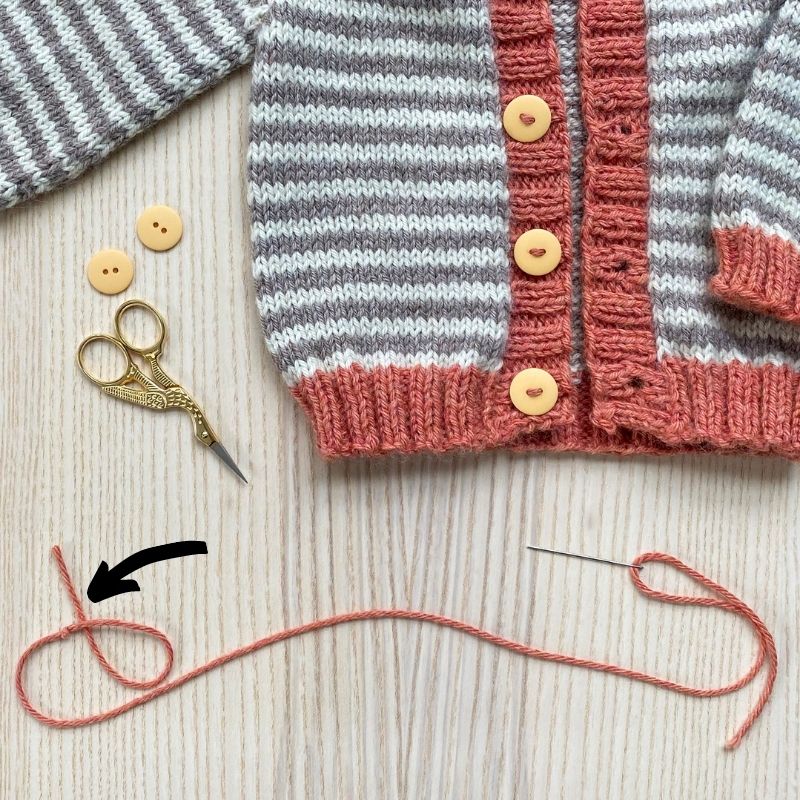
I cut a piece of yarn, usually around 18″ long or so. On one end, I tie a double-knot, making sure to keep a long tail (at least 3″). I then thread the other end through my tapestry needle. Now it’s time to attach!
Attach Button to Buttonband
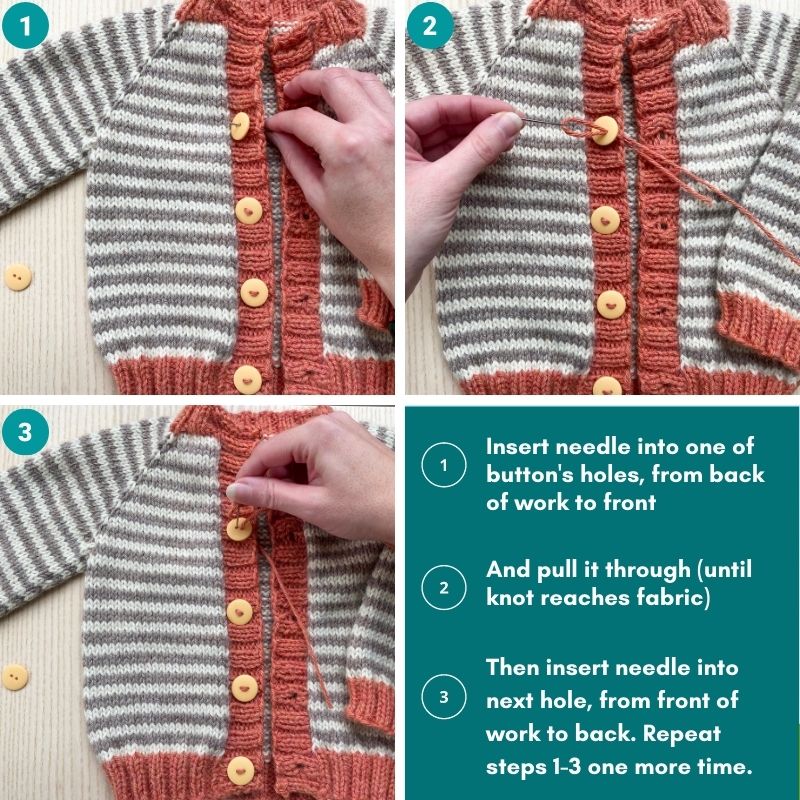
The next step is to do the actual sewing – attaching the button to the buttonband with your threaded yarn. Below are visuals are these steps:
- Step 1: Insert needle into one of button’s holes, from back of work to front
- Step 2: Pull the needle through (until the knot reaches the backside of the fabric)
- Step 3: Insert needle into the next hole, from front of work to back. Then repeat these 3 steps one more time.
Secure Backside of Button
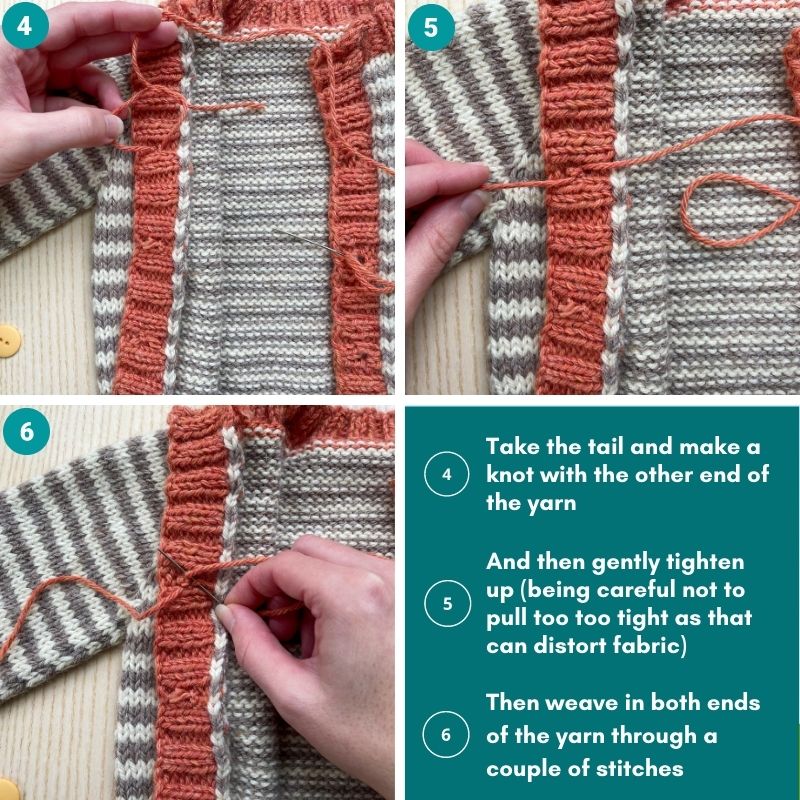
The next step is to secure the backside of the button. Turn the work so the wrong-side is facing you and complete the next 3 steps:
- Step 4: Take the tail and make a knot with the other end of the yarn
- Step 5: Gently tighten it up, but be careful not to tighten it too too much because that can cinch up and distort the fabric.
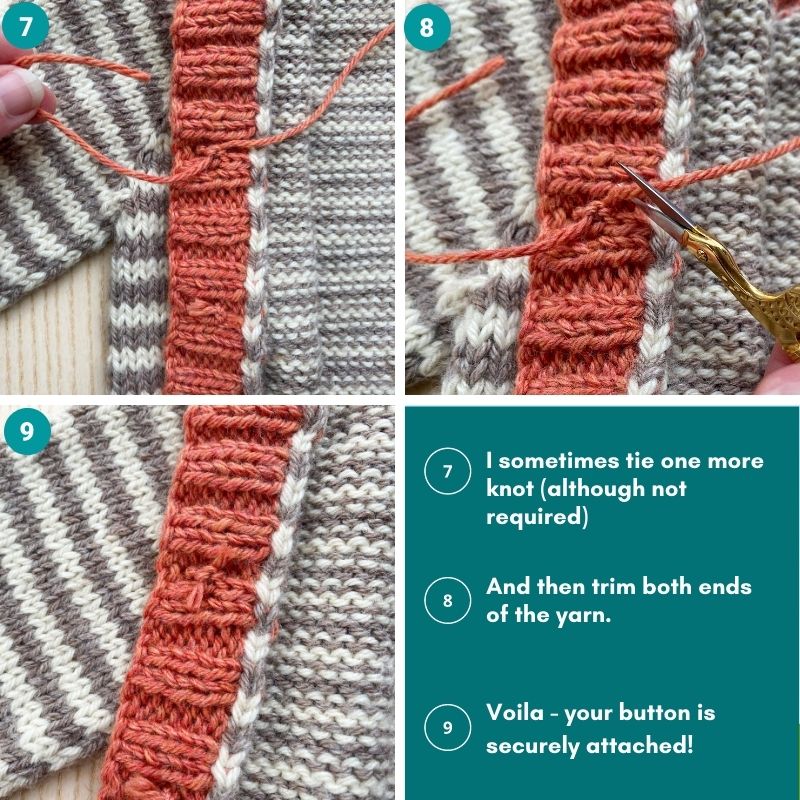
- Step 6: Then weave in both ends of the yarn through a couple of stitches. If your buttonband is ribbing like in my example, I like to weave it through a stitch or two of the knit stitches.
- Step 7: Sometimes I will then tie one more knot (although it’s not required – see how secure the button is feeling at this point).
- Step 8: Trim up both ends of the yarn.
- Step 9: Voila – you’re done! Your button is now secure.
If you want to see some additional photos, here is another one of my button tutorials that I did for the adult version of this sweater, Coffee Bean Cardigan.
I hope some of the techniques I use to sew on my buttons may help you next time you have a cardigan project! If you have a technique that you like to use that you’d like to share with me, or if you have any questions, feel free to reach out – I’d love to hear from you.

