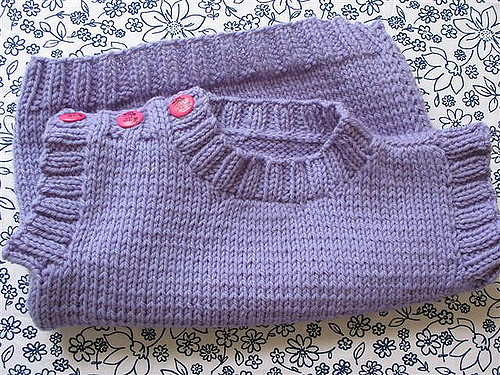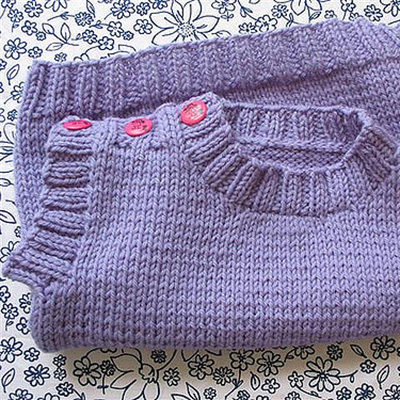
I saw the pattern for this adorable toddler vest on Ravelry, from Crystal Palace Yarns. I followed this pattern for the body of the sweater, but revised the pattern when it got to the neck, shoulders and button band on the shoulder. I have detailed the revisions I made below.
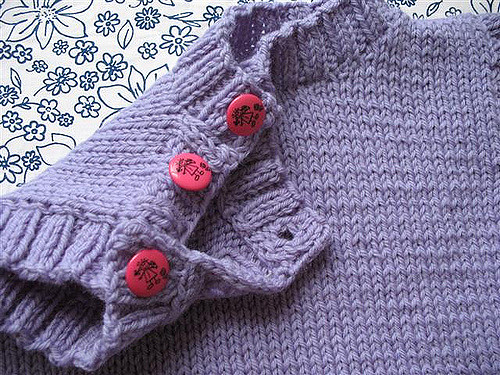
It’s a great quick knit, and I love these buttons- I found them at a yarn shop in Connecticut when we were visiting my family during the holidays. This is a belated birthday present for my neighbor’s adorable 2-year old. Hopefully I will get pictures of her wearing it!

Materials:
- 2 skeins of Cascade 220 (I only used .25 of the 2nd skein).
- Size 8 straight needles
- Size 7 16″ circular needles
- Size 7 double-pointed needles
- (3) .5″ button
- Tapestry needle (to weave in ends)
Gauge: 4.5 stitches = 1″
Revisions to Crystal Palace Yarns Baby-Toddler Vest UPDATED 1/25/09 to correct mistake in language for front side
(I recommend printing out the original pattern, then following along my revisions)
Back
Follow original pattern as written until you get to “Shape Neck and Shoulders”
My version of “Shape Neck and Shoulders”
- With right side of work facing you, you will now start to shape the left side:
- Knit 12 (12, 14, 14) sts for right shoulder
- Bind off 16 (18, 18, 20) sts for neck
- Knit 12 (12, 14, 14) sts for left shoulder
- Now you will JUST be working the left shoulder (keep right shoulder stitches on the needle – these will be worked later)
- Row 1: purl
- Row 2: Bind off 2 sts, knit across
- Row 3: purl
- Row 4: Bind off all stitches
Cut yarn - Now you will JUST be working the right shoulder
- With wrong side facing you, join yarn at the neck edge
- Row 1: Bind off 2 sts, purl across the row
- Row 2: K2 (2, 3, 3), P2, K2, P2, K2 (2, 3, 3)
- Row 3: P2 (2, 3, 3), K2, P2, K2, P2 (2, 3, 3)
- Row 4: K2 (2, 3, 3), P2, K2, P2, K2 (2, 3, 3)
- Row 5: P2 (2, 3, 3), K2, P2, K2, P2 (2, 3, 3)
- Row 6: K2 (2, 3, 3), P2, K2, P2, K2 (2, 3, 3)
- Row 7: P2 (2, 3, 3), K2, P2, K2, P2 (2, 3, 3)
- Row 8:Bind off all stitches
- Cut yarn
Front
Follow pattern as written until you get to “Shape Neck and Shoulders”
- My version of “Shape Neck and Shoulders”:
- With right side facing you, you will now start to shape the right side:
- Knit 16 (16, 18, 18) sts for left shoulder
- Bind off 8 (10, 10, 12) sts for neck
- Knit 16 (16, 18, 18) sts for right shoulder
- Now you will JUST be working the right shoulder (keep left shoulder stitches on the needle – these will be worked later)
- Row 1: purl
- Row 2: Bind off 2, knit across
- Row 3: purl
- Row 4: Bind off 2, knit across
- Row 5: purl
- Row 6: Bind off 1, knit across
- Row 7: purl
- Row 8: Bind off 1, knit across
- Row 9: purl
- Armhole should now measure 4 (4.5, 5, 5.25)”. If not, work until it does (ending on a wrong side row)
- Now you will work the ribbed button band
- Row 1: K2 (2, 3, 3), P2, K2, P2, K2 (2, 3, 3)
- Row 2: P2, (2, 3, 3), K2, P2, K2, P2 (2, 3, 3)
- Row 3: K2 (2, 3, 3), P2, K2tog, YO, P2, K2, (2, 3, 3)
- Row 4: P2, (2, 3, 3), K2, P2, K2, P2 (2, 3, 3)
- Row 5: K2 (2, 3, 3), P2, K2, P2, K2 (2, 3, 3)
- Row 6: P2, (2, 3, 3), K2, P2, K2, P2 (2, 3, 3)
- Row 7: Bind off all stitches (in ribbing pattern)
- Now you will work the right shoulder:
- With wrong side facing you, join yarn at the neck edge
- Row 1: Bind 2 sts, purl across the row
- Row 2: knit
- Row 3: Bind off 2 sts, purl across the row
- Row 4: knit
- Row 5: Bind off 1 st, purl across the row
- Row 6: knit
- Row 7: Bind off 1 st, purl across the row
- Row 8: knit
- Row 9: purl
- Row 10: Bind off all stitches
- Cut yarn
Finishing
- My version of “Finishing”
- Weave in all ends
- Seam left shoulder together (non-button band side) using whip stitch
- Seam both left and right vest sides together using the mattress stitch
- My version of “Left band Armband” which on my version is actually the “Right band Armband” (right armhole, with right side of piece facing you)
- With size 7 circular needles, join yarn at top corner of right shoulder
- Pick-up & knit 62 (62, 66, 66) sts
- Row 1: *P2, K2; repeat from * around
- Row 2: *K2, P2; repeat from * around
- Row 3: P2, K2 to last 6 stitches, P2tog, YO, K2, P2
- Row 4: *K2, P2; repeat from * around
- Row 5: *P2, K2; repeat from * around
- Row 6: *K2, P2; repeat from * around
- Row 7: Bind off all stitches
- Cut yarn
- My version of “Right band Armband” which on my version if the “Left band Armband”(left armhole, with right side of piece facing you
- With size 7 double pointed needles, join yarn at armpit
- Pick-up & knit 56 (56, 60, 60) sts and join for working in the round
- Row 1: *K2, P2; repeat from * around
- Repeat this 5 more rounds (total of 6 rounds)Bind off all stitches in pattern
Neckband
- My version of “Neckband”
- With size 7 circular needles and with right side facing you, join yarn at back right shoulder
- Pick-up knit 76 (76, 80, 80) sts
- Row 1: *P2, K2; repeat from * to end
- Row 2: *K2, P2; repeat from * to end
- Row 3: P2, K2tog, YO, *P2, K2; repeat from * to end
- Row 4: *K2, P2; repeat from * to end
- Row 5: *P2, K2; repeat from * to end
- Row 6: *K2, P2; repeat from * to end
- Row 7: Bind off all stitches in pattern
Weave in all ends, block, and you’re done!


I love the buttons! They are so cute. I also like how they’re just on one side of the vest.
thank you for posting the alternate directions for the shoulder and neck…I thought I was going crazy trying to follow the original pattern!
There is not instruction about the button.. please help.. i am stuck.
No problem. Here is how you attach the buttons:
-With the right side of the back of the vest facing you, attach the 3 buttons to the right shoulder (this is the shoulder that was not attached during seaming), right on the ribbing.
-When you are attaching the buttons, just make sure they are lined up with the buttonholes you made on the right front shoulder
Let me know if you have any other questions! Thanks!