Layla Tips
On this page you’ll find tips and tutorials for making your own Layla! Below are the topics I cover:
- Choosing which version to make (1 row stripes vs self-striping yarn)
- Yarn options
- Picking a size
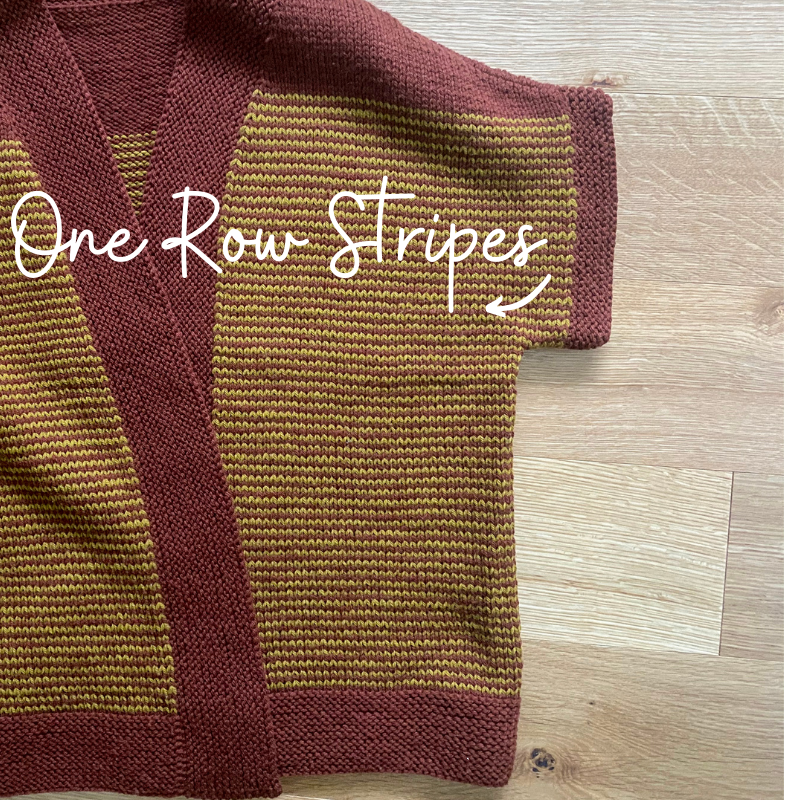
- Working 1-row stripes
- Adjusting length
- Adjusting armhole depth
- Back Underarm: picking up front CO sts
- Rejoining self-striping yarn tip
- Technique tutorials:
- Long-tail cast-on
- Joining a new skein/color
- Cable cast-on
- k2tog & ssk
- wrap & turn short rows
- Three needle bind-off
- Pick-up and knit (for front bands and armholes)
- Blocking
Choosing which version to make
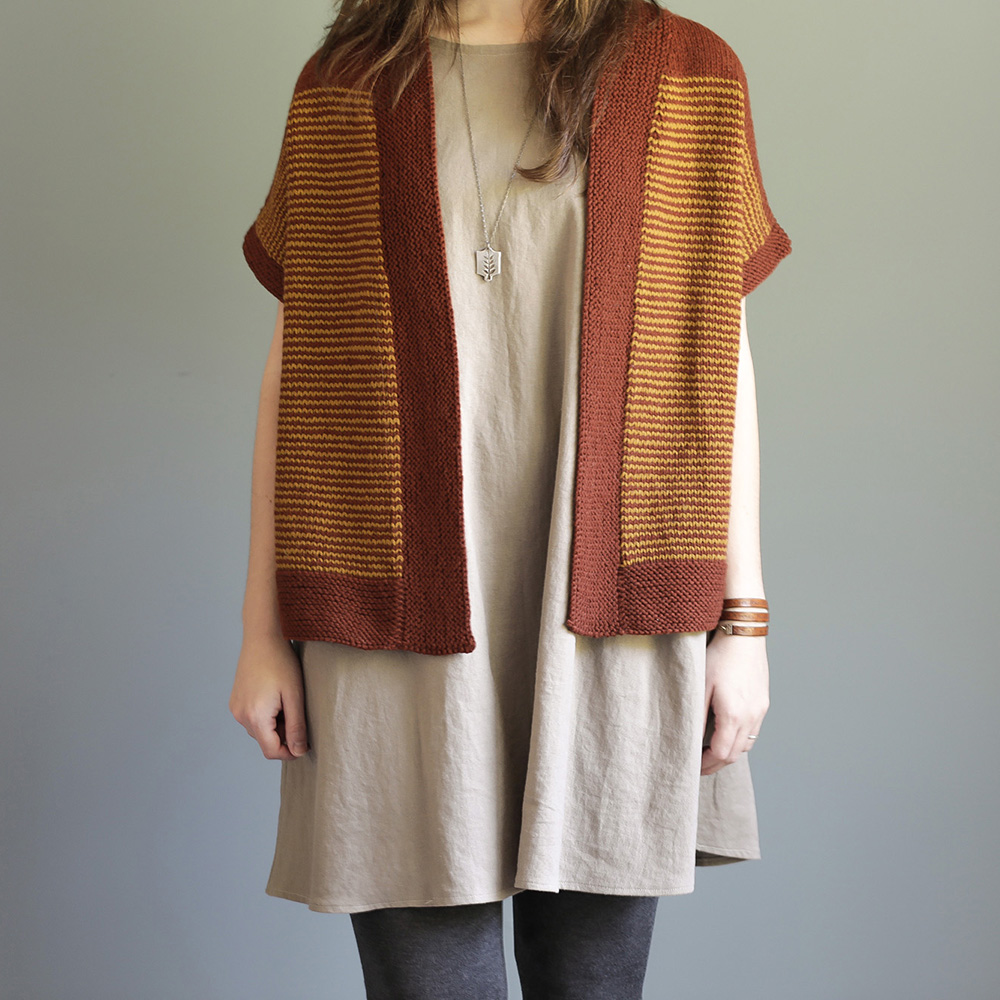
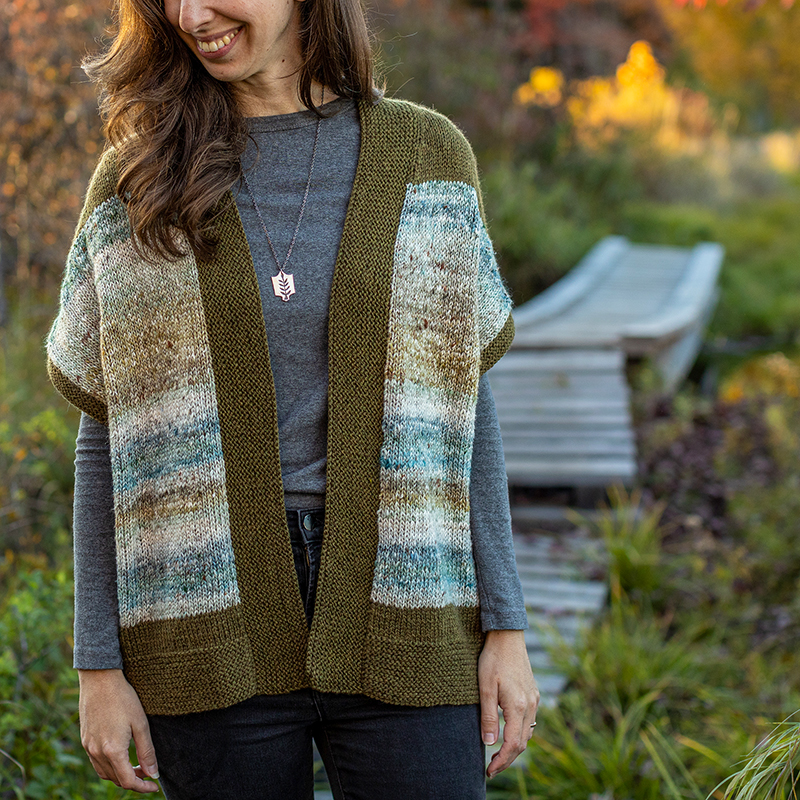
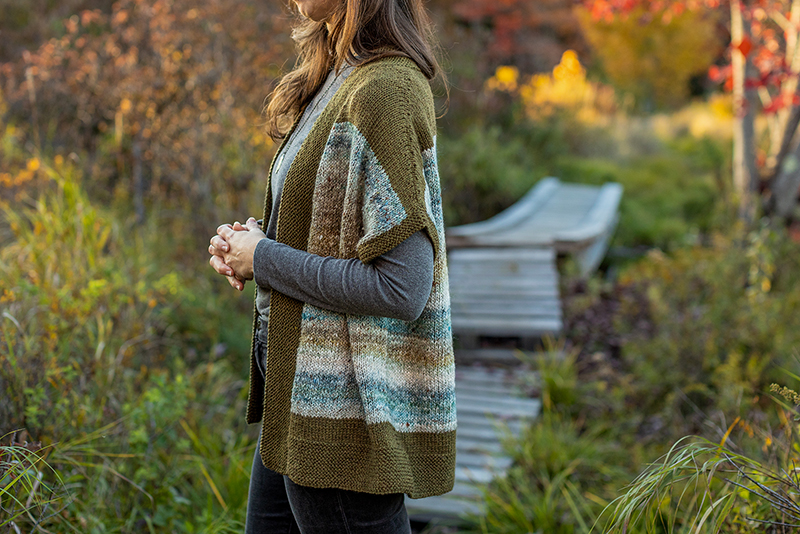
In the most recent version of Layla, you can choose between 2 different versions: the 1-row stripes version where you stripe 2 different colors throughout, or the self-striping version which you use a self-striping or variegated yarn for the bulk of the body instead of manually creating stripes.
I was inspired to create the ‘self-striping’ option after I had seen some beautiful versions knit up by other knitters on Instagram and Ravelry (check out this blog post where I originally talk about it!). And since so many knitters wanted to recreate this self-striping yarn look, I decided to update the pattern to include a version just for that.
Here is some basic information about the 2 versions that may be helpful to know before you make your decision:
- It’s all about the yarn. The 1-row stripes version uses 2 different colorways that will create traditional skinny stripes. Whereas the self-striping version is more for those who prefer the look of self-striping yarn that has a more gradient-like striping affect. I used Noro Akari for my sample.
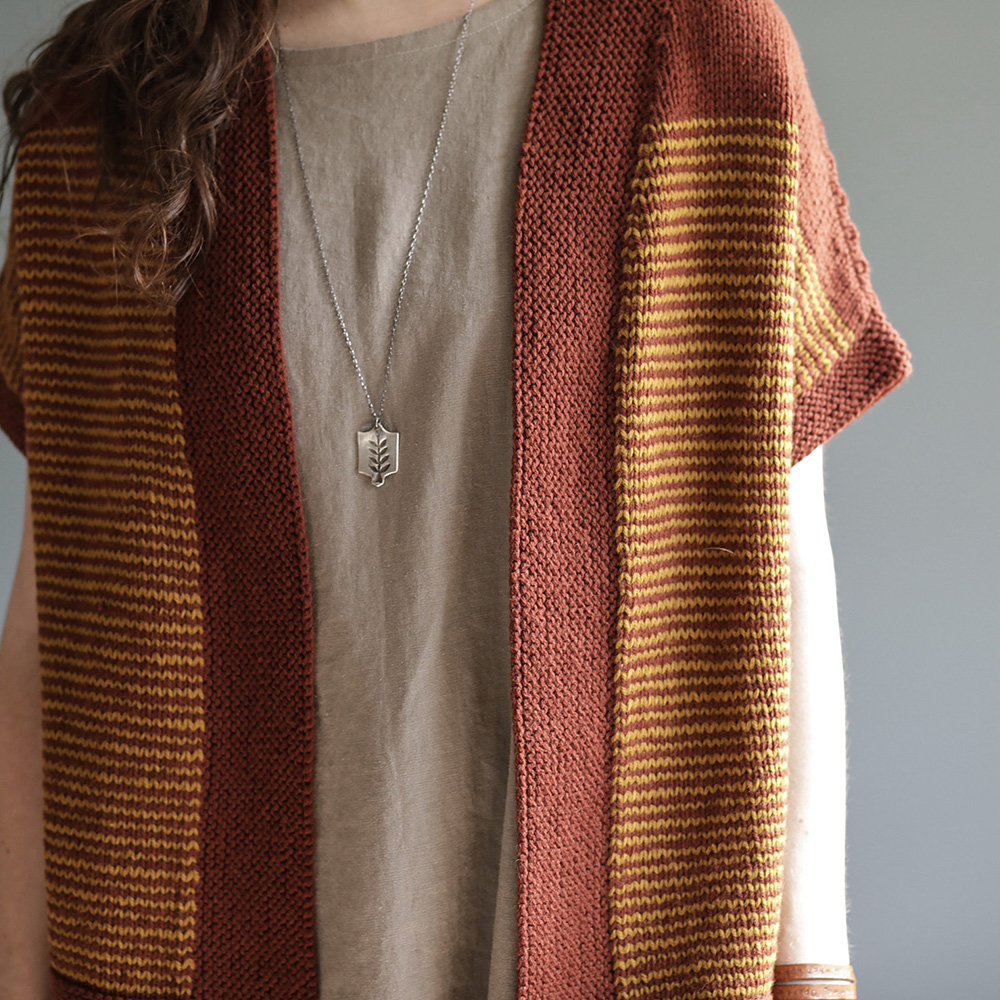
- The 1-row stripes version uses a particular technique to create the 1 row stripes. Because you are knitting Layla back-and-forth (not in the round), in order to create 1-row stripes you have to work an alternative version of Stockinette stitch (which is explained in the pattern – you work 2 RS rows followed by 2 WS rows). The self-striping version does not require this (so you work in traditional stockinette stitch).
- With the self-striping version, after the Underarm Divide section, if you want your Right Front and Left Front to match, you’ll likely have to do some yarn re-winding (and possibly cutting) in order to start your Right Front at the same colorway as you had worked your Left Front (so that your striping sequence is the same on both fronts). I explain this more below.
Yarn Options
1-Row Stripe Version:
In my original I used the worsted-weight, 100% wool yarn Lark by Quince & Co. But any worsted-weight yarn will work. If you choose to use a superwash, just keep in mind that this type of yarn tends to grow lengthwise after blocking, so you may want to consider knitting the underarm to hem length a little shorter than what you would like your final piece to measure. Color-wise, it’s all up to you in terms of the look you are going for! You can go subtle or bold with your color contrasts – either will work! For inspiration, you can check out the finished photos on Ravelry.
Self-Striping Version:
Just like the 1-row stripe version you will need worsted-weight yarn. In my sample, for the solid main color (featured in the hem, top of shoulders, fronts bands and armhole trim), I used Blue Sky Fibers Woolstok For my self-striping yarn, I used Noro Akari. You could also consider a multi-color yarn that isn’t necessarily striping, but provides all-over color variegation/speckles/etc.
Picking a Size
I suggest picking a size whose finished body circumference is approximately 5-10″ larger than your actual bust measurement. However, it all depends on how you want to wear it! You can decide to chose a size with less or more ease in this range if you want to a more fitted or more oversized look. Here are a couple of things to consider:
- You can choose to pick a size with less ease than that range if you want a more fitted look, or to wear your Layla more like a cardigan vest. If you go this route, you’ll just need to potentially adjust your armhole depth (since it will sit higher up on your arm with less ease). I provide information below about how to do this.
- You can also pick a size that is more ease that I suggest. I’ve also tried on a size that has over 20″ of positive ease and I love that look too (it’s a much more oversized, drapey look – like a cocoon-type cardigan).
- Keep in mind ALL of your body circumferences. My suggested ease range bases it on bust, but it’s also good to consider your abdomen or hip circumferences if those are larger than your bust. For example, in my samples, I am wearing my Layla with 11″ of positive ease at the bust but only 5-6″ of positive ease at the hips (as I am very pear-shaped and my hips are much wider than my bust). You don’t necessarily need 5-10″ of positive ease at all of your circumferences, but if you’re like me and your hips are much wider than your bust, you may want to at least make sure you have some positive ease at the hips. I could have also knit the size 2 which would have given me 1-2″ of positive ease at the hips. But I went up a size since I wanted that more oversized jacket-like fit.
- If you are looking at Ravelry at projects posted before 2023, you may see that they reference sizes labeled like this: XXS (XS, S, M, L, XL, 2X). In the updated version 3 of this pattern (published in January 2023), additional sizes were added and these labels have been updated to:1 (2, 3, 4, 5) (6, 7, 8, 9, 10). The old sizes XXS, XS, S, M, L, XL, 2X = new sizes 1, 2, 3, 4, 5, 6, 7.
Working 1-Row Stripes
If you are working the 1-Row Stripe version of Layla, check out this photo tutorial that shows you how it’s worked!
Adjusting the Length
Making your Layla longer is super easy – there’s no shaping involved so all you do is work the both until your happy with the hem to underarm length. Just keep in mind that, especially if you are using a superwash yarn, that your length may grow after blocking.
Adjusting Armhole Depth
After the Underarm Divide section (where you will separate each Front and Back, placing the Back and Right Front stitches on holders), you’ll be working on just the Left Front. In the first section of “Left Front” you are starting your armhole depth. Right before the “Left Front Neck Shaping”, you are 1.75 (2.25, 2.25, 3, 3) (3, 3.5, 3.5, 4.75, 4.75”/4 (6, 6, 8, 8) (8, 9, 9, 12, 12) cm less than your full armhole depth). You continue working the rest of your armhole depth in the “Left Front Neck Shaping” section, however, in that section you are also working decreases which create the v-neckline. So if you want to adjust your armhole depth (or need to due to a row gauge difference), it’s best to do it before you begin the Neck Shaping section. So if you want to do this, here is what I suggest:
If you have the right row gauge and want to adjust the depth:
- First figure out how much extra length you want to add (or remove). Review the schematic on page 10 and look for the “C” measurement (this is the armhole depth). If let’s say you are making size 1 and want your armhole depth to be 7″ instead of 5.75″, then that means you want to add 1.75″ worth.
- Multiple the amount of added inches you want by your per row gauge. If you are getting the pattern row gauge of 6.5 rows = 1″, then you would multiple 1.75 x 6.5 = 11.375. So you want to add 11.375 rows. But you need to round it! In the 1-row stripe version, the amount of rows you add should be a multiple of 4, so in this case, round up to 12.
- Then in the Left Front, for the 1-row stripes version, I will repeat rows 2-5 8 times instead of 5. I’ve added 3 repeats because there are 4 rows involved in the repeat. And since I want to add 12 rows total, I divide 12 by 4 and get 3 extra repeats. For the self-striping version, I will repeat rows 4-5 18 times instead of 12. I’ve added 6 repeats because there are 2 rows involved in the repeat.
- Then just make sure to add these same number of rows to the Right Front and Back when you get to those sections.
If you have a different row gauge but want to achieve the length listed in schematic:
- First, let’s figure out how many total rows you will want to work in your whole armhole depth at your particular gauge. To do this, look at the schematic and for your size, find the armhole depth amount. Let’s say you are knitting size 4 – that amount is then 7.75″.
- Multiple this amount by your per inch row gauge. Let’s say your gauge is 6 rows = 1″ (instead of 6.5 rows = 1″). Using the size 4 example, I’ll multiply 7.75″ x 6 = 46.5 rows. So around 46 rows is my target amount.
- In the pattern, the total rows in all of the armhole depth is: 38 (42, 46, 50, 54) (54, 58, 58, 62, 62). Find the number for your particular size. Using our size 4 example, that would be 50 rows.
- Subtract your target number of rows by the pattern number of rows to figure out how many rows you need to eliminate. So in our example 50 hours – 46 rows = 4 rows. So I need to remove 4 rows from my armhole depth to get the depth I want at my particular gauge.
- Take out 4 rows from the section before the Left Front Neck Shaping. So this would simply mean working 1 less repeat in the “repeat rows 2-5” section.
Rejoining Self-Striping Yarn Tip
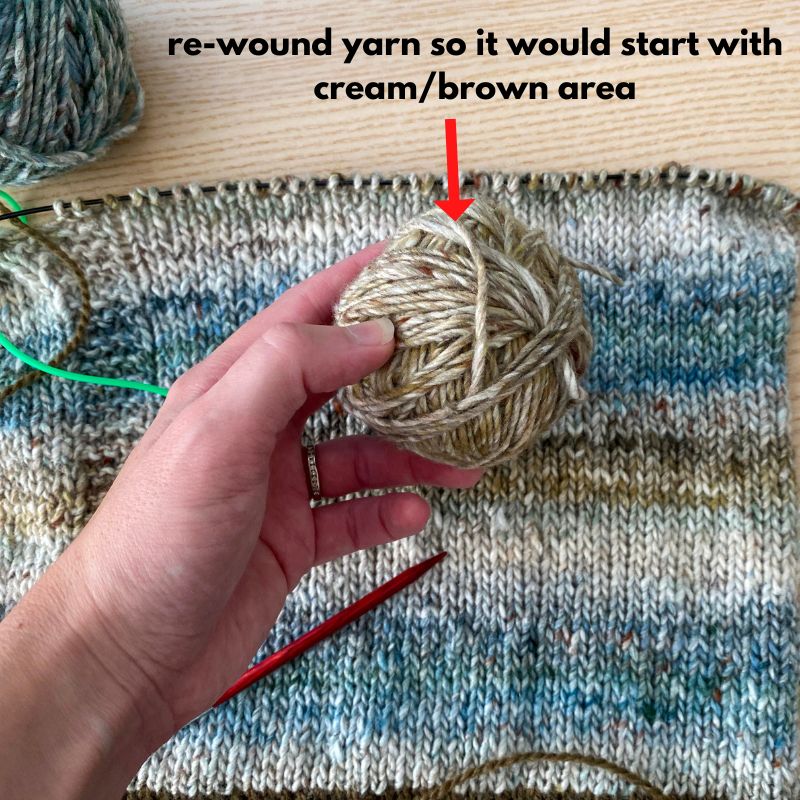
When you get past the Underarm Divide, you’ll be placing your Right Front and Back stitches onto holders and continuing with just the Left Front. when you’re done with the Left Front, you’ll then be instructed to transfer your Right Front stitches back onto your needle and rejoin yarn to then work your Right Front. But since you’re working with self-striping yarn, there’s a chance that your yarn color sequence may not be at the same point as it was when you started the Left Front. And this may cause your Right Front and Left Front to look a bit different. Depending on the color variation it may not be a big deal, but if you prefer them to match as closely as possible, here is what I recommend.
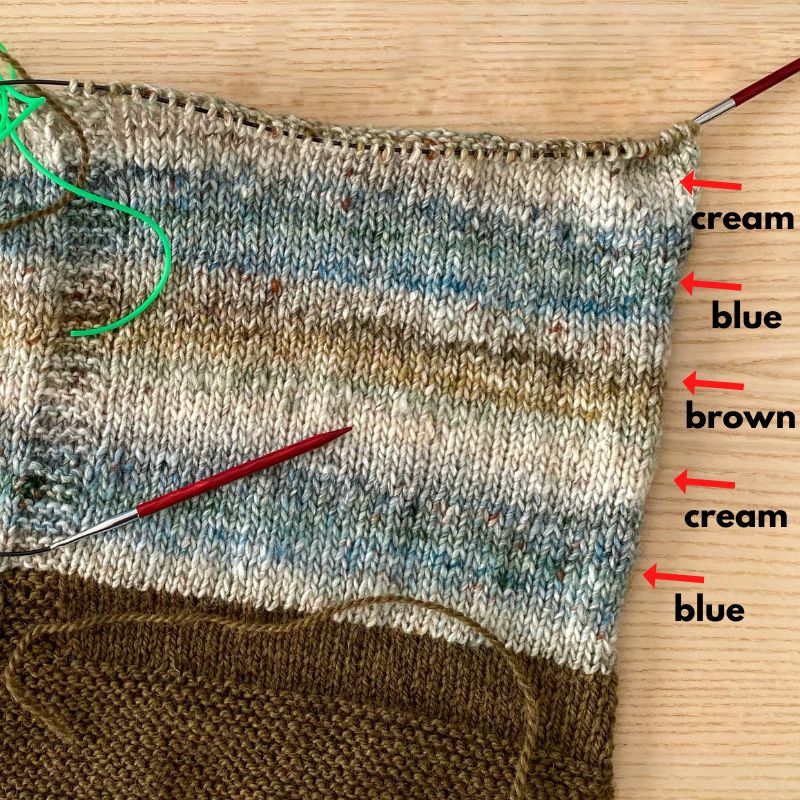
Once you’ve transferred your Left Front sts back onto the needle, look at where it had left off colorwise in the striping sequence. In my example below, my Noro Akari striping sequence seems to go like this: blue > cream > brown. As you can see, I ended at the part in the sequence where I’m starting to transition from cream to brown. So I found that part in my big ball of Noro Akari and created a new ball of yarn.
You can do this for the Back as well if you like, but I was less concerned with the color sequence in the Back because it would be less obvious than the Fronts (due to the Fronts displaying side-by-side).
Back Underarm: picking-up into cast-on stitches
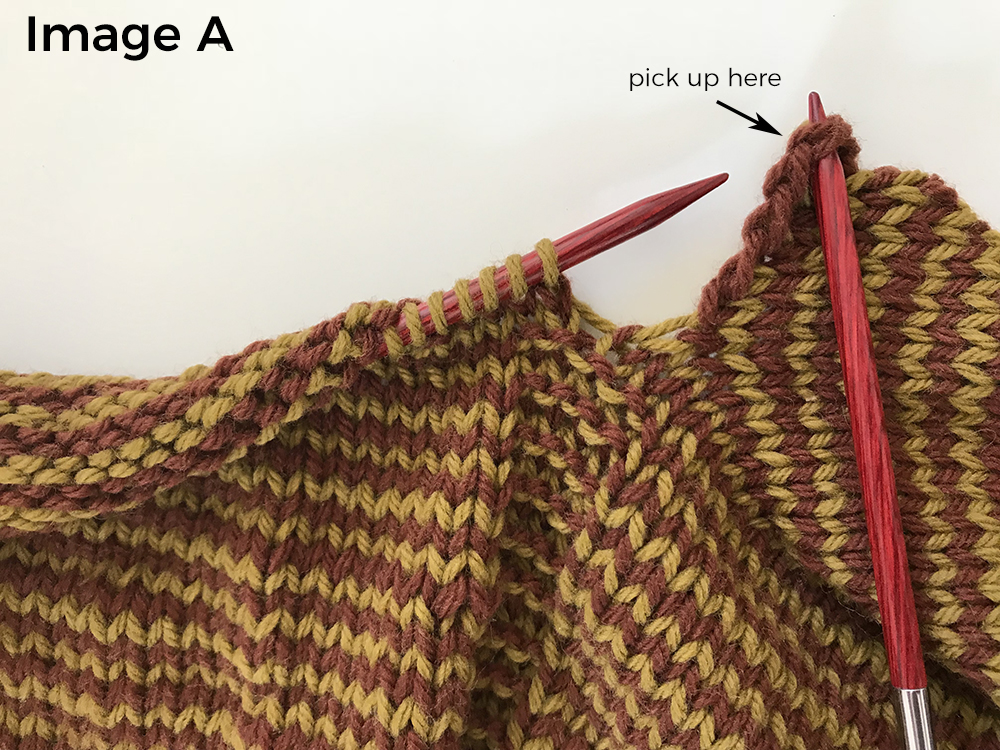
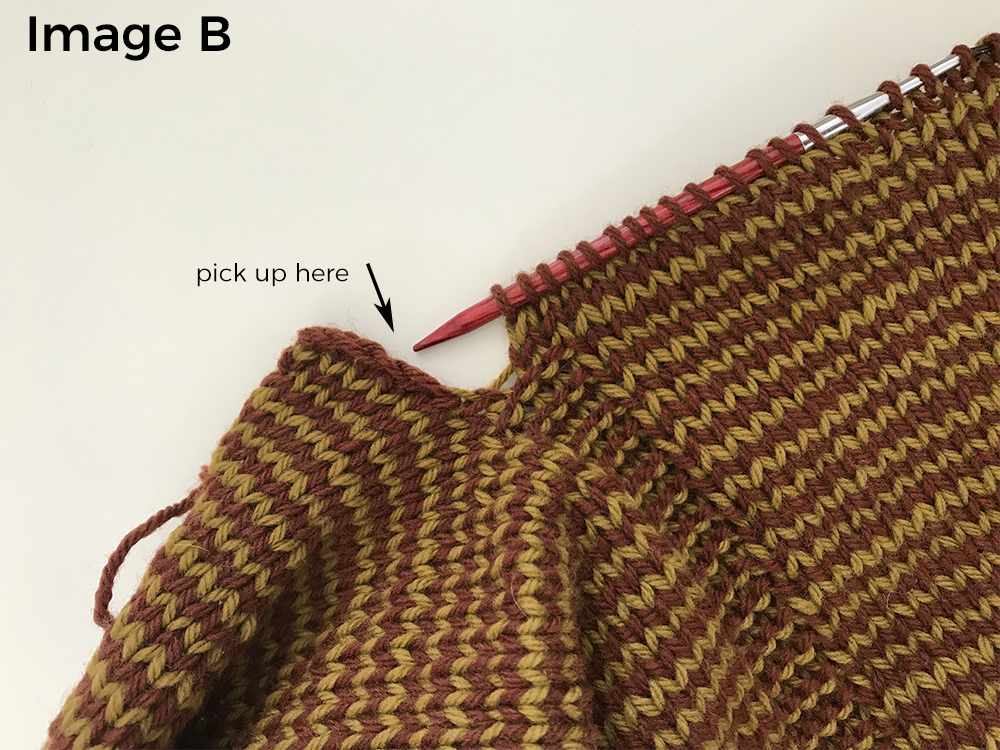
When starting at the upper Back (on page 7), on row 1 you’ll be instructed to pick up and knit into each of the 5 CO sts from Right Front (image A below) and Left Front (image B below). If you would also like to see a video tutorial about this, check out my lesson here. It was for my Azalea top, and so the number of stitches you are picking up is different, but the technique itself is the same and may be helpful in providing a visual of this process.
Technique Tutorials
Below are links to different knitting techniques that are used in Layla:

