I’m a big fan of blocking. Blocking is what takes your finished knits from “ok” to “wow”! In this blog post I’ll share some of the basics of blocking, as well as share some before & after photos so you can really see what a difference blocking can make.
First things first…
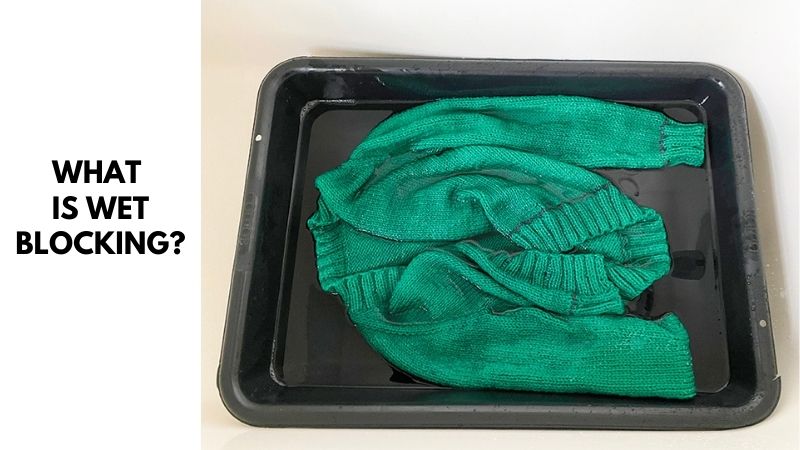
What exactly is blocking? I’ll be talking specifically about wet blocking because that is my preferred method (although I also mention steaming in my before & after photos so I address that below as well). Wet blocking is when you submerge your finished knit into water (usually with a little bit of wool wash like Eucalen) and then let it soak in the water for about 15 minutes (the above photo shows this phase). Then you gently take it out of the water, roll it in towels until your knitted piece feels just damp (not wet), and then lay it flat to dry.
If you’ve never wet blocked before, it can be a little nerve-wracking the first time you do it, but as you’ll see in my examples below, it’s well worth getting over the nerves and giving it a try! I go over my top 10 tips for wet blocking here, and I also have a video tutorial where I walk you through how I wet blocked my Audrey’s Cardigan – you can watch the video below!
Before & After Blocking Photos
A picture can be worth a thousand words! Check out a few before & after photos below…
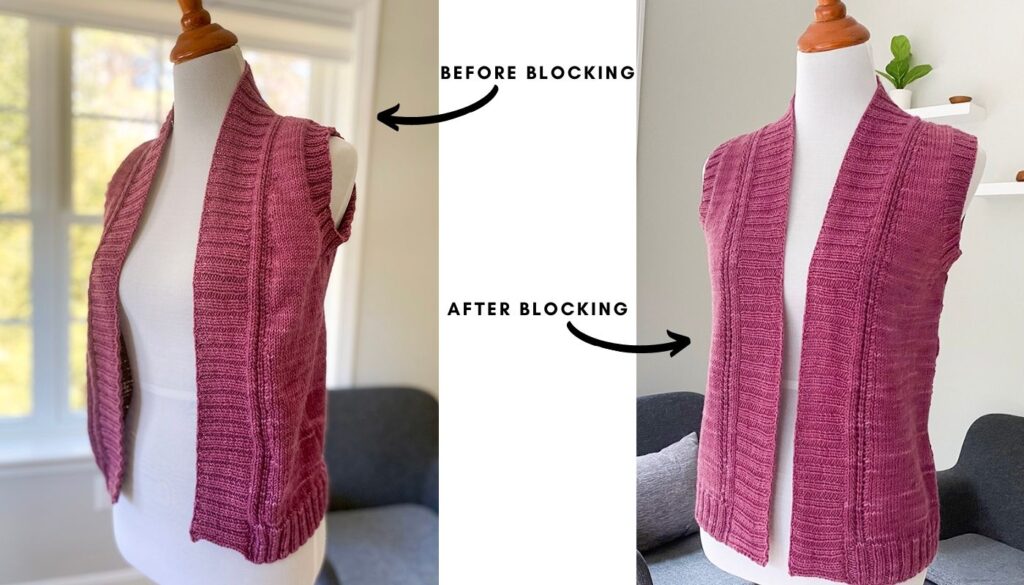
Lilac Trail
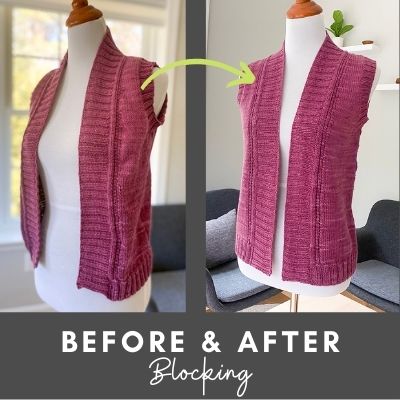
I knit my Lilac Trail vest in wool/silk blend (Dirty Water Dyeworks Edna). Because you pick up and knit stitches for the front bands as well as for armhole trim, it can make the fabric look a little bunchy. But check it out after blocking – everything is nice and smooth – no bunching whatsoever!
Cruel Summer:
Because my Cruel Summer cardi was knit with a linen blend yarn (Berroco Chai), blocking your finished cardi is very important! Before blocking, it looks very crinkled and the edges are very rolled too. But I wet blocked it and then steamed it as well – I often will also steam my linen garments because it softens up the fabric a bit and helps to relax the edges more.
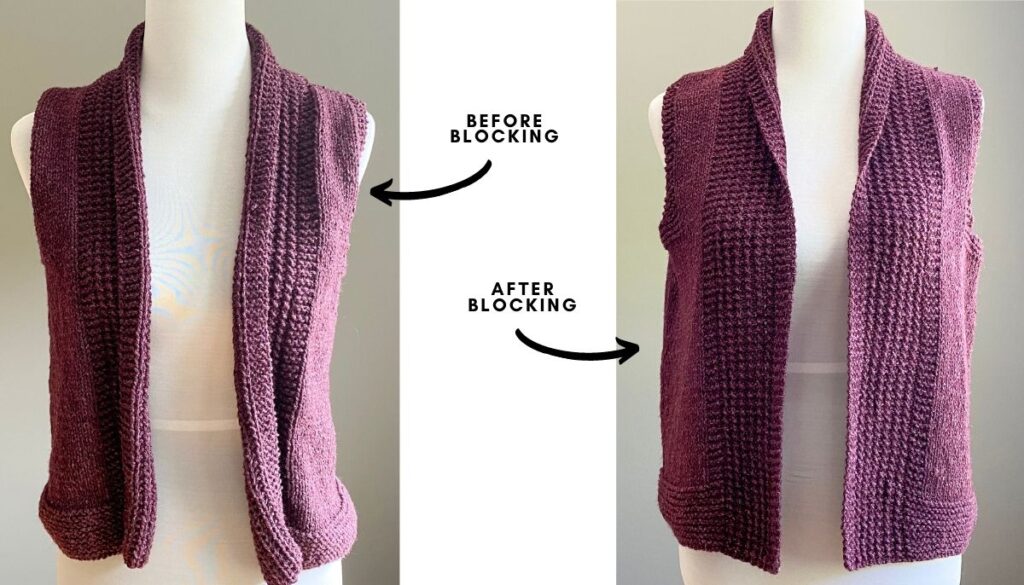
Brookdale Vest
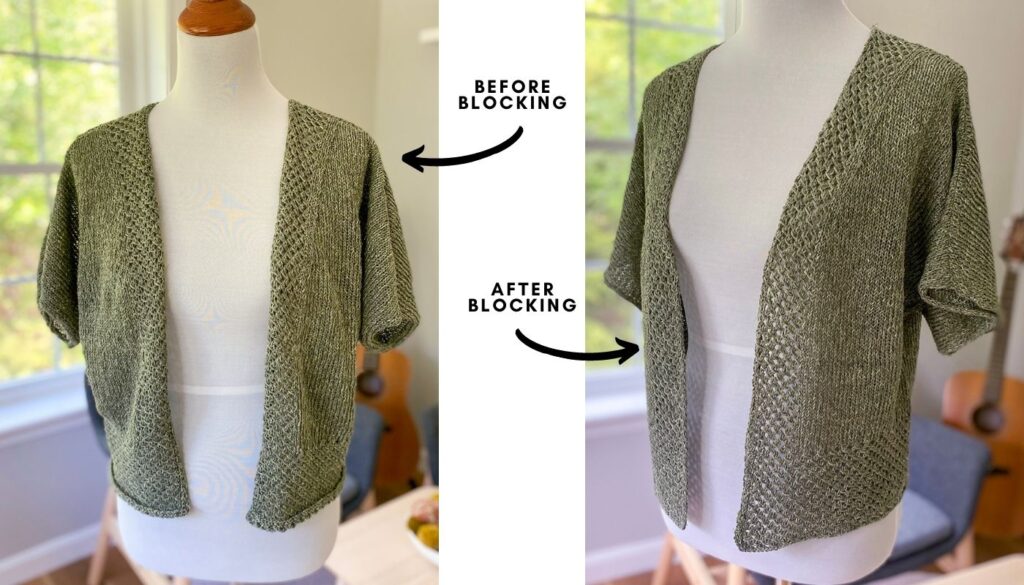
My Brookdale vest definitely needed a good blocking after it was done! Due to the nature of the stitch pattern I used for the front panels, the fabric before blocking kept folding over (this is just due to the tension/torque of the stitches). But blocking can help relax the stitches a bit. So as you can see, after blocking the edges look much flatter. Over time it will start to curl in again but I usually just do a little steaming and that helps to flatten it back down again.
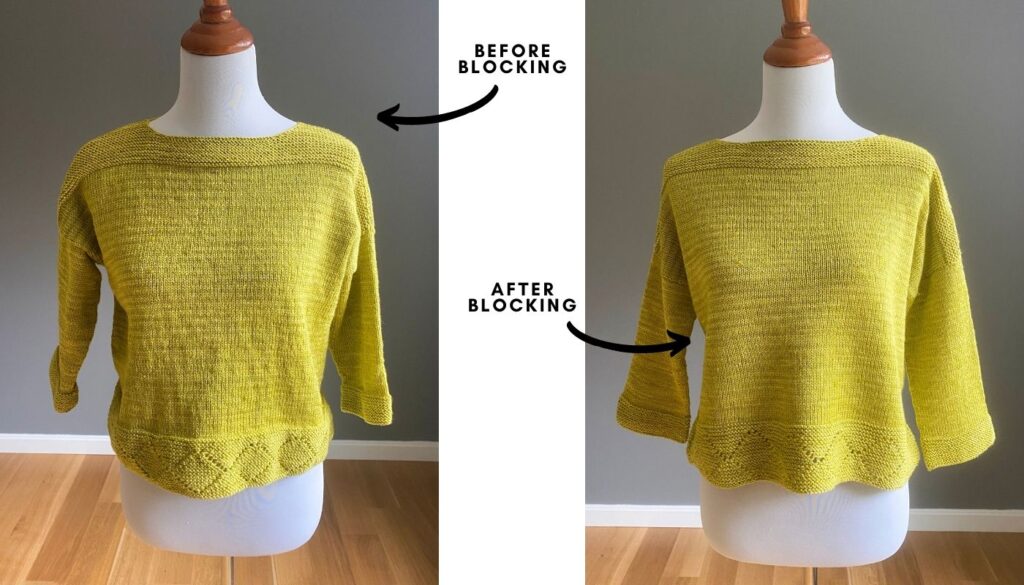
Azalea:
For my Azalea (which I made during our knitalong earlier this year), I used Manos del Uruguay’s Feliz yarn which is a merino/modal blend. Before blocking my stitches just didn’t look very even overall. But after a wet blocking, everything smoothed out beautifully!
Mountain Laurel:
Shawls definitely benefit from a good blocking! Here’s my Mountain Laurel shawl, knit out of Manos del Uruguay’s Fino yarn. As you can see, before blocking the edges were very curly, and the tension differences between the stockinette stitch areas and the eyelet areas made for some bunching. But after wet blocking, it all smoothed out! This is another piece that I will sometimes also steam the edges every now and then because they will tend to roll the more you wear it.
Steaming
Above I mention steaming as well. There are different ways you can steam, but I like to use a hand steamer. I’ve tried different models – this was my first one which is small but definitely did the trick. The only issue I had was that you had to hang your garment up to steam (vertically) – you couldn’t steam with the garment laying flat (otherwise water would drip all over). So now I’m trying this one – so far it’s working well and it does allow for steaming both vertically and horizontally. I’ve only had it for a month or so though, but I’m happy with the results so far!

