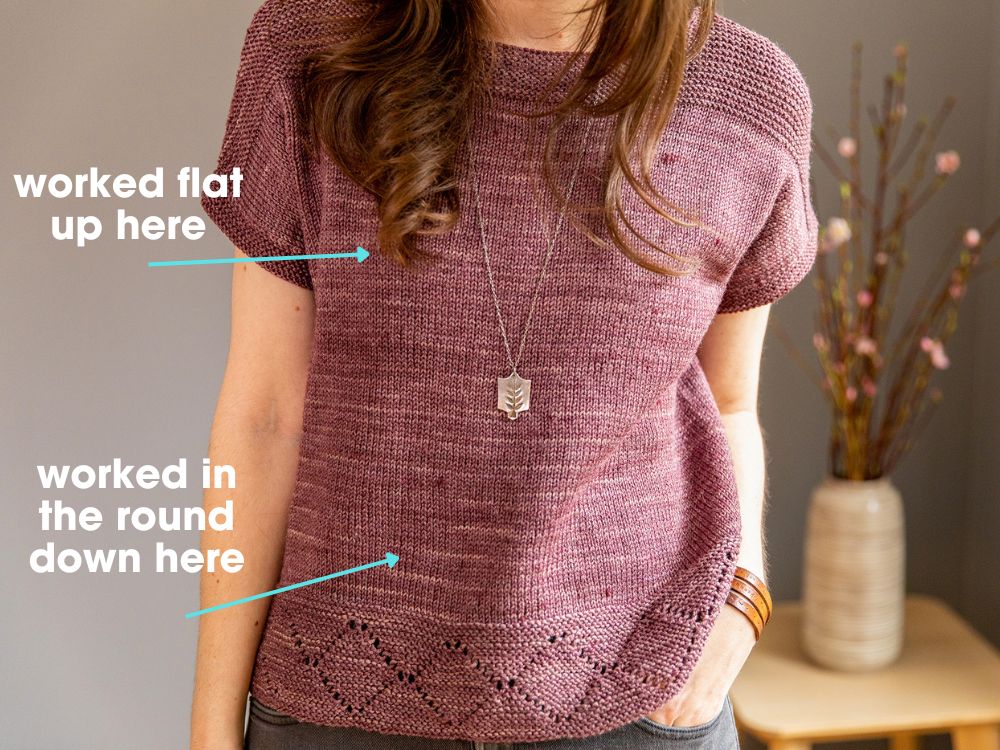
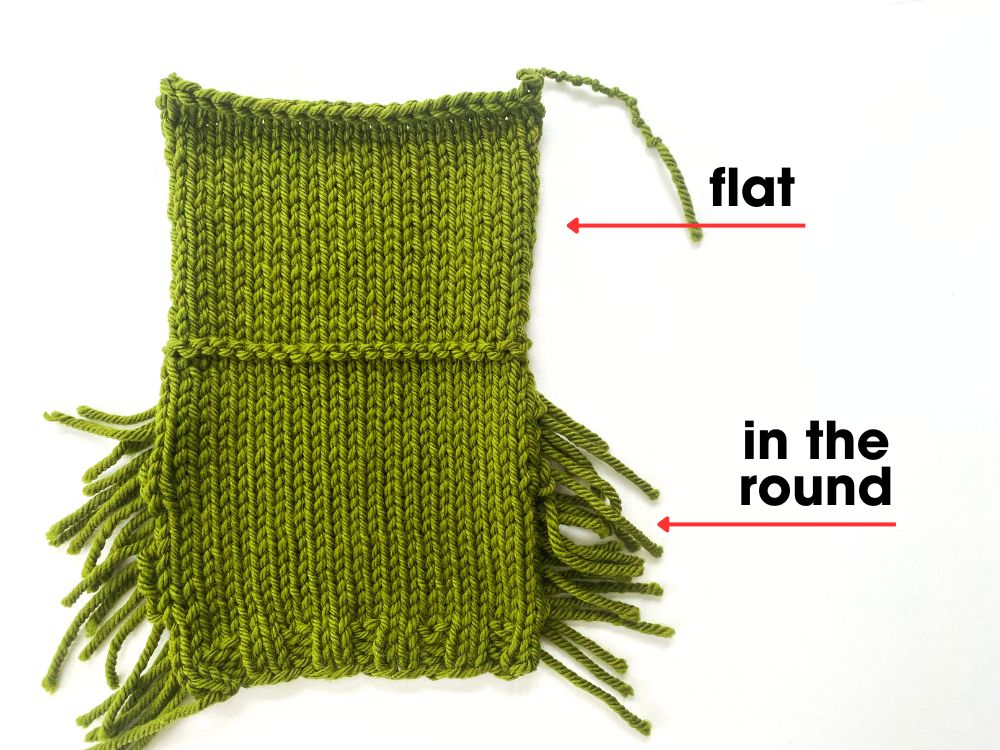
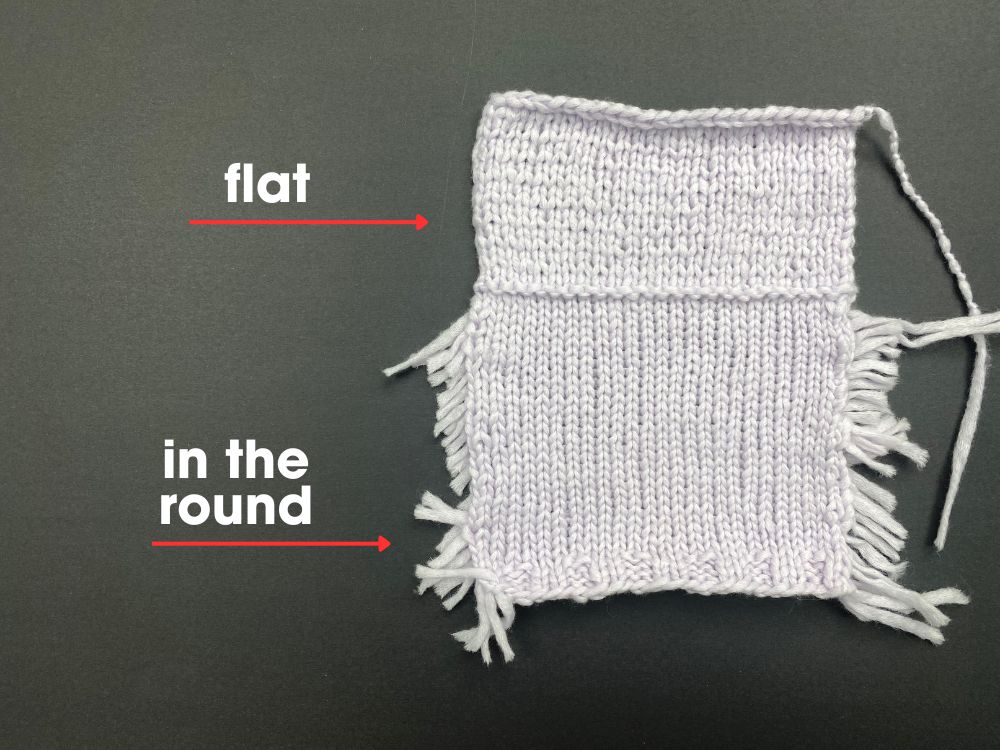
I love seamless knitting. But…there are some issues that can come up when knitting seamlessly – specifically, issues that arise due to working part of the garment in the round and part of it flat. For example, I have many pullover-style garment patterns that are knit seamlessly from the bottom-up. The body of the sweater is all worked in the round but then once the front and back of the garment are divided at the underarm, you work each side flat (i.e, back and forth, not in the round). An example of this is my Azalea top, featured below:
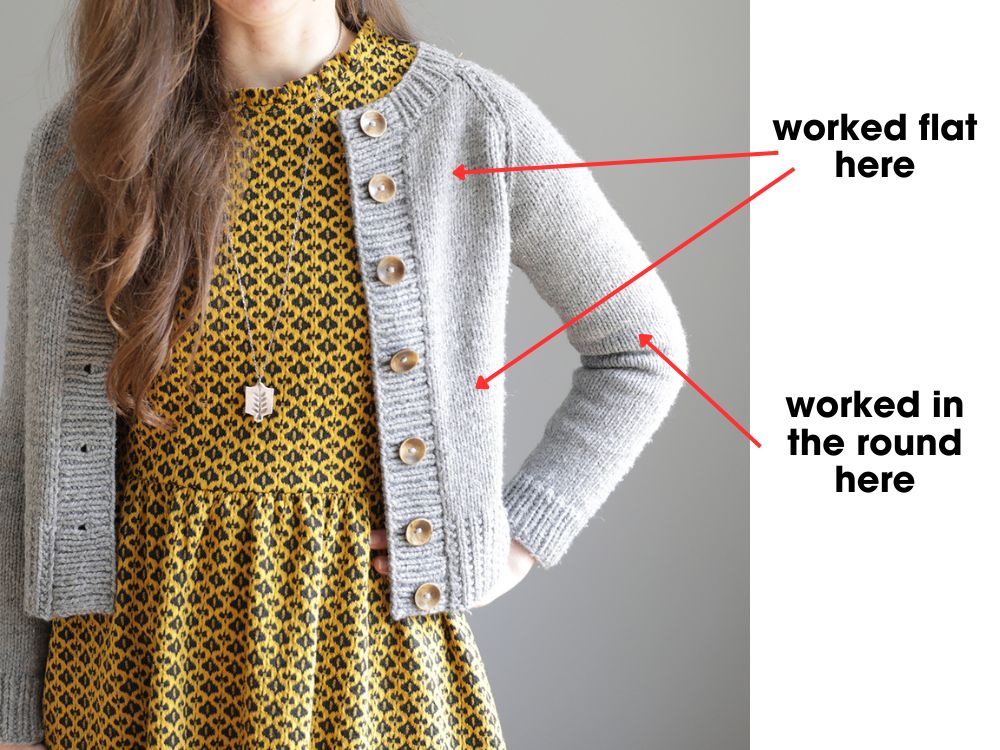
Or if you’re knitting a cardigan seamlessly and the whole body is worked flat, but the sleeves are worked in the round, such as in my Ramona Cardigan:
Why is changing from in the round to flat (or vice versa) a potential issue? It’s because many stitch patterns are worked differently in the round vs flat. And since they are worked differently, sometimes this can affect how the stitches look and how they measure (i.e, your gauge!).
An example of a stitch pattern that changes in this scenario is stockinette stitch (abbreviated St st). This is because when worked flat (i.e, back and forth with right side and wrong side rows), you knit on right side rows and purl on wrong side rows. But when St st is worked in the round, there is no wrong side – the right side is always facing you. So every round is knit. The lack of purling in St st in the round is what causes the look and measurement of the stitches to be different.
This isn’t a big deal when your entire garment is knit in the round or knit flat, but if part of your garment is worked in the round and part is worked flat, then it’s good to know what issues you can potentially expect and how you might be able to remedy any potential issues due to this direction change.
Potential Issue #1: Your gauge might change
For many knitters (myself included), their purl stitches tend to be looser than their knit stitches. So their in the round gauge in St st where they’re knitting every round tends to be tighter than their flat gauge where they are purling on wrong-side rows. By how much? It all depends on the individual and the yarn they’re working with. Here’s one example:
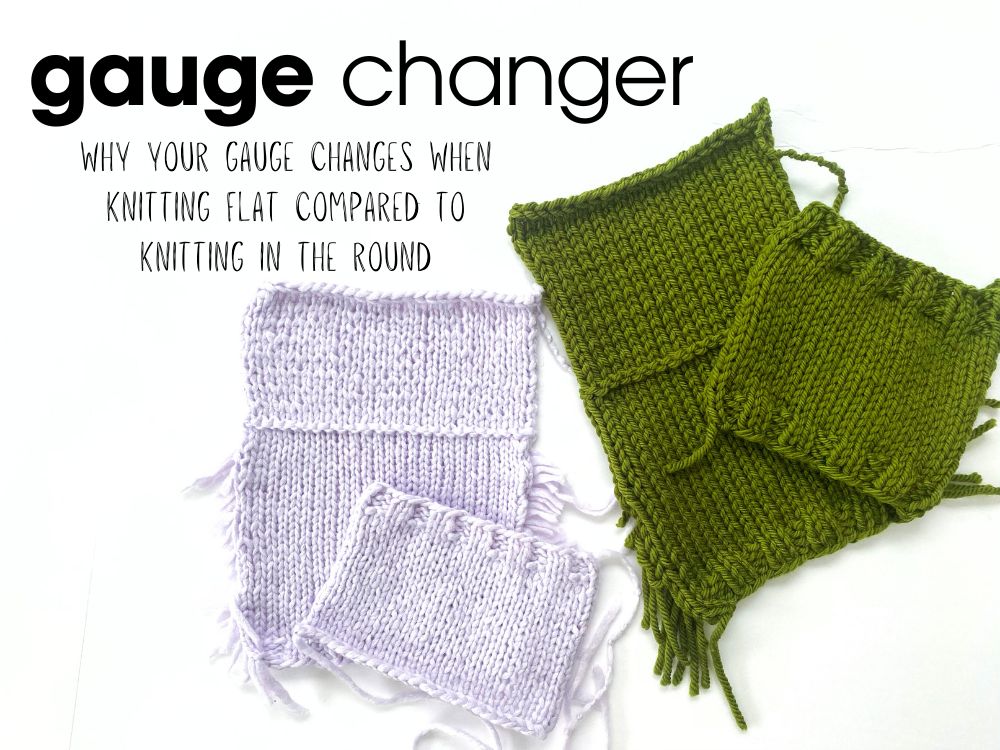
In this aran/bulky-weight wool yarn (Falkland Chunky by Queensland Collection), my in the round gauge is 15 stitches & 22 rounds = 4″ but my flat gauge is 14.75 stitches & 21 rows = 4″. It’s a bit easier to compare things when you break that down over a 1″ increment:
- So in the round I’m getting 3.75 stitches & 5.5 rounds = 1″;
- And flat I’m getting 3.687 stitches & 5.25 rows = 1″
So it’s close, but I am indeed looser when working flat than in the round in this scenario (a difference of .063 sts & .25 rows). I wouldn’t be concerned with the stitch gauge difference because it’s SO close but the .25 difference in my row gauge could be a bit more significant.
Let’s look at another example that shows how a totally different fiber type can produce much different results.
Above is a worsted/aran-weight cotton blend yarn (Happiness by Lang Wool Addicts) and my in the round gauge is 17.5 stitches & 28 rounds = 4″ but my flat gauge is 16 stitches & 25 rows = 4″. Let’s break that down over a 1″ increment:
- So in the round I’m getting 4.375 stitches & 7 rounds = 1″;
- And flat I’m getting 4 stitches & 6.25 rounds = 1″
That is definitely not as close as my wool yarn example. The difference in stitches is .375 (vs only .063 with the wool yarn) and the row difference is 1.25 (vs .25 with the wool yarn). This is a great example of how the fiber content can make a big difference in how significantly the gauge can change.
Potential Issue #2: The stitches can sometimes look different
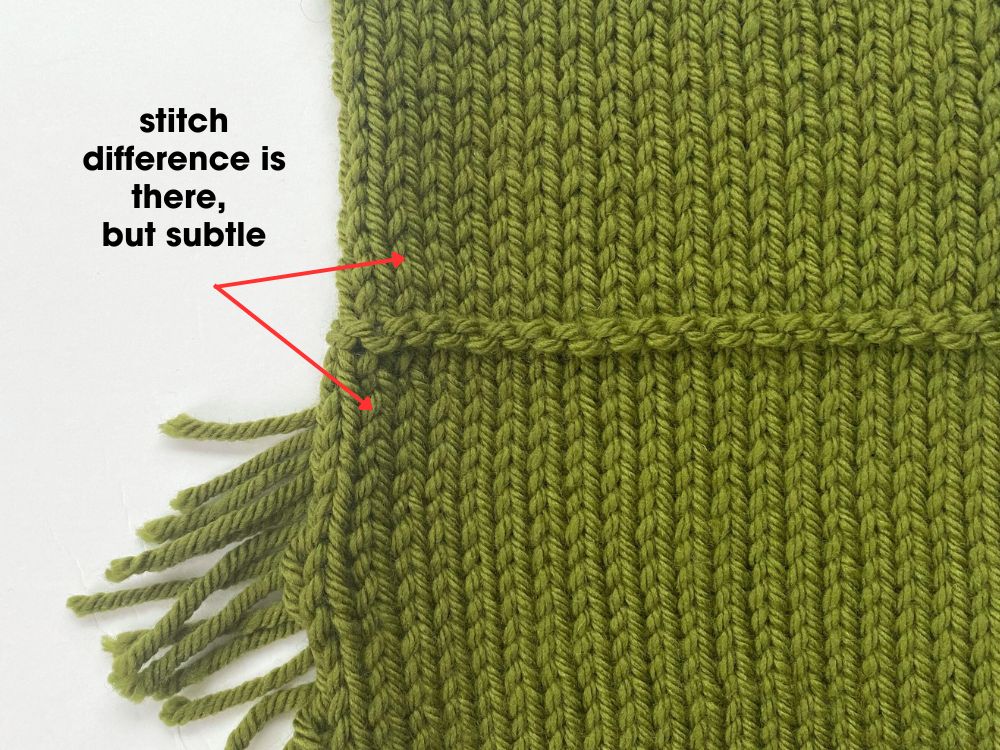
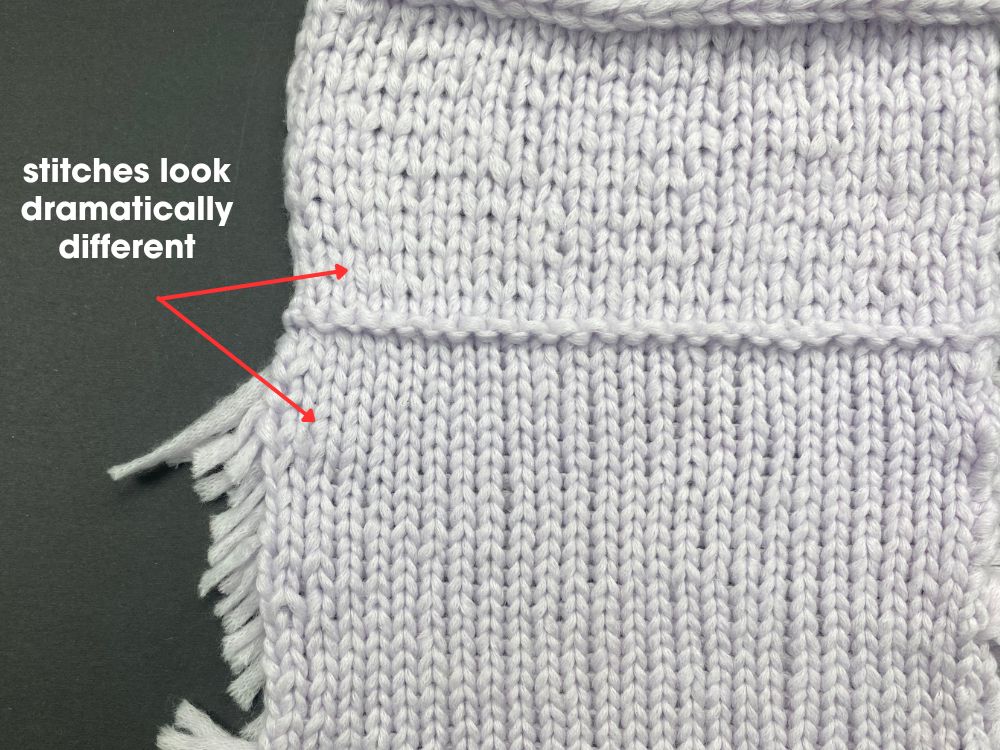
I find this second issue to be very dependent on the type of yarn you are using. Although I proved in the exercise above that my flat gauge is looser than my in the round gauge, in wool or wool blend yarns I don’t see this difference visually as much as I do with cotton or linen yarns. Here are two examples:
Why does the visual difference depend on fiber-type? Wool is fuzzier and has more elasticity, making it more forgiving in situations like this. Cotton and linen are less elastic and have great stitch definition due to the lack of fuzziness, but it means it’s less forgiving. So if your tension changes when transitioning from in the round to flat (or vice versa), you’re more likely to notice these changes visually and not just when you measure your stitches in non-wool yarns.
So even if you can make adjustments to account for the gauge difference (such as knitting less rows, decreases some stitches, etc), the fact that the stitches look so different can be an issue and affect the overall look of the garment.
So what can you do about it?
It all depends on your particular situation. If you’re a) working with a wool/wool blend yarn, b) your gauge is just slightly off (like in my example above) and c) you don’t visually see a difference in your stitches, you could not do anything differently other than perhaps keeping an eye on your lengths (such as armhole depth) and adjusting the number of rows you work.
But if your gauge is more than just slightly different and/or your stitches look visually different (and that bugs you), here is a great option to try:
When working flat, purl back on 1 needle size smaller
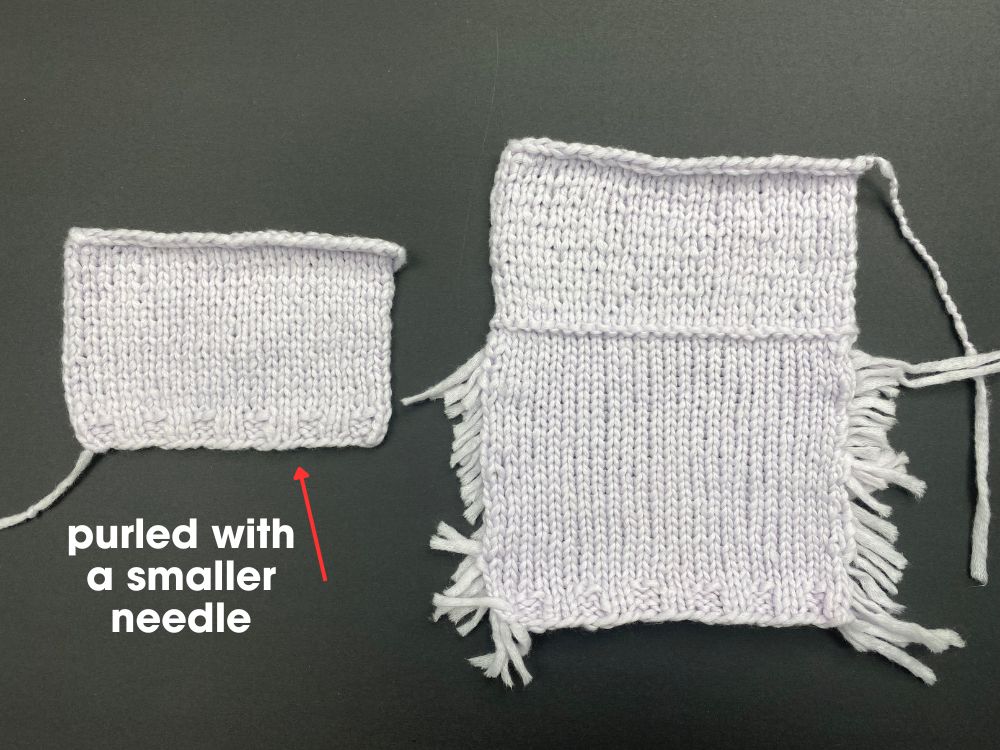
For example, if working a bottom-up sweater in the round and you have been knitting the body on a US 8 needle, when you get to the underarms and split the front/back and begin working back and forth (with right side and wrong side rows), work your purl rows with a US 7 needle (and continue working your knit rows with the US 8). I did that with the cotton yarn and as you can see below, it definitely helped to correct the look of my stitches. It still doesn’t look exactly like my in the round stitches, but it’s better and the gauge is much closer. And in a garment, it visually wouldn’t be as disrupting.
It might sound cumbersome to be working with 2 different needles but it’s really not that bad. When working your right side rows, your stitches are ‘resting’ on the smaller needle and your right needle is the larger needle that you are knitting the stitches onto. And then that reverses on wrong side rows.
If you use interchangeable needles this is even easier. Simpler screw on the smaller needle tip on the left side and have the larger needle tip on the right side.
Below is a video lesson where I show you exactly how it’s done!
I hope this information may be helpful the next time you encounter a similar issue with your seamless knitting!

