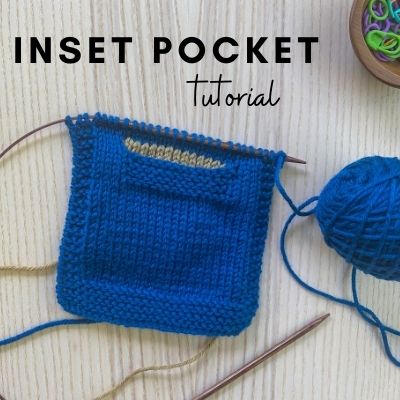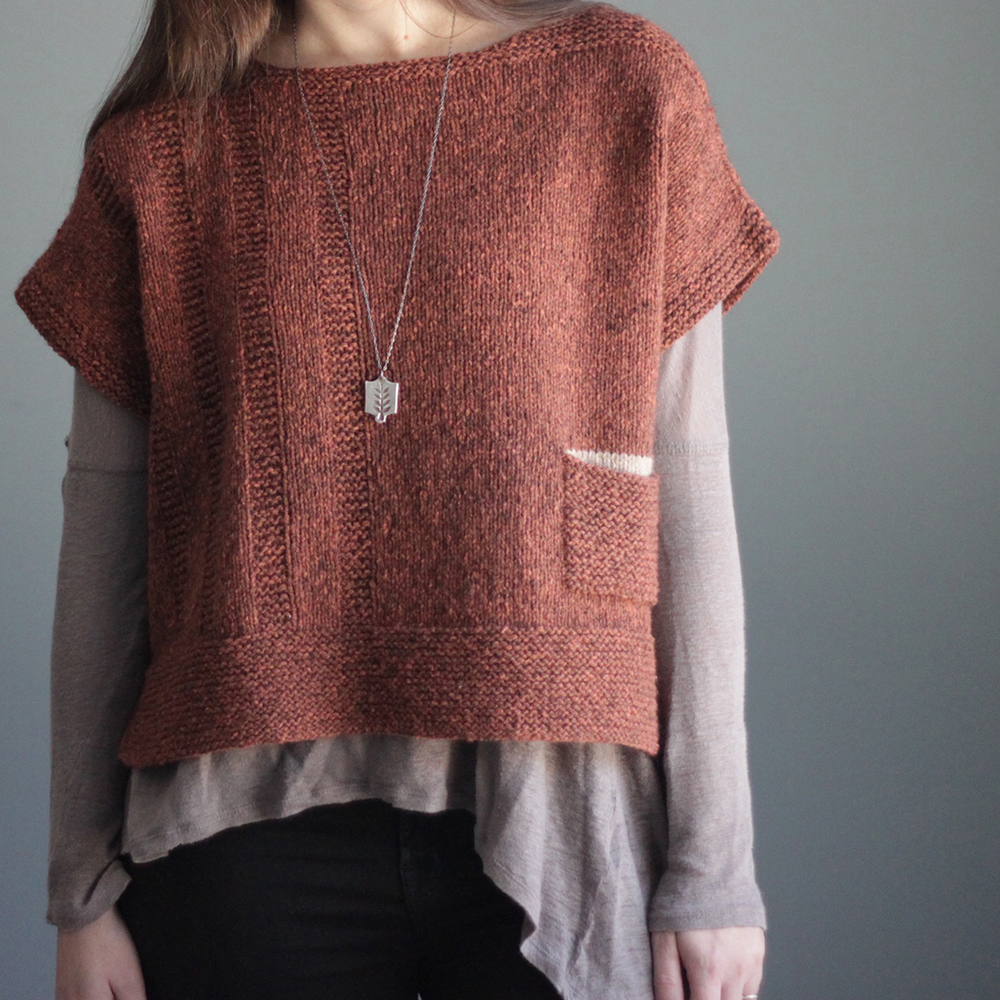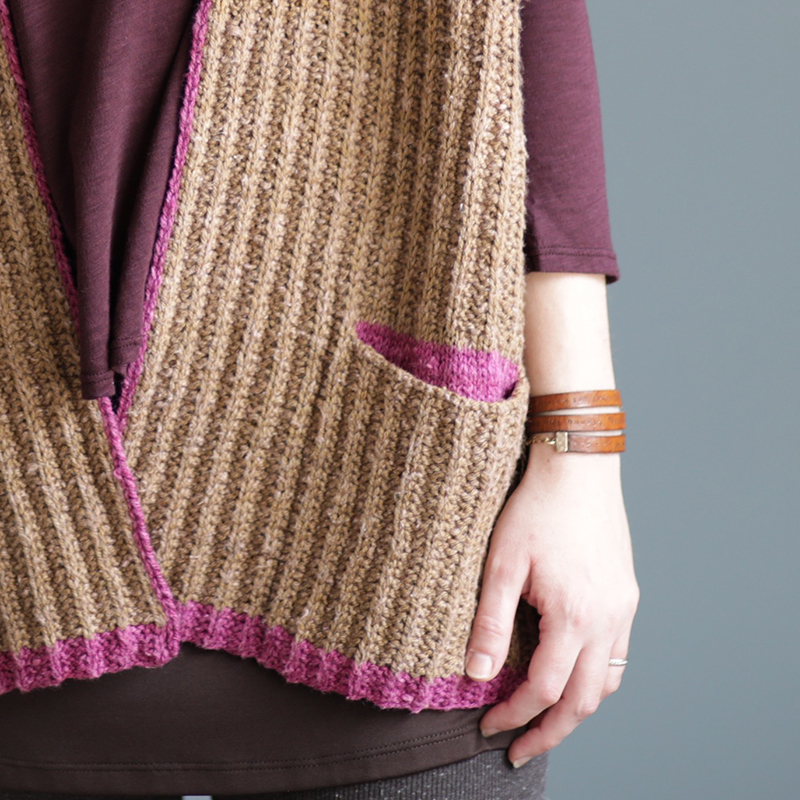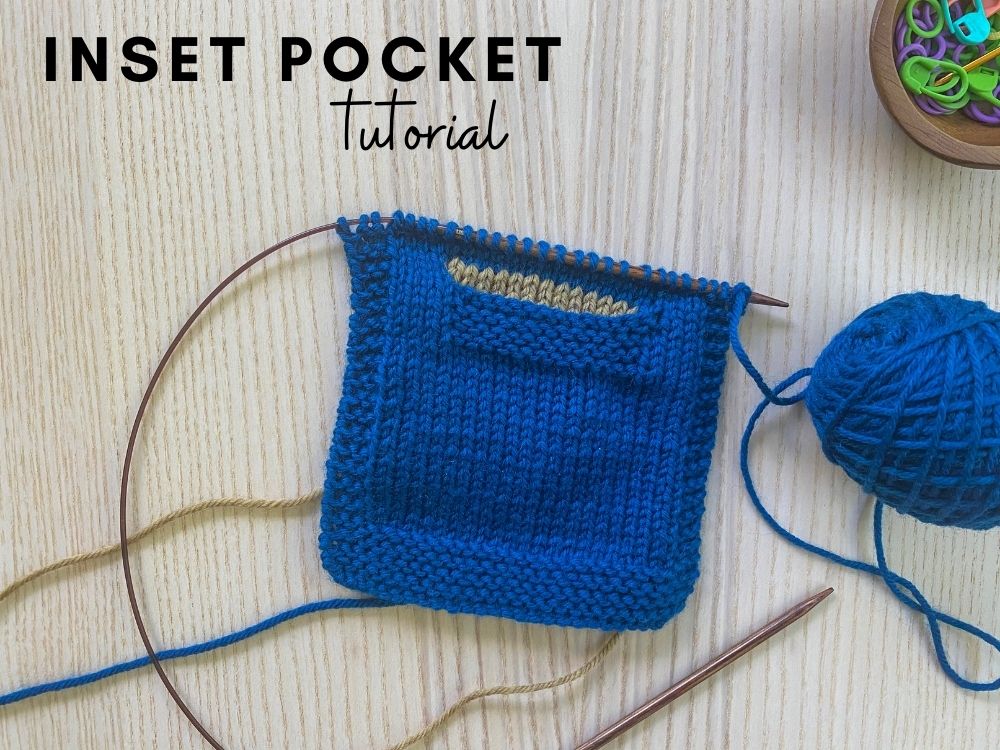
I love an inset pocket – they’re easy to do (once you get the hang of it!) and it gives even the simplest garment some personality. I have included bottom-up inset pockets (i.e, pockets that are worked in garments that are knit from the hem-up) in my designs Alanis, Mazzy and 1979 (to name a few):
How to work an inset pocket from the bottom up
I’ve created a photo tutorial that will walk you through the steps for creating the inset pocket, and might be a helpful visual companion to my written instructions in any of my patterns that use this style pocket!
Pocket Lining
You’ll be instructed to knit a pocket lining – this is the inside part of your pocket and you can knit it in either the same color as your garment or in a contrasting color. When you’re done working your lining, you will keep it on the needle you worked it on and cut a long tail (you’ll be using this tail later to sew the pocket lining sides and bottom to the inside of the garment – it will make more sense later!). Your pocket lining will just ‘rest’ on the needle until it’s needed.
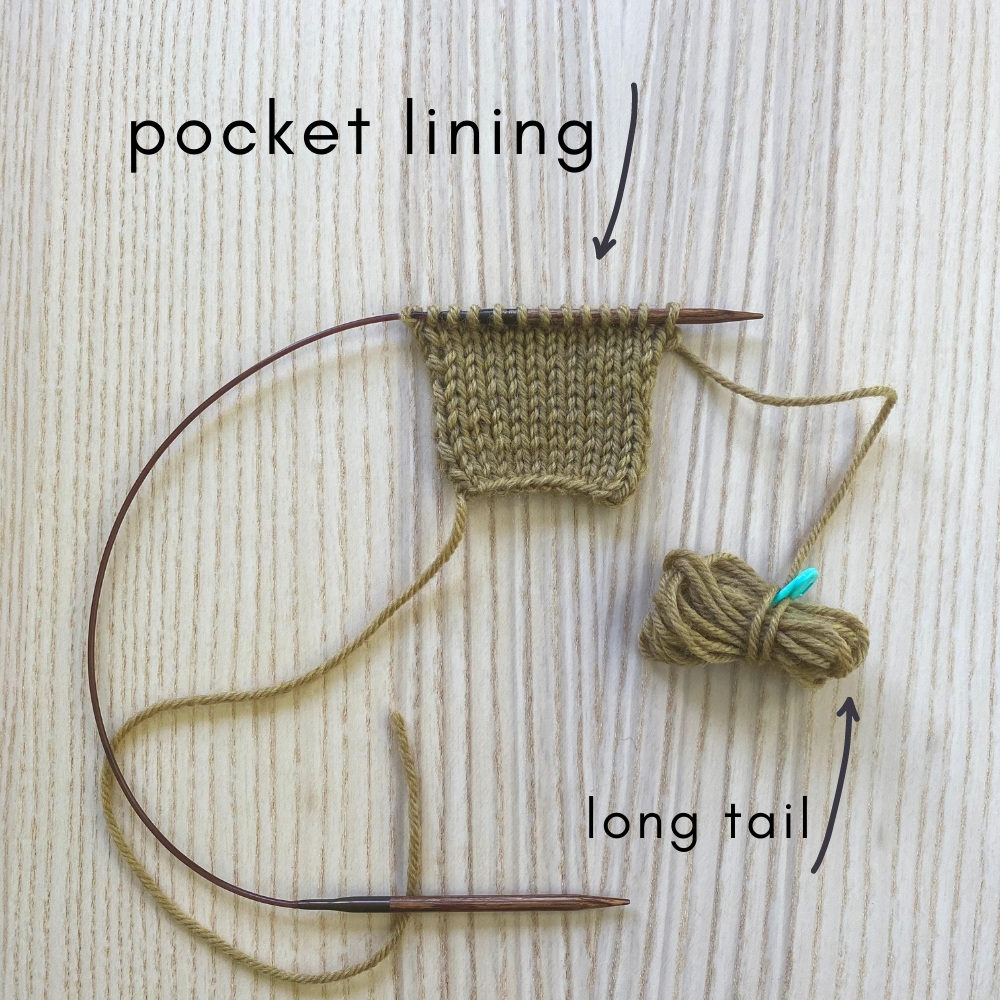
Tip: To make it less cumbersome, you can wrap your long tail around your fingers and then secure together with a removable marker like I did above. This way you don’t have a long tail getting in the way.
Pocket Setup
You’ll be instructed early on in your pattern to place 2 markers for your pocket. Depending on the style of the outside of your pocket, you’ll either just work a trim at the top portion of the pocket (as in my example below), or you’ll work a particular stitch pattern, such as what I did with Alanis where I worked a garter stitch pattern for the outside of the pocket.
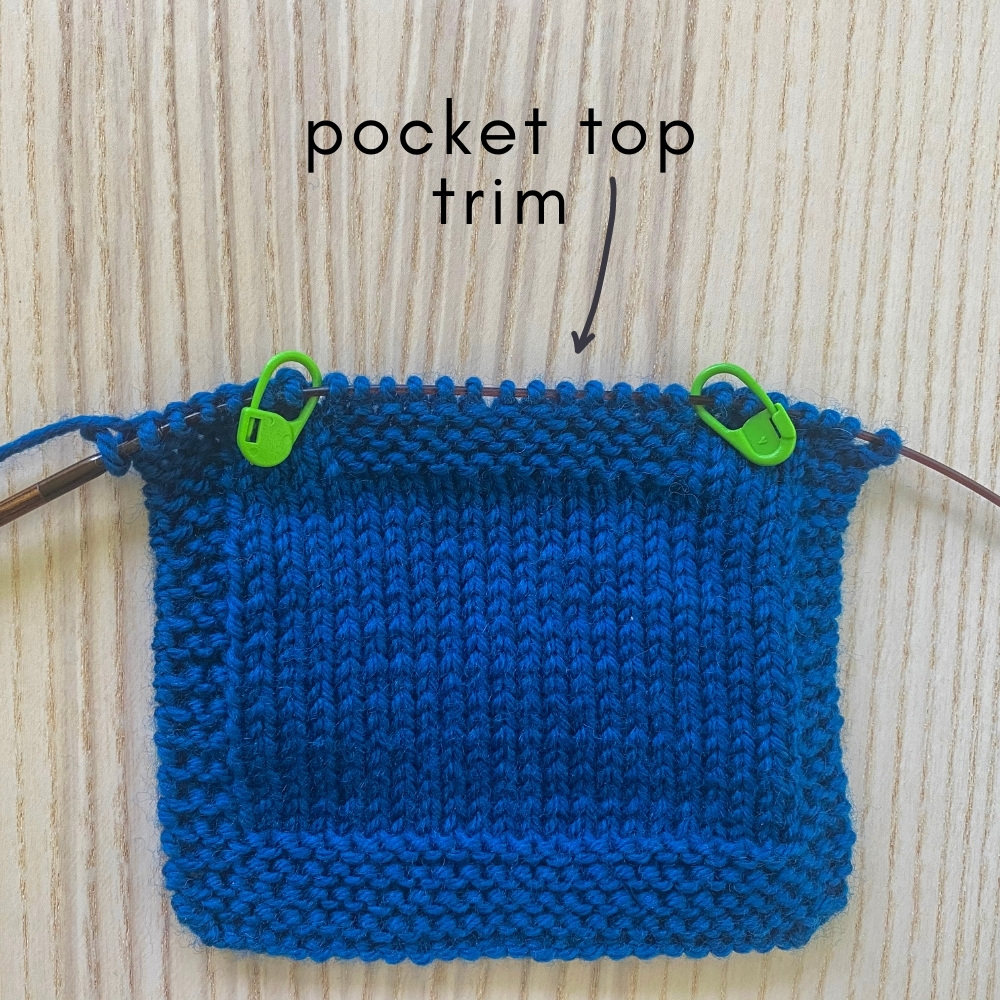
Now let’s get to the nitty-gritty of the techniques used to create the pocket opening and then to add the pocket lining:
Step 1: Create Pocket Opening
You’ll be instructed in your pattern to work to the first pocket marker, remove it, and then bind-off all stitches to the next marker. In the photo below you can see I have worked to that first marker and now I’m removing it:
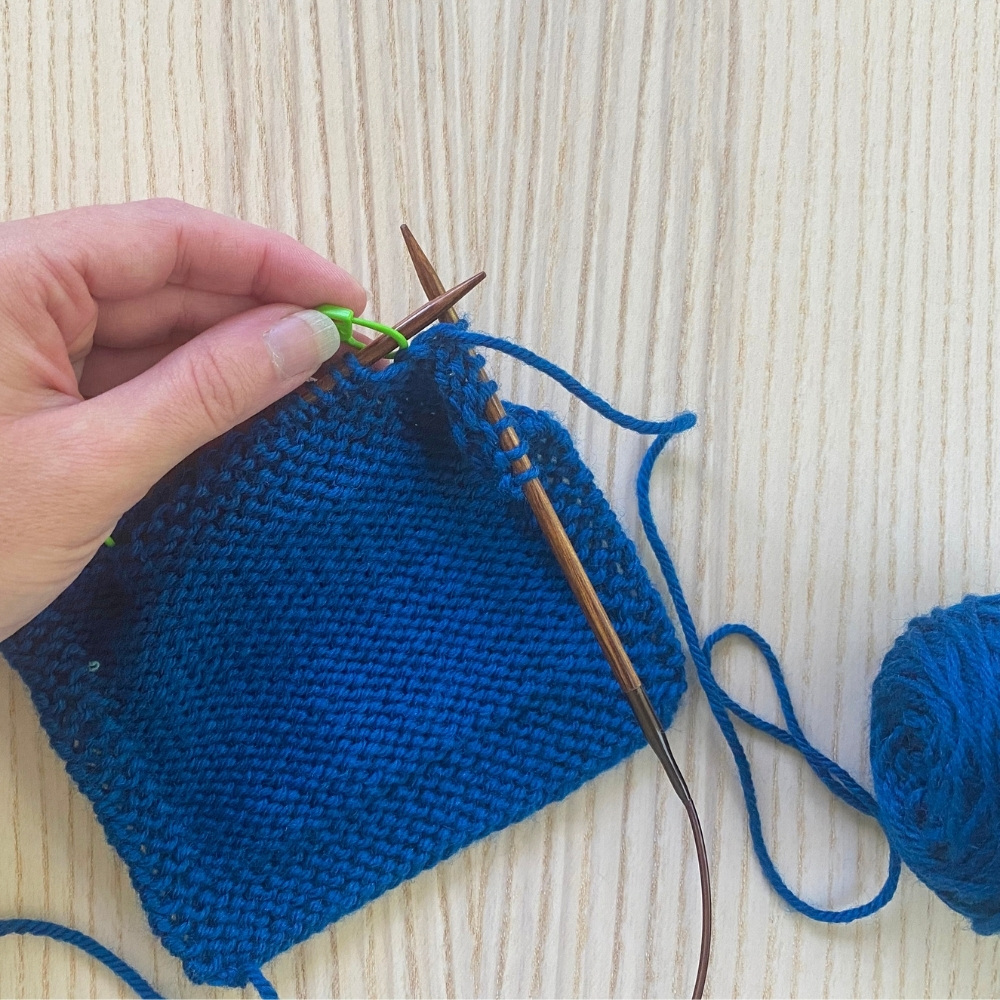
Remember, when you are starting a bind-off, you first need to work 2 stitches, then you insert your left needle into the 2nd-stitch-in on the right needle and lift it up and over the last stitch. Then moving forward you just need to work 1 stitch before you work the next bind-off. When you get to the 2nd pocket marker, remove it and then bind-off 1 more stitch:
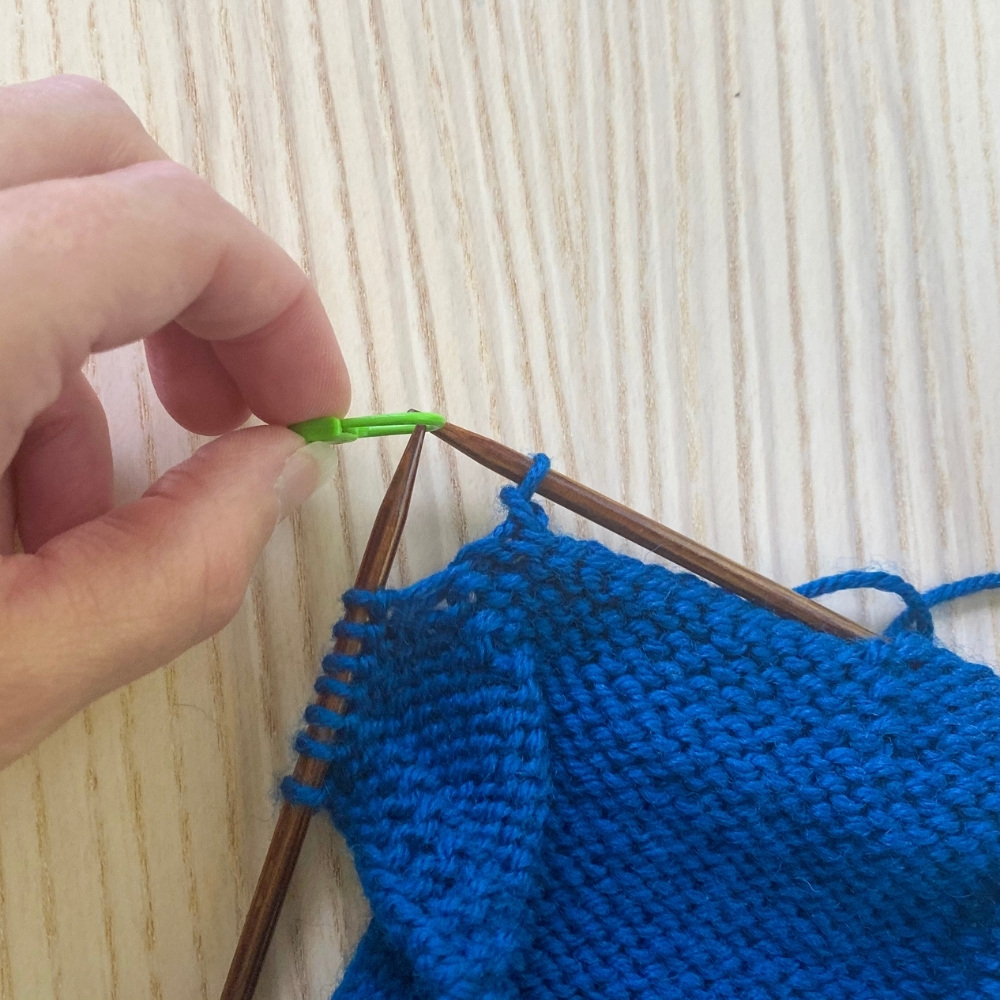
Now you have your pocket opening!
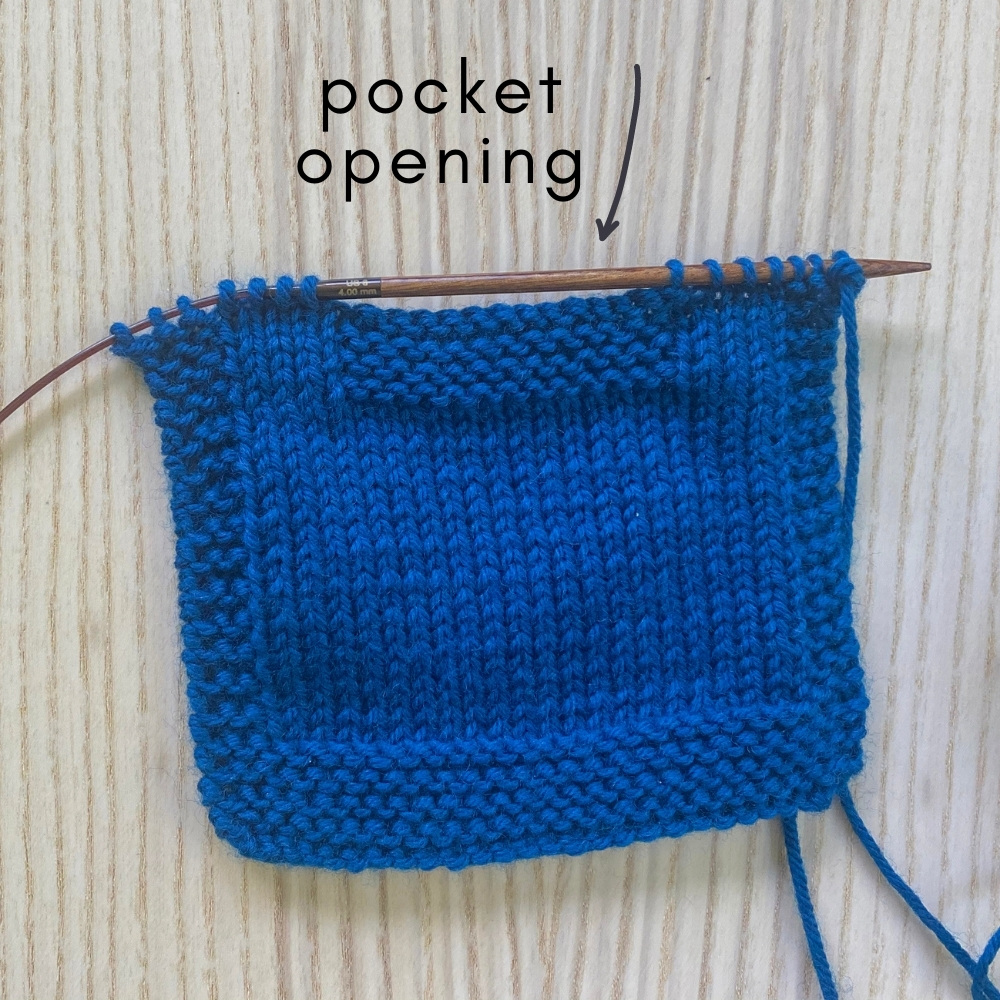
Step 2: Attach Pocket Lining
First you will work to the opening (where your stitches were bound-off):
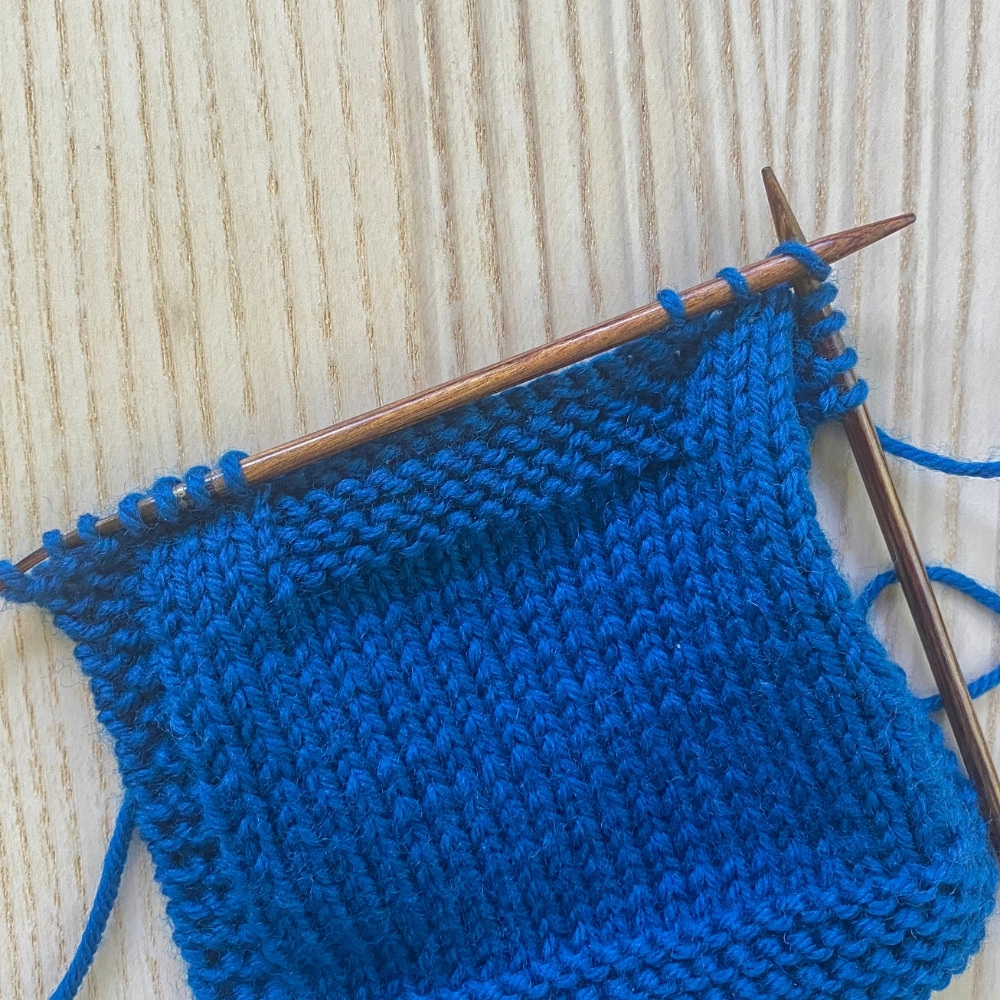
Then pick up the circular needle (circ) containing your pocket lining (or whichever type of needle you are using for your lining):
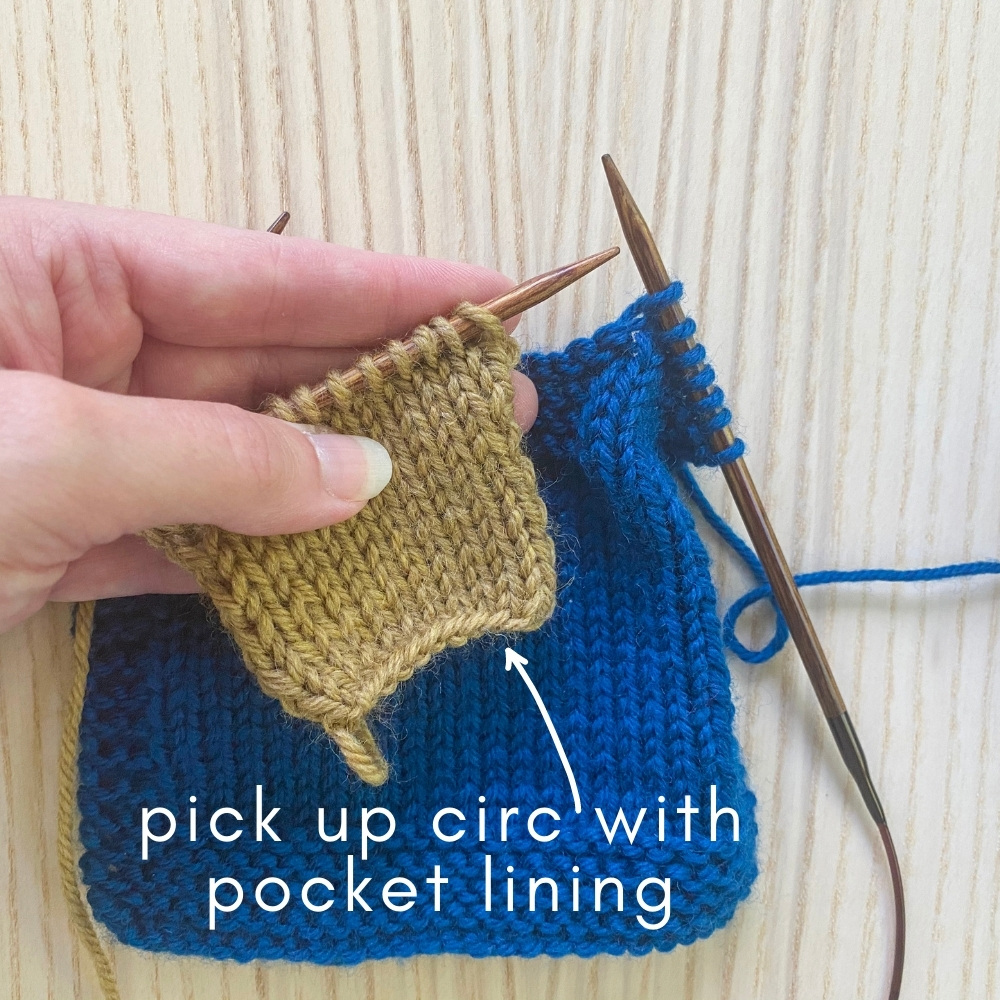
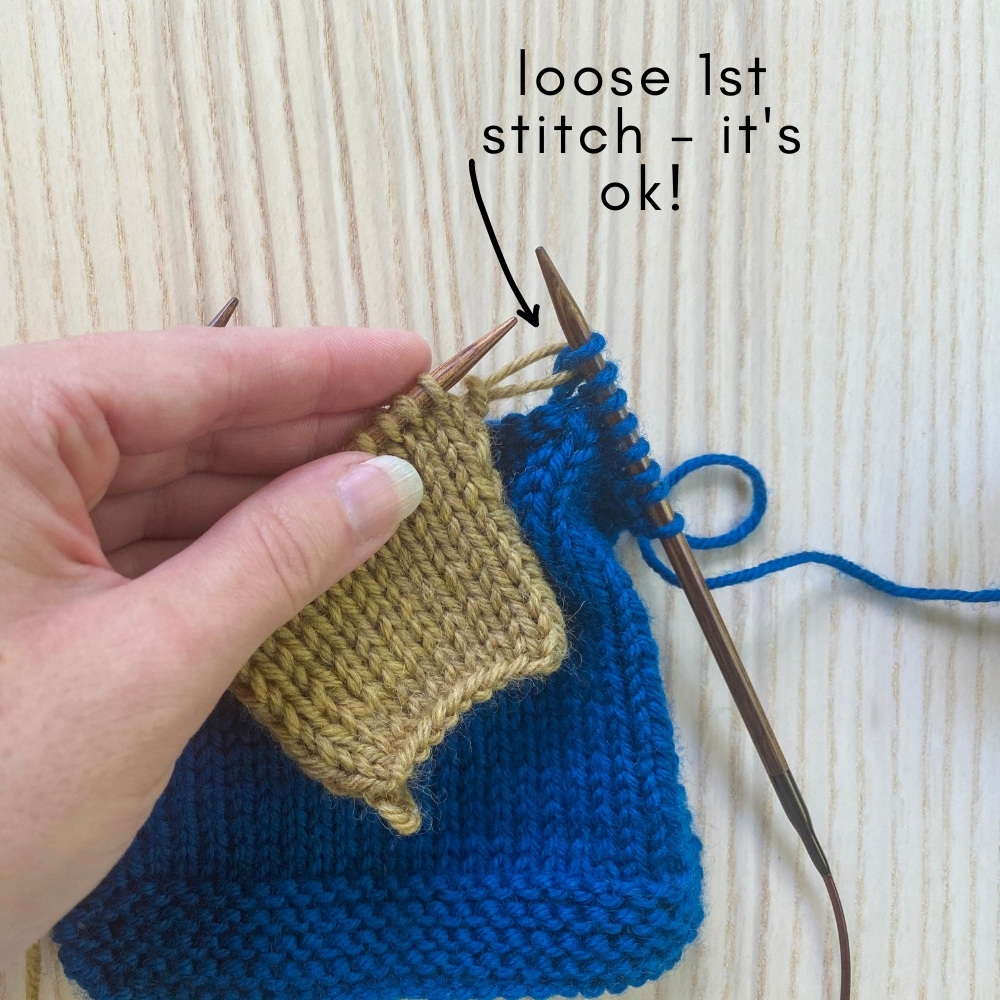
Insert your right needle into the first stitch on your pocket lining needle and knit it:
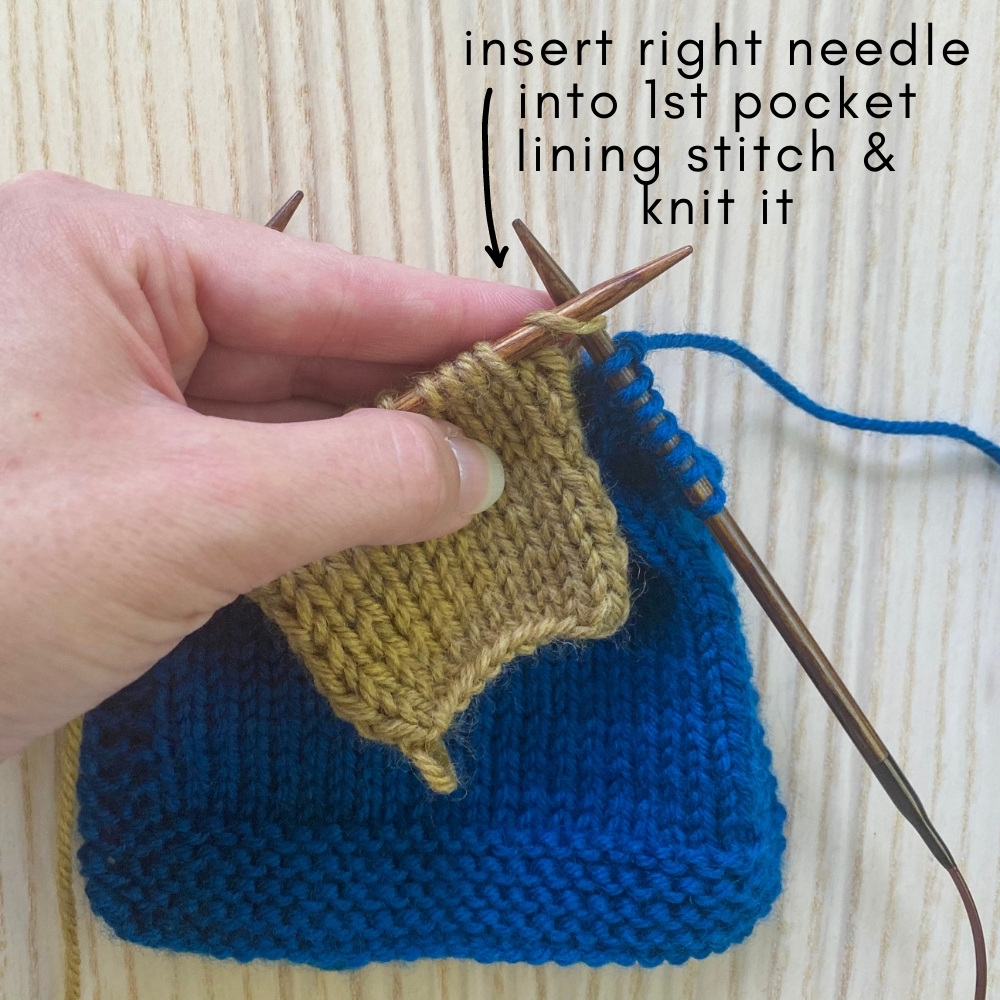
This first stitch will look a bit loose on the needle…you can just pull on the linings’ tail a bit to cinch it up. Also, it can be tightened a bit when you sew down the lining sides later on.
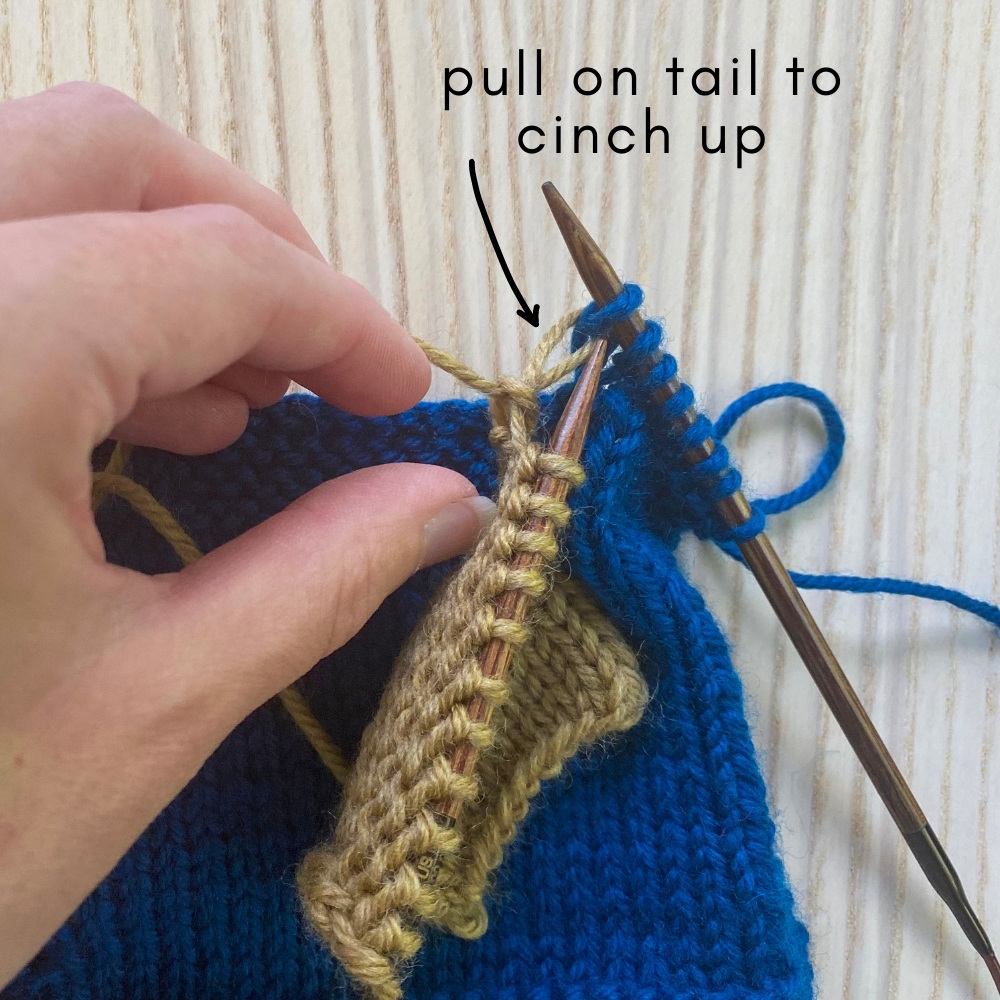
Then continue knitting across all of the pocket lining stitches until they have all been knit onto the garment’s right needle.
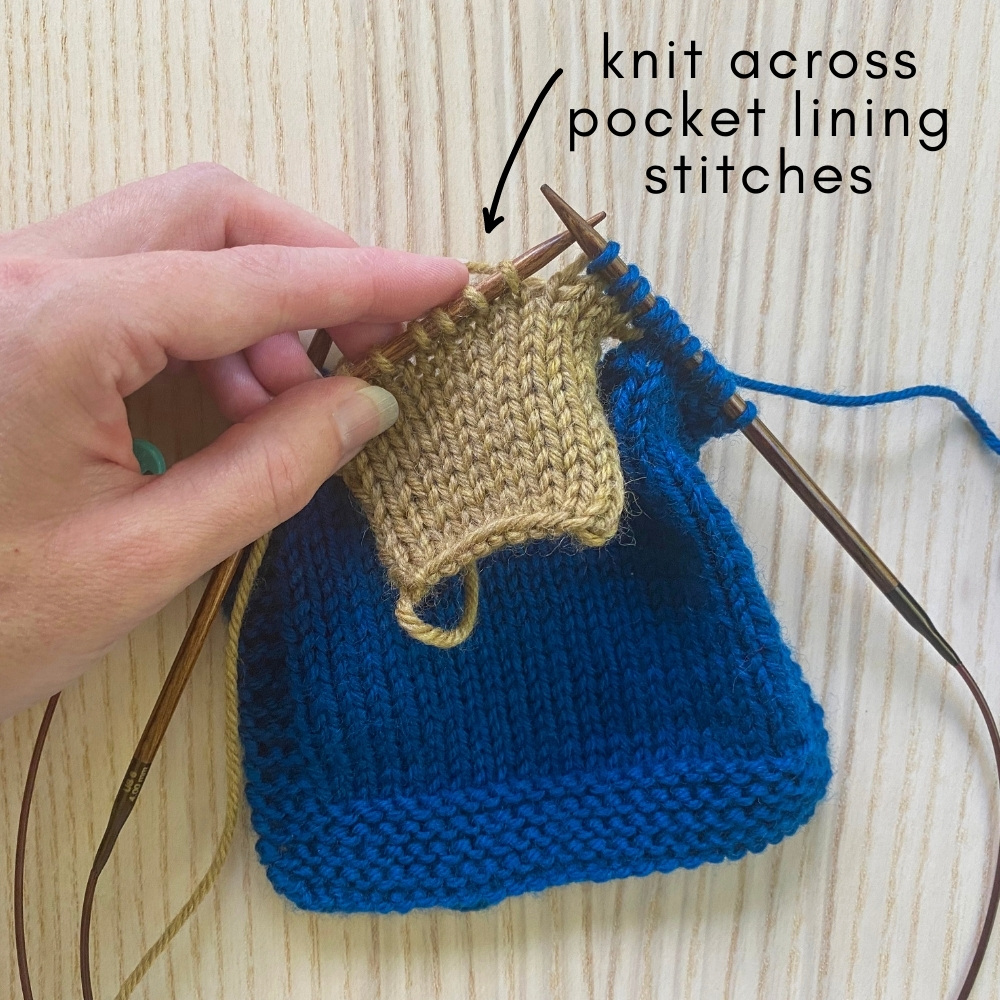
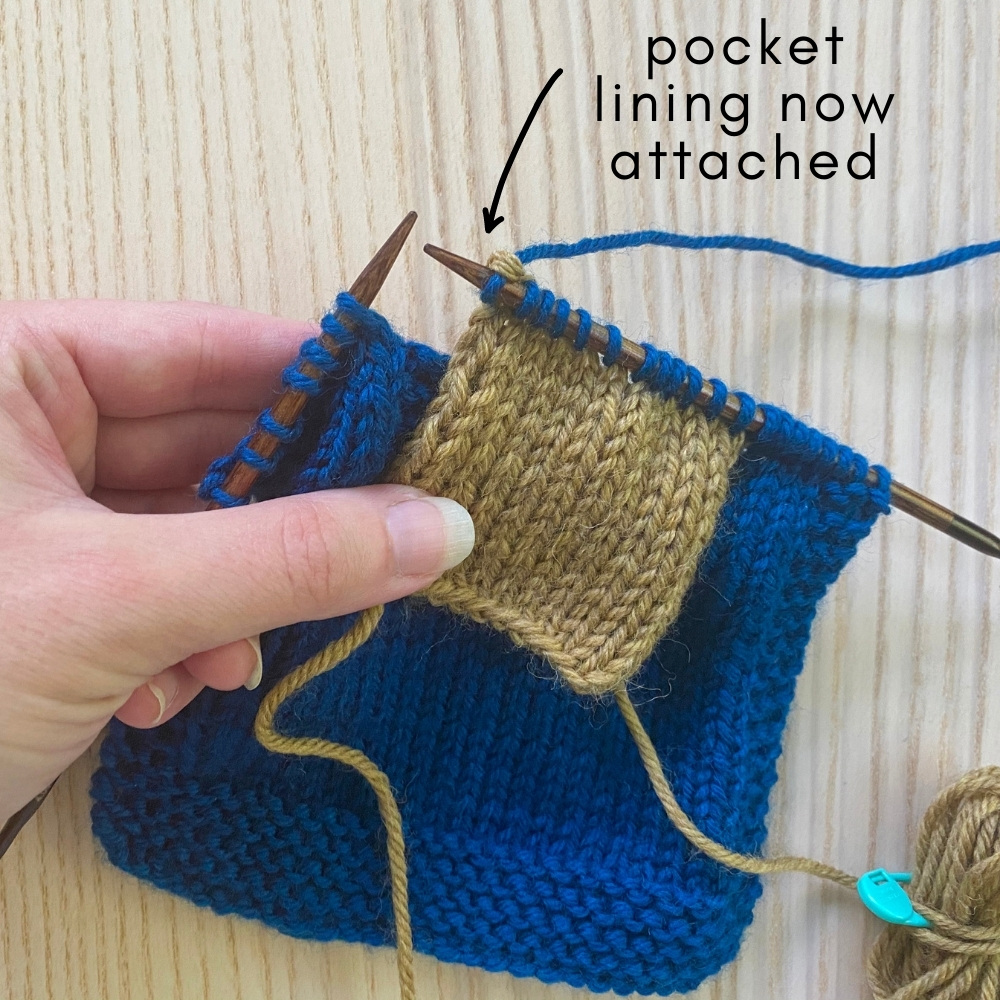
Then you will insert the right needle into the next stitch on the left needle:
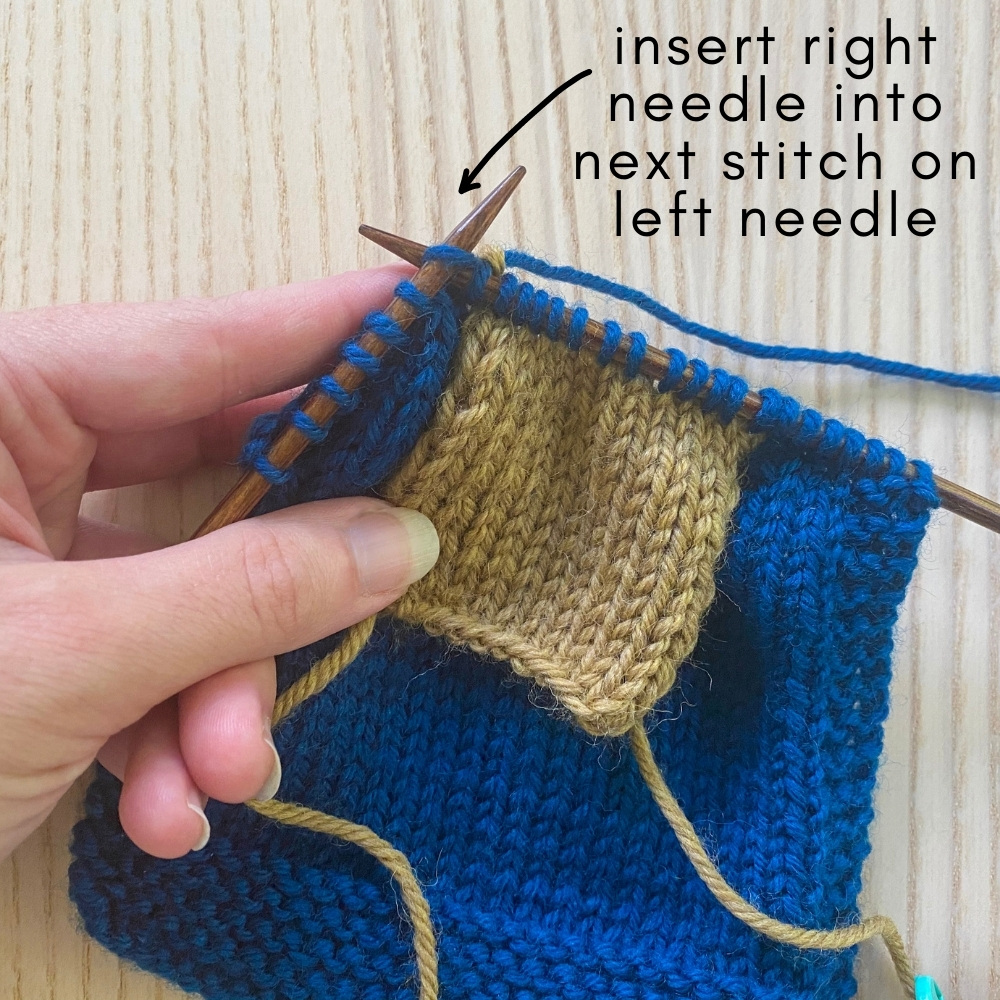
Then work as instructed to the end of the row or round. Your pocket lining is now attached!
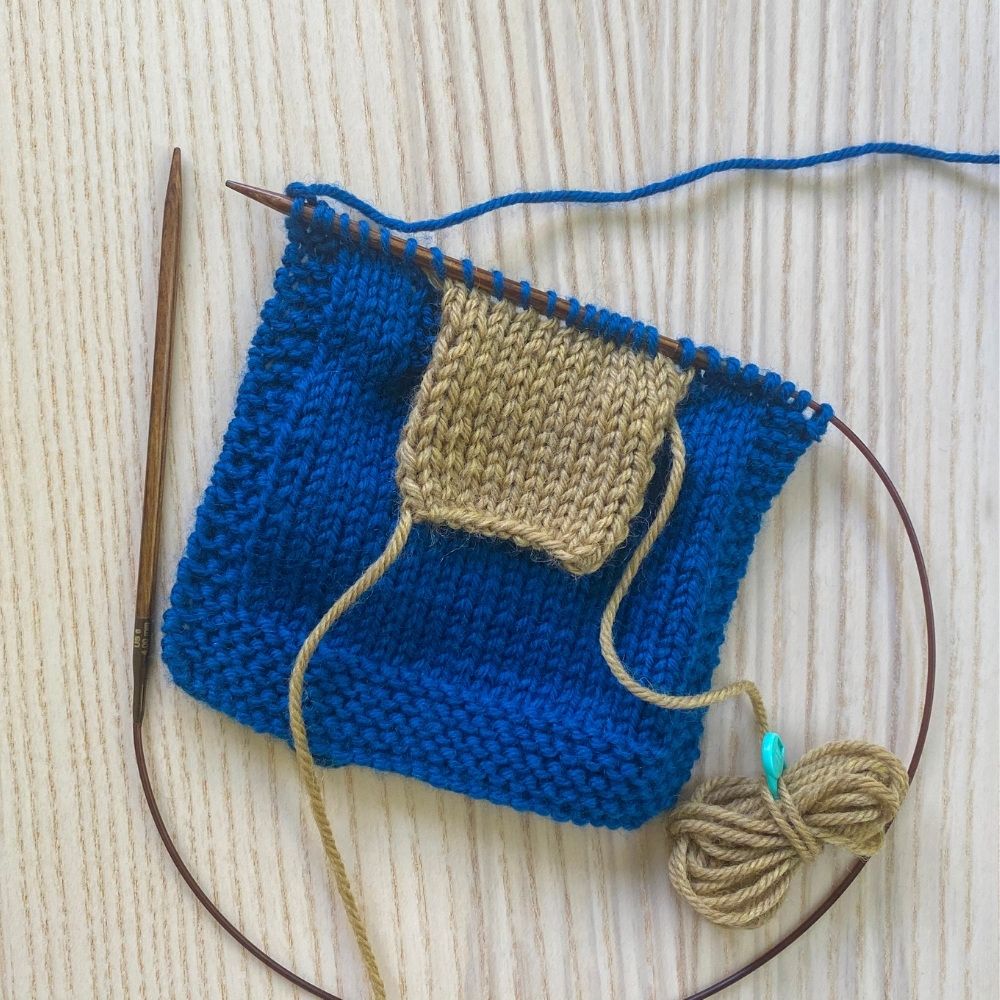
Now you’ll just want to put the lining through the opening so that it lays on the inside of the work:
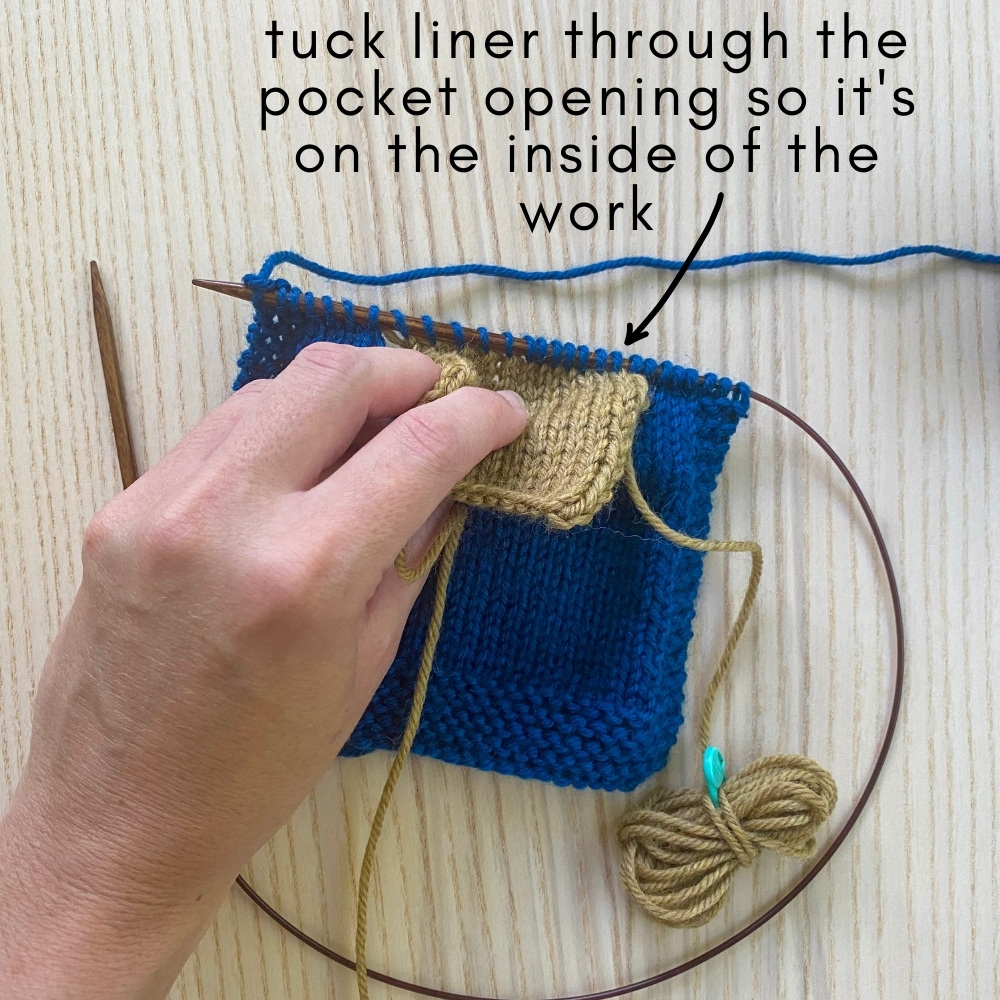
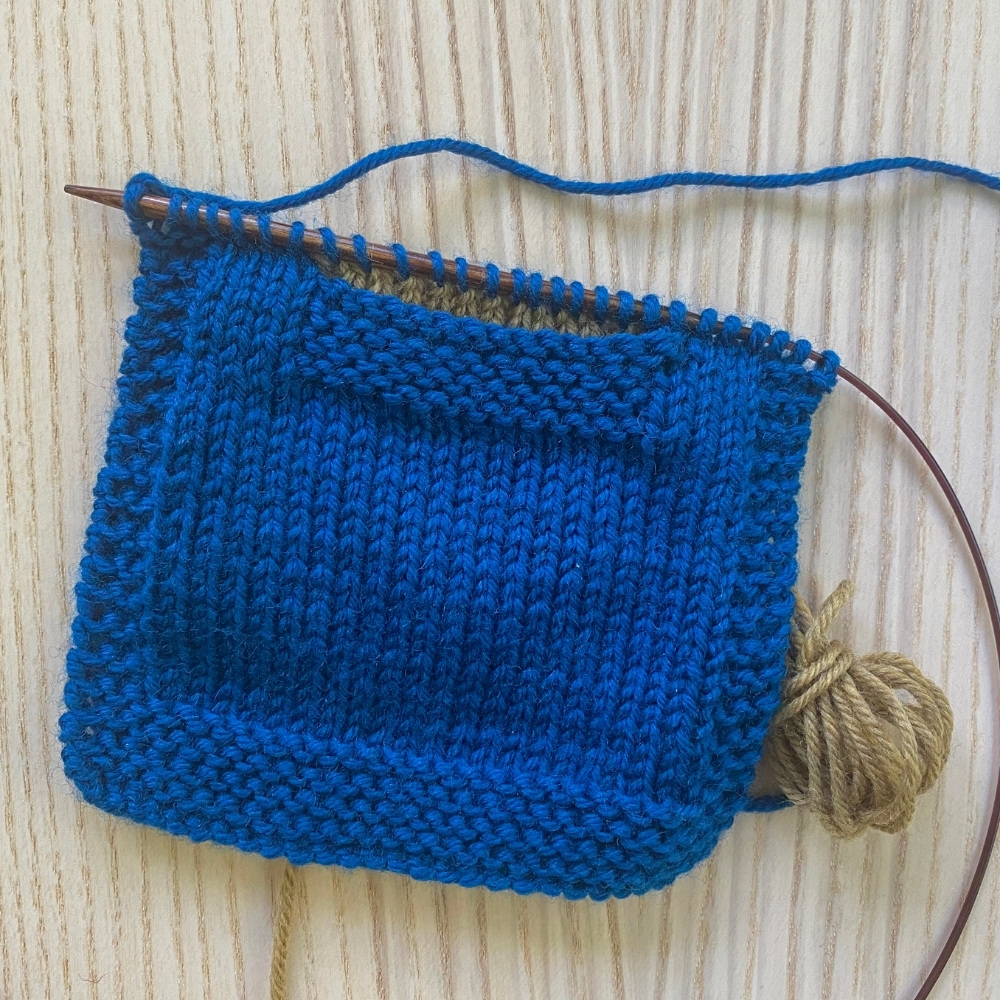
The lining is attached at the top, but the sides and bottom are open. These will need to be seamed down later (an intro demo below). But in terms of this step in the pattern, you are all done now!
Step 3: Seaming Down Lining
Typically I wait until the garment is done to seam the pocket lining sides and bottom to the garment, but you can do it sooner if you prefer. The first step is to thread your lining tail through a tapestry needle:
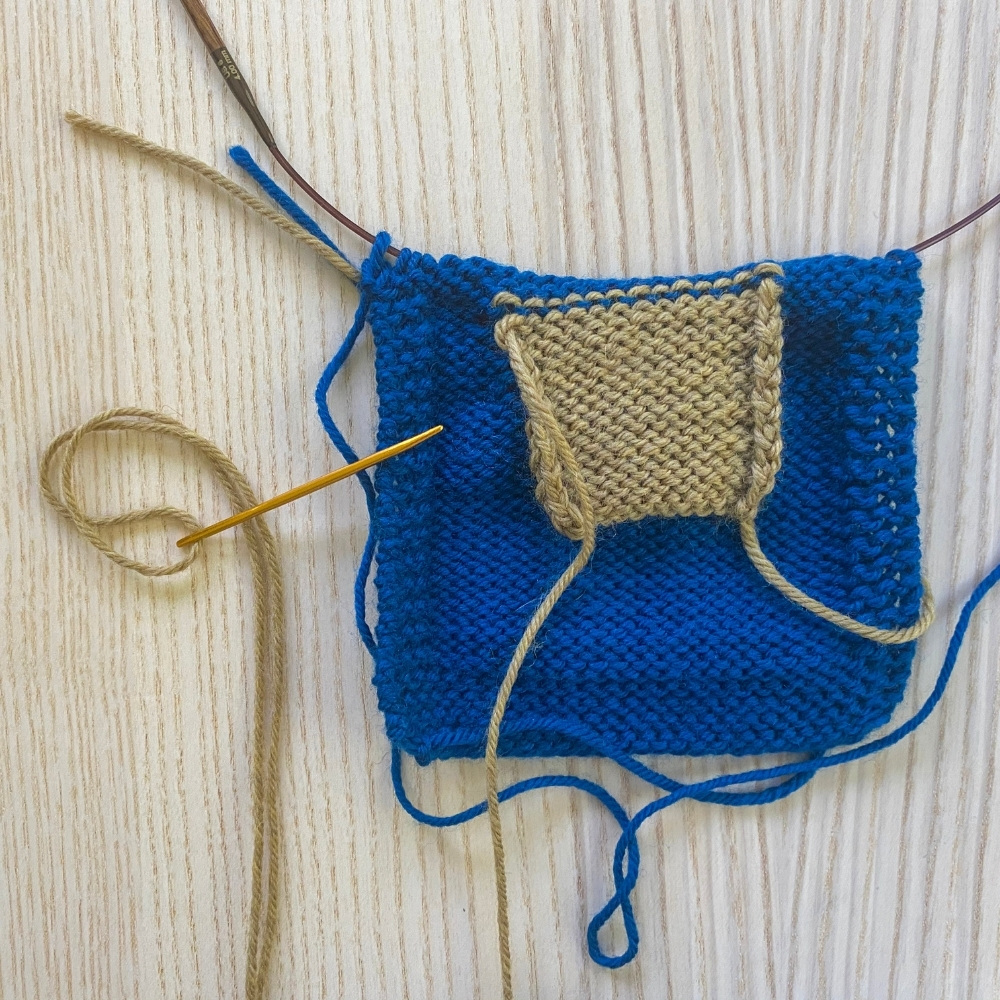
Then, because often there is a little hole up in the corner, I like the thread the tail around the hole to cinch it up:
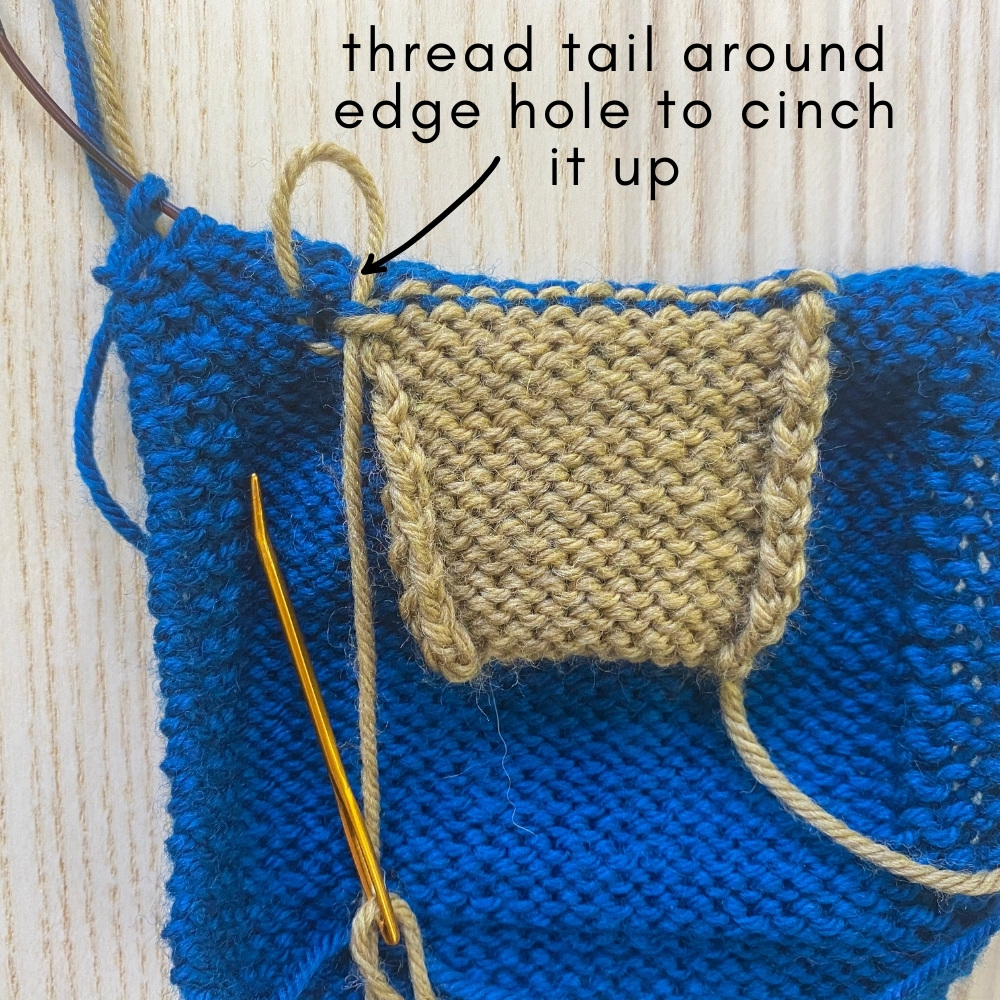
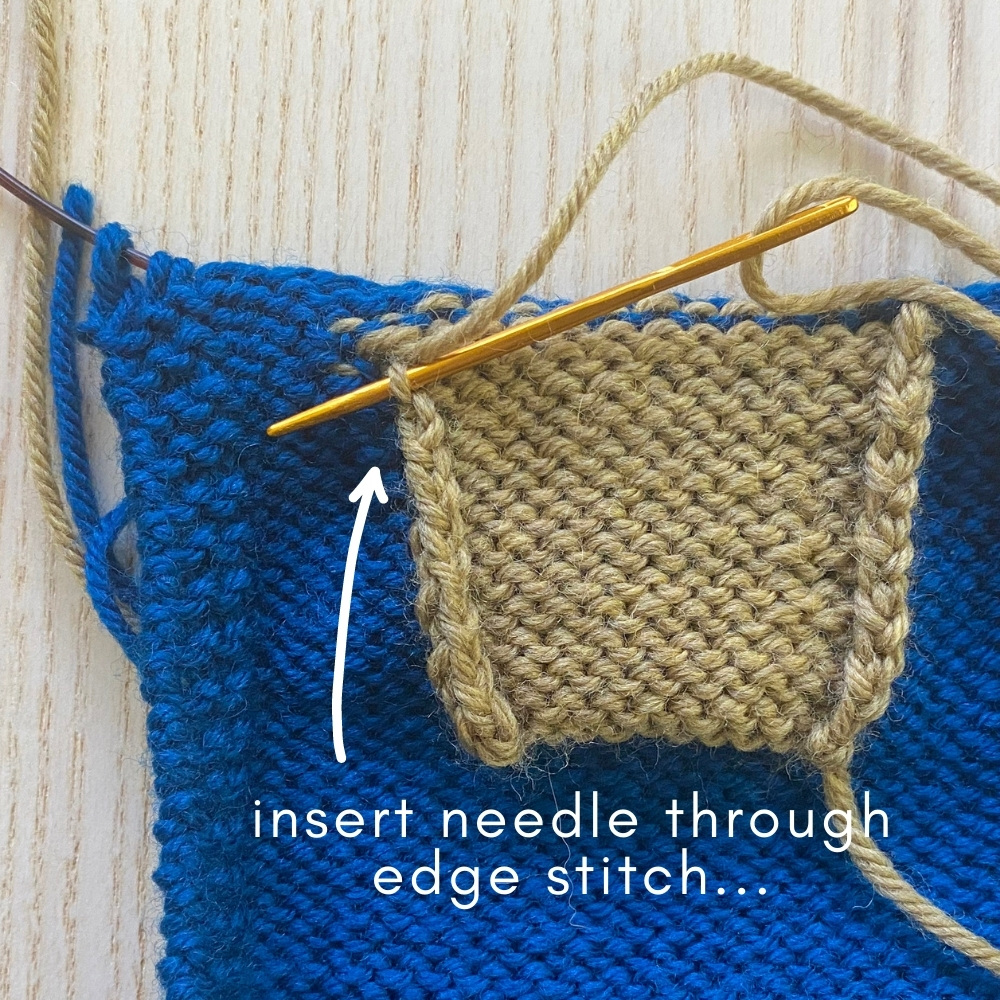
Then to attach the sides, first insert your tapestry needle into an edge stitch on the lining, from the inside of the lining to the outside (so needle is pointing away from the lining):
Then insert the tapestry needle into a loop on the garment and then pull needle through:
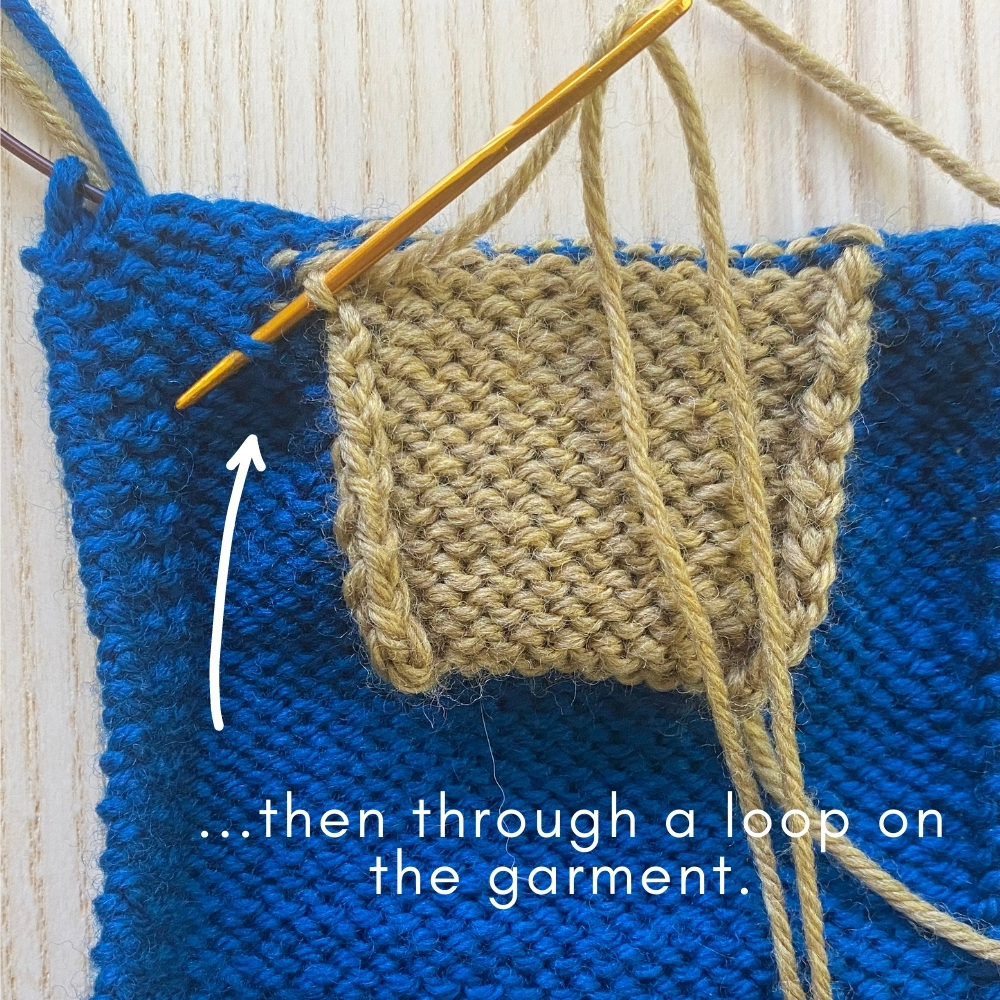
You’ll continue in this manner (tip: I like to periodically turn my work to make sure my linings’ yarn isn’t poking through to the right-side of the work – if it is, it just means you went through the wrong loop).
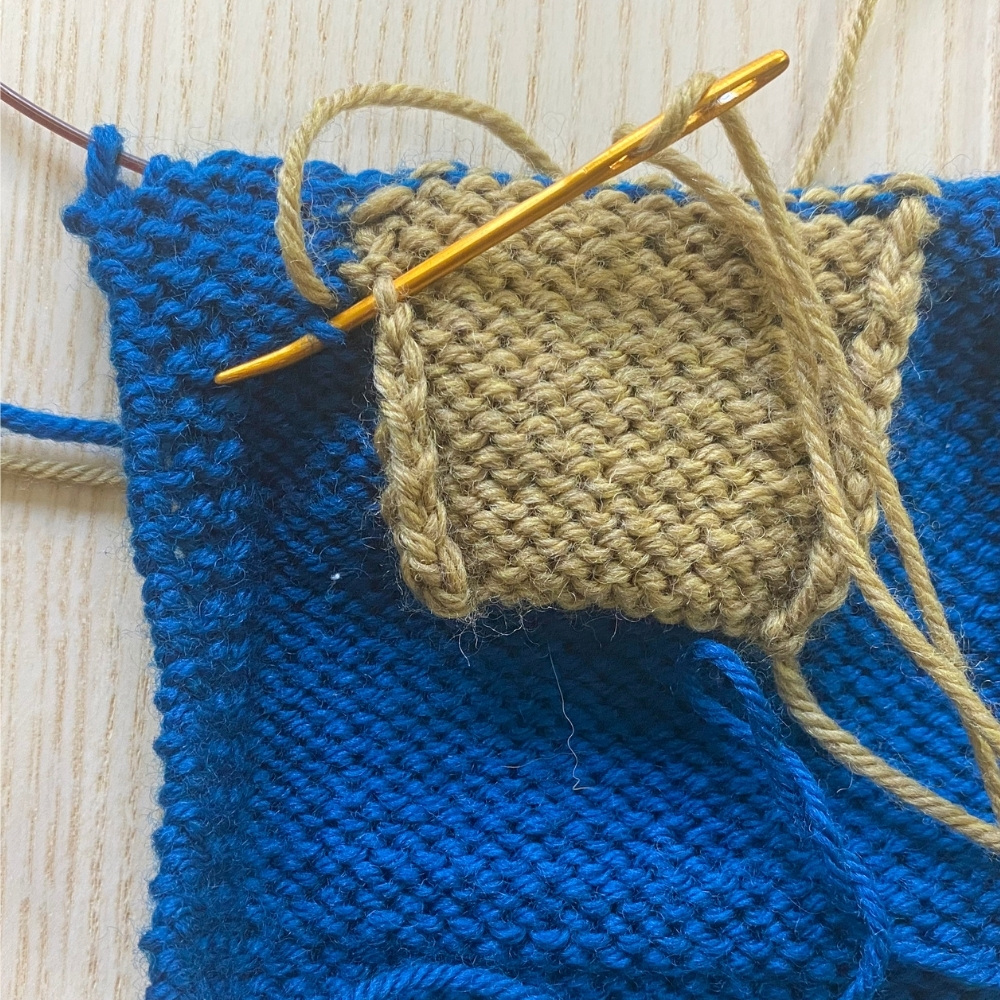
It will start to look like this after a few stitches:
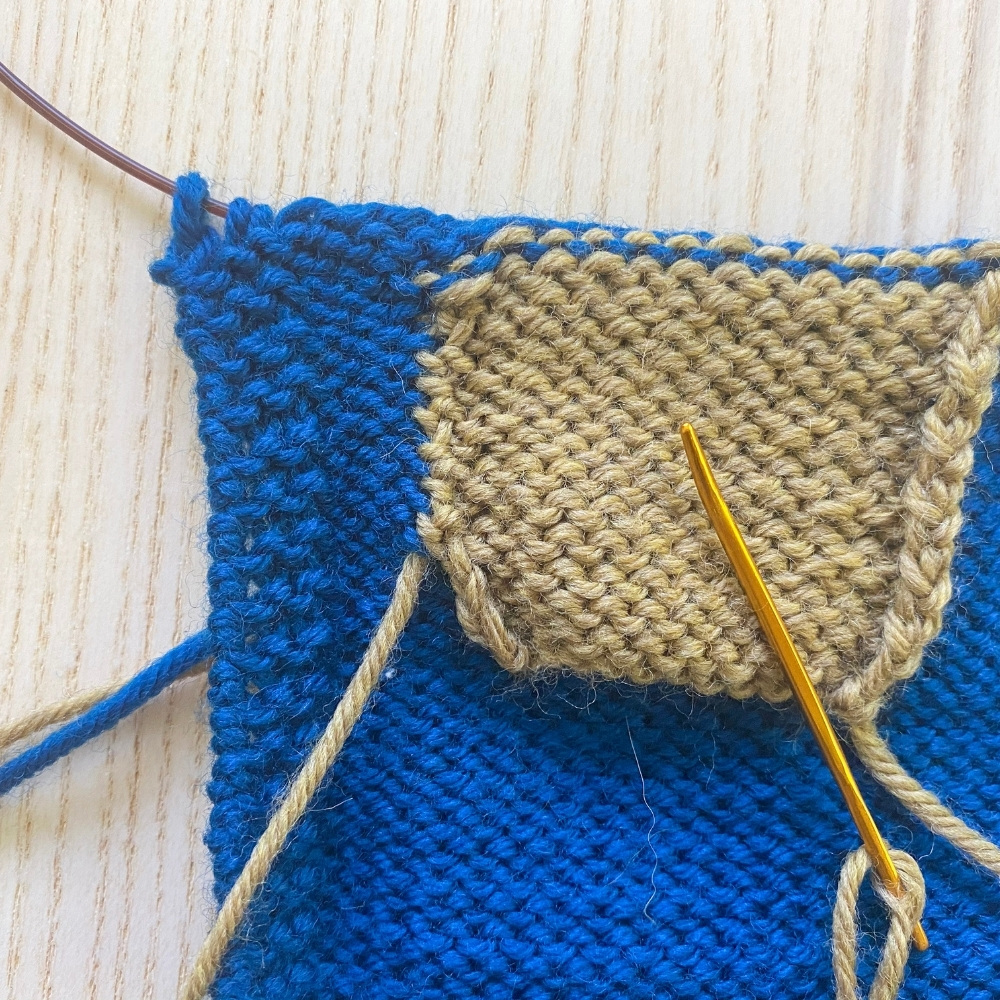
I did a thorough tutorial of seaming down pocket linings in this blog post – so for a more detailed explanation as well as to see how to seam down the bottom and the other side of the lining, check it out!
I hope this tutorial helped provide a good visual demonstration of the steps involved with creating an inset pocket in bottom-up garments! If you have any questions feel free to reach out!

