Winslow Park Cowl Tips
On this page you will find tutorials and tips to help you make your own Winslow Park Cowl! You’ll find information about:
- Yarn options & picking colors
- Casting-on and working in the round
- Working the Turned Hem technique
- Working the helical stripe technique in 1 row stripes
- Tip on ‘tinking’ back when working helical stripe technique
- Binding-off in pattern
Yarn Options & Picking Colors
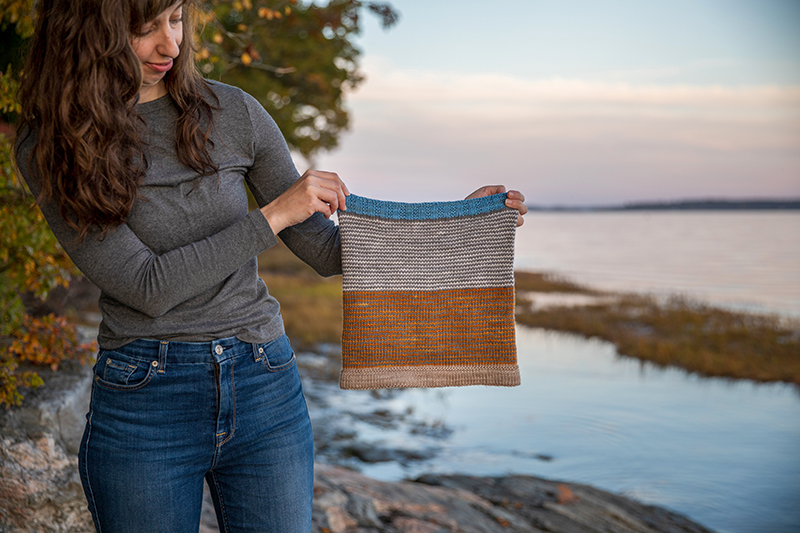
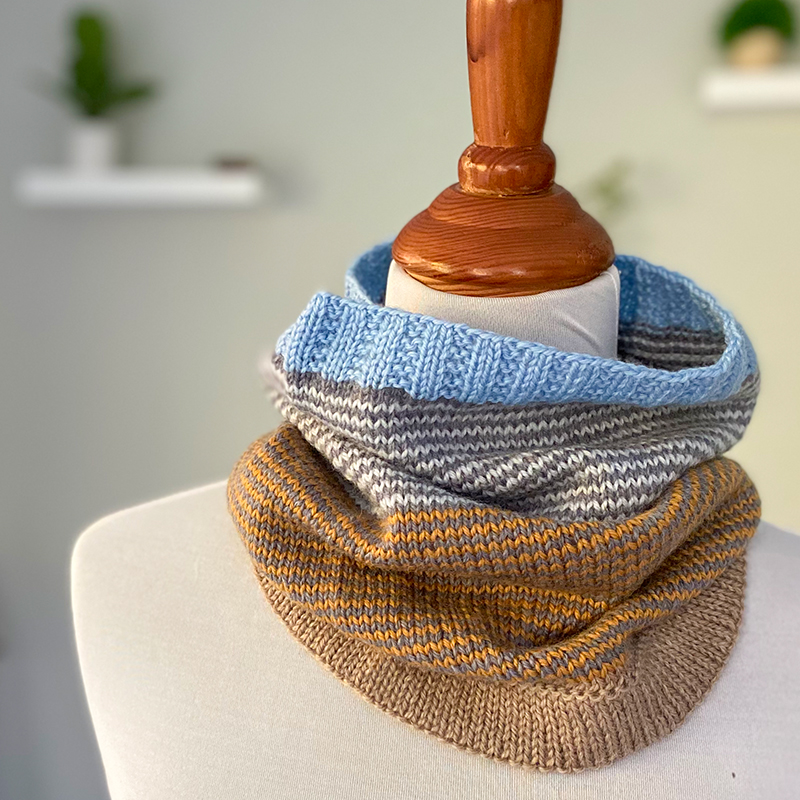
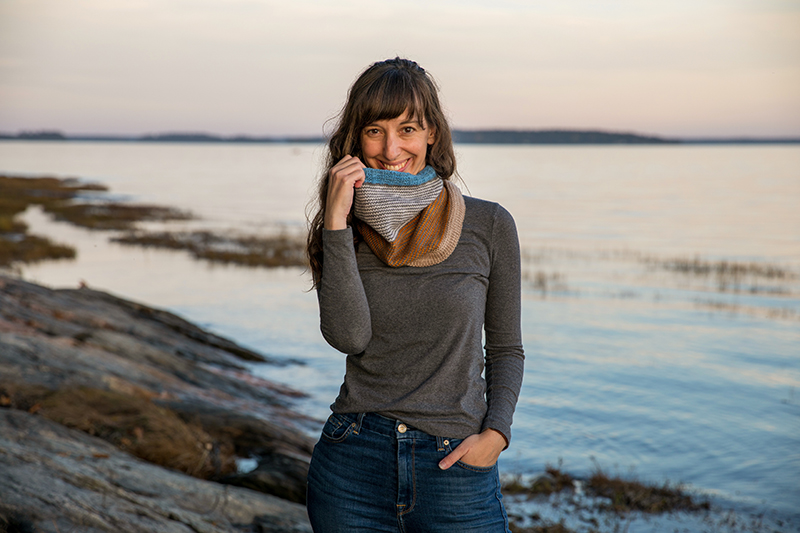
The pattern calls for 5 colors of DK-weight yarn. The inspiration for this cowl and the colors I chose for it was the photo featured below. It was taken by my husband Jeff at Winslow Park in Freeport, Maine and I was so captivated by the colors and textures!
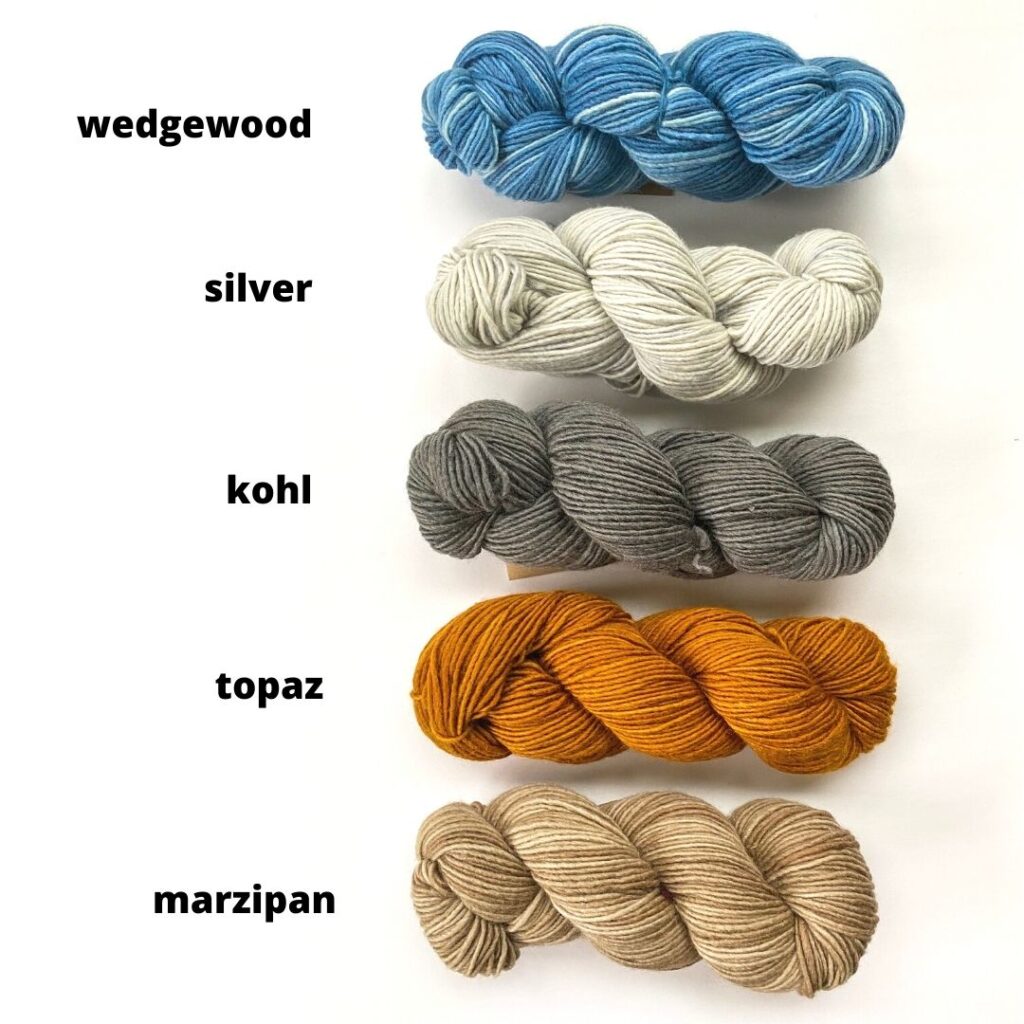
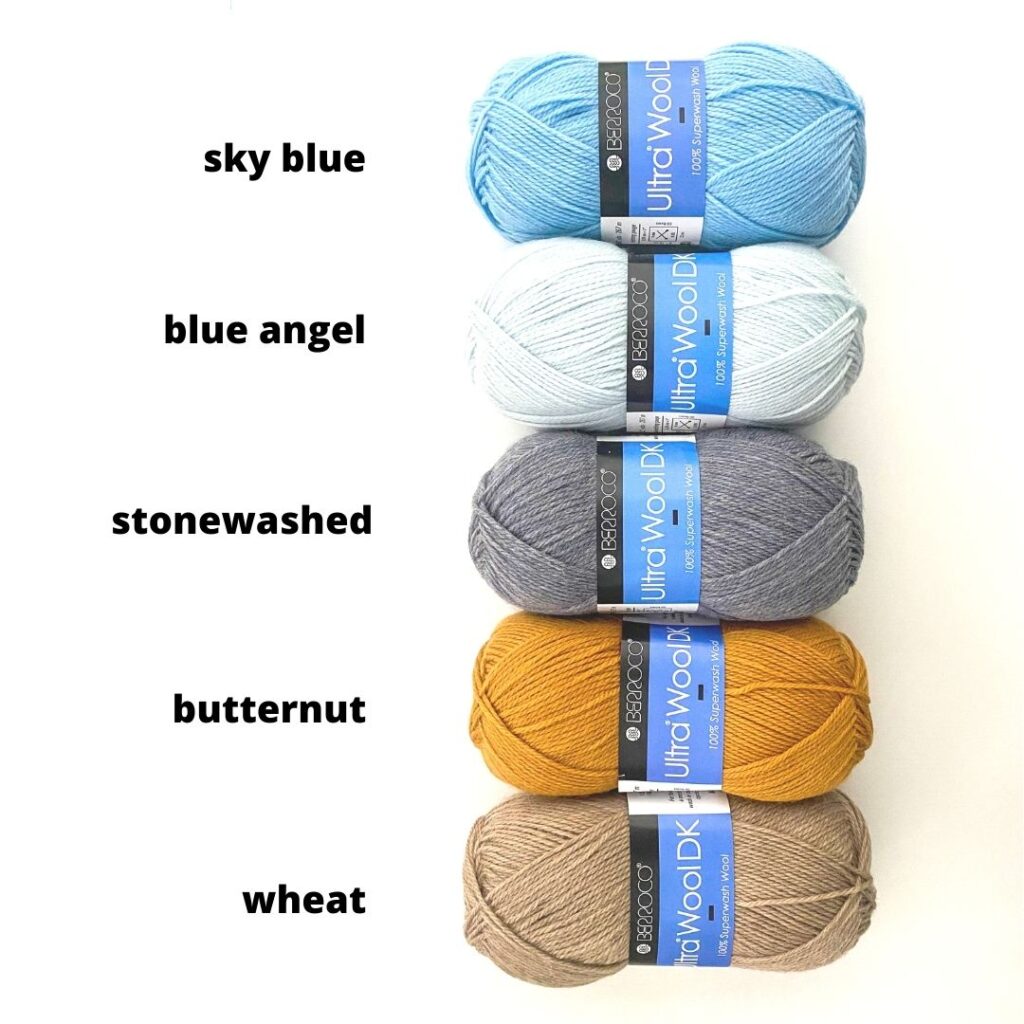
For my original sample I used Manos del Uruguay’s Silk Blend in these 5 colors: Marzipan, Topaz, Kohl, Silver and Wedgewood. Another great yarn choice is Berroco’s Ultra Wool DK which has these similar colorways: Wheat, Butternut, Stonewashed, Blue Angel and Sky Blue. The gauge is just slightly different with Ultra Wool but not enough to make a significant difference in finished size.
If you want to use these exact colors, check with your local yarn shop, or Wool & Co online has all 5 of these colors of Manos del Uruguay Silk Blend. You can choose these colors, or have fun and play around with your own color palette! Maybe let this idea inspire you and find a nature photo that draws you in and pick colors based on that, just like I did. I chose Manos del Uruguay Silk Blend and Berroco Ultra Wool DK because they both have such large color palettes and you’re sure to find colorways close to what you are looking for. But feel free to use any DK-weight yarn you like, or mix and match different ones together too!
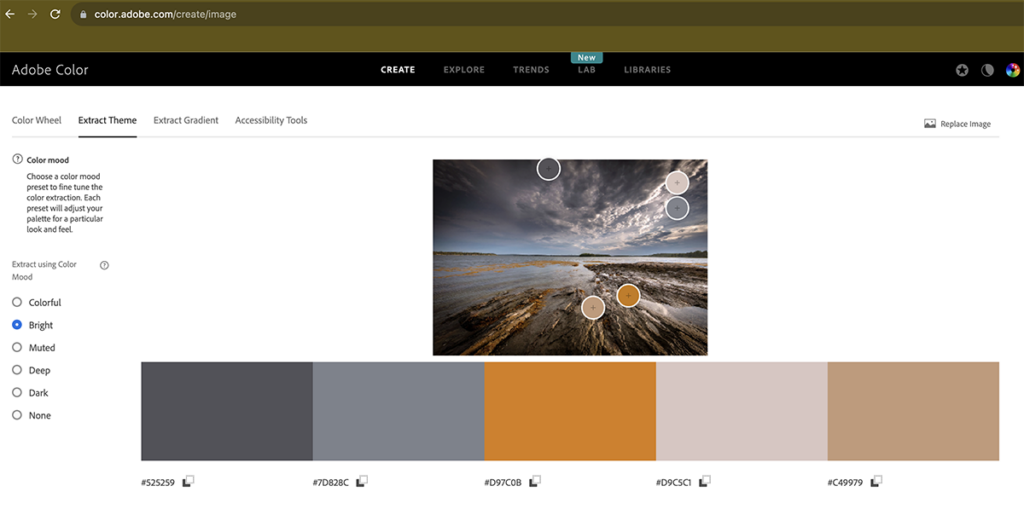
If you have a photo that you want to use as your inspiration source just like I did and need a little help pulling out colors, you can use a little technology! If you go to https://color.adobe.com/create/image and upload your own photo, it will suggest a color theme for you. On the left-hand side, it will also change the theme based on your chosen color mood (colorful, bright, muted, etc). Below is what this website suggested I use based on my inspiration photo and it was pretty close to what I chose. Using a color-theme generator such as this can definitely be a good way to at least get the ideas going and a good starting point to your color-pairing exploration.
Also, you can choose to use less than 5 colors if you prefer. In the pattern I list the exact yardages for each color so if you want to use less colors, just add those yardages to see how much extra of the other colors you may need. For example, a 3 color version can be made by combining colors A & B into 1 color and combining colors D & E into 1 color (just as one possible option).
A note about the Ultra Wool DK version: In the Berroco Ultra Wool DK version above, I used the same needle size as listed in the pattern (a US 7), but my stitch gauge was a little tighter and my row gauge was a little looser. But that’s the great thing about this cowl – gauge doesn’t have to be exact! The finished measurements will just be a little different (my circumference was 23″ and height was 13.5″ in this version).
Casting-On and Working in the Round
I recommend using the Long-tail Cast-On method for this piece. The reason is because when you go to work the turned-hem technique, you’ll be picking up into the cast-on stitch and so you need your cast-on stitches to be nice and sturdy but still a bit flexible (and the long-tail cast-on is both of those things). I personally like using the thumb-method of this cast-on – click here to check out my video if you would like to see a tutorial of it!
Working the Turned Hem Technique
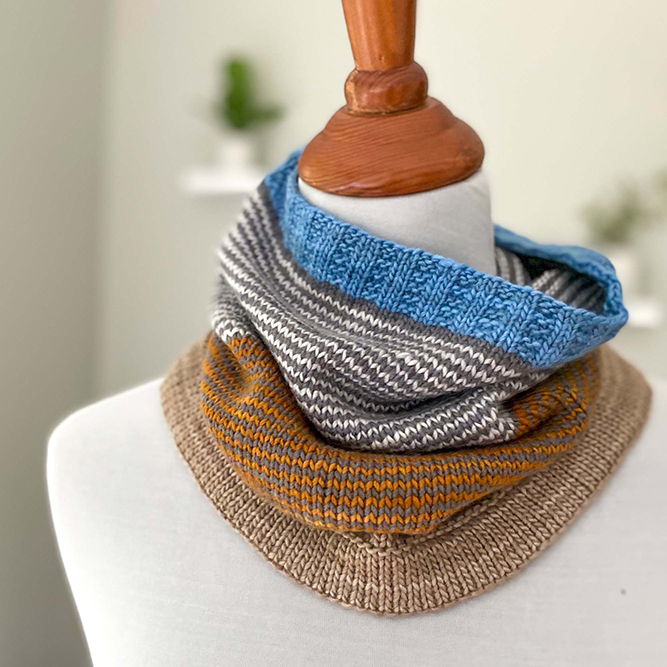
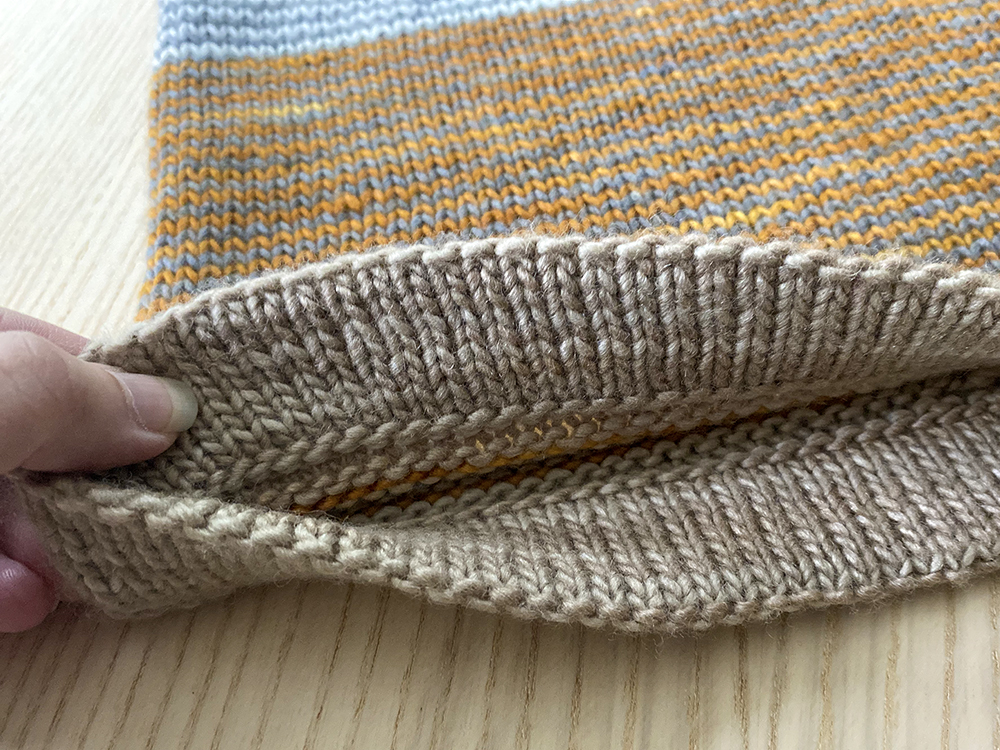
The turned hem technique creates such a nice hem edging:
It’s one of those techniques though that you really need to see in order to get the concept, so I’ve created a tutorial page for it that will show you photos of every step of the process. It also includes a link to my YouTube video if you want to see a demo of it in-action! Click here to for the tutorial page.
Helical 1 Row Stripes:
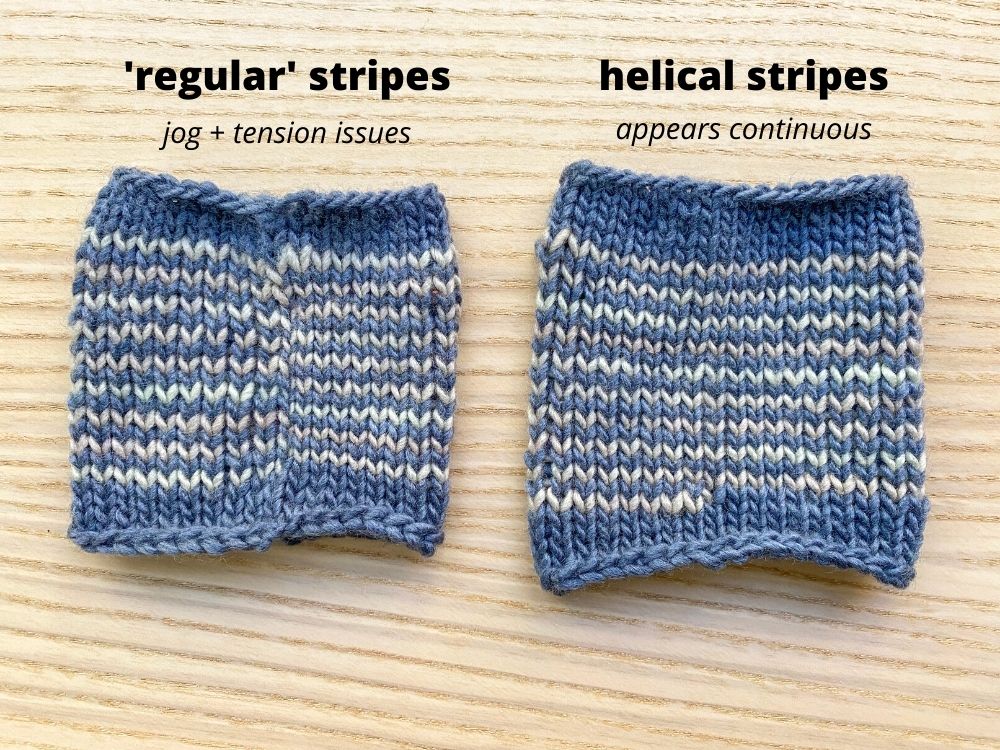
In this cowl pattern I utilize the helical knitting technique to work the 1 row stripes (something I learned about recently – there’s always something new to learn in knitting!). What is helical stripe knitting? There are different methods for it, but the idea is similar regardless of the method – you work your stripes in a spiral-like formation so to avoid the ‘jog’ you see in typical stripes worked in the round. The ‘jog’ appears because when you work stripes in the round, the first stitch and last stitch of a round don’t meet – the last stitch will be above the first stitch. The other issue that can occur with typical in the round stripes is that the tension around the beginning of round marker can be tight due to switching colors every round. So between the jog and the tension issues, your 1 row in the round stripes may not appear as smooth or consistent as you would like. But by working “helical stripes”, you can avoid these 2 issues and have continuous looking stripes:
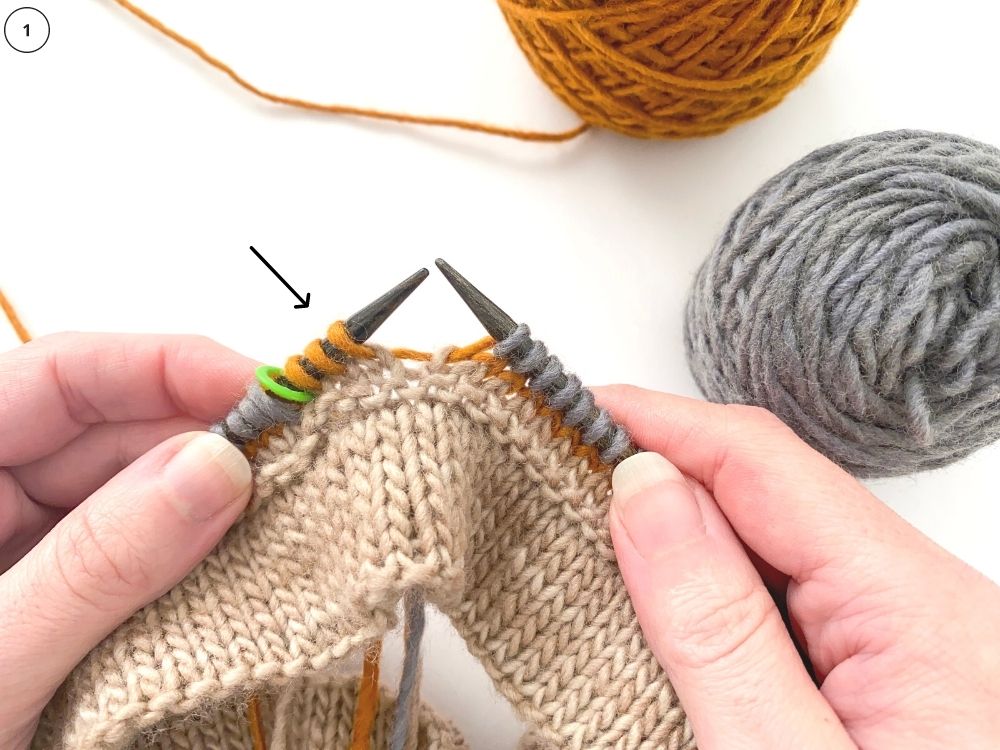
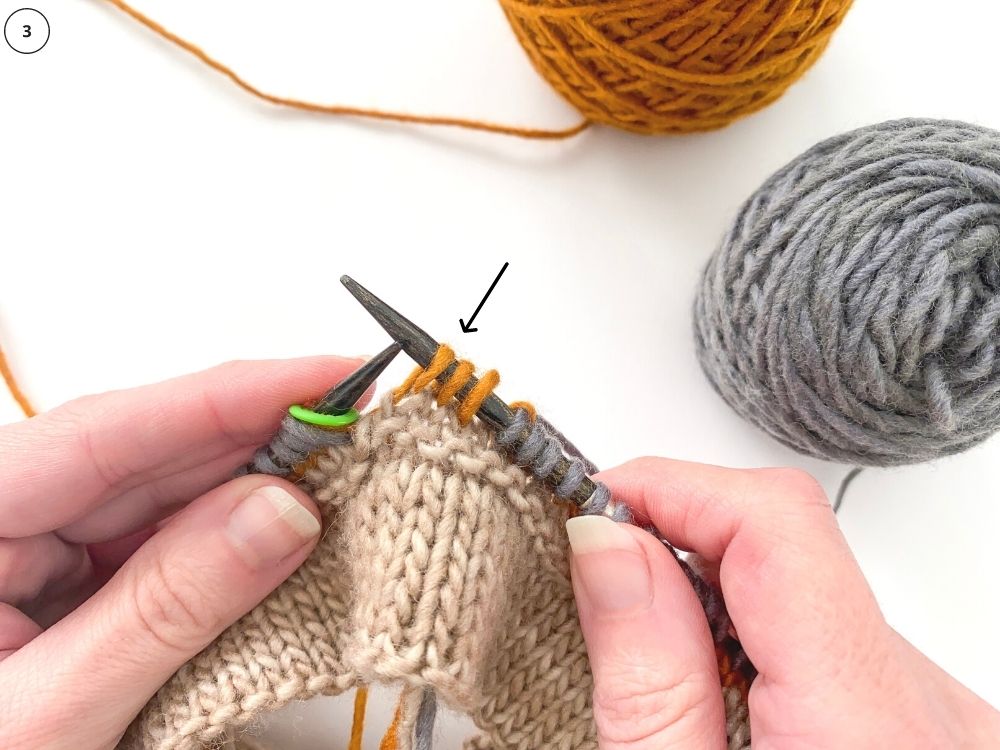
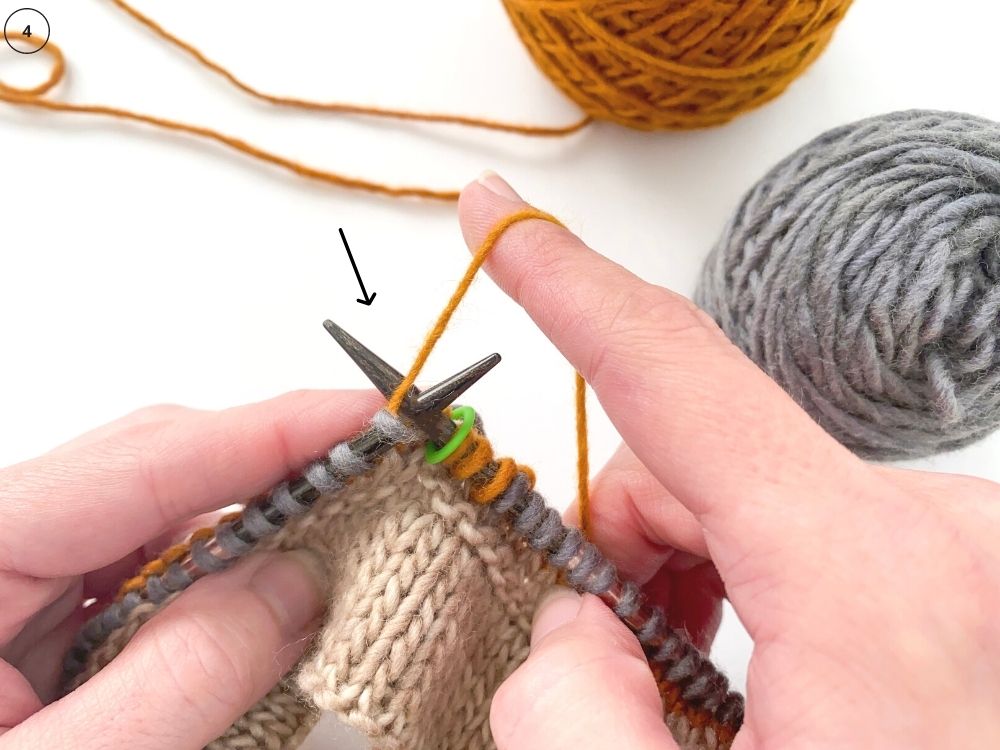
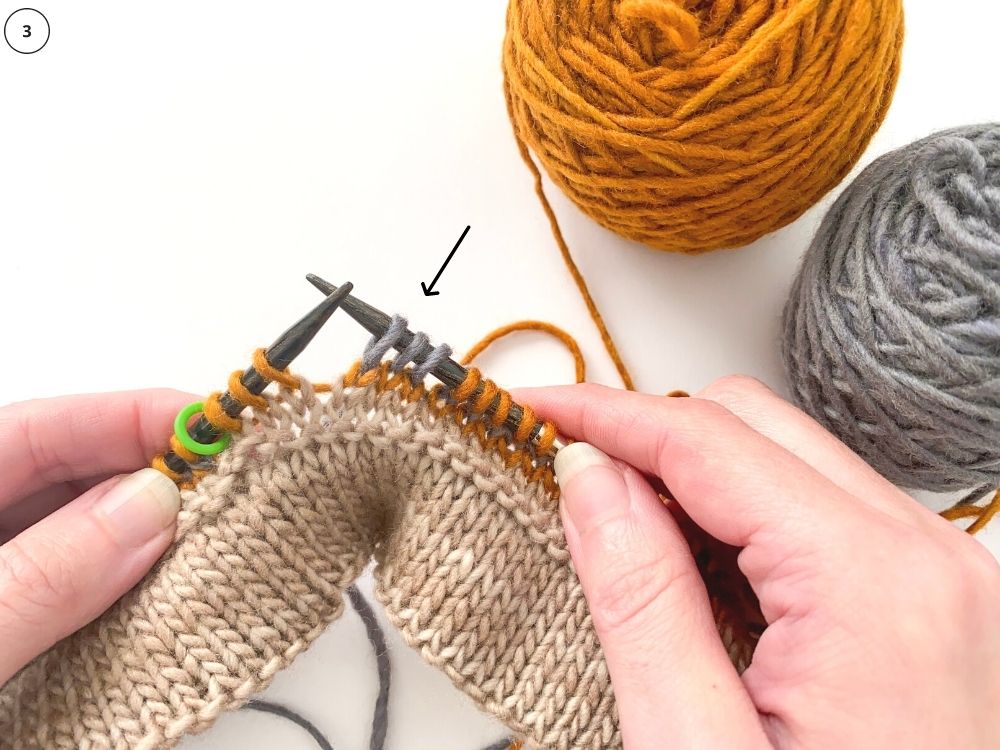
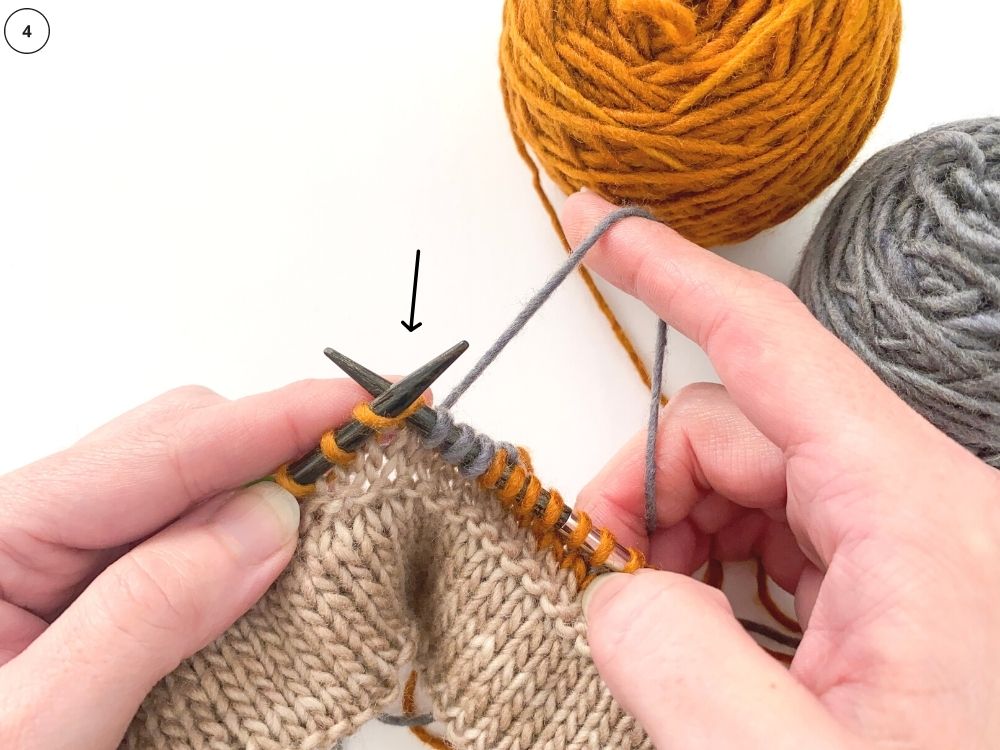
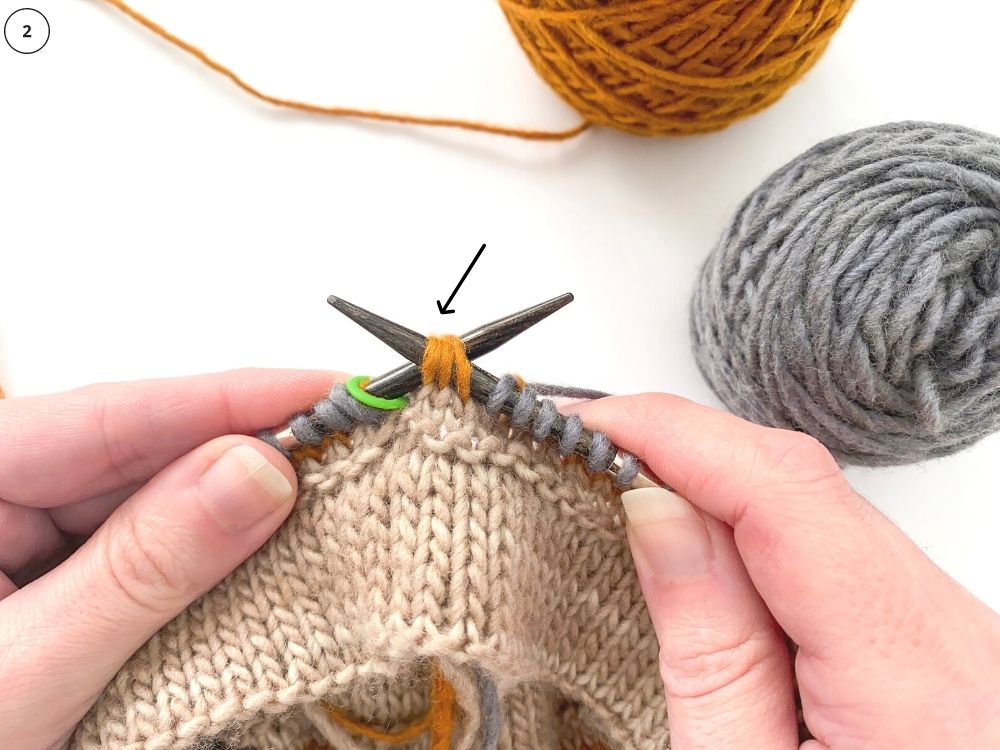
So how does it work? I’ve seen quite a few different methods out there but the one I use in this cowl is often referred to as the ‘slipping method’. Check out the steps below to learn how I worked these in the cowl pattern:
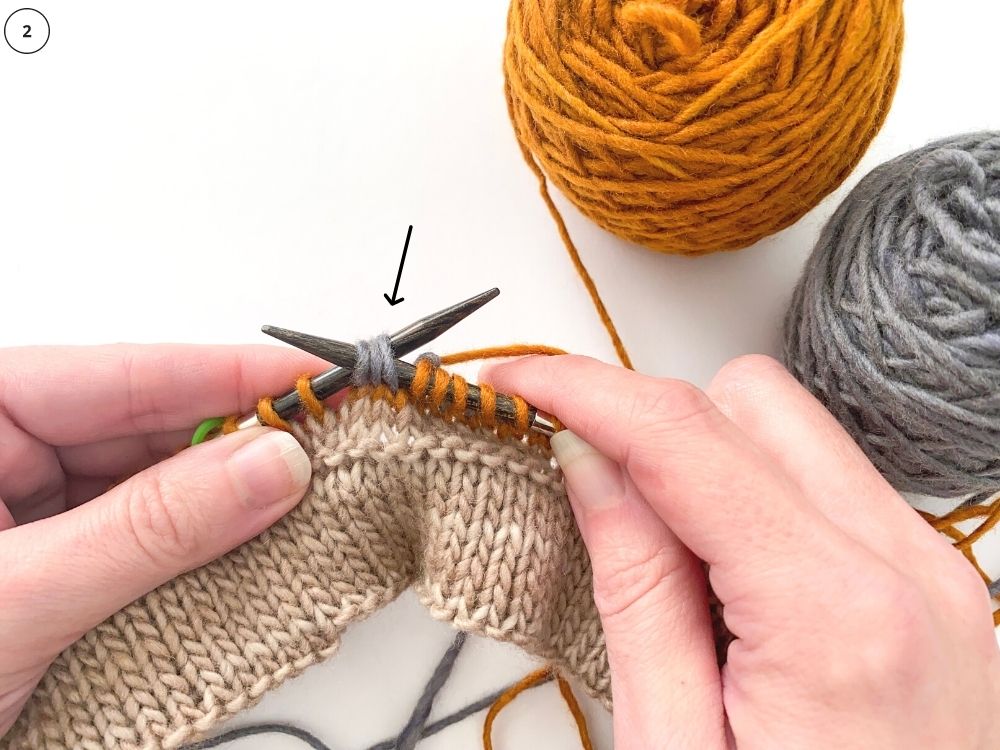
Then you repeat those steps over and over again! Here’s an important note: slip the BOR marker as you reach it on each step. When you’re working helical stripes, the marker doesn’t really do much – it’s still marking the technical BOR, but it has no impact on the color change going on.
So in essence, your colors are chasing each other and you’re creating a spiral. It’s such a cool technique and really fun to knit. I first learned about this technique from a video Brooklyn Tweed posted, and then I did some googling and found lots of other tutorials, including this one from Interweave.
One thing I wondered when I first learned this was, why slip 3 stitches? Could I just slip 1 or 2 instead? So I did some experimenting – slipping 2 or 3 stitches seems to be the way to go because when you only slip 1 stitch, the tension doesn’t stay as even – there appears a bit of tightness. So the slipping at least 2 stitches (more commonly 3), you are helping to keep your tension even at the color change point. Also one thing I’ll mention is that with helical knitting, you’ll still see a bit of a jog when you incorporate a new color – that seems inevitable (of course if you discover a way that avoids this, I’d love to know!). Here you can see the back of my cowl and you see the little jogs where I incorporated a new color. But they are subtle and I think it still looks better than when you see those jobs on every row:
‘Tinking’ when working helical stripes
Here’s a helpful tip I wanted to share – should you need to ‘tink’ back your knitting when you’re working your helical stripes (and you’re tinking back 1 round or more), here is how you do it: tink back your current color until there are 3 stitches left of that color. Then, slip the next 3 stitches from right needle to left needle. Then, pick up the next color and continue tinking with that color. So the key is this: *when tinking, tink back until 3 sts remain of the color you are currently tinking back with – then slip those last 3 stitches to the left needle and start tinking with the next color (repeating from * until you’re tinked back to where you want to be).
Adjusting the length of the stripe sections
I purposely made the length of each of the stripe sections to line up with the helical stripe slipping sequence. This way when you switch stripe colors from section 1 to section 2, it lines up at the beginning of round marker. This way the color change jog always appears just at the beginning of round point. As I mentioned above, the helical stripe technique avoids the stripe jog every round, but you will still see 1 small jog whenever you join a new color. Let me explain it another way: In each round in helical stripes you are moving where the color change happens on every round – if you slip 3 like I do in this cowl, then the color change moves over 3 stitches every round. So if you have 120 stitches on the needles, and you move the color change 3 stitches every round, that means you will knit 40 rounds before the color change happens at the beginning of round again (120 divided by 3).
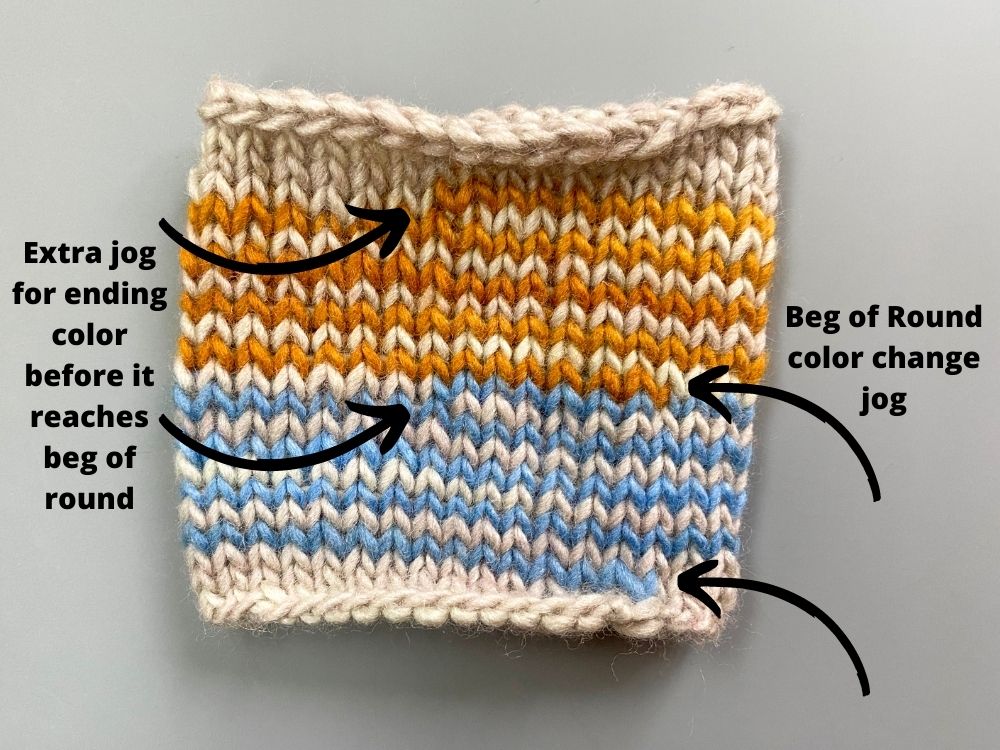
But what if you want to make your cowl shorter? You can totally work less stripes, it’s just that your color change jog will just not appear at the beginning of round point then – not a big deal as it’s subtle, but just something to know beforehand. Let me show you a visual: in the little swatch below, I’ve noted where my beginning of round point is (and you see small jogs there at the new color introduction), and then I note the additional jog that appears when I discontinued a color prior to it making it back to the beginning of round marker.
As you can see above, it’s pretty subtle and in a piece like this cowl, with so many stitches on the needles, it won’t really be all that noticeable. As a side note, I personally like to always introduce a new color at the beginning of round, as that first stitch tends to be a little loose and so I like it to be in a not-so-noticeable spot (I usually cinch it up when weaving in ends afterwards, using the duplicate stitch technique). This is why I don’t just join the new color wherever the old color ends – but it could be something worth trying if you are experimenting with color change like this in the helical stripe technique.
Binding-Off in Pattern:
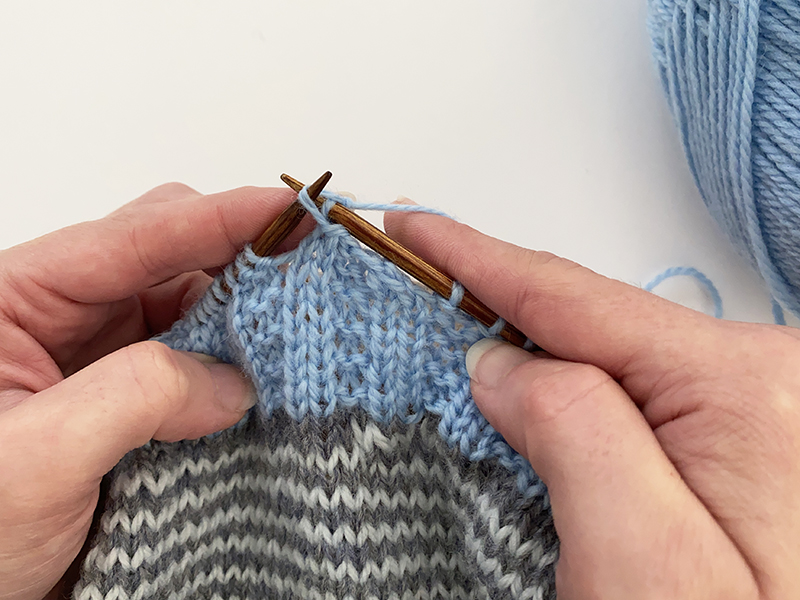
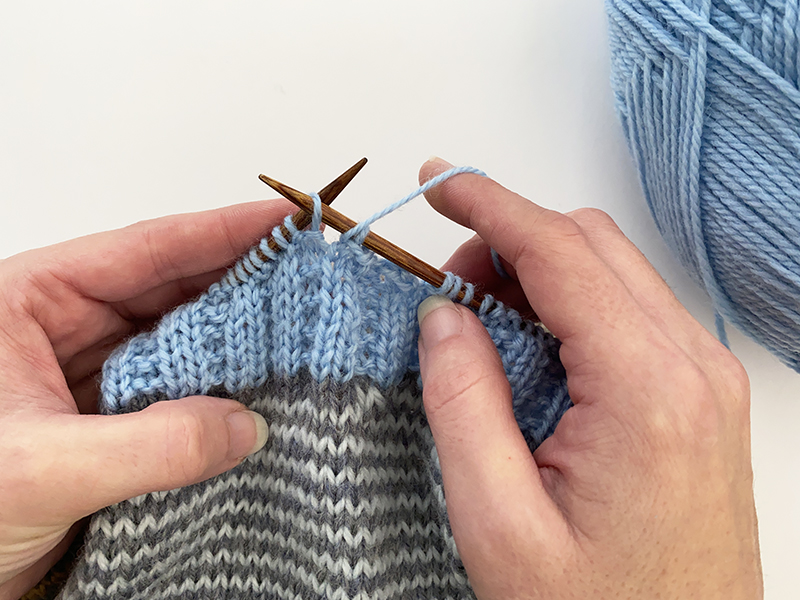
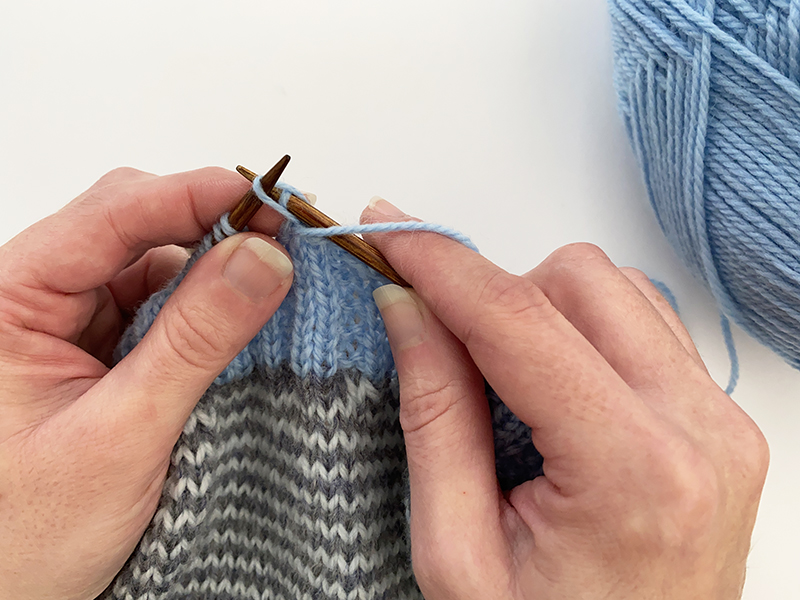
Whenever I am working in any kind of rib pattern and I need to bind-off, I tend to always bind-off in pattern. I think it creates a nice and tidy edge and doesn’t disrupt the ribbing pattern. In Winslow Park Cowl, I say to bind-off in k2, p2 pattern – this just means that you will work each stitch as it presents itself. If the next stitch is a knit stitch, you will knit it and then bind-off as usual. If the next stitch is a purl stitch (so you see that purl bump under the stitch), you will purl it and then, keeping the yarn in the front of the work, bind-off as usual. Let me show you some visuals:
I hope these tips are helpful as you work on your own Winslow Park Cowl! If you have any follow-up questions feel free to reach out.

