Triple Time Tips
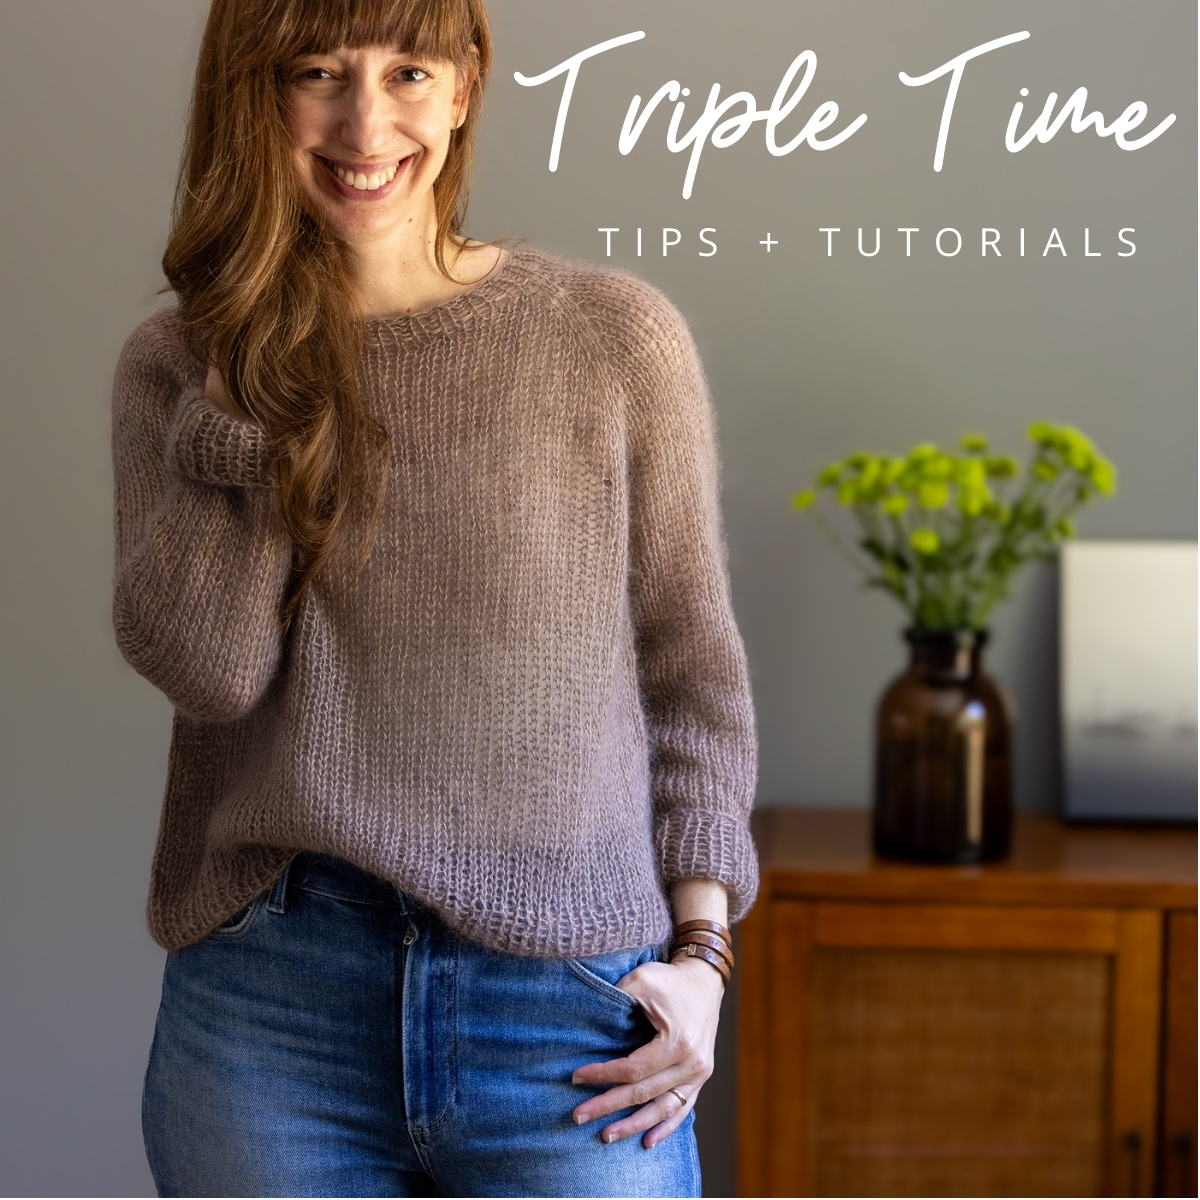
On this page you’ll find tips and tutorials for all the techniques used Triple Time pullover pattern! I review the following topics on this page:
- Adjusting body length
- Working sleeves
- Techniques
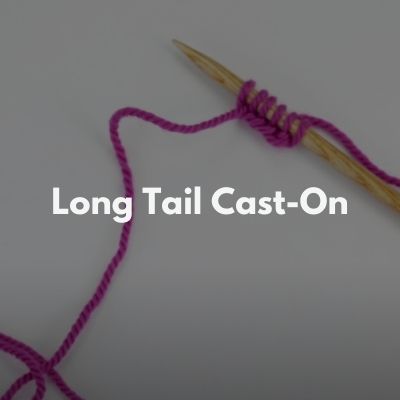
- Long tail cast-on
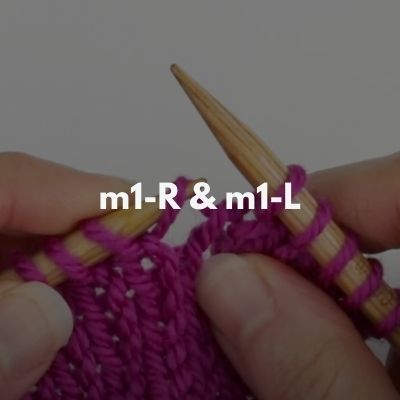
- m1-R & m1-L increases
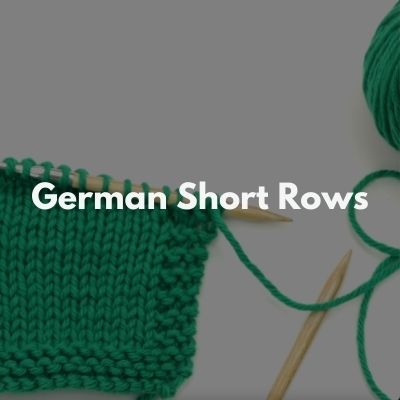
- German short rows
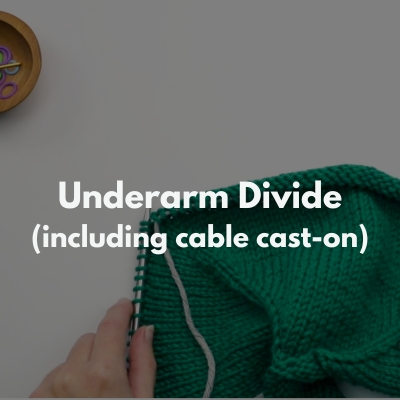
- Underarm divide and cable cast-on
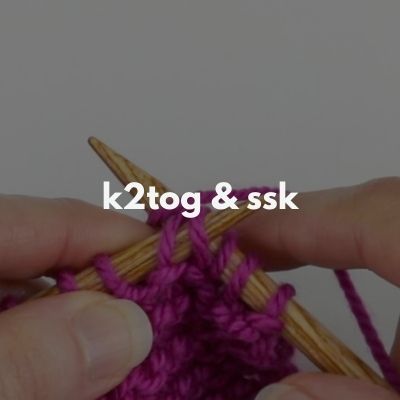
- ssk and k2tog decreases
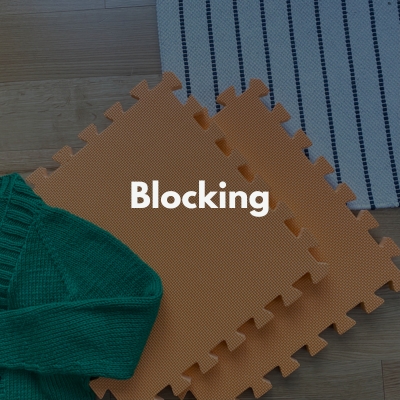
- Blocking
Picking a Size
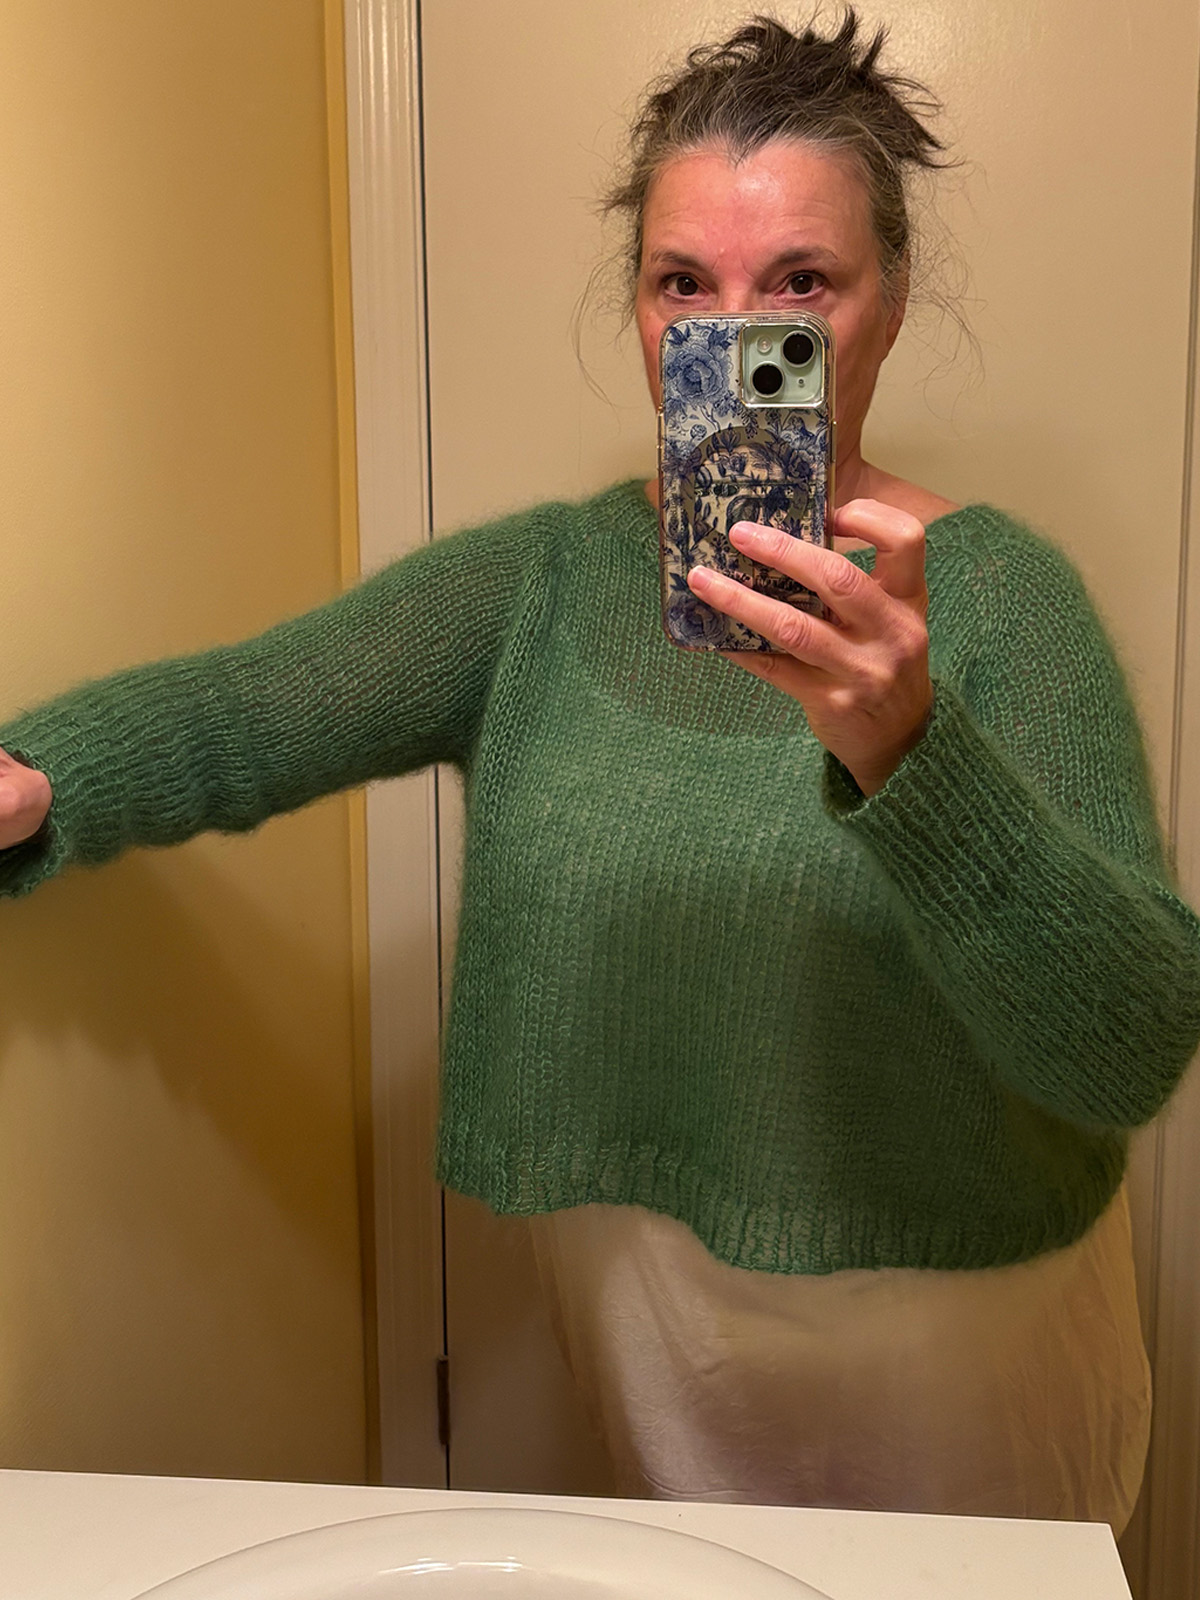
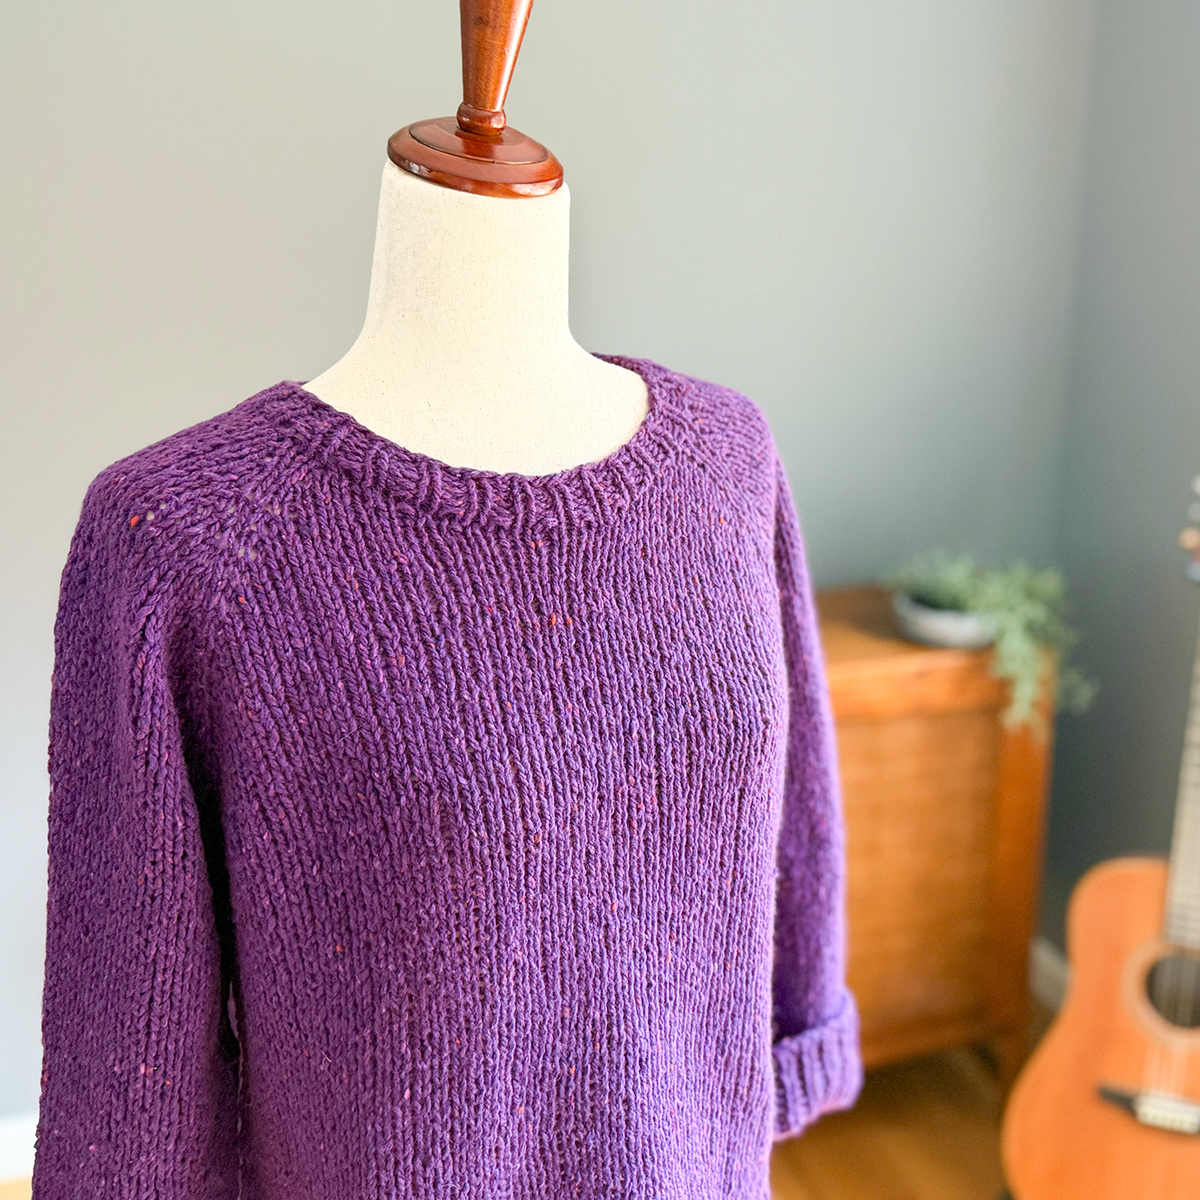
In Triple Time, I suggest picking a size whose finished circumference is approx. 4-8” larger than your actual bust measurement, depending on your desired fit. For reference, in the pattern photographs, I am wearing the sweater with approximately 7.5″ of positive ease in the chest (so on the higher end of the ease amount) because I wanted a more loose, flowy fit to go with the loose and flowy fabric. Below are some examples with different ease amounts:

Of course you can choose to pick a size outside of this range as well if that is what your preferred fit is! Another thing to consider with top-down raglans is that some people find that using their upper torso (or “high bust”) as your starting point instead of their actual full bust provides a better fit. This is often especially true if you have a larger bust but smaller shoulder width. For more information about this as well as general info about ease, check out my blog post here.
And one last tip if you aren’t sure or are in-between sizes – measure the widths of pullovers in your closet that you love the fit of! Even if they are store-bought sweaters, this helps to give you an idea of the typical widths you like to wear on your body and can be helpful when deciding between sizes.
If you need any help with deciding on a size, feel free to reach out to me!
Yarn Options & Triple-Stranding (or not)
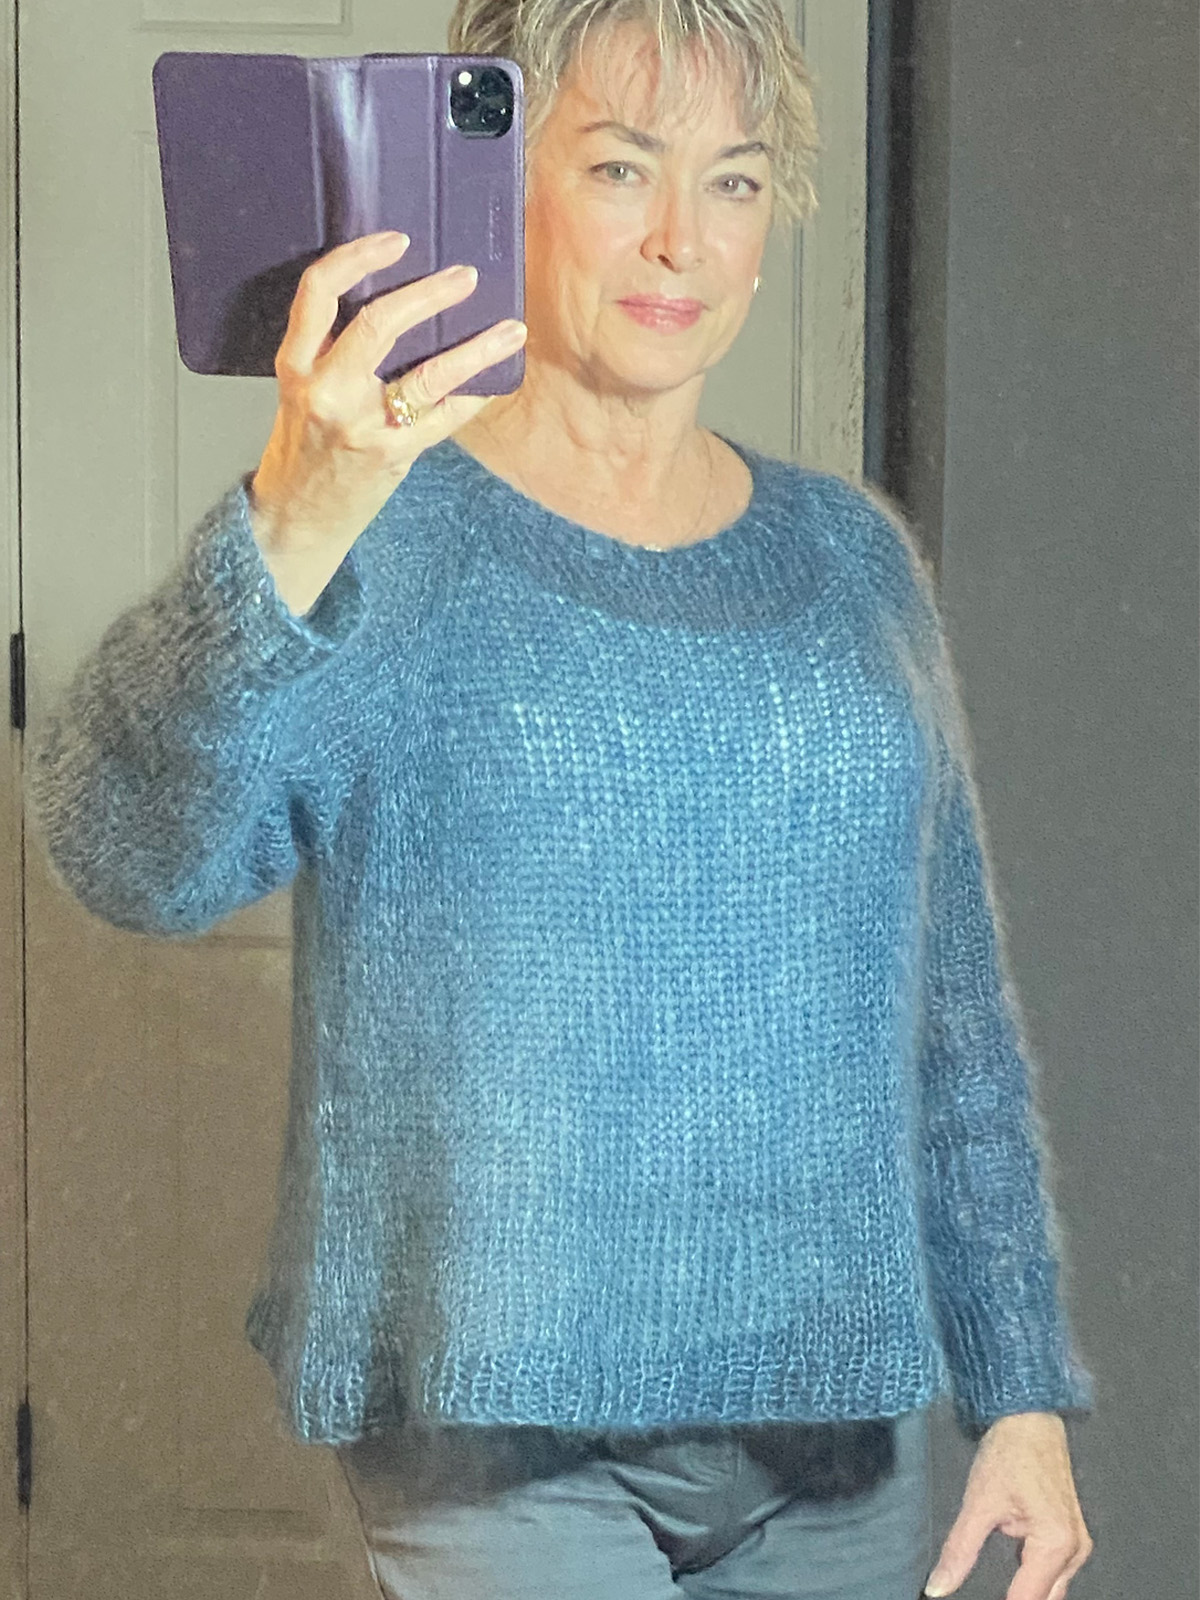
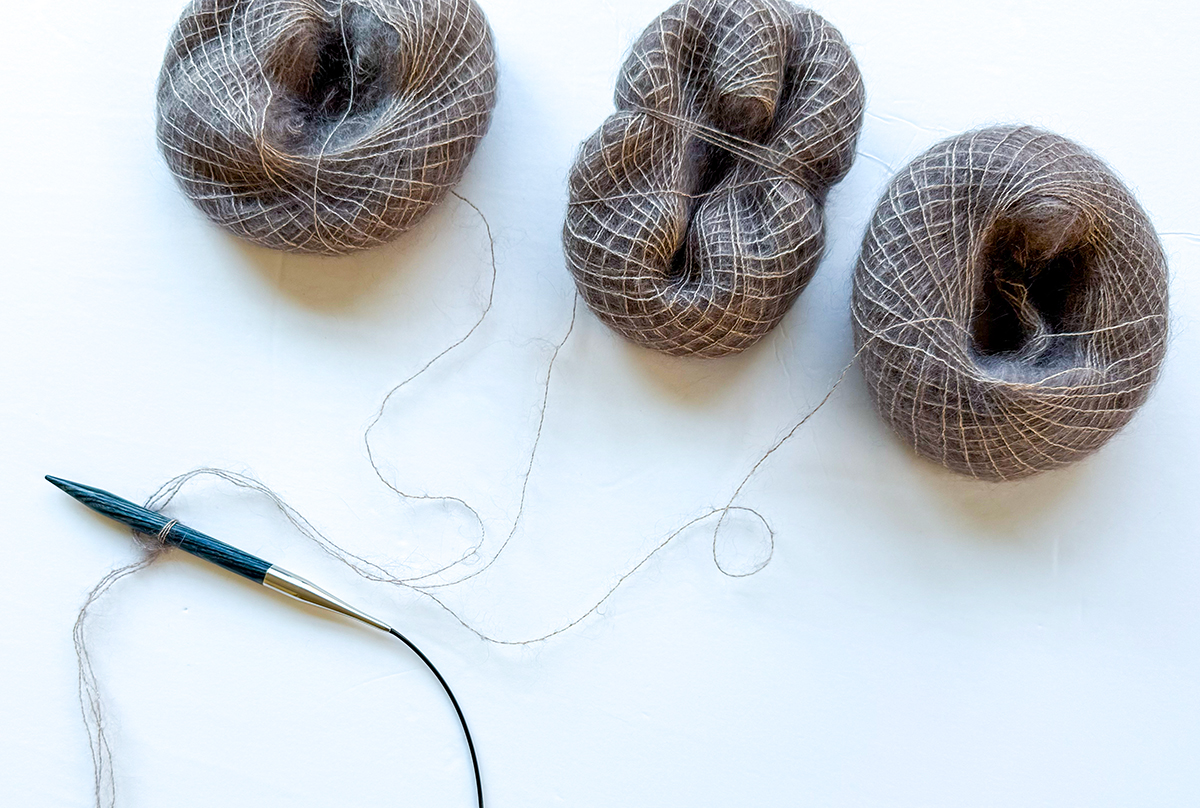
I specifically designed this piece to work with Berroco’s lace-weight yarn Aerial held triple on a big needle. By doing this, the fabric created is SO light and airy, but it still knits up super fast (as if using bulky-weight yarn). In my sample, I used 3 skeins of the same colorway (Driftwood 3404), but you can also mix and match colors for a marled affect. Or consider combining a solid Aerial Color or Aerial Dégradé.
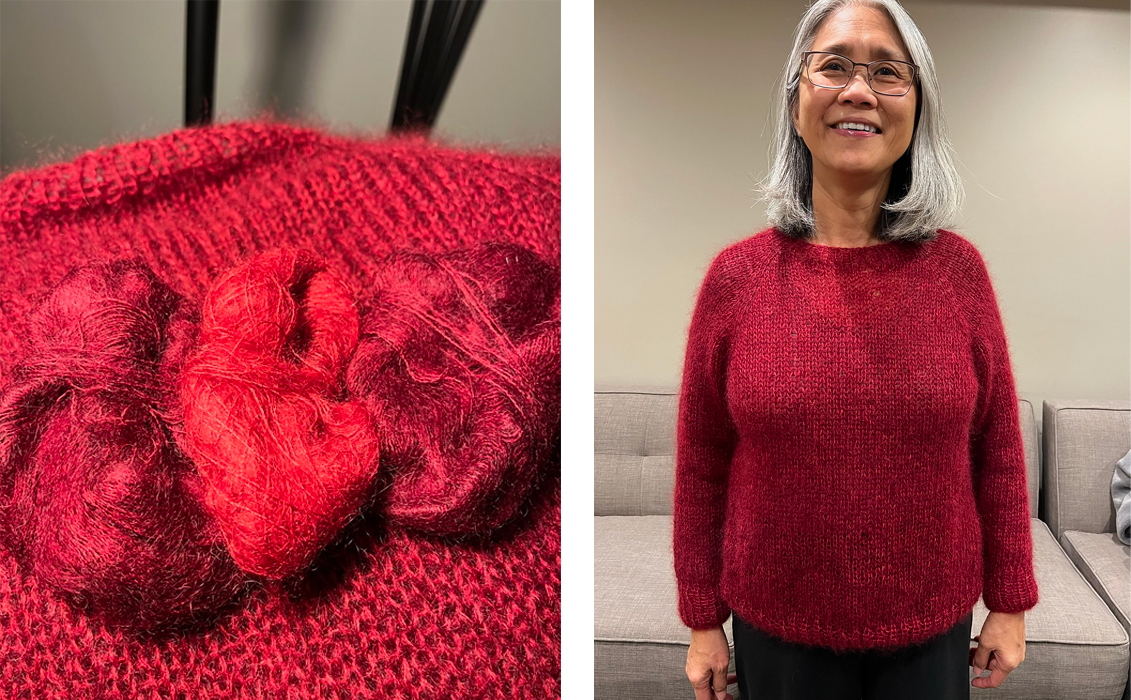
Here’s an example of combining 2 colors together – my test knitter Joan used 2 different shades of red and I think the results is just beautiful!
Triple-Stranding
Never triple-stranded before? It’s not hard at all! The easiest way to work it is to use 1 strand from each of 3 balls of yarn. This is why in the pattern’s yarn requirements section it says you will either need 6, 9 or 12 balls of Aerial (a multiple of 3). You just pull a strand from each skein and hold them together as if they were 1 strand. But there’ are other options you can consider as well’s another option you could consider – I’ve listed both methods down below.
Number of Skeins Needed: For some sizes, using this technique of pulling 1 strand for each of 3 balls will mean that you will have a larger amount of leftover yarn than typical for a sweater project. If you would prefer to be more economical, you could consider incorporating option 2 below (pre-dividing 1 ball into 3 equal parts). If you want to consider that, below is the actual number of balls needed, for both the no-shaping version as well as the A-line shaping:
- No Body Shaping: 5 (6, 6, 7) (7, 8, 8) (9, 9, 10) balls
- A-line Shaping: 6 (6, 6, 7) (7, 8, 9), (9, 10, 10) balls
Suggested options for triple-stranding
Option 1: Using 1 strand from each of 3 balls
- Pro’s: Easiest option with no prep work needed.
- Con’s: For some sizes (especially sizes 1, 4, 5, 6, 7, & 10 for no body shaping version and sizes 4, 5, 6, 9 & 10 for A-line body shaping version), you may have extra leftovers and it’s not as economical.
- How to do it: Simply take a the outer strand of each of the 3 balls and hold them together as if they are 1 strand.
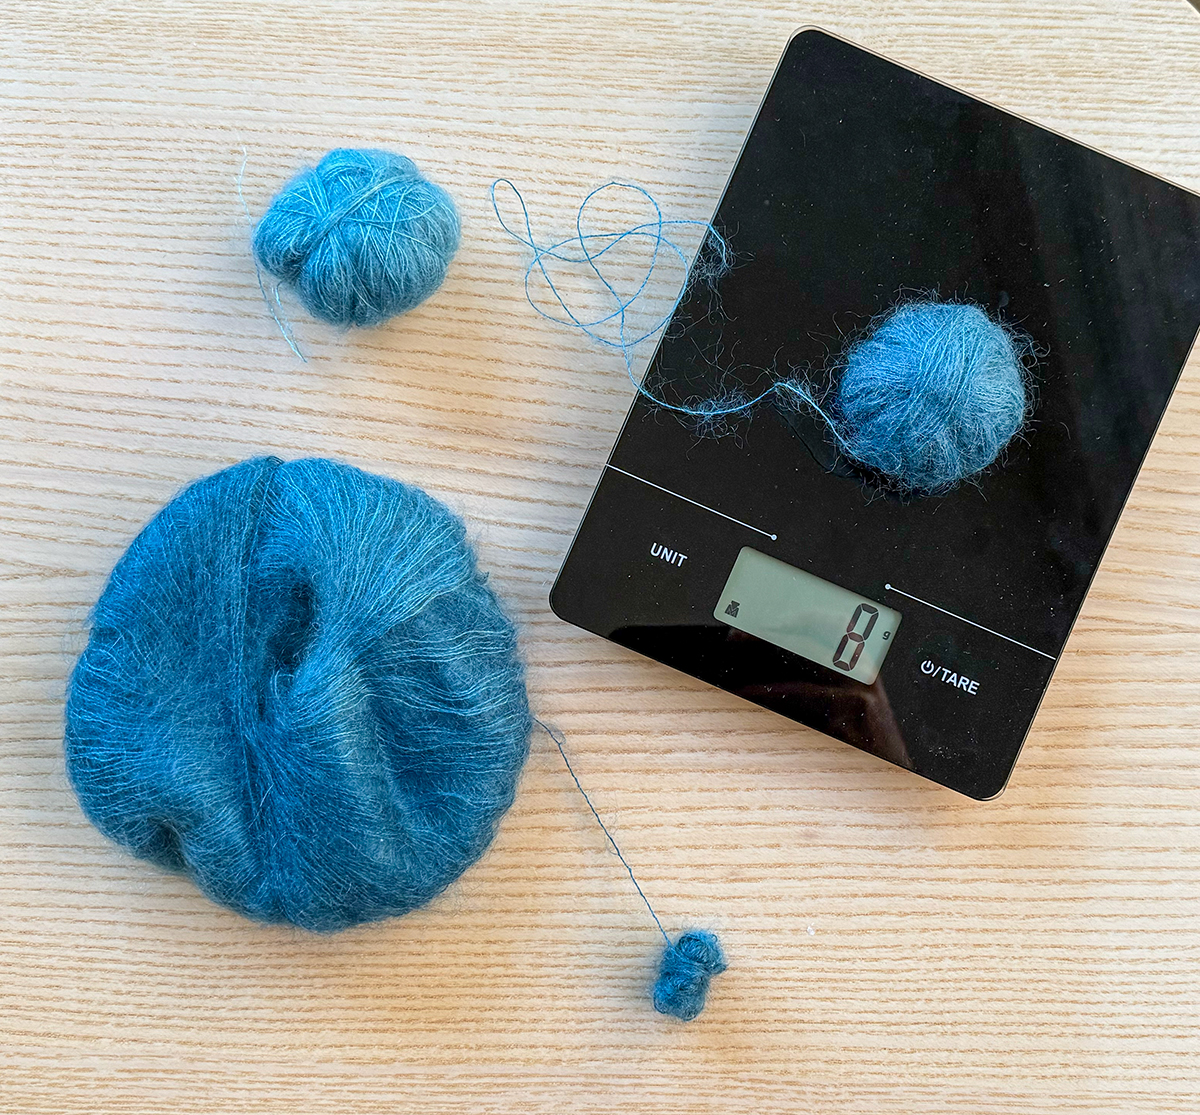
Option 2: Pre-dividing 1 ball into 3 equal parts
- Pro’s: For some sizes, it allows for a more economical option and can be worked in conjunction with option 1 (much less waste).
- Con’s: Prep work is involved and you’ll need a kitchen or postage scale.
- How to do it: Take 1 ball (which weighs approx. 25 grams) and, using a kitchen scale, hand-ball it into 3 equal-ish parts weighing approx. 8.3 grams each.
- Example of how it’s worked together with option 1: If, say, you are making size 4 and will need a total of 7 balls, you could work option 1 for the first 6 balls worth of knitting. Then at the end when you just need a little more yarn, you can take a 7th ball and divide it into 3 equal-ish parts (so you can get 3 strands out of 1 ball) to finish your knitting. This will allow you to need only 7 balls instead of the 9 you would have needed if you opted to use option 1 throughout.
Why aren’t I suggesting pulling from both the outside & inside of 1 ball?
One common method to create 2 strands out of 1 ball is to pull from both the outside and inside of a ball/skein. However, I wouldn’t recommend doing this with a mohair lace like Aerial for a couple of reasons. One, due to the fuzzy nature of the yarn it’s hard to find the inner strand! Also (again due to the fuzziness), you’re more likely to encounter tangling issues this way. So for these reasons, I’d suggest using 3 separate balls and dividing a single ball into 3 parts when/if needed.
What if you don’t want to triple-strand lace-weight?
The simple construction and style of this sweater makes it super versatile, so if you don’t want to triple-strand lace-weight, there are other options to consider. Or, if you’re just looking for fabric that isn’t as drapey and has a little more denseness to it. Below are some options to consider, and for all of them I used the same needle size as listed in the pattern (a US 11) and got the pattern gauge (12 sts & 18 rnds = 4″ in the round).
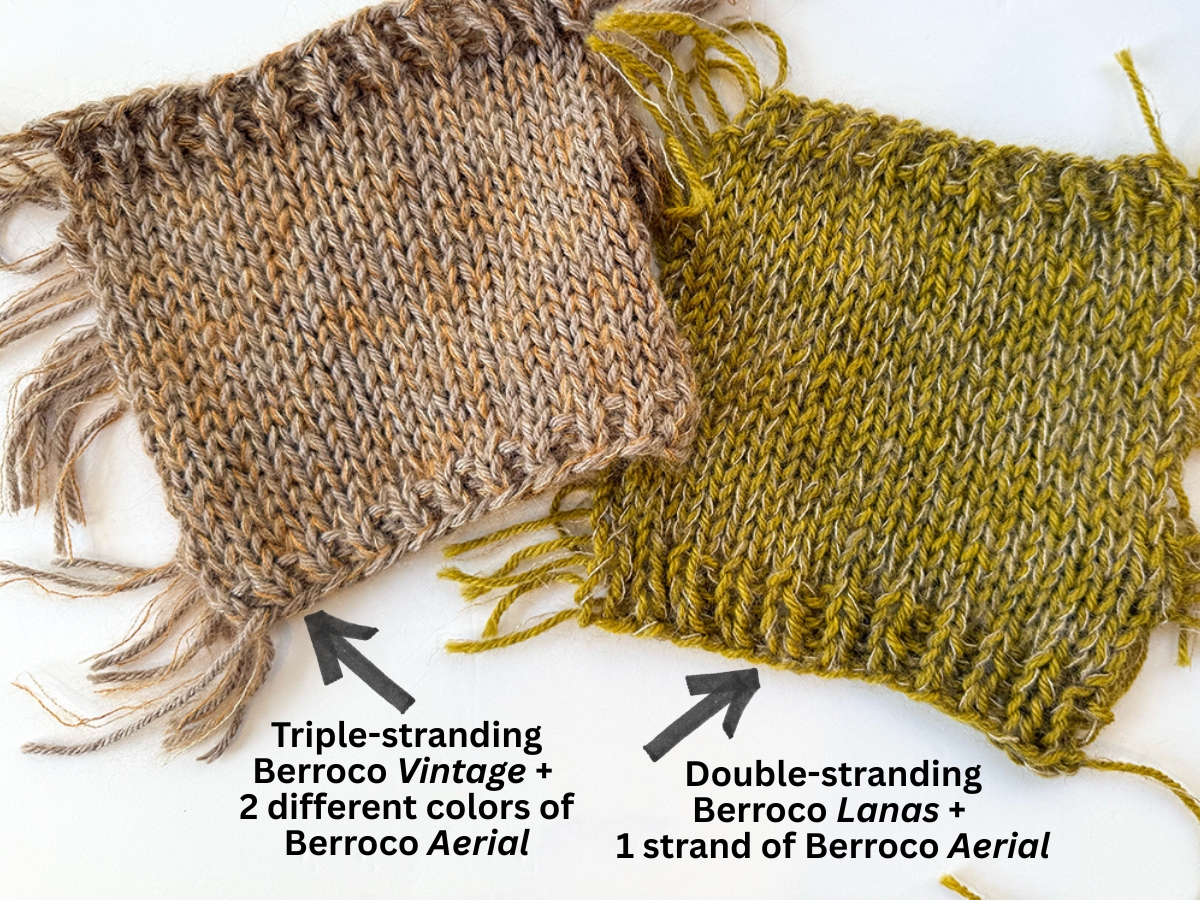
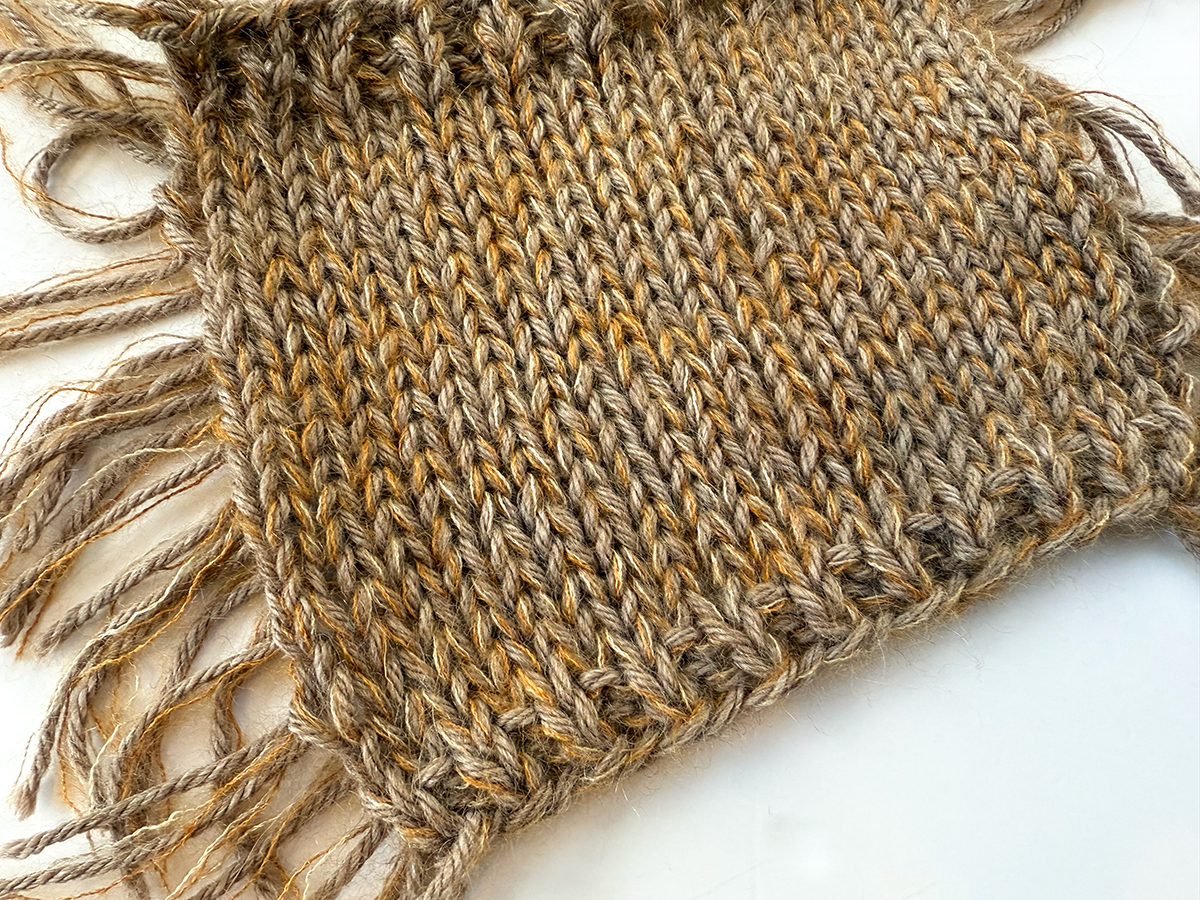
Option 1: Combine 1 strand of a dk or worsted-weight with 2 strands of lace-weight mohair
I did the below swatch where I combined 1 strand of Berroco Vintage (a wool/acrylic blend in worsted-weight) with 2 strands of Berroco Aerial (the lace-weight mohair), in 2 different colors:
Option 2: Double-strand a dk or worsted-weight with lace-weight mohair
I did a swatch where I combined 1 strand of Berroco Lanas (a 100% wool worsted-weight) with 1 strand of Berroco Aerial (the lace-weight mohair):

How much yarn would you need if you went with either of these options? Here is an approximation I came up with (but please keep in mind this is just an approximation!): 1000 (1100, 1200, 1300) (1400, 1550, 1600) (1750, 1900, 2000) yards of dk/worsted-weight and 450 (500, 525, 575) (625, 700, 725) (800, 850, 925) yds of lace-weight (and double this lace-weight if using 2 strands of I did in Option 1).
Option 3: Single-strand an aran or bulky-weight
If triple or double stranding isn’t your thing, you can opt to just use a single-strand! I made another version of Triple Time using just a single strand of Berroco Millstone Tweed (an aran-weight wool/nylon/viscose blend) and on the same US 11 needle I got the exact pattern gauge. Below are some pictures – I love how this version came out!
How much yarn would you need if you went with this option? You would need approx. 500 (550, 600, 650) (700, 775, 800) (875, 950, 1000) yds of aran or bulky-weight. In Millstone Tweed, this works out to 6 (6, 7, 7) (8, 8, 9) (10, 10, 11) skeins.
Option 4: Get creative and swatch!
Play around with combining different yarns together, whether it’s triple or double-stranding. The options can be endless! And if you can’t get quite the exact same gauge (maybe just 1 stitch off over 4″), scroll down to my tips about what to do if your gauge isn’t matching.
Swatching and Gauge
Because everyone’s tension can be a little bit different, it’s important to swatch before you start so you know what needles you should be using with your chosen yarn and personal tension. There are 2 important points I want to make about swatching and gauge when it comes to this sweater:
1. Swatch in the round
First, you should swatch in the round because the body circumference of this piece is knit in the round and that is what the finished measurements are based upon. So when it comes to matching the pattern gauge of the pattern (12 sts & 18 rnds = 4″), you should aim to match this gauge when working in the round. If you are new to swatching in the round, you can check out my tutorial here.
2. Stitch gauge is more important than round gauge
Stitch gauge is more important than in the round gauge in this case (stitch gauge determines widths in the sweater and round gauge determines lengths). So if you are able to match stitch gauge but your row gauge doesn’t match exactly, that is ok. I provide tips throughout the pattern on how to adjust the lengths in different areas should your round gauge be a little off. And if your stitch gauge is off, read below for tips on knitting a different size to accommodate a slightly-off stitch gauge.
Note: When starting the pattern, you’ll be working on 1 needle size smaller than that used to obtain gauge. So if you got gauge on a US 11, you’ll be casting-on with a US 10.5 (note: some companies do sell a US 10.75 but after testing both I prefer the ribbing and short rows done on a US 10.5). And you use this smaller needle for both the ribbing as well as the short row neck shaping section. Then, once your neckline is shaped, you’ll switch to your gauge needle.
Stitch gauge off? Knit a different size!
One nice thing about top-down raglans is that due to the simple construction, it’s fairly easy to accommodate a slightly-off stitch gauge. For example, if you prefer a not-as-loose fabric at 13 or 14 stitches = 4″ instead of the pattern gauge of 12 stitches = 4″. In this example, your stitch gauge is tighter and so to accommodate this tighter stitch gauge, you can knit a larger size and end up with finished measurements close to the size you had actually wanted to knit. Below is the number of inches more or less you will get for each size at the slightly-off stitch gauges of either 13 sts = 4″ or 14 sts = 4″:
If you’re getting 13 sts = 4″, the approx finished circumference of each of the sizes will be:
- 32 (34.5, 38.25, 41.75) (45.5, 49.25, 51.75) (55.25, 59, 62.75)”
- So approx 2.75-5″ smaller than what’s listed in the pattern, depending on the size.
If you’re getting 14 sts = 4″, the approx finished circumference of each of the sizes will be:
- 29.75 (32, 35.5, 39) (42.25, 45.75, 48) (51.5, 55, 58.25)”
- So approx 5-9″ smaller than what’s listed in the pattern, depending on the size.
Other considerations:
- When length measurements are given in the pattern, make sure to follow the length listed for the size you had wanted to knit. So for example, if your gauge had been 13 sts = 4″, and you had wanted size 3 (41.25″) but are knitting size 4 at your gauge (so you get a 41.75″ circumference), when looking at the armhole depth measurements listed at the top of page 5, look at the measurement given for size 3 not size 4. Because size 3 is closest to the size you will end up with at your particular gauge.
Short Row Neck Shaping
Triple Time features German short rows to shape the neckline so that the back sits up higher than the front. I have a video lesson that walks you through all of the steps outlined in the pattern so that you can have a clear visual of this process. The video is for my similar top-down pattern The Downbeat but the short row instructions are the exact same in Triple Time so the instructions shown will be identical.
Important Note regarding continuing on the smaller needle in this section: The pattern instructs you to continue working on the smaller needle as you work the short rows (you switch to the “body” needle in Raglan Section 2). The reason for this is because while working the short rows, you are working back and forth and not in the round – so this means there will be rows that are purled in this section. And because many people’s purl stitches are looser than their knit stitches, if you were to switch to the main needle in this section, there may be a visual difference in the fabric at this top part of the yoke. So to avoid this, I advise staying on the smaller needle until you’re back to working in the round. With all of this said, if you know that for you personally that your flat gauge is always the same as your in the round gauge, then you can switch needle sizes in this section if you prefer.
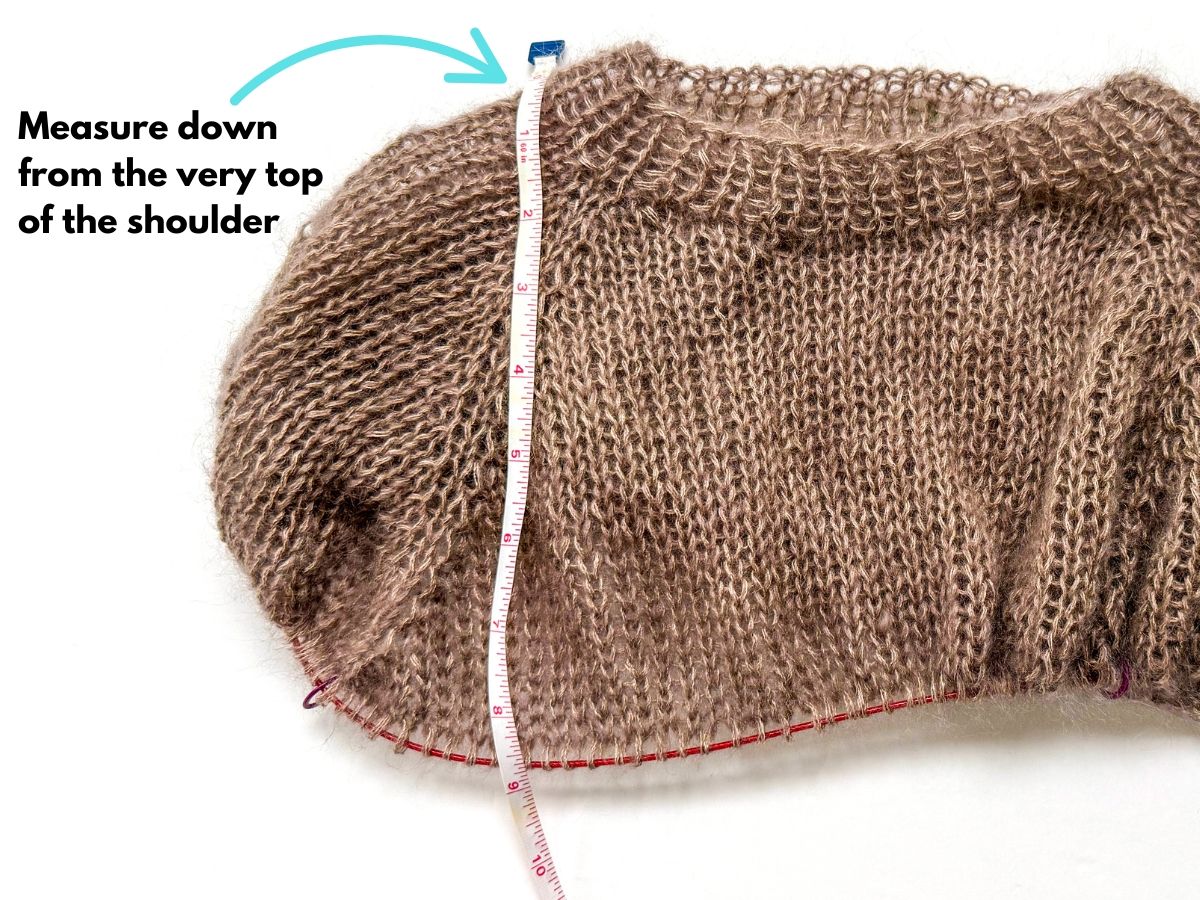
Measuring armhole depth
A common question I get about raglan sweaters is how to exactly to measure the armhole depth. It’s not measuring the diagonal raglan line – instead, your measuring straight down from the top of the shoulders when your sweater is laid flat. And so technically your raglan depth includes not only all the rows involved in the raglan shaping but a piece of your sleeve cast-on as well (half of your sleeve cast-on to be exact).
Here’s a visual to show you how to measure your armhole depth with your garment laying flat:
Underarm Divide
The Underarm Divide section is when the sleeves are separated from the body and underarm stitches are cast-on as well. If you have never worked this technique before, I highly recommend that you check out my Underarm Divide tutorial page here. In it I provide both a video lesson example as well as photo tutorial lesson.
Note: in the tutorials on that page, I use scrap yarn to transfer sleeve stitches onto a holder. However, more recently I have discovered stitch holder cords and they are now my go-to tool instead of scrap yarn. To learn more about them, click here for my blog post. Note: because in Triple Time you’re on a large US 11 needle, the standard stitch holder cords will likely be too small. I used these that are specifically made for larger needle tips.
Deciding on Shaping
I designed this piece to have a little A-line shaping – the total difference in circumference between the hem and the bust is approx. 4″ total (so you can imagine that’s 1″ at each side. So it’s not super dramatic, but enough to give you just a little extra room. For exact measurements, make sure to check out the schematic page of the pattern.
However, if you don’t want any shaping, that is totally ok! The pattern provides instructions if you want to just knit your body straight. In my sample, I opted for no body shaping as I knit a size with enough positive ease that it accommodated not only my bust but my hips as well.
Adjusting the Length
As written the body of Triple Time is 11″ from underarm to hem. But when deciding on if you want to adjust the length or not, it’s important to look at the overall garment length, not just the underarm to hem. On the schematic page, measurement “K” is the total length from top of shoulder down to the hem – look at this measurement and compare it to sweaters that you love the length of and see if you want to add/remove any length. Note: if you are adding length, and especially if it’s more than 1″, consider getting more yarn.
If you would like to add length and you’re not working the A-line shaping: Simply knit the body until you’re happy with the length. Just keep in mind that your row gauge may stretch with blocking.
If you would like to add length and you’re working the A-line shaping, here are some tips:
- If you just want to add 1″ or less, add this amount after working the last body increase round (and before starting the ribbing)
- If you want to add more than 1″ of length, then just work your increase rounds more spaced out than as written. For example, after working the first increase round, the pattern says to repeat the increase round every 14th round 2 more times. Instead, you can repeat it every 18th round 2 more times. This will add 8 rounds to your body, and at the pattern gauge that would equal an extra 1.75″ in length. Then any additional length can be added after the last increase and before the ribbing.
Working sleeves
In the beginning of the sleeve section, I suggest using DPN’s or that you can use your 32″ circular and work the magic loop method. If you are new to one or both of these options, I have video demonstrations that you may find helpful that I’ve listed below. It’s for a different pattern (Audrey’s Cardigan) but because it’s also a top-down raglan construction, the techniques I use are the same regardless.
Note: Many people find that when working lace-weight triple stranded and on such a large needle that working the magic loop is not as smooth as it typically is. So if you try magic looping and are struggling, it may just be because of this situation (and DPN’s may be your best bet).
- Click here for video demo of working sleeves on DPN’s.
- Click here for video demo of working sleeves using the “magic loop method”.
Techniques
Below are other technique used in this pattern: