
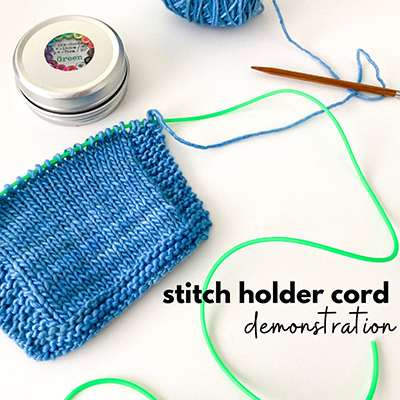

A couple of months ago I was at my local yarn shop and saw they were carrying the Knitting Barber Cords. I had seen an ad for this product online and was curious so I purchased a tin to give it a try! If you have been curious about them yourself, or have no idea what they even are, let me tell you a bit more about it.
First, what exactly is a stitch holder cord?
It’s a type of stitch holder. You may be familiar with the more traditional versions of stitch holders…

In the photo above, on the left is a stitch holder you may have used or seen in the past. This is the very traditional, aluminum-style holder that worked well when needing to hold a small amount of stitches (common in garment projects worked flat/in pieces). And then on the right is scrap yarn – this had been the go-to method for holding stitches when you have a lot of stitches to hold (common in garment projects worked in one-piece/seamlessly).
Seamless sweaters are my specialty so I had used scrap yarn exclusively for many years. That is until I tried stitch holder cords. This hollow silicone cord acts as a stitch holder and can be a substitute for the traditional metal or plastic stitch holders you may be familiar with, or can be used instead of scrap yarn.

So what are stitch holders used for?
They are used to hold live stitches. It’s commonly needed in seamless sweater patterns. Because the construction is seamless, it means that from time to time, certain parts of the garment will need to put onto scrap yarn in order to work another part. Then later on, those stitches are transferred back onto the needles.
I often will use scrap yarn when holding stitches because they would be more flexible than metal holders and could accommodate a large number of stitches (pictured below is an example of when I would use scrap yarn to hold stitches). So of course I was curious to try these cords since they also would work for this purpose!

So how do you use the cord?
You press the flexible silicone cord onto your needle’s tip and then slide the stitches from the needle onto the cord. The flexibility of the silicone cord allows it to squeeze over a wide variety of needle sizes – in my testing at home, I was able to fit it onto needle tips up to a US 10.5 so long as the tip was sharp. On more blunt ended needle tips, I could only go up to a US 8 or 9, so it just depends on your particular brand/style of needles.
A picture is worth a thousand words so let me show you how it works! Below you’ll find photos of how to transfer live stitches onto the cords, how to then transfer them back to the needle, and an alternative method to try if the cord doesn’t fit on your particular needle tip. I also posted an Instagram reel if you’d like to see an in-action demonstration – click here to view it!
Transferring live stitches onto the cord


Transferring stitches from cord back to needle


Alternative method to try
If you are using a larger needle and the silicone cord won’t secure itself on the needle tip, then you can try this alternative method. All you need is a smaller double-pointed-needle (in the example below I’m using a US 6 DPN).


How are the cords different from scrap yarn?
There are 2 main benefits I can see from using these cords vs scrap yarn:
- It’s a much faster way to transfer stitches
- The cords are sturdy yet flexible, and seem less likely to have the held stitches slide under
In regards to #2, what I mean is that sometimes the stitches that are being held on the scrap yarn will slide down, making then tight and this can make the transferring back to the needle process trickier. A tin of these cords (which includes 3) costs around $18, so obviously scrap yarn is more economical.
But if you find yourself needing to transfer stitches onto a holder often, or have had problems with scrap yarn or other types of holders in the past, it may be worth giving it a try! I also think it could make a great little gift for a knitter. I see myself using them often in the future!
One last thing to note:
When I first opened my tin the cords had a bit of an odor to them – just a plastic-y kind of smell (perhaps to be expected due to the silicone material). I read a couple of other reviews online that other people had a similar experience, so it may be relatively common. But once I took them out the smell dissipated. I just wanted to mention it in case anyone is very sensitive to certain smells! If you are, it might be best to take then out of the tin and let them sit outside for a little bit until the initial smell goes away.