Working the Body of Azalea
Once you’ve finished the hem of Azalea, it’s time to move on to the body! In general, this is the more “mindless knitting” part of this project because you’re just knitting every round. But there are still lots of tips I wanted to share with you, including some information about adding a new skein, deciding on what length might be best for you, and tips on if you want to add any shaping. Check out my 6 tips below!
Tip #1: Make sure to change your needle size!
You worked the hem of Azalea in a needle size smaller than your gauge needle. So just make sure that when you start on the body to switch to your larger needle.
Tip #2: If you’re working with a semi-solid color, consider blending your skeins
In both of my samples of Azalea I used semi-solid colorways of the Manos Feliz yarn – but even though they aren’t too variegated, there can still be slight differences skein-to-skein so it’s always a good idea to gradually introduce a new skein of yarn when you’re almost out of the previous skein. This helps prevent the distinctive line that can appear in your knitting when you stop one skein and start another.
You can also alternate skeins throughout the body (typically recommended for highly variegated yarns but some people prefer it for semi-solids too). Check out my post here all about your options for alternating skeins with either semi-solid or variegated yarn. For the method of alternating yarn, I used the “yarn forward” method although the “carry up” method works well too (videos for both are on that page as well).
Tip #3: Deciding on length…
As written, the underarm to hem length is 12″/30.5 cm. My idea for the length was for the hem to fall in-between the natural waist and the high hip (so not the fullest part of your hip). But, depending on if you are long-waisted or short-waisted, this length may fall in a different place on you. Or, you may just like your tops longer or shorter – the great thing with knitting is that you can customize things to work for your unique body and style! Here are some things to keep in mind:
- If you’re unsure about what length might work best for you, measure some tops that you just love where it falls on your body lengthwise.
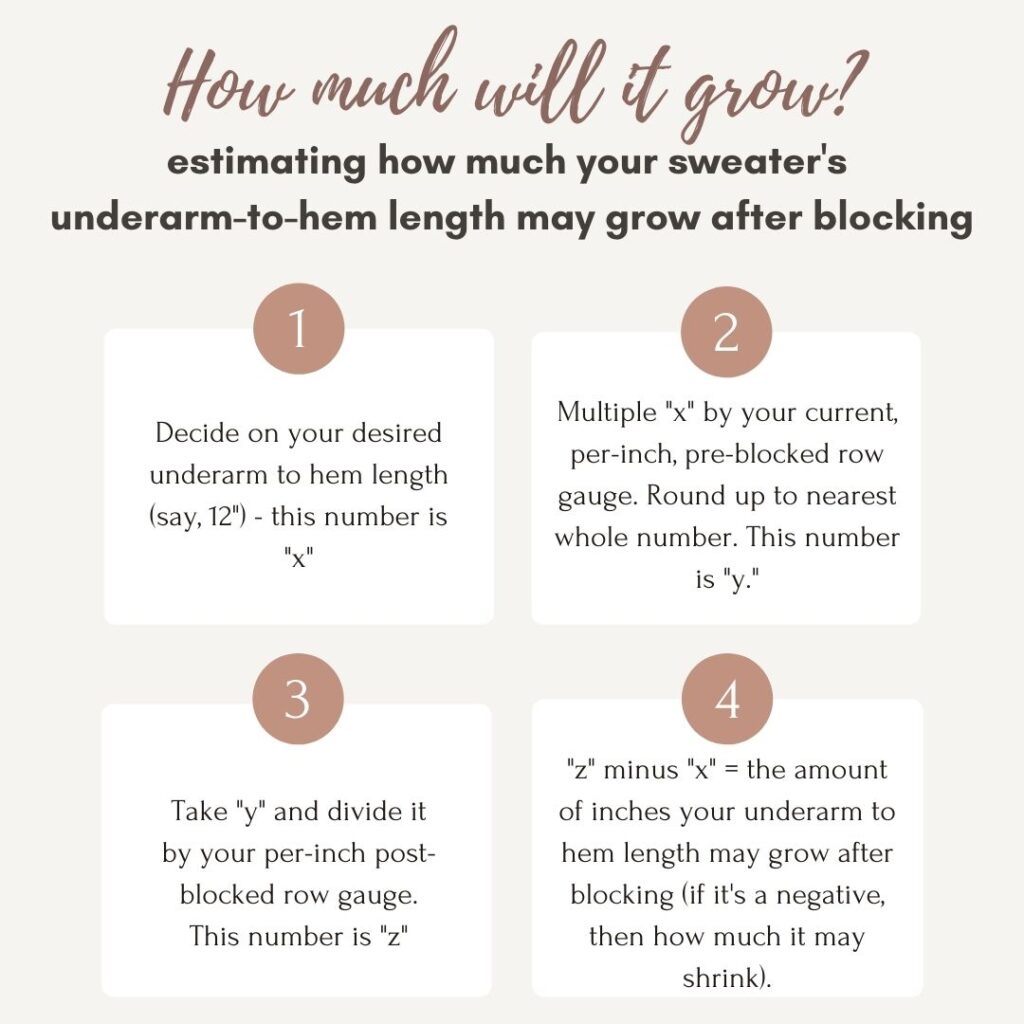
- Keep in mind that your length may change after blocking. This is why measuring your swatch before blocking and after was helpful just so you could have an idea of how much (or how little) your fabric may grow. There’s an easy formula for figuring out how much you can expect your underarm to hem length to grow (or shrink – this is less likely but many cotton or cotton blends yarn will shrink lengthwise). All you will need is:
- Your pre-blocked, per-inch row gauge number
- Your post-blocked, per-inch row gauge number
- Your desired underarm to hem length. With those 3 numbers you can estimate your approximate growth – see my graphic below (also typed up below):
Step 1: Decide on your desired underarm to hem length (say, 12″) – this number is “x”.
Step 2: Multiple “x” by your current, per-inch pre-blocked row gauge. Round up to the nearest whole number – this number is “y”.
Step 3: Take “y” and divide it by your per-inch post-blocked row gauge – this number is “z”.
Step 4: “z” minus “x” = the amount of inches your underarm to hem length may grow after blocking (if it’s a negative number, then how much it may shrink).
As with so many things in knitting, this is approximate and there are other factors that can cause your sweater to grow more or less. But it’s a great way to know in general how much growth you can expect.
Tip #4: If your tension seems a little different from your swatch, don’t panic
So here’s the thing about knitting and gauge…if we were machines, then we could be totally certain that our swatch gauge will perfectly match our garment gauge. But, we’re not robots. We’re human and that means we’re not perfect and our gauge may be subject to change as we knit our garment. Personally, I have found the following to be factors if this happens to me:
- If I’m feeling more stressed or anxious on a particular day (or knitting while watching a movie that has me feeling tense!), my gauge sometimes tightens up.
- As my garment grows, the row gauge can start to loosen up a bit just due to the weight of the fabric on the needles.
- For yarns that are a bit different for me (i.e, I don’t have much experience knitting with), my swatch may be a bit tighter or looser because my hands were getting used to working with it (this happened to me in the past when knitting with linen for the first time). Then as I was knitting the garment, I got more used to it and my tension changed.
But don’t let these possible gauge-changing factors get you down! What I love about knitting pieces like Azalea that are a bit oversized and drapey is that they are SO forgiving. In my own Azalea, my gauge tightened up just a bit in the middle – I went from 5.5 sts to the inch to more like 5.75-6 sts to the inch. But after blocking, everything just evened out nicely. I have found that with pieces like Azalea that are meant to be knit with a generous amount of ease, if your finished circumference comes out an inch or two different than what you planned, the difference does not come across too dramatically. But, with that said, if you are concerned that your gauge difference will have an impact on your fit, check out tips #5 & #6…
Tip #5: You can check-in on your sweater width
If you notice your gauge is looking considerably different than your swatch (per tip #4), or you are having second thoughts on the size you picked, you can do 1 of 2 methods to measure your sweater width as you’re working on the body:
Method 1: Transfer all of your stitches to a very long piece of scrap yarn: It’s a bit tedious, but by getting your stitches off of the needles and onto scrap yarn, you’ll be able to lay your work flat and really assess how your width is looking. Remembering of course that you haven’t blocked anything yet so based on your pre- and post- blocked swatches, things may likely change.
Method 2: Transfer half of your stitches to an extra, long circular needle. This way half of your stitches are on your regular 32″ circ and then if your other half are on another 32″ or 40″ circ, you may be able to get the fabric to lay flat since the stitches will have more room on the circs (so they won’t be scrunched up). The benefit of this is that there is no transferring of stitches back to the circ from the scrap yarn.
If you are just feeling like your gauge changed dramatically enough that you need some kind of shaping to either gain or diminish width (to get closer to the size you intended to knit), check out tip #6!
Tip #6: You can add some shaping if you like
As discussed in tips #4 & 5, gauge changes can happen and if you feel it’s dramatic enough that you won’t end up close to the size you had intended to make, then you can consider adding some shaping. To gain or diminish width, the first step will be to make sure to place another side marker in your piece (because the decreases or increases will take place at each side). So your BOR marker is at one side – take the total number of stitches you cast-on and divide by 2. This is the number of sts to work before you place your 2nd side marker.
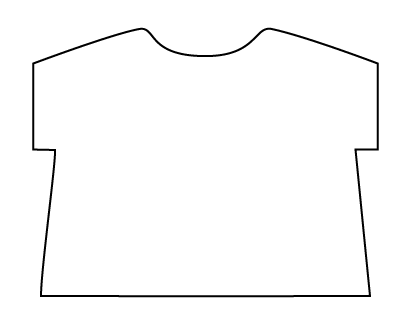
If you feel like things have loosened up too much and want to decrease the amount of fabric, you can add in some decrease rounds so your body will have more of an A-line shape to it. Here is the general shape of an A-line body in a drop-shoulder construction like Azalea:
Here are the steps to take:
- In order to not over-complicate the yoke area of the sweater, if you do want to decrease stitches, then you should work enough decrease rounds so that your stitch count at the end matches the next size down’s cast-on amount. This way, you would follow the remaining instructions for that particular size instead of the size you started with.
- There is a 16 stitch difference between all of the sizes (except of course the smallest size doesn’t have a size smaller) – this would mean you would want to work 4 decrease rounds if you decide to go this route (because in one decrease round you loose 4 stitches total).
- A decrease round can be worked as follows: k1, k2tog, k to 3 sts before side marker, ssk, k1, sm, k1, k2tog, k to 3 sts before BOR marker, ssk, k1.
- Where you place your first decrease round is up to you – you can start as soon as just a couple inches above the hem or you can start later at a bit closer to the waist. Then you will just want to evenly space the next 3 decrease rounds between your starting point and 2-3″ from your underarm. This is key – you want to make sure you work 2-3″ even (meaning, no decrease rounds) between your last decrease round and your underarm.
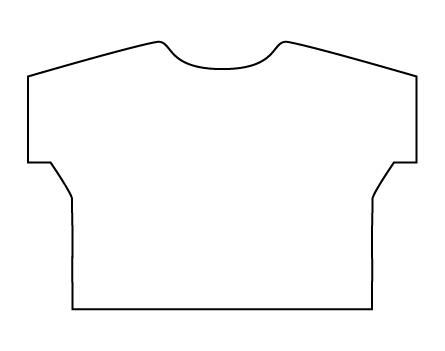
If you feel like things tightened up too much and want to increase the amount of fabric, you could work some increase rounds close to the underarm, creating more a dolman-type shape. Here is the general shape of a dolman sleeve in a drop-shoulder construction like Azalea:
Here are the steps to take:
- Similar to creating an A-line shape, in order not to over-complicate the yoke area of the sweater, you should work enough increase rounds so that your stitch count at the end matches the next size up’s cast-on amount. This way, you would follow the remaining instructions for that particular size instead of the size you started with. So you will want to work 4 increase rounds.
- I’d recommend working your first increase round approx 2.5-3″ from your underarm. Then you would repeat the increase round approx. every 8th round 3 times – this works out to 24 rounds.
- An increase round can be worked as follows: k1, m1-R, k to 1 st before side marker, m1-L, k1, sm, k1, m1-R, k to 1 st before BOR marker, m1-L, k1.
I hope these tips are helpful as you work the body, especially if you are in need of making some adjustments as you go. And these suggestions will apply for many other garments as well that are constructed in a similar manner (such as my Alanis or Castaway).


