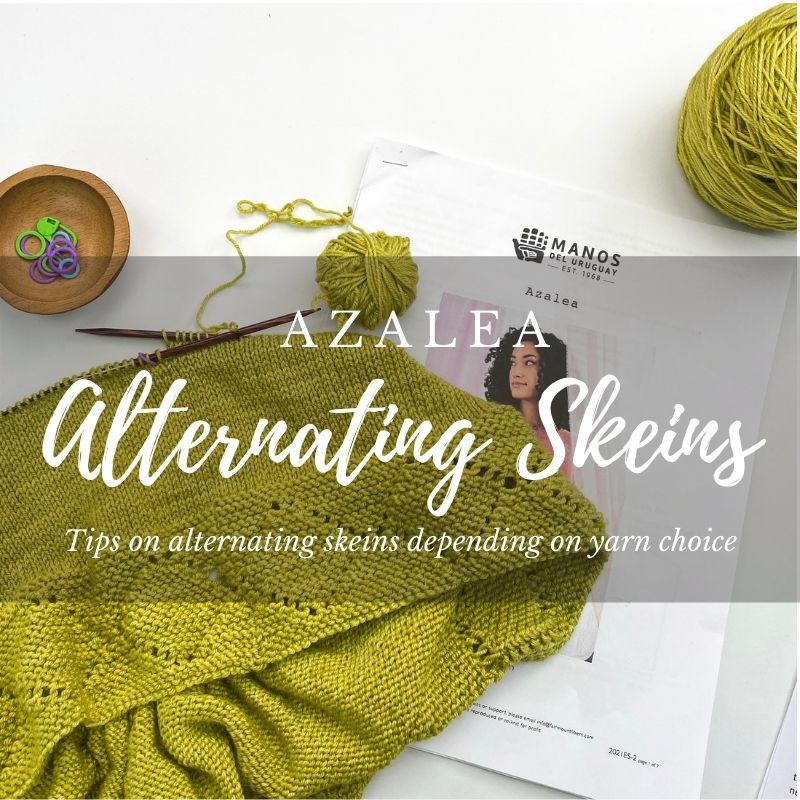
Tips on Alternating Skeins
In the Azalea top, the recommended yarn is Feliz by Manos del Uruguay yarns. Manos yarn is kettle-dyed which means that, like other hand-dyed yarns, each skein (even within the same dye lot) can be slightly different. Often it is recommended with hand-dyed yarn that you should alternate skeins throughout the project to help blend skeins together and to also help avoid color “pooling.” Here is a great explanation about color pooling from the Biscotte Yarns blog post that I often like to refer people to if you are new to the term. But do you need to do this in Azalea? I recommend 2 approaches with Azalea and it depends on if you chose a semi-solid color or a variegated.
Semi-Solid vs Variegated
In the Feliz line, some colors are semi-solid and some are more variegated. Here are examples of the two types:
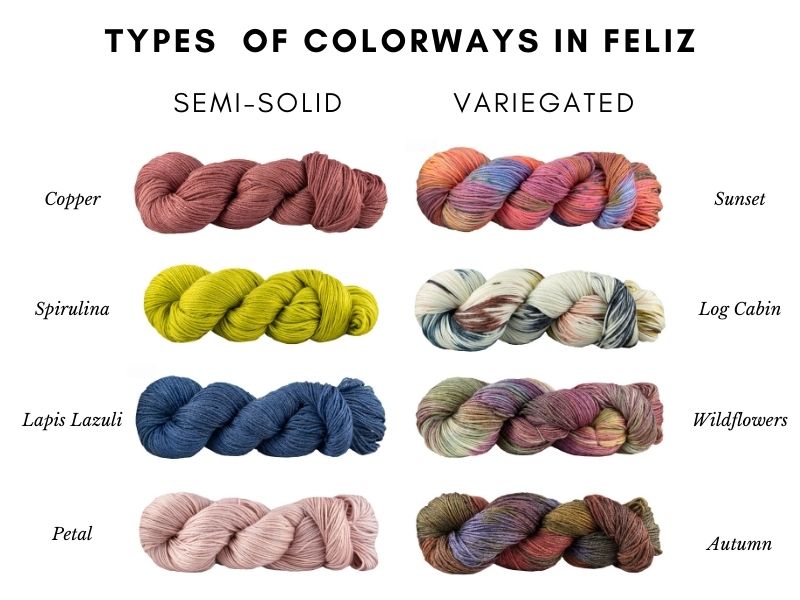
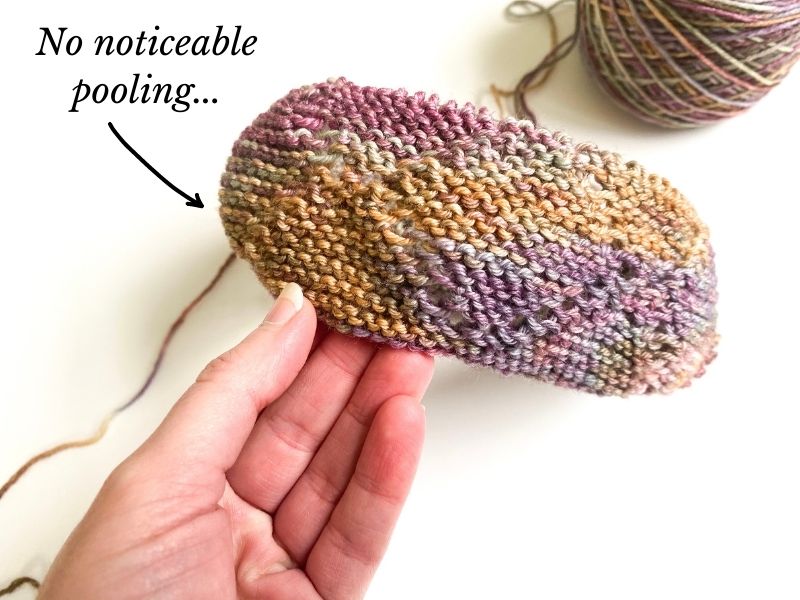
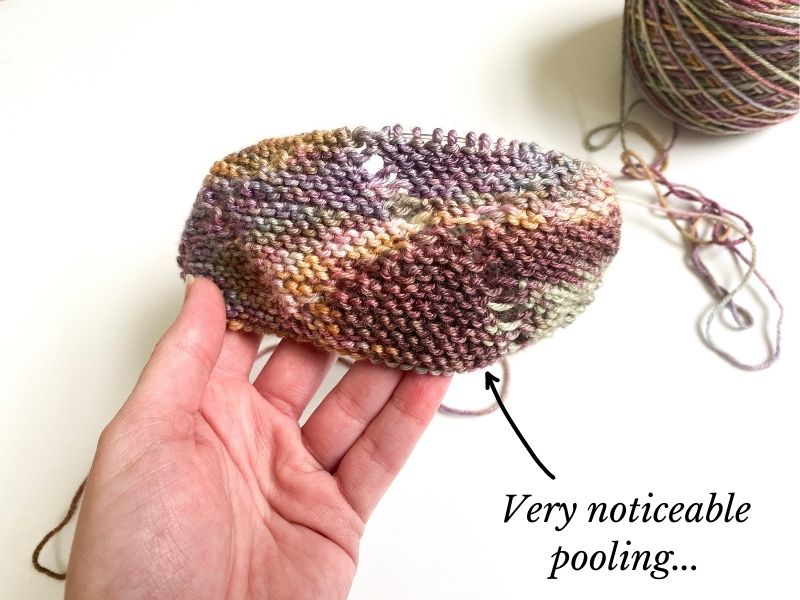
Semi-solids are primarily just one color, with just some hints of lighter/darker shades within it. Variegated have multiple colors throughout. And because of these multiple colors, they can have a tendency to “pool” as I referenced above (where one of the colors collects together in one spot). Let me show you an example of pooling with Feliz. I did a little sample of the Wildflower color in the same hem stitch pattern as I used in Azalea. On one side of the sample, there isn’t any noticeable pooling – but on the other side there is!
Some people don’t mind pooling and others do – so it’s just your personal preference whether or not you mind this affect. But if you choose a variegated yarn and you want to avoid dramatic pooling, then you might want to consider alternating skeins throughout your project.
If you chose a semi-solid yarn, you don’t necessarily have to alternate throughout the project this like (because pooling isn’t as much of an issue since there aren’t multiple colors), but you may want to consider blending your skeins, otherwise known as “fading in”, as there may be slight differences from skein-to-skein and if you don’t fade-in your new skein you may get a distinctive line in your work of when you stopped working with 1 skein and started working with another. So with this technique you’ll be alternating skeins, but only for about 1/2″ worth of fabric as you use up the end of one skein and introduce a new skein (the length you decide to alternate skeins is totally up to you).
So to sum up, you can either alternate skeins throughout (recommended for highly variegated colors if you want to avoid pooling), or alternate just for 1/2″ or so to fade your skeins together (recommended for semi-solid colors). Of course you can also choose to do neither – as with most things in knitting, there are recommendations but no rules 🙂
Now I’m going to go over the 2 methods/techniques of alternating skeins that can be used in these situations:
Method 1 for Alternating Skeins: Carrying-Up
The “carry-up” is the most common method of working with 2 skeins of yarn at the same time. And it’s a method that can be used whether you’re working in the round or working flat, and can be used with any stitch pattern. If you are working with variegated yarn for Azalea and want to alternate skeins throughout, I recommend using this carry-up method when you are working the hem (in the garter diamond eyelet stitch pattern). When you get to the stockinette stitch body, you can either continue with this method or try method 2 which I describe below.
When using the carry-up method, you typically work 2 rounds with 1 skein, and then when you’ll knit the next 2 rounds with a 2nd skein. And when you alternate the skeins, you entwine the 2 skeins by making sure the new skein you are about to work with is carried up over the previous skein. It’s best understood with visuals, so check out my video tutorial below! I also have written about this technique in previous patterns, and you can check out my blog post about it here.
Method 2 for Alternating Skeins: “Yarn Forward” Method
I was first introduced to this method recently by a friend – I tried it out and really liked it and used it for my own Azalea. I’ve seen a few other tutorials online for it but it doesn’t seem to have a standard name so I’ve called it the “Yarn Forward” method just to help differentiate it from the “Carry-Up” method. This is a good method to consider using instead of the carry-up method for the Stockinette stitch area of the body of Azalea (if you are using variegated yarn and alternating skeins in the hem, I still recommend the carry-up method for that section). Although it really comes down to personal preference, so you can try out both methods and see which one you might like best! Personally I found that with the carry-up method, when using it in stockinette stitch in the round, I couldn’t help but entwine the skeins too tightly and it puckered my fabric a little. Most puckering will work itself out in the blocking process anyway, but after learning this other method, I decided it just worked better for me.
So in this “yarn forward” method, you switch skeins every row and instead of crossing the skeins in the back of the work like you do in the carry-up method, you bring skein #1 to the front of the work while you work a round with skein #2, and then when you reach the marker again you switch them and bring skein #2 (that you were just working with) to the front of the work and then move skein #1 from the front to the back (giving it a little tug to tighten things up as you bring it to the back). It’s a bit easier to understand when you see it, so in the video below I show you how I work this method while working the “fade-in” technique of alternating skeins.
I hope these tips on alternating skeins has been helpful! One last thing I wanted to bring up was that Azalea is worked in the round to the underarms and then it’s worked back and forth to the shoulders. For the back-and-forth area where you’re working flat, whether you are fading or alternating throughout, you’ll want to use the carry-up method (the “yarn forward” method is just for in the round).