Casting-On for Azalea
Let’s get started knitting our Azalea! There are three main steps in the very beginning of Azalea. Below are tips for each of these steps:
Step 1: Cast-on!
In the pattern I say to use the long-tail cast-on as I really like the look of that cast-on and it’s just my preferred way (but if you have a different preferred method, feel free to use it). I like using the thumb-method of this type of cast-on, so my video below shows you this way (but the traditional “sling-shot method” works fine too!). The first step in the long-tail cast-on is estimating the amount you need for the long-tail – and in Azalea, because you have a lot of stitches to cast-on, this can be tricky! In the below video, I also show you how to estimate this – my method is by no means exact, but it has worked well for me. When in doubt, it’s better to estimate too much than too few (nothing worse than casting on almost 300 stitches only to run out of yarn at the very last few stitches!). Lastly, my video below is my general “how to do the long tail cast-on” video (so it’s not unique to Azalea) – I’m using straight needles for this demo but for Azalea you’ll be on your long circular.
One last thing to mention: you will want to cast-on with the circular needle size that you had gotten gauge with. So for me, this was the US 6 needle. You’ll knit the rest of the hem with a needle size smaller, but for the cast-on you’re using the larger needle.
Here is what it will look like after you cast-on your stitches:
Step 2: Do not join to work in the round yet – knit the next round
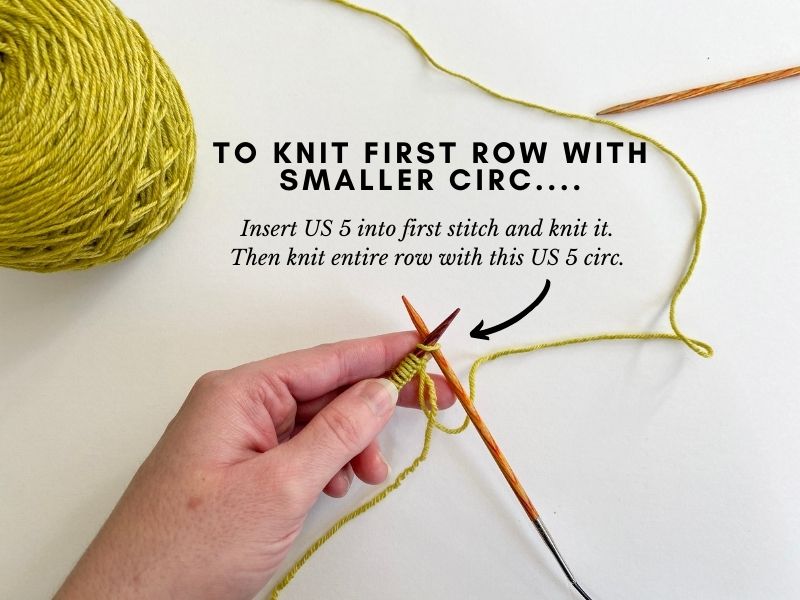
The first instruction in the pattern after casting-on is to switch to the smaller needle and then knit all the stitches to the end. So you don’t join in the round after casting-on – you’ll just knit 1 row first with the smaller circ. Note: If you had needed to go down a needle size to get gauge, then you’ll just want to make sure that your “smaller circular” is 1 needle size smaller than the one you got gauge with.
Step 3: Join for working in the round
After you knit that first row with your smaller circular, put the larger circ away – you won’t need that until after your hem is done. And now it’s time to join for working in the round, so when you finish that first row, do not turn the work. The below video shows you exactly how I then join to work in the round (or if you prefer, I also have photos and written descriptions below that):
Photo tutorial of this process
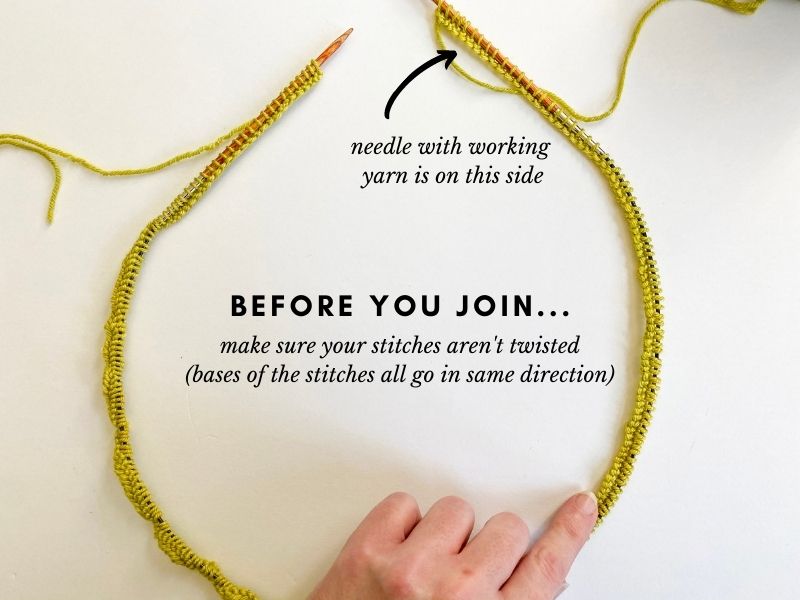
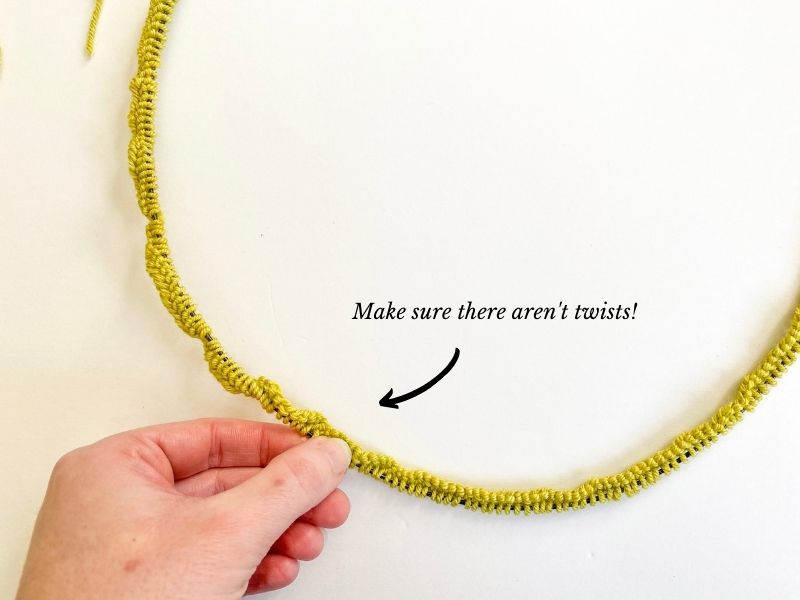
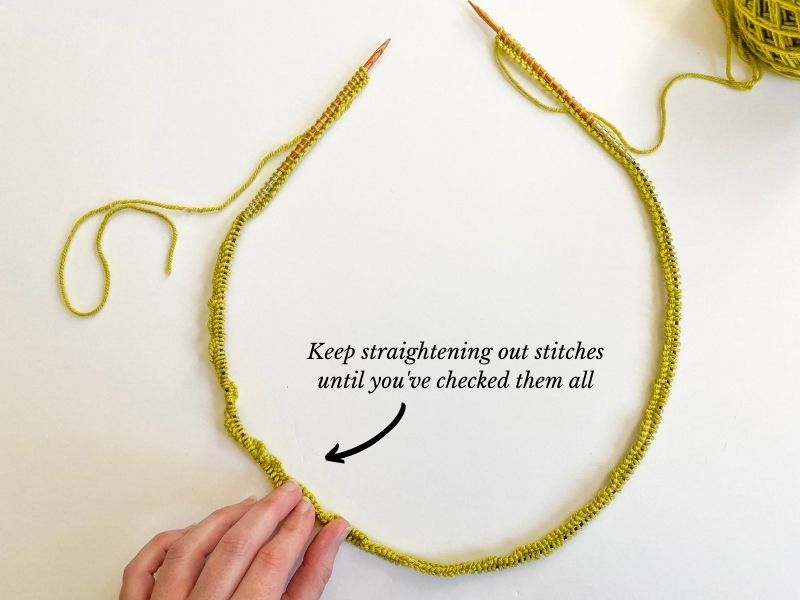
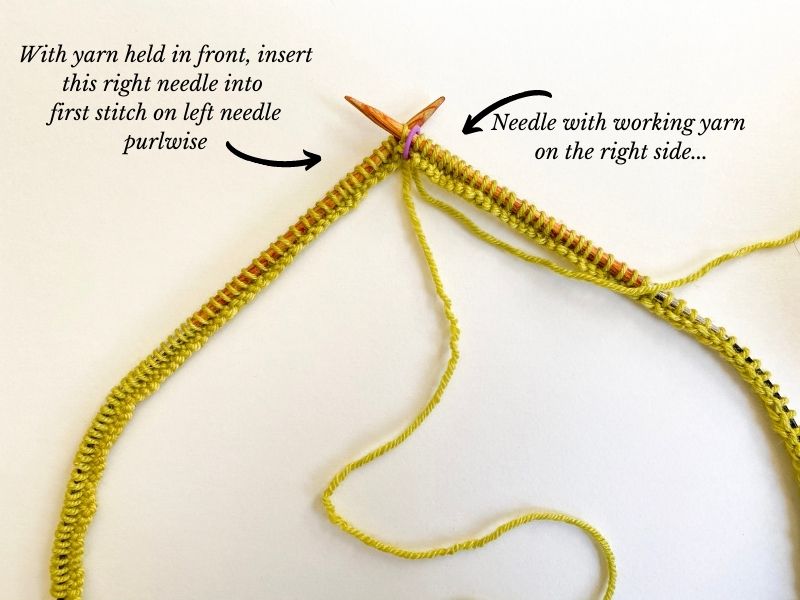
Before you join, you need to make sure that your stitches aren’t twisted. This just means you want to make sure that the base of each stitch is going in the same direction. It’s a bit easier to do after knitting 1 row than if you were to join after casting-on (this is why I had you knit 1 row first). Align so that the needle tip with the working yarn attached is on the right side, like pictured below:
Once you have all of your stitches going in the same direction, you can join to work in the round! Just place a marker on the right needle, then, because your next round will be a purl round, bring the yarn to the front and insert the right needle into the first stitch on the left needle purlwise.
Purl that first stitch and you have now officially joined to work in the round! You’ll purl all the stitches in that round, then your following round you’ll knit all the stitches, and then the following round after that you’ll purl all the stitches. Once you’ve done all of that, it will look like this:
Once you’ve completed those first 4 rows, you’ll then move on to working the diamond eyelet stitch pattern! Click here to view the tutorial page all about it.
Important tip for those working with highly variegated yarns…
If you are using a semi-solid yarn like I am in the photos above, you don’t have to alternate skeins at this point (although you could if you prefer). I personally use a “fade in” technique when working with semi-solid colors where I alternate skeins for maybe around 1/2″ to 1″ as I’m introducing a new skein (video on the method I use for that will be found later in the body section tutorial). But if your color has lots of variegation to it, you may want to alternate skeins throughout the project as this helps avoid color pooling if that’s something that may bug you. If you are using a highly variegated yarn, make sure to read my post here to learn all about this topic.

