Audrey Tips

Tips for making your own Audrey’s Cardigan
On this page you’ll find the following tips, tricks and tutorials that will help you make Audrey’s Cardigan. These tutorials walk you through every step of the process of making Audrey’s Cardigan! You can also view the full playlist of YouTube videos for every step is also available by clicking here. These videos were originally part of a knitalong for this sweater in the Fall of 2020 but they are now available to everyone for free!
Here are the tutorials outlined on this page (for quick reference):
- Picking a size
- Swatching
- Long tail cast-on technique
- Raglan set-up
- m1-R & m1-L
- Underarm divide, body shape and body lengthening and hem
- Sleeve tips + DPNs and Magic Loop tutorials
- Front Bands & buttonholes
- Button attachment
- Blocking
Picking a Size
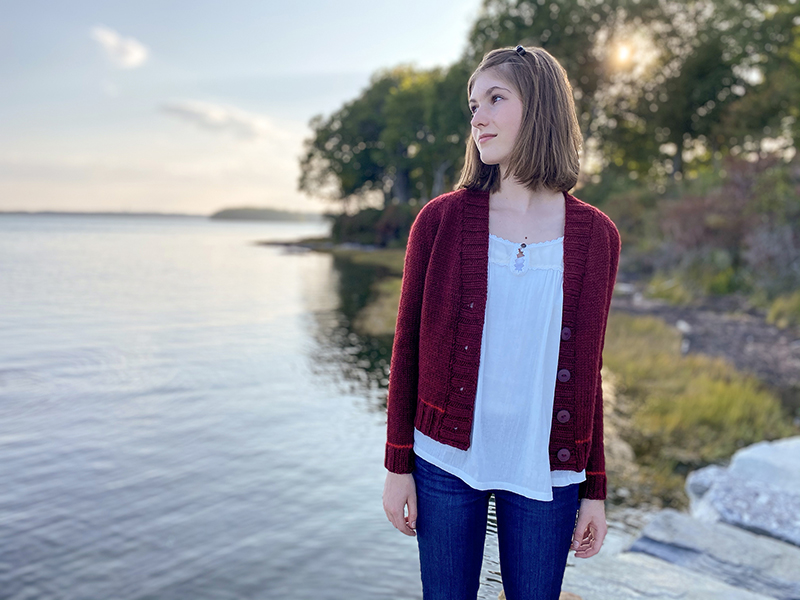
Audrey’s cardigan has 10 possible sizes to pick from. The sample photographed is size 1, being worn on a 14 year old (so this sweater makes a great piece for the teenager in your life!). The sizes are labeled 1-10. In general, size 1 would be equivalent to a XXS, size 2 a XS, size 3 a S, etc. You should pick a size based on how you typically like to wear your sweaters but I do provide a little bit of guidance…
My recommended amount of ease is between 1-4″. This means you should pick a size that is 1-4″ larger than your actual bust measurement, depending on your desired fit. For a very fitted look, go with the lower end of this range and for a standard sweater fit, go with the higher end. Personally, I know that I typically like a raglan sweater with 4-5″ of ease because I usually like to wear my sweaters over other long-sleeve layers. But if I wanted a cardigan that I would wear with just a tank or short-sleeved underneath, then I may go with just 2-3″ of ease. The great thing about top-down raglans is you can easily adjust as you knit too – on the tips page I provide some suggestions but you can also email me if you have specific questions. Here is a link to my video where I talk about picking a size for Audrey’s Cardigan.
Swatching
If you want your finished sweater to fit, then you have to swatch! Everyone’s tension is a little different, so although I was on a US 10 needle to get gauge (of 15 sts & 21 rows = 4″ after blocking), you may need to use a US 9 or a US 10.5. But the only way to know for sure is to swatch. If you’re new to swatching, or just want to read some of my swatching tips, check out my tutorial page!
Long tail cast-on
It’s not super important that you use the long tail cast-on as your cast-on technique, but it’s the type I prefer so that is why I have it listed in the pattern (but feel free to use a different one if you prefer). Click here for my video tutorial that will show you how to work the thumb method of the long tail cast-on. Below I also show you how I worked this cast-on for Audrey’s Cardigan.
Raglan set-up
After you have cast-on, you’ll place markers (otherwise known as raglan set-up). Click here to watch my tutorial on how I cast-on for this cardigan and then worked the raglan set-up row.
m1-R and m1-L increases
I use m1-R and m1-L as my increases for Audrey in the raglan shaping (m1-R stands for “make 1 right leaning” and m1-L stands for “make 1 left leaning”). Click here for my video tutorial that shows you how to work this type of increase.
Underarm Divide, Adjusting Body & Hem
If you need a video of the underarm divide process, check out my tutorial page here. Also on this page is lots of information about picking your body shape version and how to adjust body length for each of these versions!
I also have this video that shows you how to work the contrasting color stripe row.
I also have videos that show you how to work the hem section of the body. Check out this tutorial page for all of the details!
Sleeve Adjustments + Methods for Knitting
You can knit your sleeves either using DPNs or Magic Loop, and I have video tutorials on how to work both methods! Also, one of the great things about top-down raglan construction is you can more easily adjust your sleeve shape ‘on the fly’ to fit your unique body. Click this link to read about all of my tips regarding sleeve adjustments as well as my DPN and Magic Loop videos! I also talk about what to do if your ‘in the round’ tension is tighter than it was when knitting the body of your sweater.
Front Bands & Buttonholes
One of the last steps in Audrey’s Cardigan is the Front Bands. Here you will pick up stitches along each Front and around the neck and work in a rib stitch pattern (and make buttonholes along the Right Front). I have video tutorials for all of these steps. Click this link to read more and watch the tutorials.
Button Attachment
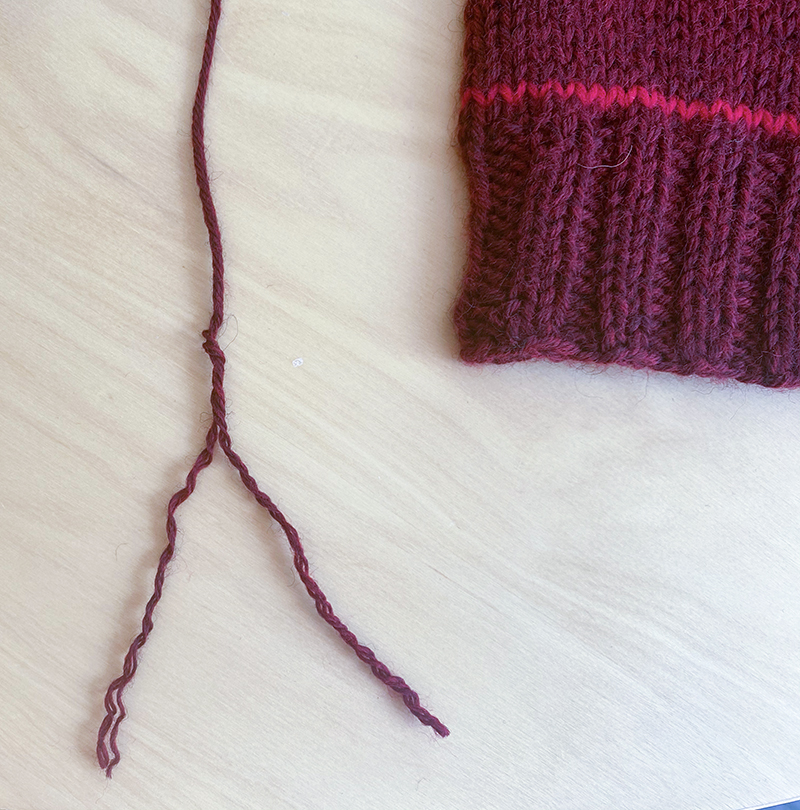
When attaching your buttons, your yarn may be a little bulky for the holes on your button. If so, you can un-ply your yarn to make it a little thinner. The advantage to this is that you can then go in and out of the button’s holes more times (now that the yarn isn’t as bulky), making it more secure. Here is a picture of me un-plying my yarn to do this on my sample:

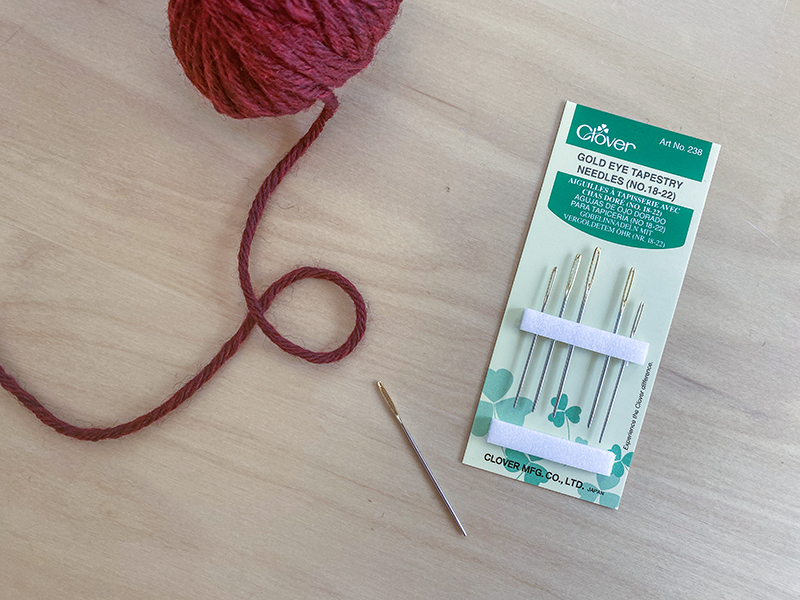
What tool did I use to then thread the yarn and attach the buttons? I like the Clover brand gold eye tapestry needle for this – they’re a perfect size for threading yarn and also fitting through the holes in a button:

For the full video tutorial of the techniques I use to attach my buttons, click here to watch my video!
Blocking
I created a step-by-step video that shows you how I wet blocked my Audrey’s Cardigan – watch it here!
Errata:
- In version 1.0 of the pattern, in the “Sleeve” section, the stitch count after all decreases have been worked so read: 28 (28, 32, 32, 32) (36, 36, 36, 40, 40).
