Underarm Divide and Body

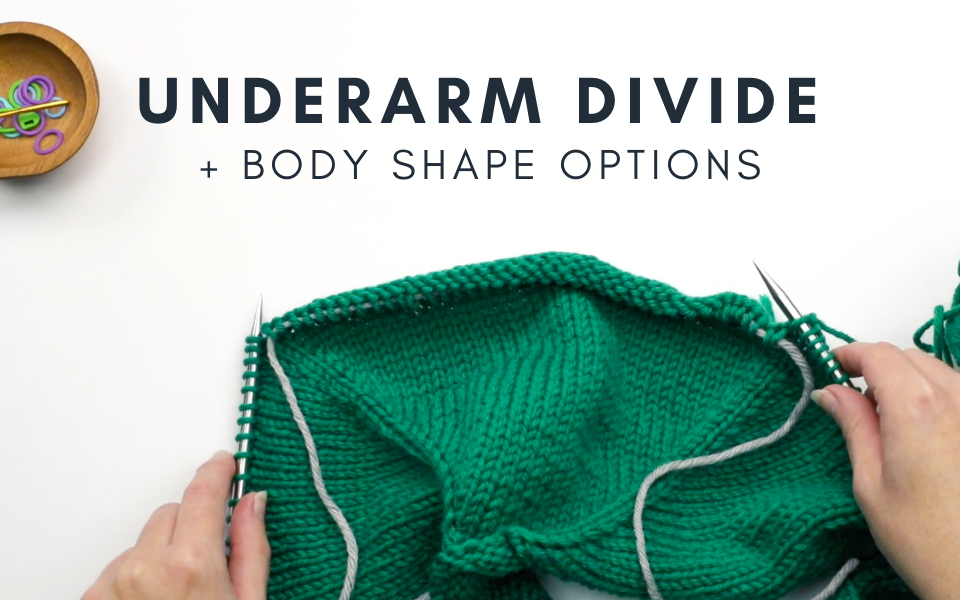
The Underarm Divide of a top-down raglan is the part where you separate the sleeves from the body. In addition, you cast-on stitches at each underarm and join each Front to the Back. So it’s quite an important step in the sweater! It can seem intimidating the first time you do it, but I hope having a video that shows you each step will help to demystify it a bit. One thing I want to mention first though is if right before your Underarm Divide you feel like you want your yoke depth to be deeper, you can just work in Stockinette stitch (slipping markers as you reach them) until you are happy with the depth.
Watch me work the underarm divide in the video below!
Body – choosing your shaping option:
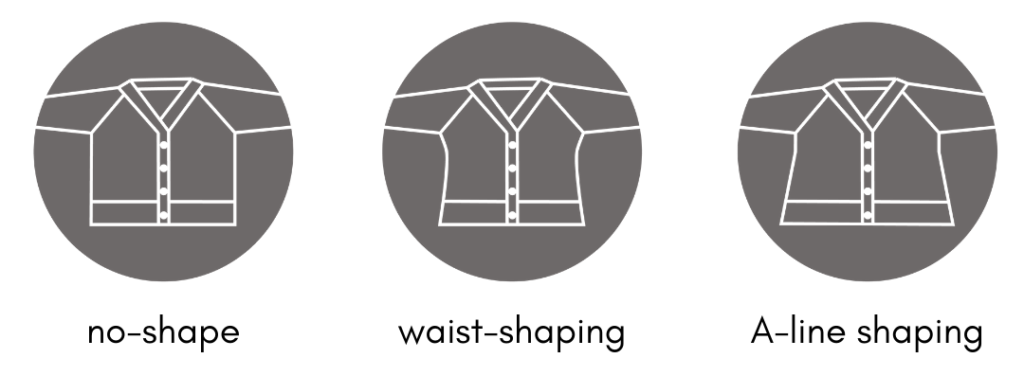
Once your underarm divide is complete, you can move on to the Body! I initially designed Audrey’s Cardigan to have no body-shaping, just to keep with the theme of simplicity and being ‘first-sweater-friendly’ (Audrey is wearing the no-shape version in the photos). But then I decided to include instructions for 2 other shaping options, just so that it’s that much more versatile for those who like a little shaping in their sweaters. So there are 3 body shaping versions to pick from:

So what option is best for you? If you have never knit a sweater before and are totally on the fence about which way to go, then I typically recommend going with the no-shape option just so you that can focus more on deciding what your ideal length will be (since altering length is a little easier when no shaping is involved). But if you’ve knit some sweaters before and know that you like some shaping in your knit garments (or you just know from other sweaters that you have worn), then you can pick the waist-shaped option or the A-line shaped option. In either of these options, the shaping is pretty subtle – I find that with chunky/bulky yarn that subtle shaping works best with the fabric.
The waist-shaped option works both decrease stitches (k2tog and ssk) as well as the same increase stitches you had worked in raglan shaping (m1-R and m1-L). The A-line shaped option uses just increase stitches (m1-R and m1-L).
One thing to note/explain about the shaping rows: in the pattern, when working these body shaping increases or decreases, it will say something like “work in St st, repeating above decrease row every 10th row 2 times.” This means that you would work in Stockinette stitch (so knit on RS rows, purl on WS rows) for 9 rows, and then work the decrease row (and then work another 9 rows in St st, and then the decrease row again so it’s a total of 2 times).
Body – changing the length:
Sweater length is such a big variable! Every person has a different preference, whether it be because of their own unique body shape or just how they like to wear their sweaters. So I want to provide some guidance should you want to change the length of your own Audrey’s Cardigan. And if you’re unsure if you want to lengthen or not, measure some sweaters in your closet that you love the length of and this will help give you an idea of the type of length that you might be aiming for.
I designed it as a bit of a cropped length, with a finished underarm to hem measurement of approx. 12″, so odds are that if you want to change the length, it’s probably to lengthen it a bit. So below are my tips, depending on which shape you go with:
No-Shape Version:
This one is easy! To lengthen, just keep working in Stockinette stitch until approx. 2.5-3″ less than your desired length (for example, if your target underarm to hem length is 15″, then work in Stockinette stitch until measures around 12-12.5″, and then proceed to the Hem section. Easy peasy!
Waist-Shaped Version:
In this style, the best place to add some length is between the waist and the hem, in 2 places:
- Instead of working increase row every 6th row 2 times, work it every 10th row 2 times. This will gain you 1.5″ of length.
- Then if you want to add a little additional length to this 1.5″, simply keep working in Stockinette stitch after the last increase row, before the Hem section, until about 2.5-3″ above your desired finished length.
A-Line Shaped Version:
In this style, if you want to add just a little bit of length (so about 1″), then just work in Stockinette stitch for 1″ after the last increase row (right before the Hem section). However, if you want to add more length than this, you’ll want to add rows in between each increase row. Follow the following steps:
Step 1 – Figure out how much extra length you want: Say you want your underarm to hem length to be 15″ instead of 12″, so you are adding 3″ in length.
Step 2 – Figure out how many extra rows this is: At the pattern’s specified row gauge (21 rows = 4″, so 5.25 rows per 1″), 3″ in length would be 15.75 rows – let’s round that to 16.
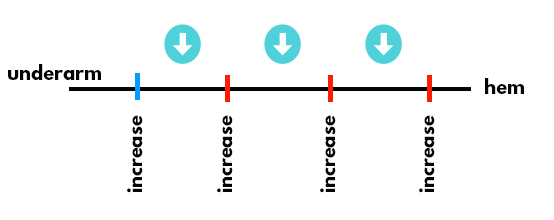
Step 3: Figure out how many increase sections you have: Look at how many increase rows you are supposed to work – in Audrey, you repeat your increase row every 14th row 1 time and then every 12th row 2 times – so, after your initial increase row, you are working a total of 3 more increase rows. This means you have 3 sections where you can add these 16 rows to. I created a little graphic that may help you visualize this:

The left side of the line is the underarm side of the body and the right side of the line is the hem side. The blue dash is your first increase row and then each red dash are your 3 other increases. Where you see the arrows are your 3 sections where you need to add your 16 rows to, in as even a way as possible.
Step 4: Figure out how to disperse your total rows to add among your sections: So instead of repeating the increase row every 14th row 1 time and every 12th row 2 times, I would do the following: increase every 18th row 3 times. This adds in 16 rows as evenly as possible among these 3 sections. If you have problems figuring out your own sequence, plotting it out on paper can help too! Or feel free to email me – I’m always glad to help.
A note about measuring your body length…
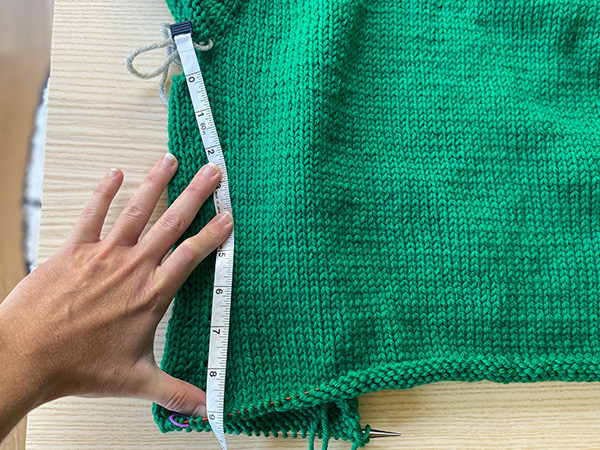
Remember how in my swatching tutorial I talk about measuring your swatch pre- and post-blocking so that you know how much it grows after you block? This can be helpful when it comes to determining your sweater length. For example, in the pattern I mention that before moving on to the Hem, your piece should measure approx. 9.5″ from underarm (if you don’t change the length). However, this doesn’t take into account that your sweater may grow in length. So in my case, I learned in my swatching process that my row gauge was a bit tighter pre-block. So when I measured my sweater length, I made sure to account for this – as you can see in the picture below, my underarm to hem length is closer to 9″ rather than 9.5″ – because I know my sweater will grow a little bit, that is ok!

If your row gauge was similar (i.e, it grew after blocking), another thing you can do is just make sure to stretch out your piece while you measure it to mimic how the fabric will be after it grows post-blocking.
Make it your own!
In top-down raglans, there is such versatility with how you can adjust the body to work for your own personal style. I hope you have found all of these tips helpful! Reach out to me if you have any follow-up questions.
