Sometimes the best knitting tools are the simplest. One of the most useful little tools I have among my knitting notions are locking stitch markers. If you are a newer knitter and unfamiliar with this type of stitch marker, it looks like this:
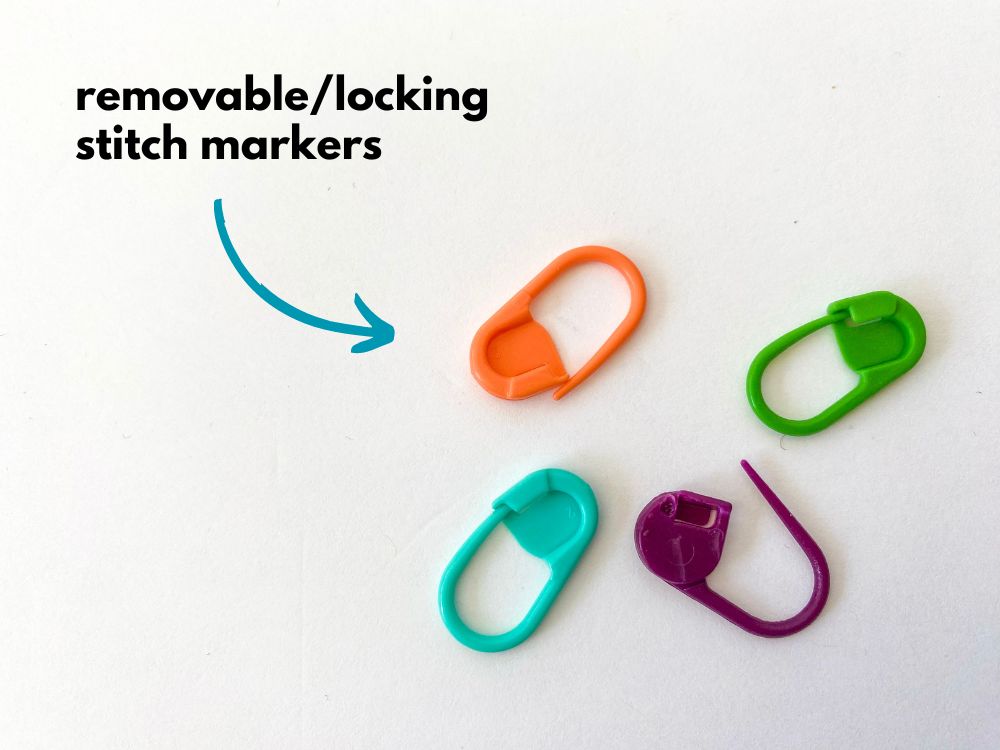
And true to it’s name, it locks (i.e, clasps shut). Unlike regular ring-style markers, a locking stitch marker opens and closes like a safety pin, so they are useful both on the needle as a regular stitch marker but off the needle as well for other uses.
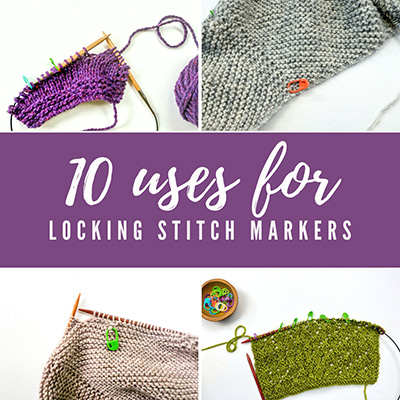
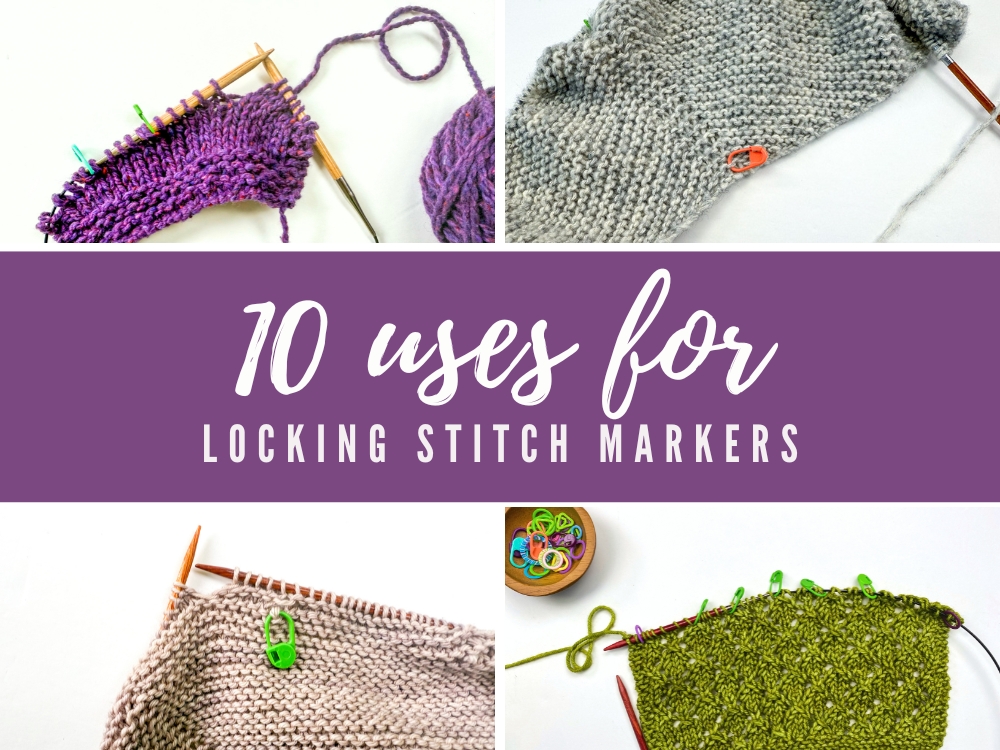
Curious what some of the different uses I have for locking markers? Check out 10 different uses below!
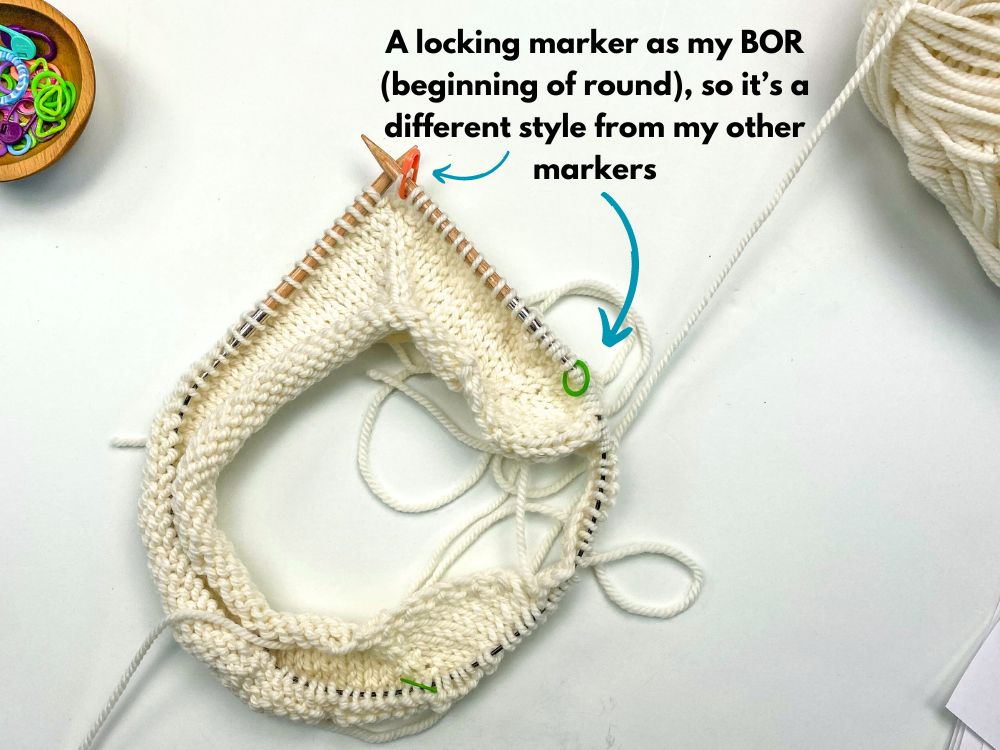
Use #1: As a BOR (beginning of round) marker
When working in the round and when I have other markers in place throughout the work, I like to use a locking marker as my BOR marker. This is because it stands out from the other markers (so it’s super obvious that it’s my BOR point). Below is an example that show this.
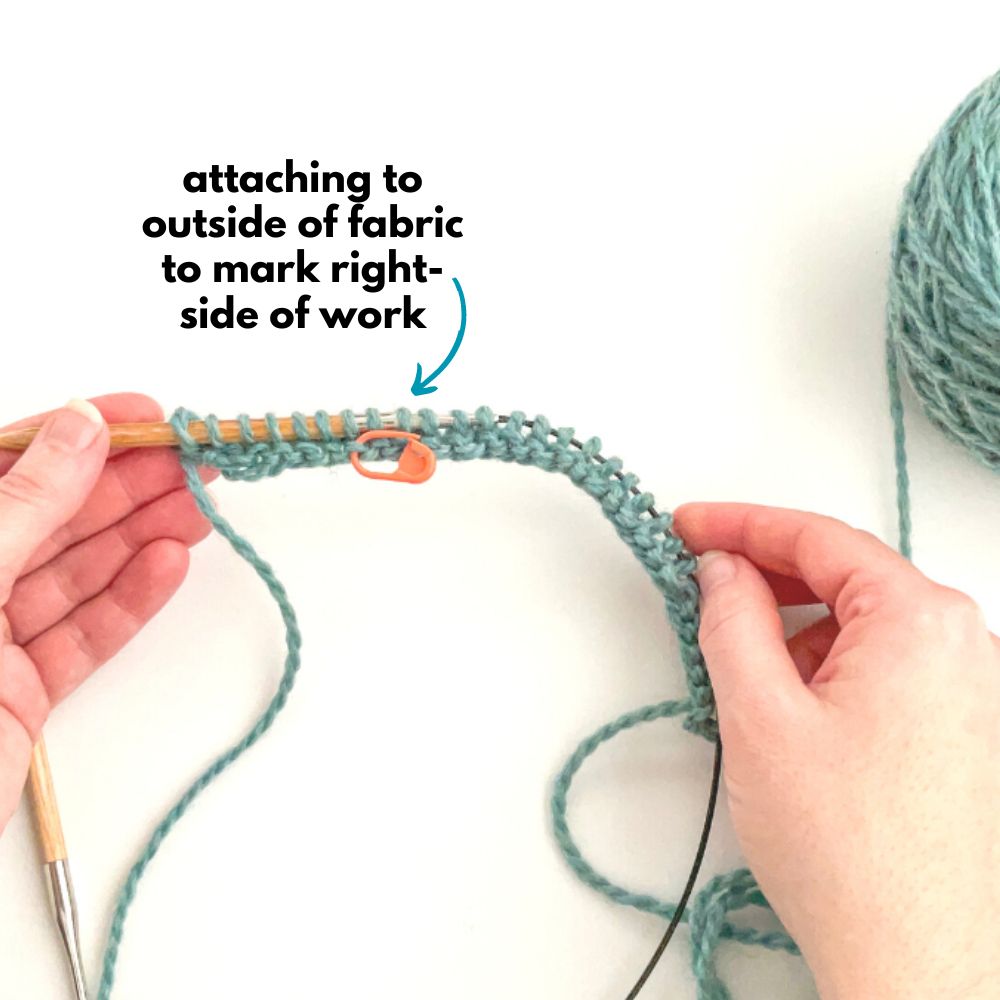
Use #2: To mark the RS of the work
A locking marker can be useful OFF the needle as well! I like to attach them to the outside of my fabric to mark which side is the RS (right-side) vs the WS (wrong-side). This is especially helpful in something like garter stitch as shown in the 2 visuals below.
Use #3: To help keep a long tail out of the way
Sometimes in a knitting pattern you’ll be instructed to cut a very long tail because that tail will later be used as your working yarn (such as for a three needle bind-off, to attach shoulder stitches). Often these long tails can just get in the way as you’re continuing to knit, so I like to create a little ball with the tail and then use the locking marker to keep it clumped together, as shown below.

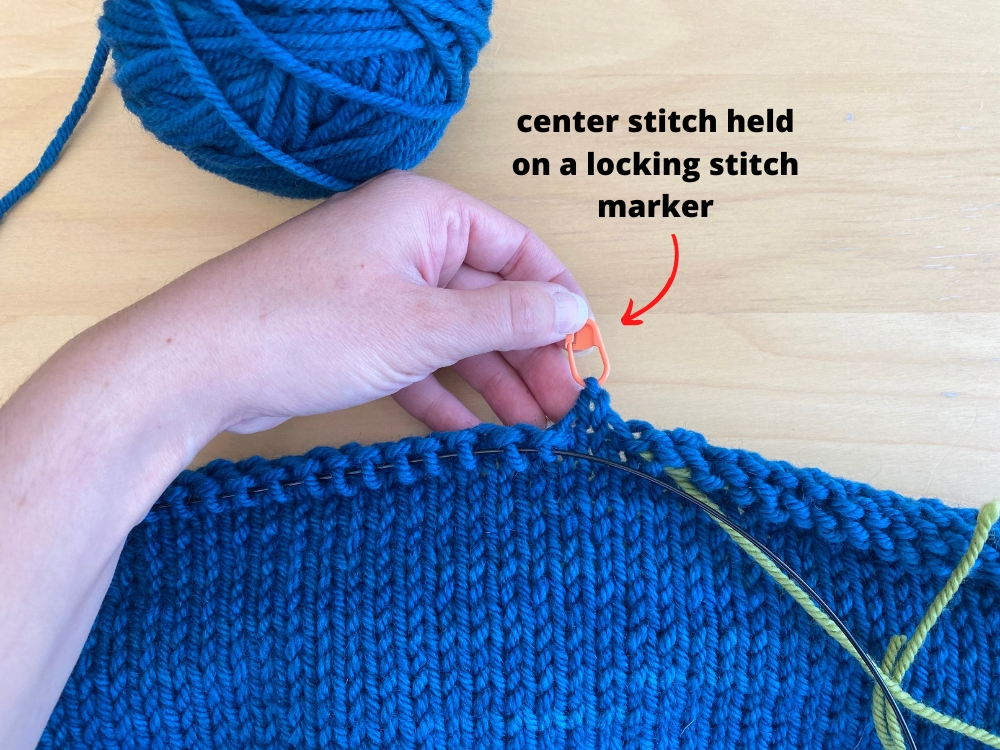
Use #4: As a mini stitch holder
A locking marker also makes a great mini stitch holder if you only need to hold one or two stitches. In the photo below, I’ve used it as a mini stitch holder when separating my front and back on a v-neck sweater (this was for my Ice Breaker top). The center stitch needs to be held (because it will later become the center stitch in the v-neck trim), and so using a locking stitch marker is a perfect way to hold it.
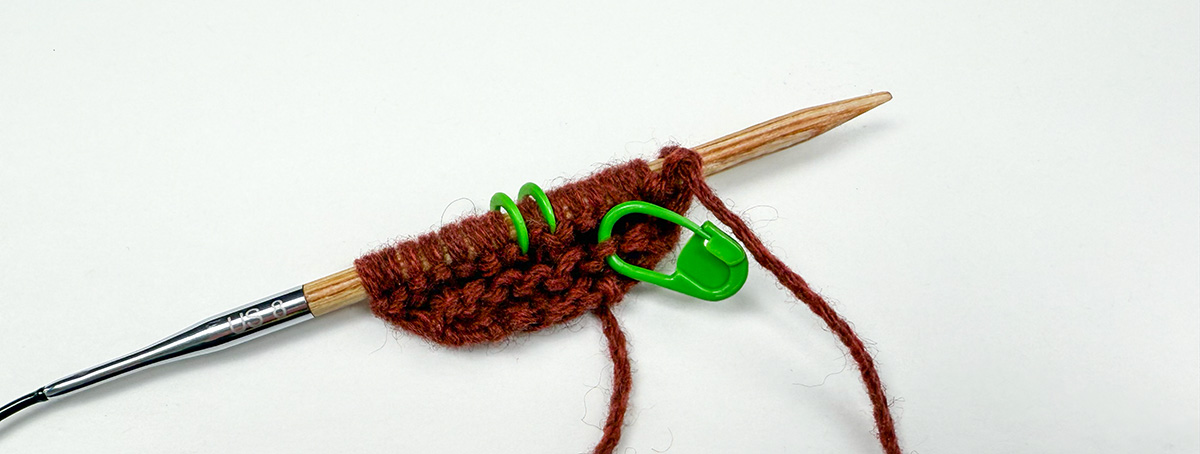
Use #5: For stitch counting purposes
I use locking stitch markers all the time to help me in counting stitches. It’s perfect for this because you can place it just like a regular stitch marker but then simply remove it once you’ve finished counting. A couple of examples of this are:
- When picking-up stitches, say around a neckline, and your instructed to pick-up a certain number of stitches in each section – you can place a locking marker for each section to ensure you have the right number and then remove it once you’re done counting (as shown in the image below).
- When casting-on a large number of stitches, you can place a locking marker after every 20 or 50 or 100 stitches (or whatever interval you like). This helps to break up the counting and avoid counting mistakes that often happen in large cast-on amounts.
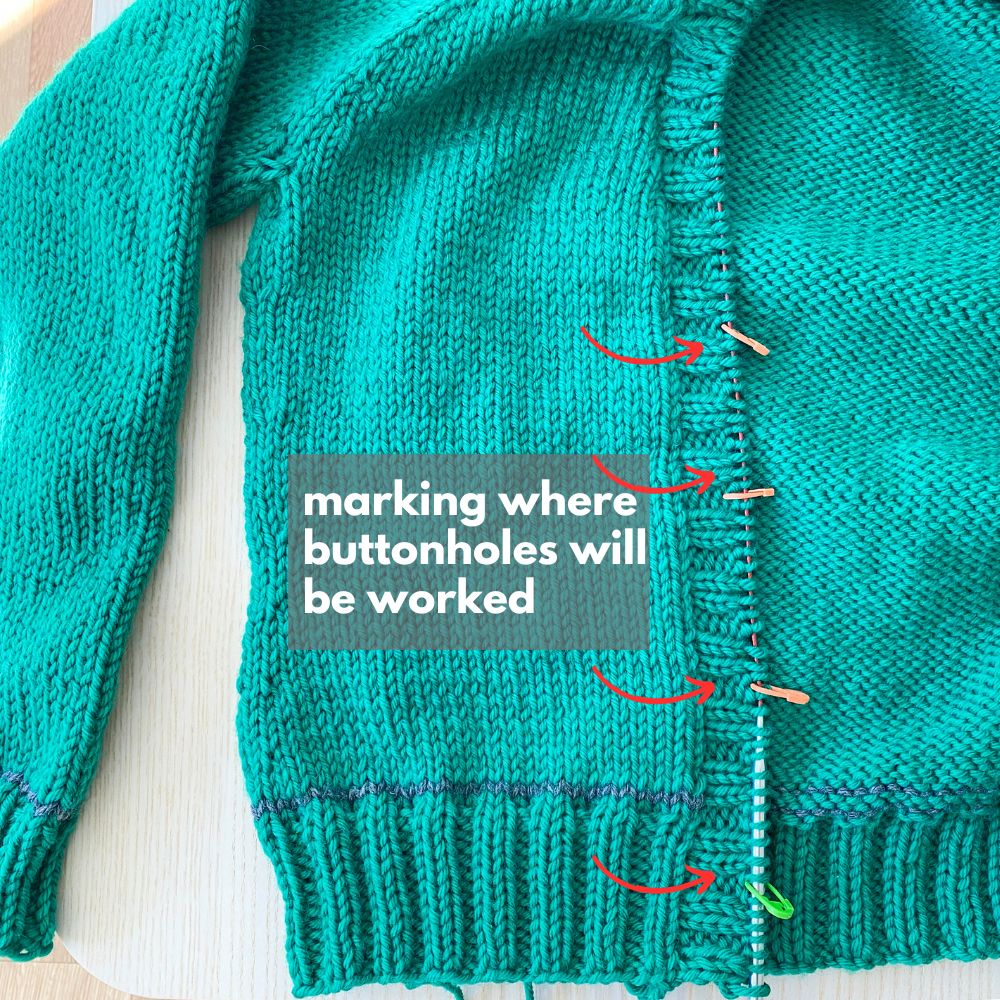
Use #6: Plotting out buttonhole placement
When working cardigans that will have buttonholes, I like to use locking markers to plot out where I want these holes to go. So on the row before making the buttonholes, I’ll place them (and all of my cardigan patterns have instructions on how I like to do this), and as I’m visualizing where they’re going, it’s easy to unlock and move them.
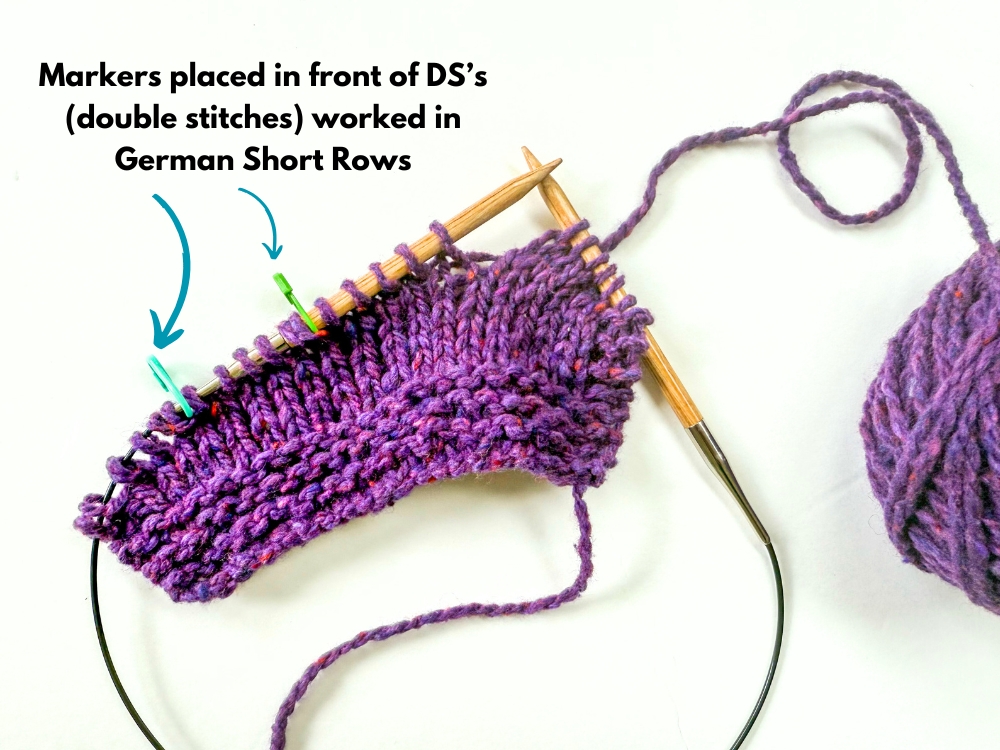
Use #7: To mark where a short row has been worked
Whether using wrap and turn short rows or German short rows, locking markers are useful when you want to easily identify where those short rows were worked. This way, when a pattern says to work to a certain number of stitches before the wrap or double-stitch (depending on the type of short row worked), you can just look for the marker instead (especially helpful with darker or textured yarn). Below is a demo of what this looks like when used for German Short Rows.
You can of course use regular stitch markers for this as well, but I like the option to move the marker in case I didn’t put it in the right spot and so locking markers give you more flexibility.
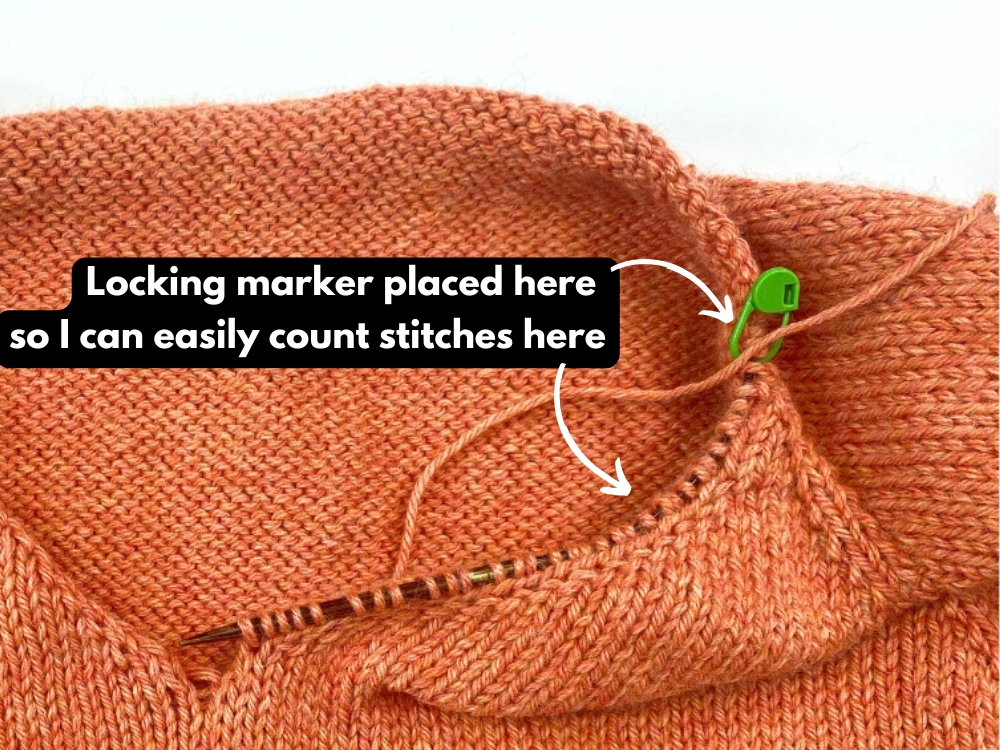
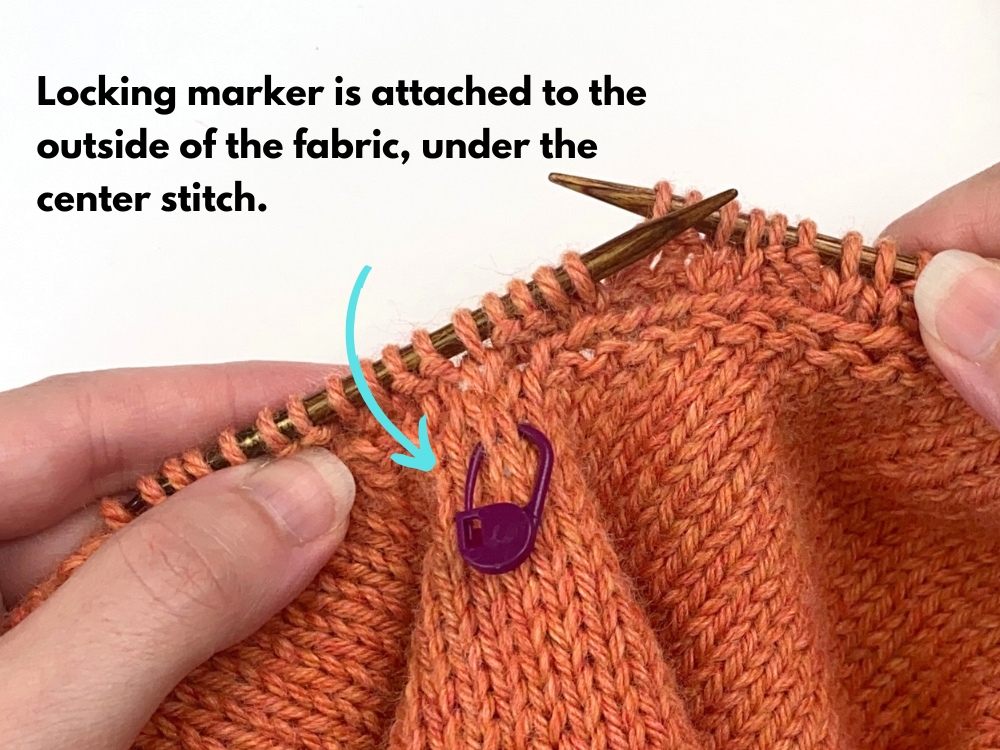
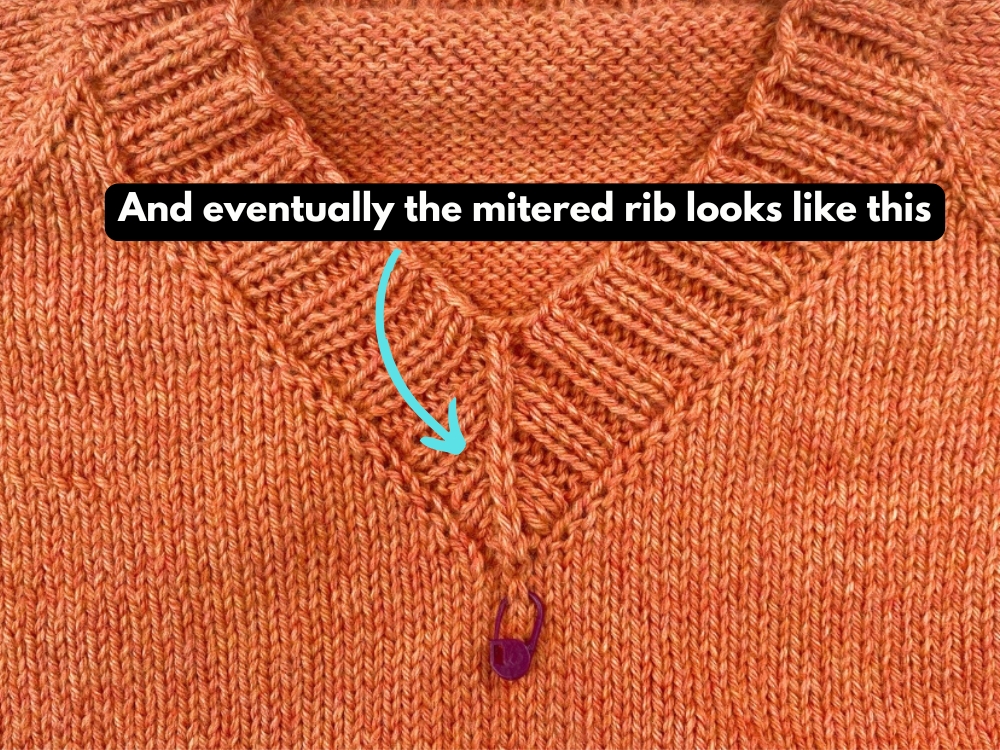
Use #8: To mark the center stitch when working a mitered rib trim
I’ve been into mitered rib stitch neck edgings lately (like in my Audrey’s Pullover or Ice Maker), and a locking marker is perfect for this. A mitered rib is created by working a center double decrease (CDD) at your center stitch. If you used regular stitch markers you mark where this CDD should occur, you would have to constantly be moving them on every round. So it makes more sense to mark the outside of your fabric, right under the location of your center stitch.
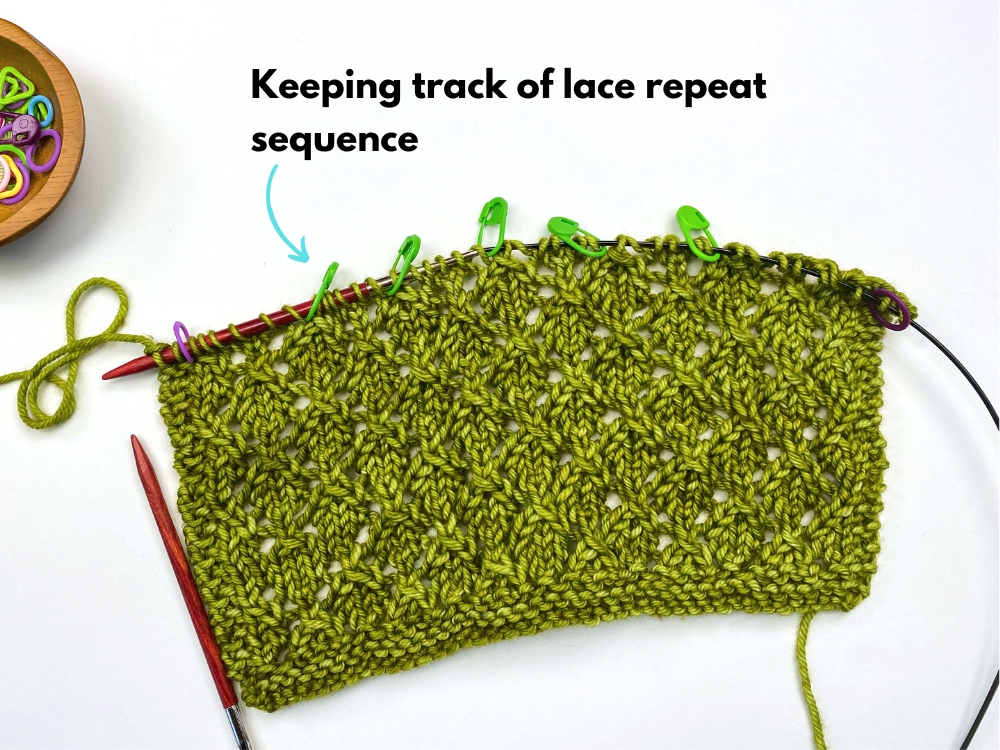
Use #9: To help keep track of a lace stitch pattern
If you are working a lace stitch pattern and having problems keeping track of the repeated sequence, marking off that sequence with locking stitch markers can be really helpful. And locking markers also come in handy if the stitch pattern ever “shifts” (in more complicated stitch patterns). I talk more about that issue specifically in this blog post if you’re curious.
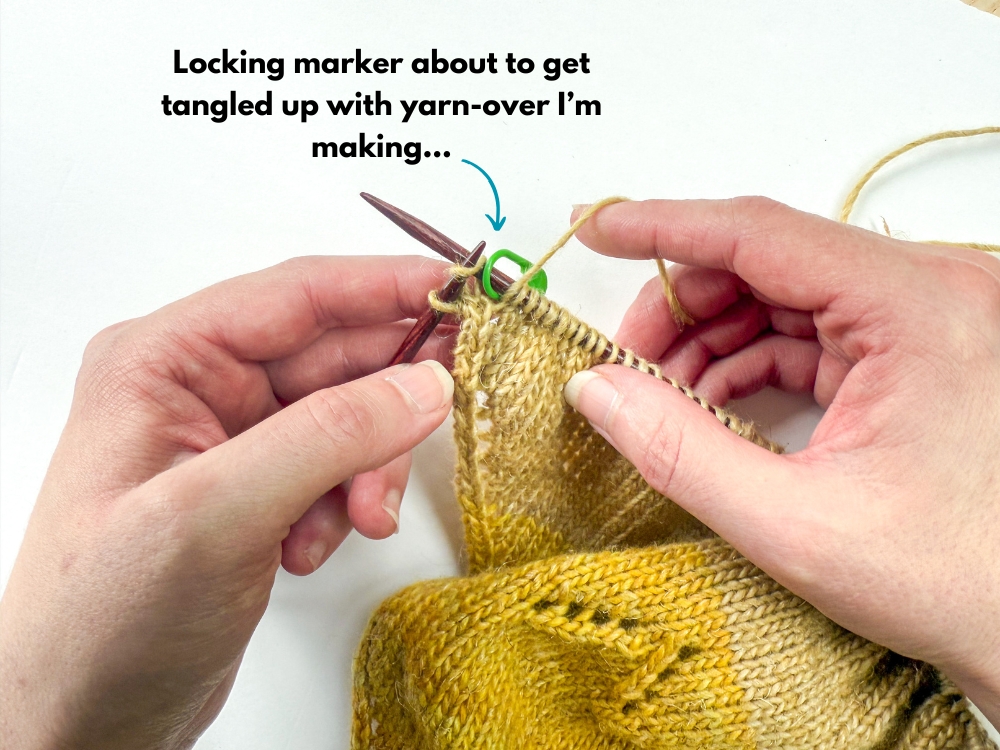
Warning: If you ever do use a locking marker when working lace or eyelets, you have to be a bit careful. Specifically, if a yarn-over is worked either before or after the locking marker. And this is because of the dangling part of this type of marker. Unless you make sure it’s completely out of the way, the yarn over can get tangled up in the dangling part of the marker (as shown below) and potentially cause the yarn-over to slide over it.
So typically I don’t use locking markers if a yarn-over is going to be worked right before or after unless I’m using it for tracking a lace stitch pattern and in those occassions, I’m just extra careful.
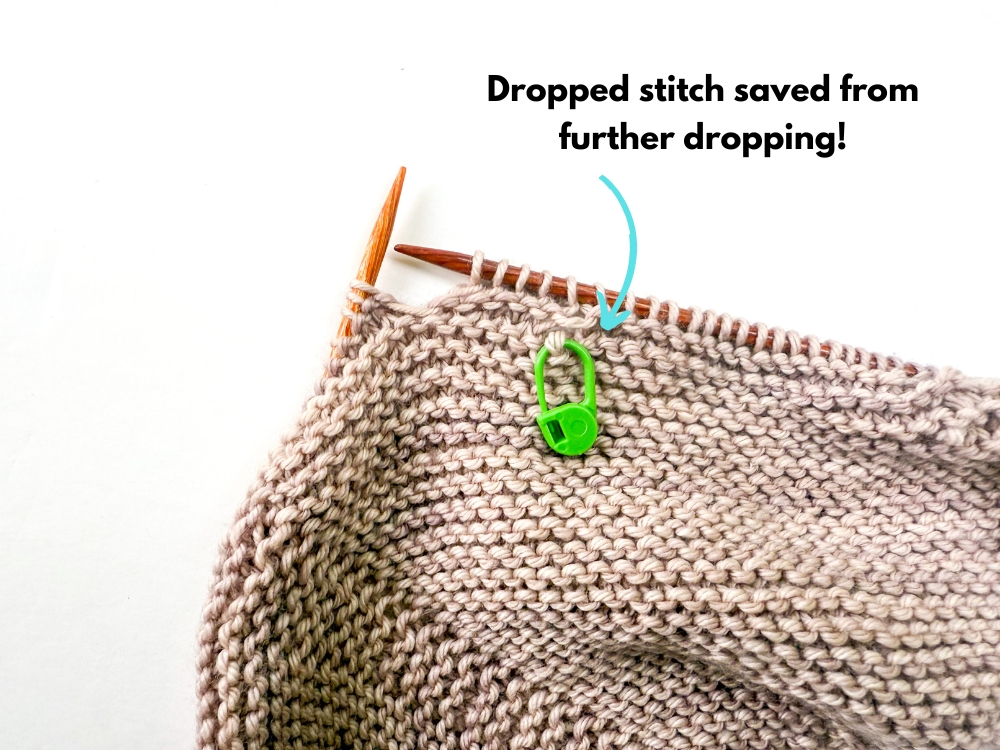
Use #10: To secure a dropped stitch
Notice a dropped stitch in your work? Step 1 is to secure it so that it doesn’t keep dropping further and one of the best ways to do that is to attach a locking marker to it, as I’ve demonstrated below. This way you’ve at least prevented further dropping and can then deal with fixing it when you’re in a good head space (and with good lighting!).
I hope reading about these 10 ways that I like to use locking stitch markers has been helpful and perhaps shown you a new way or two that can be helpful in your knitting adventures! Do you have any other interesting uses for locking stitch markers? I’d love to hear about them!