There can be a lot of “assumed knowledge” in knitting – things that rarely seemed to be explained anywhere but that somehow you’re just supposed to know! And this can be so confusing to newer knitters. I know it was for me when I was first learning!
Below are what I consider to be my personal top 10 “assumed knitting knowledge tidbits” based on questions I have received in the past and my answers to them, based upon my experiences. I hope you might find some of this info helpful! And if you have any additional ‘assumed knitting knowledge’ that you think should be added to this or that you need answered, I’d love to hear from you!
And for those who prefer watching/listening, I’ve also created a video on YouTube where I review this information (although not as thoroughly as below) – click here if you would like to watch it!
#1: Left and Right are from the perspective of wearing the garment.
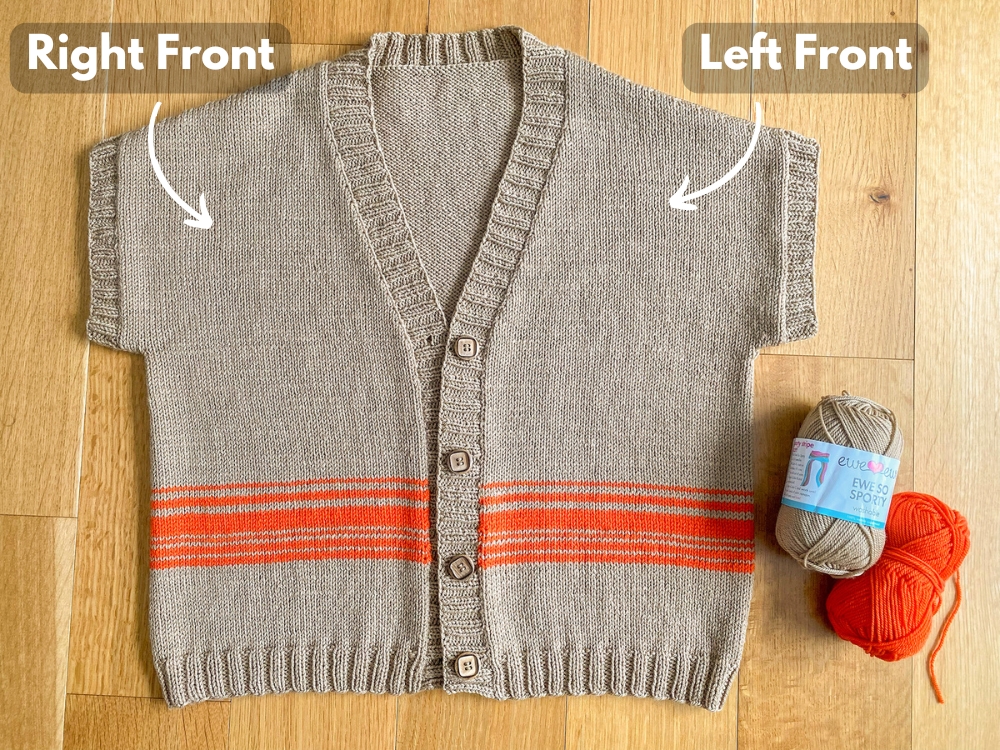
When a pattern is talking about the pieces of a garment such as Left Front or Right Front, it’s not from your perspective as the knitter – it’s from the perspective of wearing the garment.
Important note: this only pertains to pieces of a garment and not when a pattern is giving you directional instructions. For example, if a pattern says to use your “left needle”, that is literally describing the needle that is on the left side, in your left hand. Or if a stitch pattern or technique has been described as “take the stitch that is to the right…”, it’s indeed talking about the stitch that is on the right.
#2: There are 2 main styles of knitting – English & Continental
The 2 main styles of knitting that I’m familiar with are English-style, also referred to as “throwing” and the other being Continental-style, also referred to as “picking”. The main difference between the 2 is that in English-style you hold the working yarn in your right hand and in Continental-style you hold the working yarn in your left hand. And because of this, the maneuvers you work in order to create stitches is a bit different.
The method you use to start off with as a new knitter often just depends on who was originally teaching you how to knit! In different parts of the world different styles can be more common (or had been in the past). But many knitters may learn one way, but eventually switch over to the other method if they try it and find it’s easier for them. Note: I have heard from my left-handed knitters that they have found the Continental-style to be easier for them, since the working yarn is held in the left-hand. I just thought I’d share that in case you’re left-handed and have had trouble with the English-style!
Personally, I’m an English-style knitter so in all of my tutorials you’ll find me knitting in that method, holding the working yarn in my right hand.
#3: Unless otherwise stated, when you slip a stitch it should be purlwise (as if to purl).
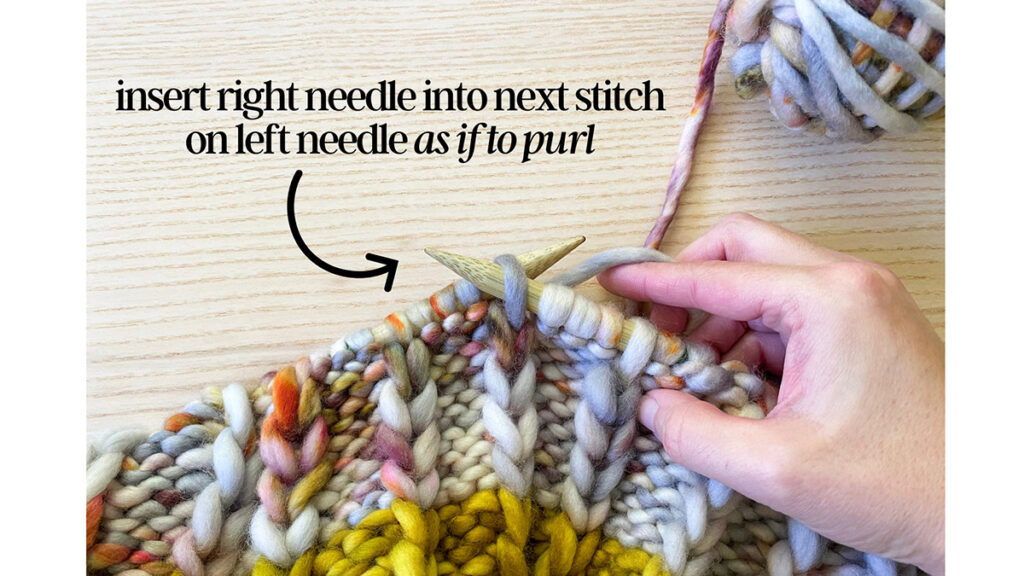
Unless a pattern instructs you otherwise (either in the instructions itself or on a ‘techniques’ or ‘abbreviations’ section), the default method of slipping a stitch is to do so purlwise. And that means simply inserting the right needle into the front of the next stitch on the left needle (just like you would do if you were to purl it), and then you slip it over to the right needle.
This applies to when it says to “slip 1” and no where in the pattern does it say to do so purlwise or knitwise. If a slip stitch is part of a decrease stitch, make sure to check the “Techniques” section because usually it’s slipped knitwise in those cases (such as in a ssk, skp or sk2p).
One important note about this is that the term “purlwise” relates to how the right needle is inserted into the stitch on the left needle – it doesn’t always pertain to where you hold the yarn. Typically a pattern will tell you whether or not the yarn should be held wyif (with yarn in front) or wyib (with yarn in back). In my picture above, although the stitches on either side of the slip stitch are purl stitches (so the yarn had been held in the back of the work), the slip stitch is worked with yarn held in back – otherwise there would be a strand of yarn in front of the slip stitch and that would affect the aesthetic look.
#4: Gauge listed in the pattern is after blocking
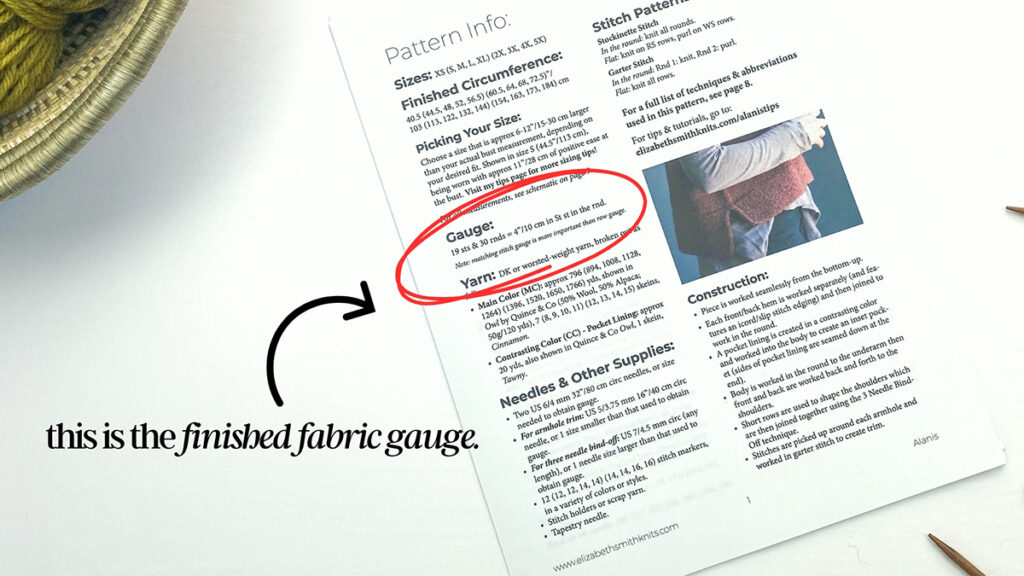
In my experience, unless otherwise noted, the gauge listed in a knitting pattern is after blocking. This is because the gauge listed will be that of the final, finished fabric and so that is typically always after blocking.
This is also why it’s important to block your swatch and measure your post-blocked swatch to make sure it matches the pattern gauge.
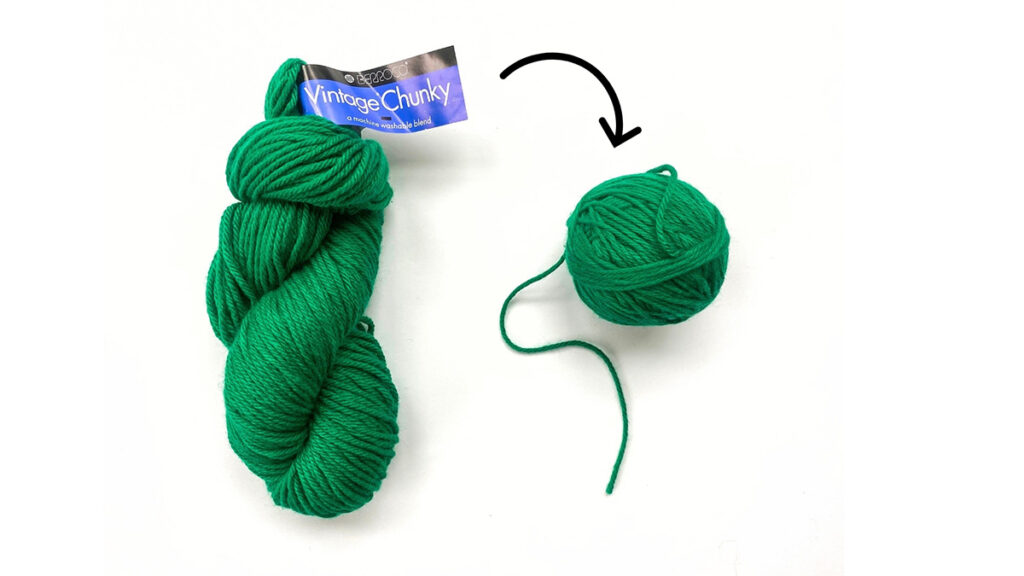
#5: Yarn that comes in hanks need to be wound into a ball before using it
This was definitely one I didn’t realize as a newbie! When you purchase yarn that comes in a big loop (like that pictured above), otherwise known as a ‘hank’, you need to first wind it into a ball or cake -either by hand or using a ball winder/swift. I have a video that shows you 3 different methods you can use for winding yarn – click here to watch!
#6: Pattern yardage amounts include enough for swatching (typically!)
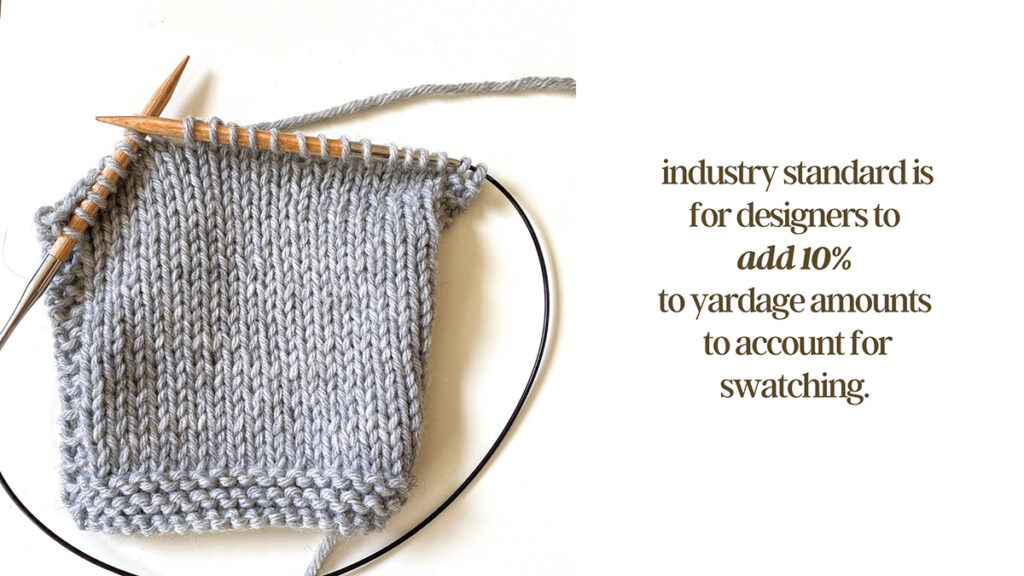
The industry standard is that designers should add approximately 10-15% extra yardage in their yardage requirements in a pattern to allow for swatching. And that is what I do with all of my patterns and so if you are using any of my designs, you can trust that 10% has been added to account for swatching. With that said, there is no way to guarantee that every designer does this, so if you’re not sure then I always recommend getting an extra skein of yarn. I like to call it an “insurance skein”, you know – for ‘just in case’! Plus, if you’re working on a garment, it’s always good to have extra in case you want to lengthen the body or sleeves.
#7: Instructions listed within brackets are considered a “repeat sequence”
When you see instructions such as this: “[k2, p2] to marker“, whatever is inside the brackets is considered a repeat sequence. This means that you repeat the sequence over and over again until the instructions say to stop.
So in the above example, you would repeat the sequence of “k2, p2” over and over again (so k2, p2; k2, p2; k2, p2; etc) until you reached the marker.
#8: Interchangeable needle sets won’t include a 16″ cable because those require a different length needle tip
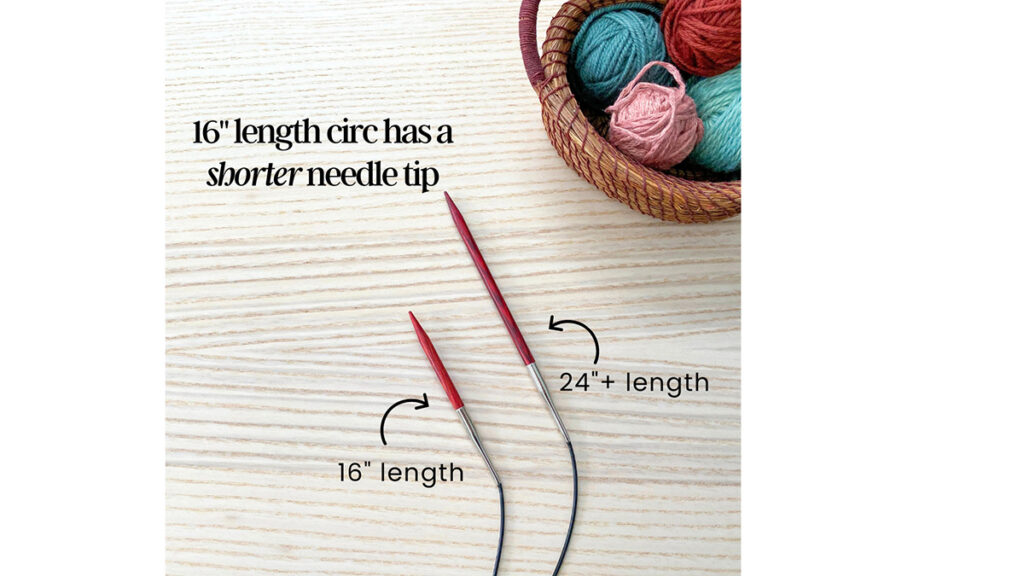
Circular needles that are 16″ length have shorter needle tips than circular needles in 24″, 32″, 40″+ lengths (as pictured above). This is why you won’t find a 16″ length cable in a regular interchangeable needle set (as pictured below):
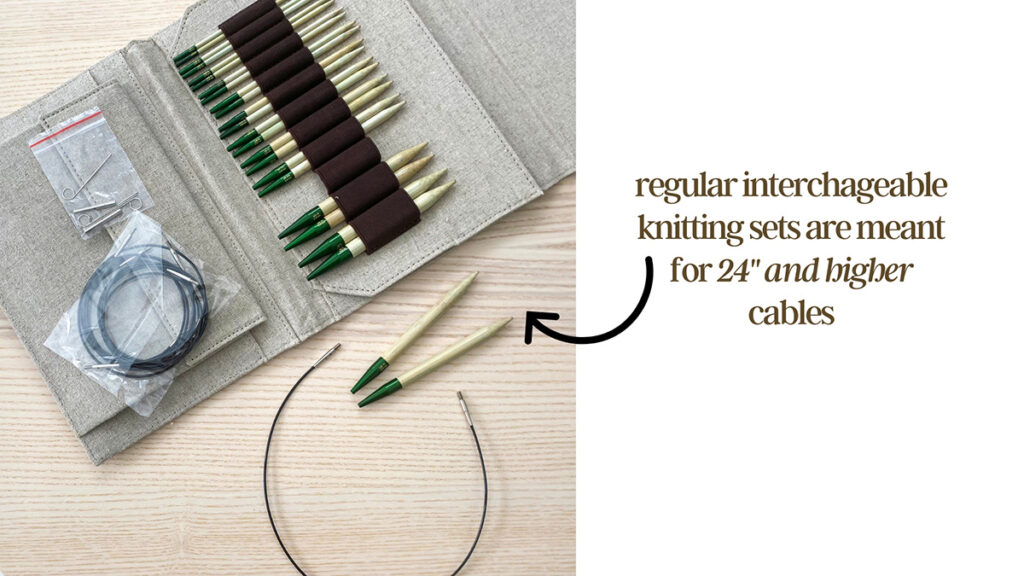
If you want 16″ length you will have to purchase a separate interchangeable needle set that is just for 16″ circulars. I have seen some sets that provide tips and cord lengths for 16″ and 20″, such as this one from Knitter’s Pride.
#9: Use stitch markers that are an appropriate size for your particular needle size
It’s obvious when a stitch marker is too small for a needle – it just won’t fit on! But did you know you should also avoid using a stitch marker that is too big for your needle? This is why a lot of packets of stitch markers provide at least 3 sizes (or sell different sized packets).
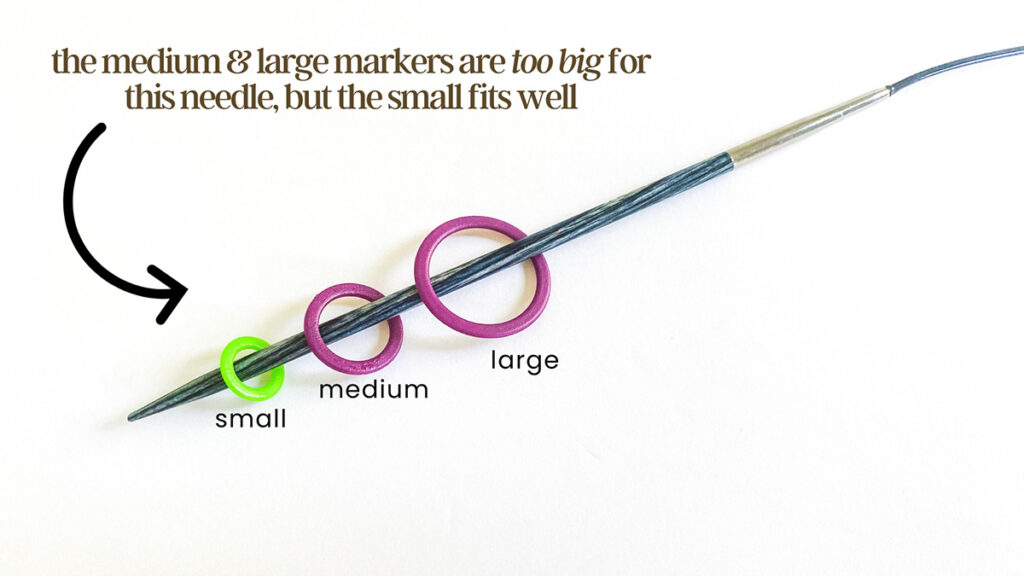
You want the marker to comfortably slide onto the needle but not be so big that there’s a large gap as that can cause a gap between your stitches. I talk more about stitch marker size in this blog post if you want to learn more.
#10: Knitting needles have both a US and a metric sizing label
On any knitting needle I’ve come across in the United States (or needle packaging I’ve seen here), the size of the needle is provided and you’ll notice that there are always two sizing labels – a “US” number and a millimeter metric number. Why? Well from what I understand, back in the day US needle manufacturers didn’t want to adopt the metric system of Europe and so they created their own system. The metric number provides the actual millimeter circumference of the needle size whereas the US number isn’t an actual measurement (at least not one that I’m aware of – if you know more about this topic I’d love to hear!)
Personally I think the metric system just makes more sense since it’s an actual measurement! But regardless, these are the systems we have. Below is a conversion table that shows what the US size is for each of the metric sizes should you want to know what the conversion is between the 2 different systems.
Knitting Needle Conversion Table – Metric to US:
| MM SIZE | US SIZE |
|---|---|
| 2.00 | 0 |
| 2.25 | 2 |
| 2.75 | 2.5 |
| 3.00 | 3 |
| 3.50 | 4 |
| 3.75 | 5 |
| 4.00 | 6 |
| 4.50 | 7 |
| 5.00 | 8 |
| 5.50 | 9 |
| 6.00 | 10 |
| 6.50 | 10.5 |
| 7.00 | 10.75 |
| 8.00 | 11 |
| 9.00 | 13 |
| 10.00 | 15 |
Note: as I mentioned, these are the 2 main sizing label systems I’ve seen here in the U.S – perhaps other manufacturers in other parts of the world have additional sizing labels as well.
I hope you have found these tidbits helpful! Do you have any other knitting topics that you feel fall under the “assumed knitting knowledge” umbrella? Let me know and I can add them in a future “part 2” list!


