
Although not every knitting design can easily be altered, there are some that can be the perfect blank canvas for lots of different types of alterations. Whether it’s aesthetic (such as changing the stitch pattern) or structural (such as changing the fit), some patterns allow even more beginner knitters to easily alter certain aspects in order to make it truly their own.
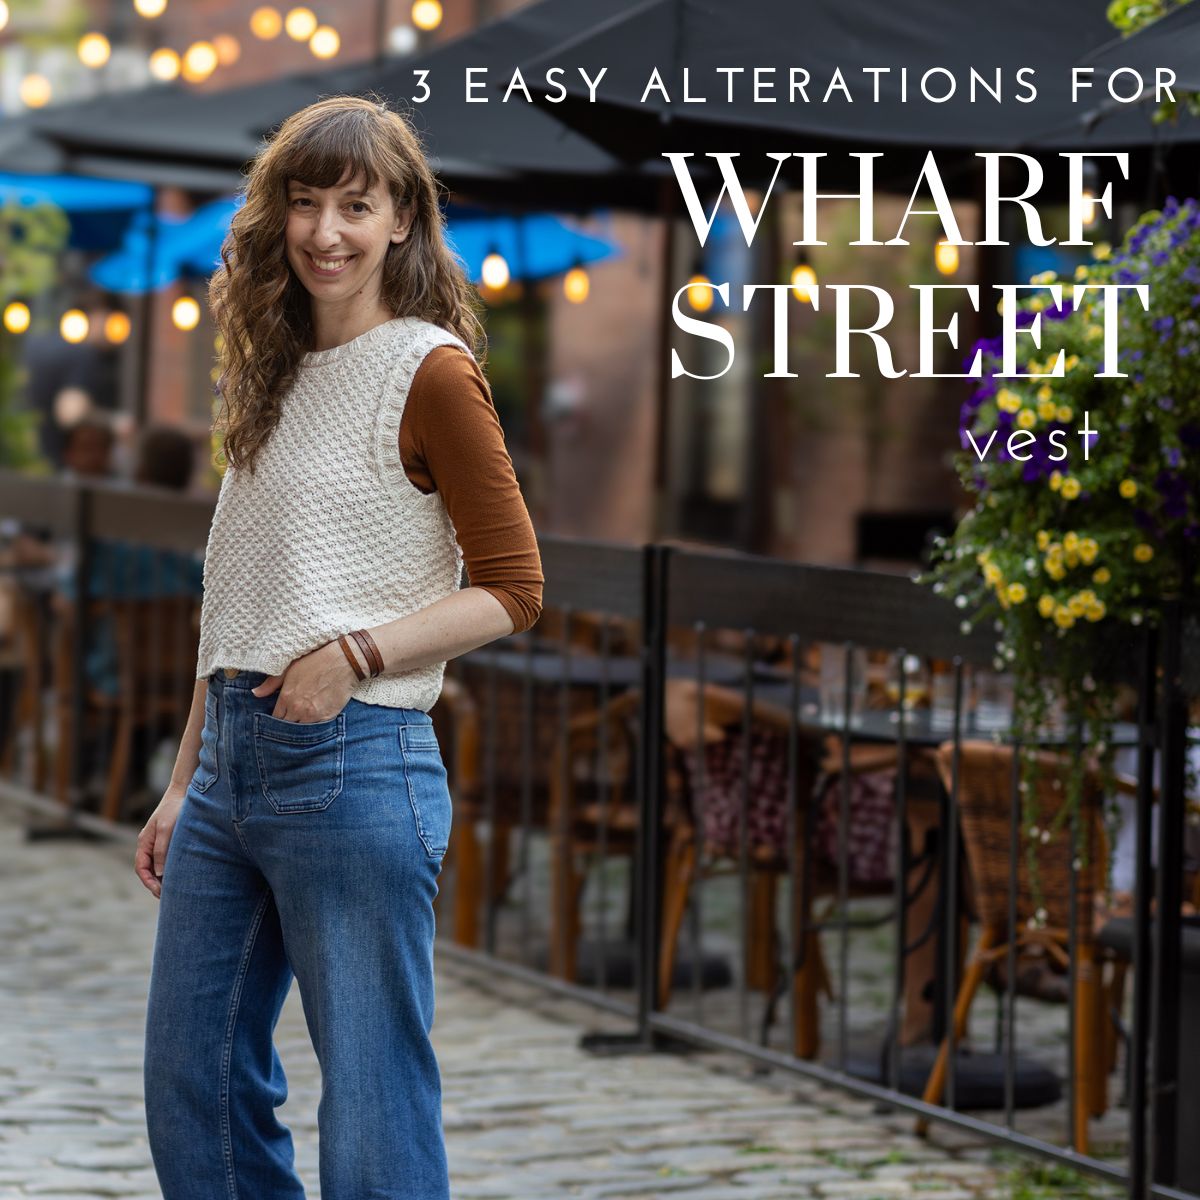
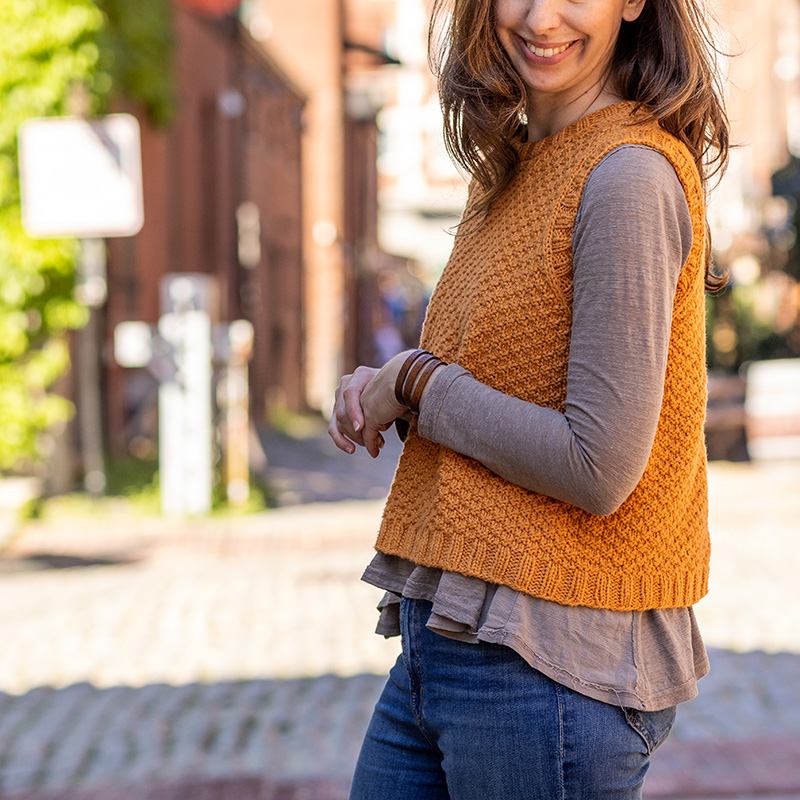
One of those patterns is my Wharf Street vest. Below are a couple more photos of this design:

Thanks to it’s simple construction and design elements, there are lots of different easy alterations you can make to this vest. Below are just 3 in particular that may inspire you to take an “alternative route” to Wharf Street!
Alteration #1: Make it stockinette stitch!
A big alteration you can make to Wharf Street that is surprisingly easy is replacing the featured “box stitch” pattern with plain stockinette stitch.
If texture isn’t your thing, or you want to use a variegated yarn and know that the texture won’t show up well anyway, you can definitely consider knitting this vest in plain stockinette stitch instead!
I have 2 examples to show of this from some of my preview/test knitters. Marsha recently finished this version knit out of the yarn Tillie by Berroco (a chainette-constructed yarn that is light and airy):
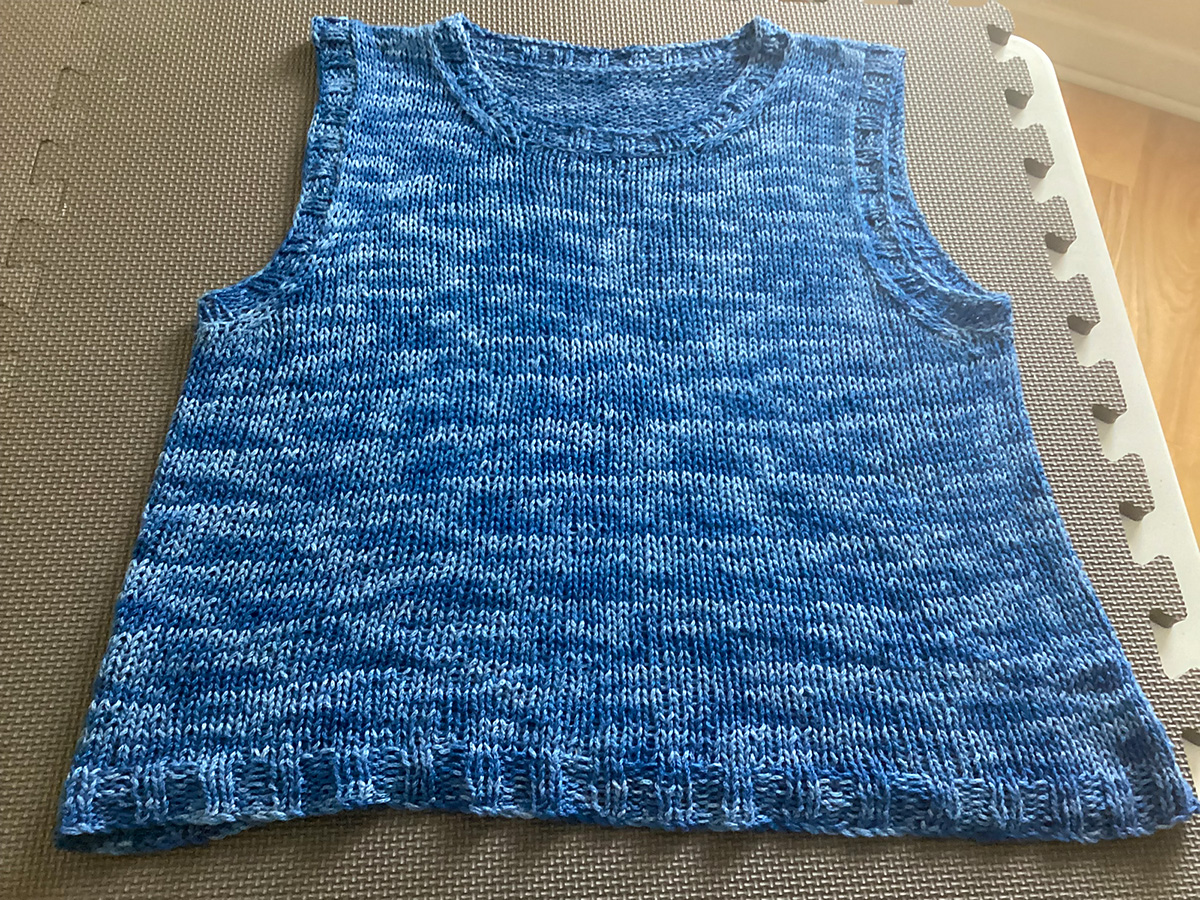
It’s variegated so it looks so great in just plain stockinette stitch. And, although Tillie is a DK-weight, she knit it on a US 9 to get pattern gauge – this created a much looser fabric but that totally works for plain stockinette stitch.
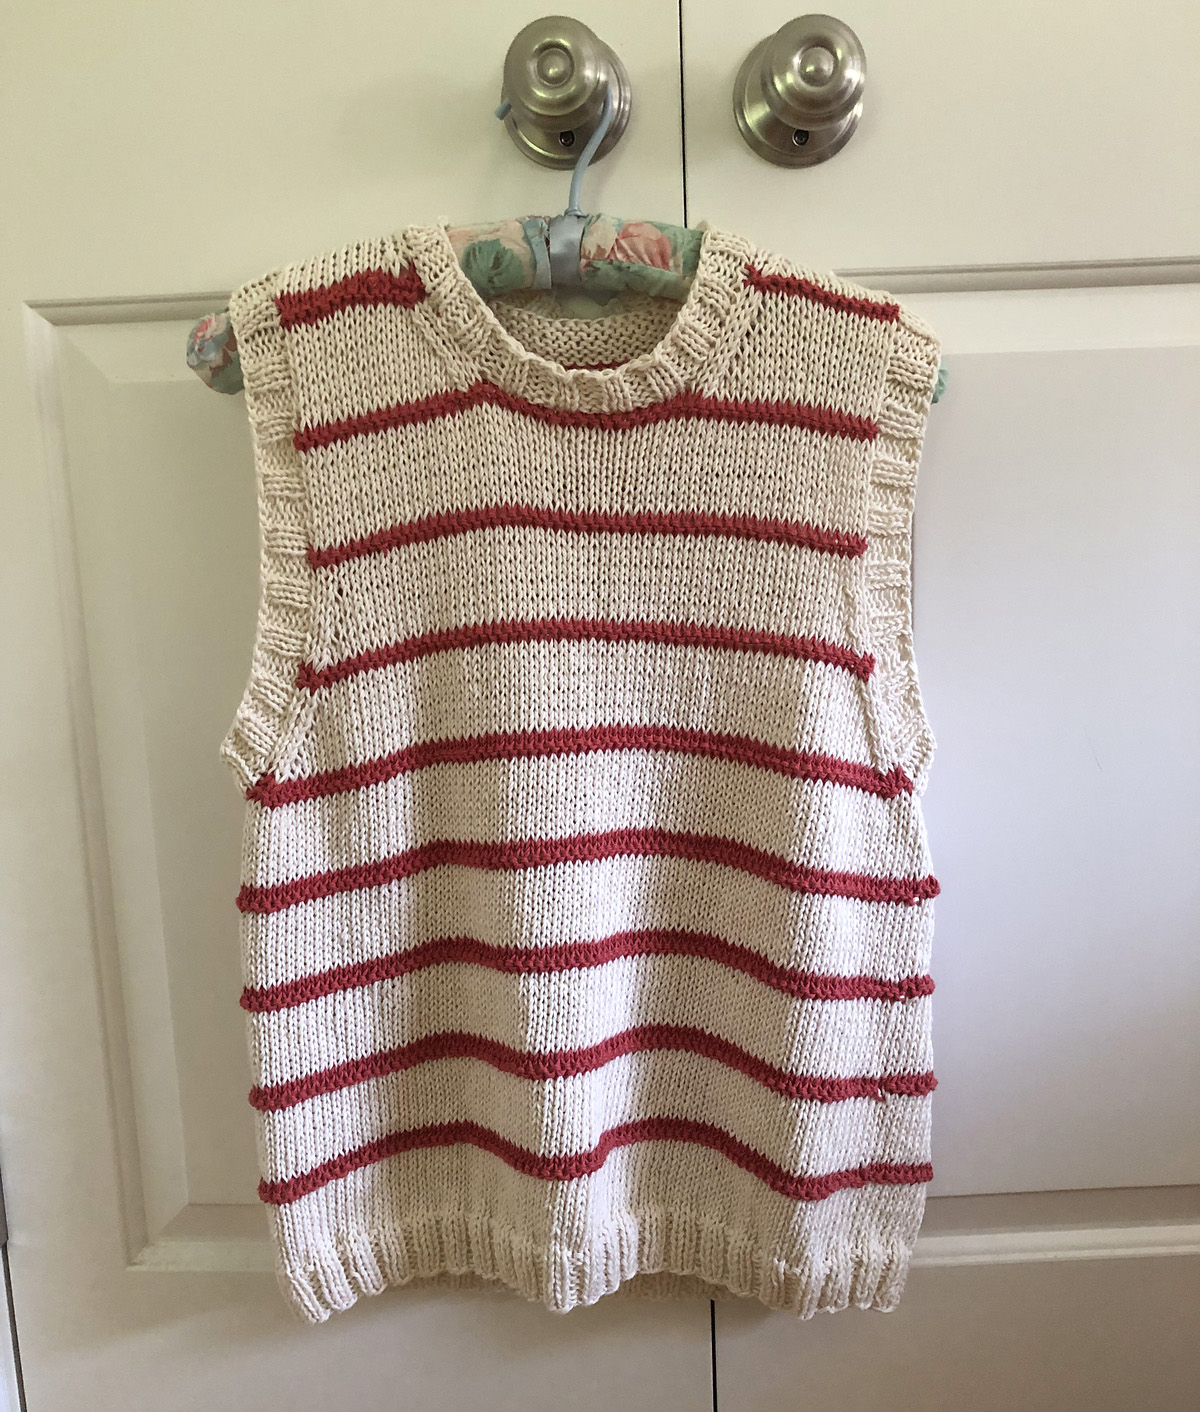
Another example is by Lee who made one in stockinette stitch as well. She used a cotton yarn and incorporated some stripes as well:
So how do you adapt the pattern to stockinette stitch? It’s easy, I promise!
So long as you get the pattern gauge, you can simply omit all references to the box stitch and replace it with plain stockinette stitch. Here are more specific tips on how to do this:
- Do your gauge swatch in stockinette stitch in the round (here’s my video lesson about it).
- Work the hem as instructed in the pattern.
- For the “Body” section, simply work in stockinette stitch in the round instead (so knitting every round).
- In the “Underarm Divide” row, whenever it says to purl just knit instead.
- For the remainder of the pattern (where you’re working the upper front and upper back), you’ll just work in stockinette stitch flat. So on RS rows, replace all the purl stitches with knit stitches and on WS rows, replace all the knit stitches with purl stitches.
Alteration #2: Make the body longer or shorter
This alteration is super easy because I kept the body silhouette nice and simple. In the “Body” section of the pattern, I say to repeat rows 1-4 until the body measures 11” from the cast-on edge, or until your desired length. So you can simply repeat these 4 rows more or less times and end at whatever length you would prefer.
If you plan to make it longer, I have figured out exactly how much extra yarn you should plan to purchase – here are the estimated extra yardage amounts: 35 (35, 40, 45, 45) (50, 55, 60, 60, 65) yds
Another thing to keep in mind when determining your length is that “hem to underarm” isn’t always exactly to your actual underarm – where your underarm falls depends on the fit from shoulder to underarm. Learn more about this concept in this blog post.
Alteration #3: Deepen the neck depth
Wharf street’s neckline sits relatively high up – before adding the rib trim it measures just under 3” down from the top of shoulder. If you prefer a lower neckline (either due to your preferred fit or if you want to wear it with a collared shirt underneath), you can deepen this neckline fairly easily.
One of my test knitters, Susan, had done this to her Wharf Street – she added 6 additional rows to her neck depth and this allowed more room for layering at the neck:
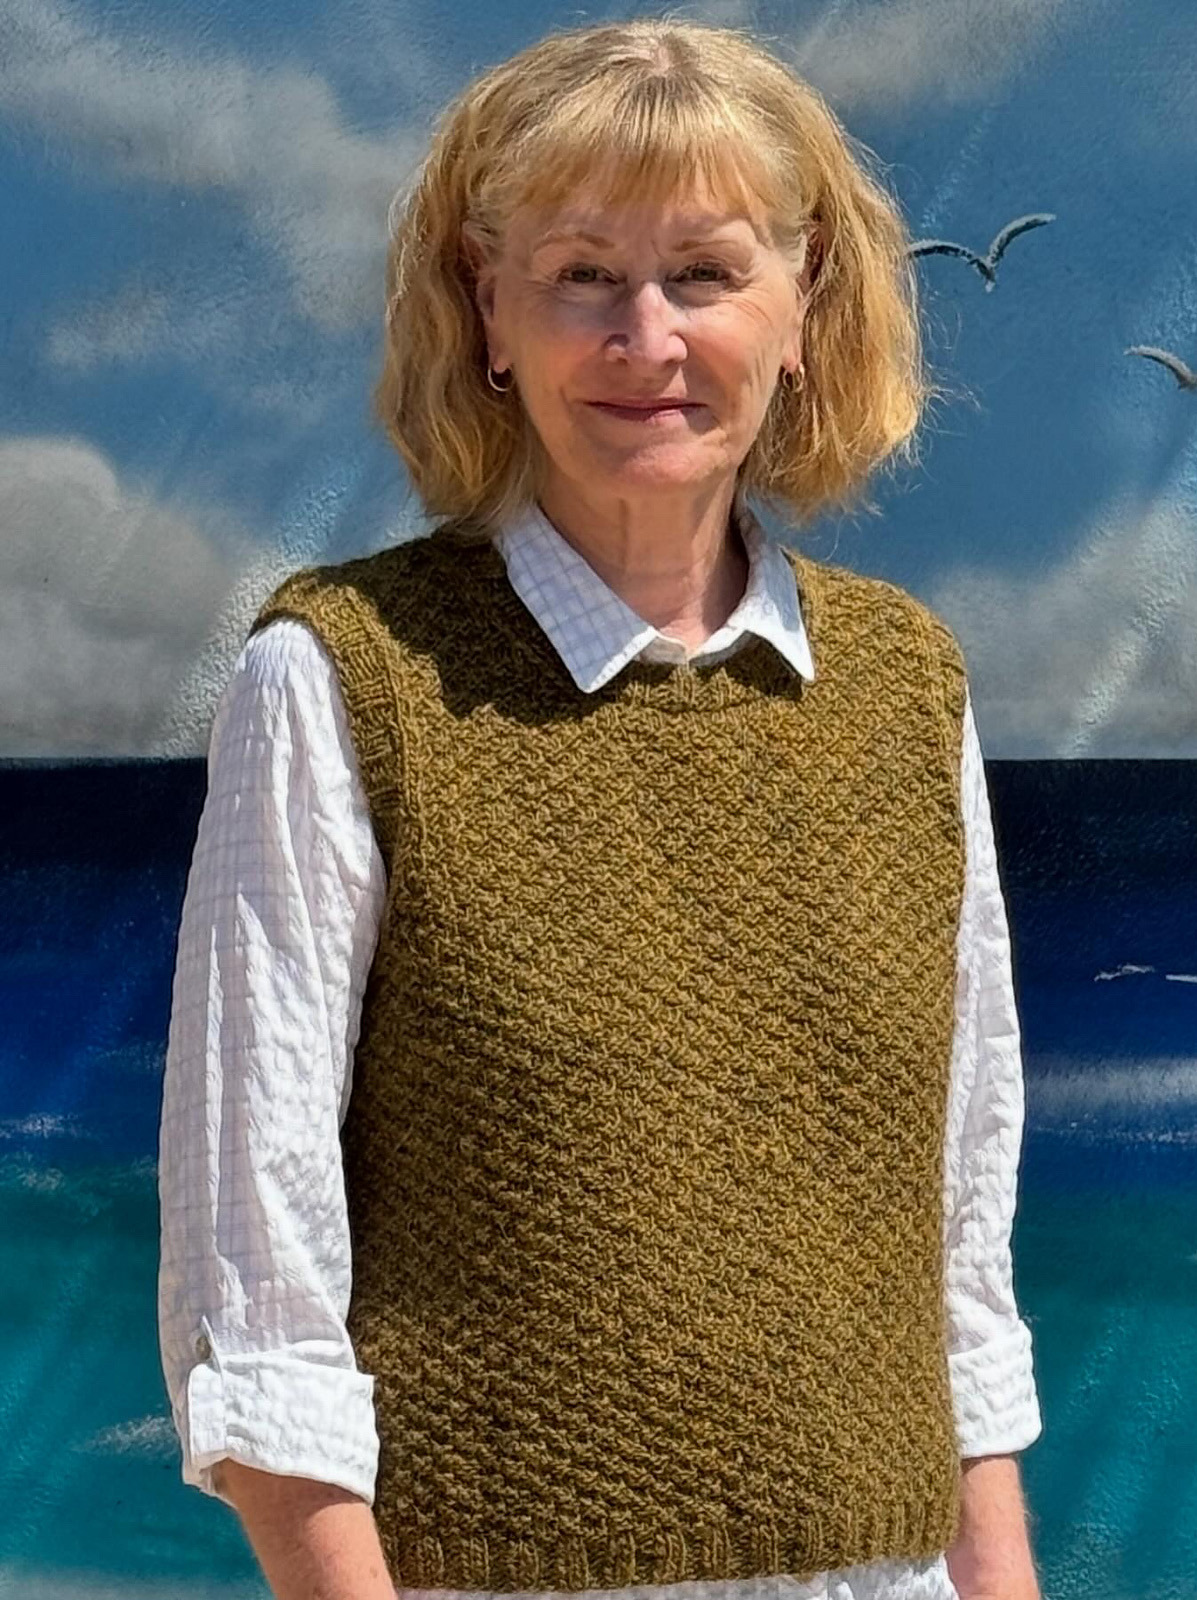
For details on exactly how to do this, check out my Wharf Street Tips page link here.
I hope these 3 alterations have inspired you to perhaps make your own Wharf Street vest in the future! For pattern details, click here for my website or here for the Ravelry page.