Ah swatching. It’s rarely anyone’s favorite thing to do but it’s such an important step in the process, especially for garment knitting. In this blog post I won’t go into all of that (although if you want to know more about why you should swatch and how to measure your stitches & rows in a swatch, click here!) – in this blog post we’re going to keep it simple and assume you already know you should swatch, but just want an answer to the simple question ‘How big should my swatch be?‘
The simple answer? Aim for atleast a 6″ square.
Your knitting pattern will almost always list the pattern gauge as a certain number of stitches and rows = 4″. For example, it may say 18 stitches & 26 rows = 4″ in Stockinette Stitch. This does not mean that you cast-on 18 stitches for your swatch (although I totally understand why many people interpret it that way!). It means that when you measure across 4″ in your Stockinette Stitch swatch, that you should be getting 18 stitches within that 4″. So that means your swatch needs to be bigger than 4″ to ensure you have enough fabric to measure across. I usually tell people to aim for 6″ wide at a minimum – this gives you 1″ on either side as buffer. As a range, a 6-8″ swatch is ideal.
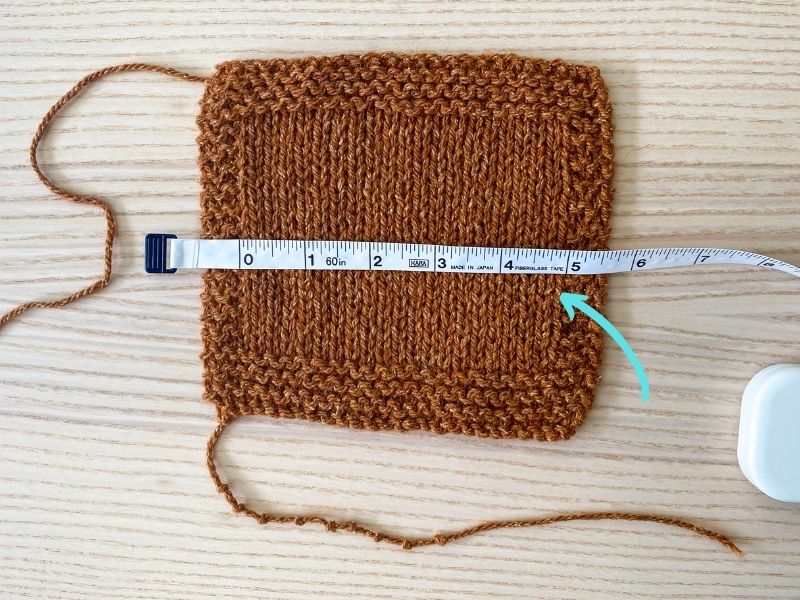
In the above swatch, the overall width is around 6″, with 1/2″ of garter stitch border on either side, so I have 5″ of Stockinette stitch. Within that 5″ I can measure to see how many stitches I’m getting over 4″. And the same goes when you measure your length/row gauge.
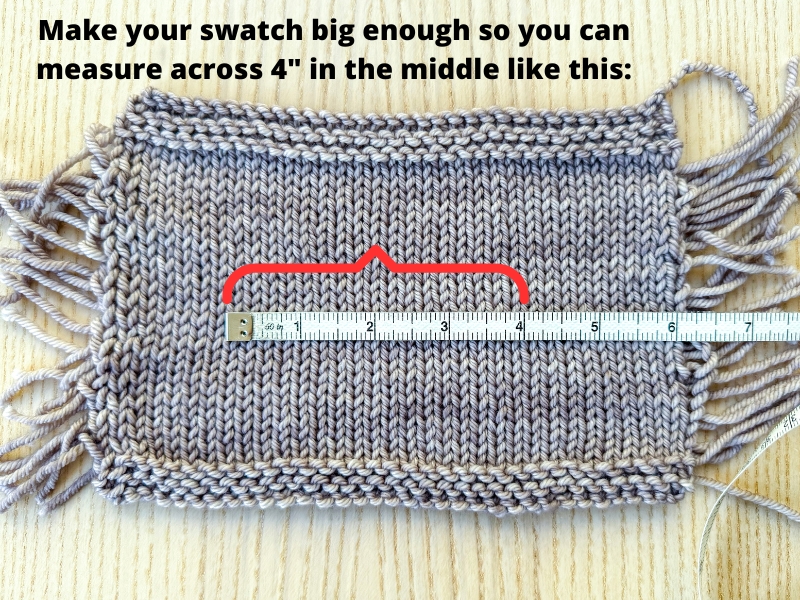
Here’s another picture, this time a swatch done in the round (click here for more details about how to swatch in the round). This swatch is also approximately 8″ wide and as you can see, I’m able to measure across 4″ in the middle of the swatch (and have about 2″ worth of fabric on either side of my measuring area).
For in the round swatches, aiming for a 7-8″ length is more ideal because the edge stitches may be even more distorted due to the technique used in creating an in-the-round swatch. So in my experience, I find I get the most accurate results by making an 8″ swatch and measuring in the inside of it.
So if I want a 6-8″ swatch, how many stitches exactly should I cast-on?
Step 1: First, figure out your pattern’s per inch stitch gauge. Going back to our example, if a pattern’s gauge is listed as 18 stitches = 4″, then the per inch stitch gauge = 4.5 stitches (you just take 18 and divide it by 4).
Step 2: Second, take your per inch stitch gauge and multiple it by 6″ (your minimum swatch width). In this example, 4.5 stitches per inch multiplied by 6″ = 27 stitches. So at a minimum you want to cast-on 27 stitches for your swatch. If I multiple it by 8″ I get 36 stitches. So in this example, for a flat swatch I’d suggest casting on 28-30 sts and for an in-the-round swatch I’d recommend casting on 34-36 stitches.
What if the pattern gauge is not in Stockinette stitch?
When your pattern gauge says it’s worked in Stockinette stitch (or Garter stitch), then you don’t have to worry about the exact number of stitches you cast-on because it’s not a stitch pattern that requires a certain multiple (such as multiple of 2, or 4, or 4+2) – it’s up to you the exact number you actually cast-on. Like in the above example, I could choose to cast-on any number between 27-32. But what if your pattern gauge is a different stitch pattern, such as a rib, or a slip stitch? Then you will want to look for the stitch pattern multiple listed in the pattern!
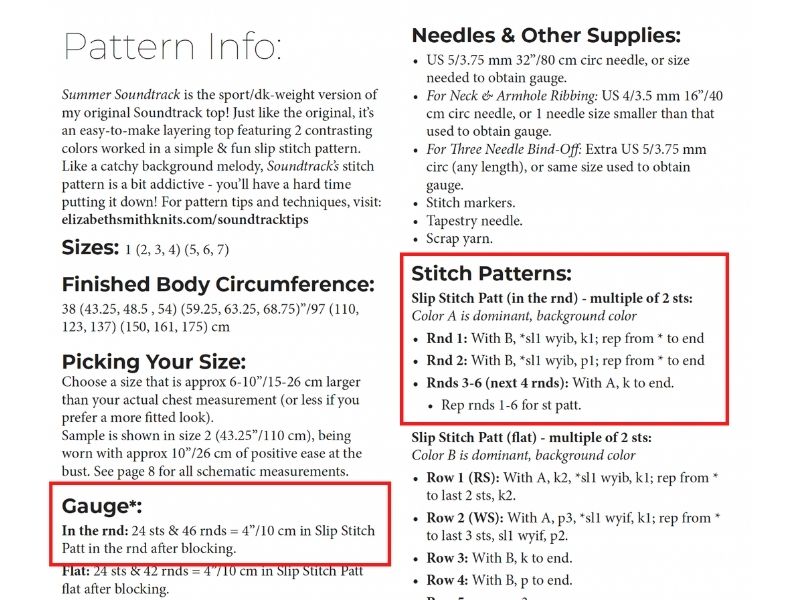
On the Pattern Information page, look for the area where it outlines what the stitch pattern is and what the multiple of stitches is. Below is an example from my Summer Soundtrack pattern. As you’ll see, in the “Gauge” area, the stitch pattern for the gauge is “Slip Stitch Patt (pattern)”. So then you look over at the “Stitch Patterns” area and see that the Slip Stitch Patt is a multiple of 2 stitches. So you need to make sure that the number of stitches you cast-on is a multiple of 2.
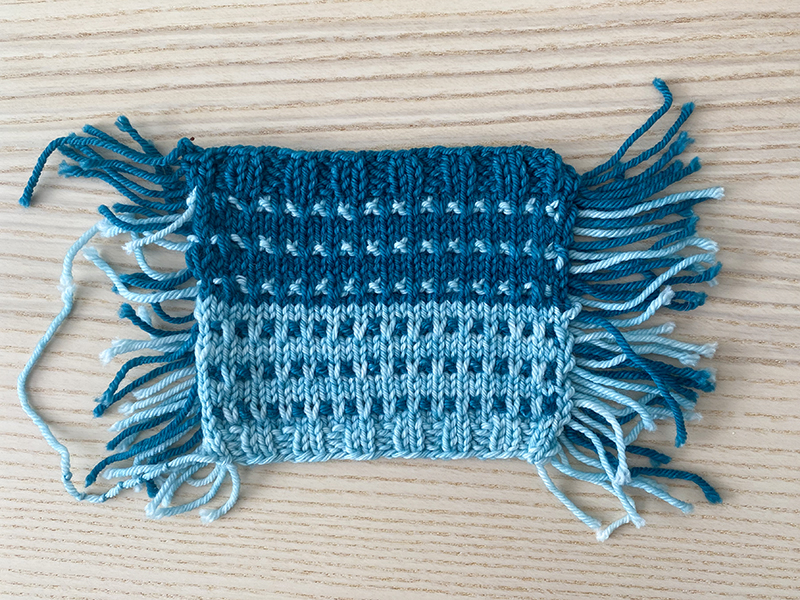
Here’s a picture of what my swatch looked like in this stitch pattern.
I hope this information about how many stitches to cast-on is helpful and that you’ll find it useful the next time you’re ready to swatch! If you have any follow-up questions, feel free to reach out.

