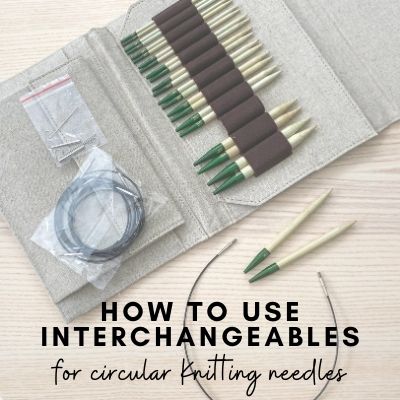
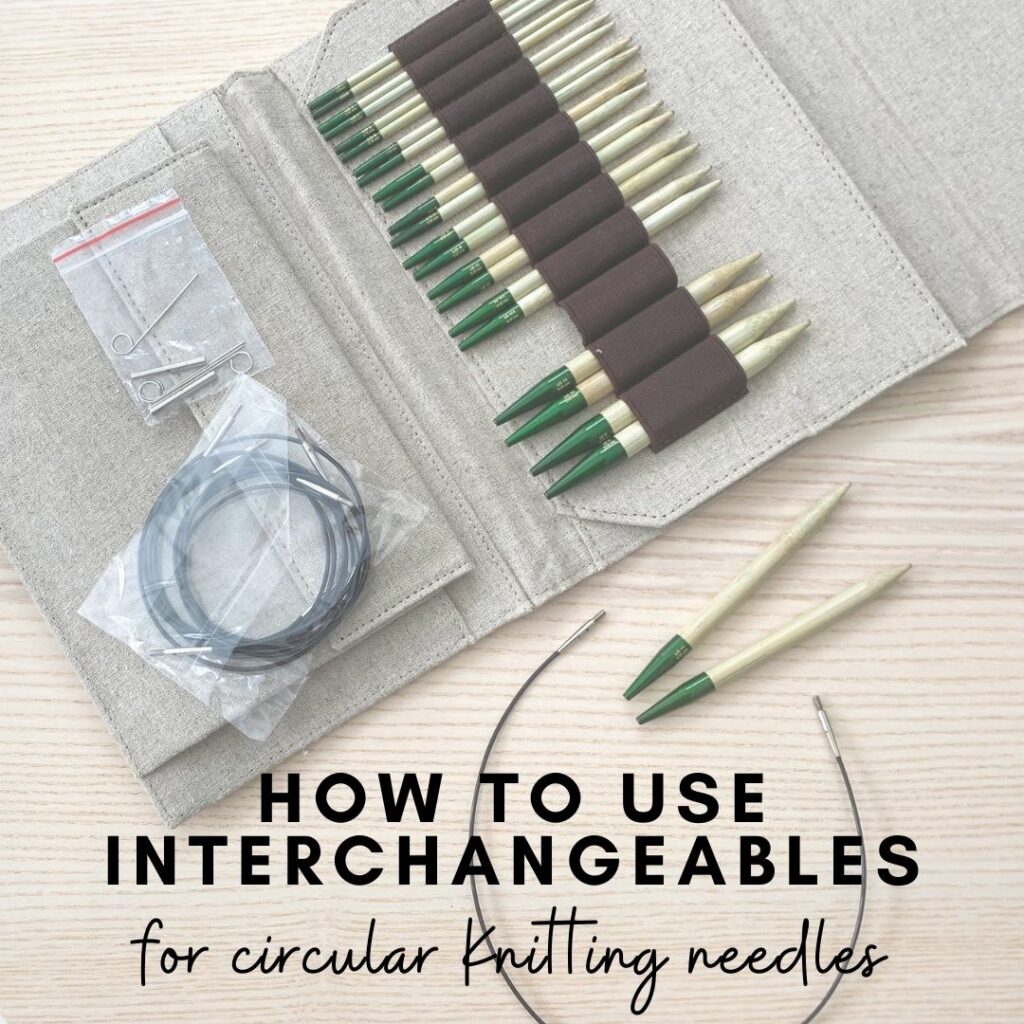
Almost all of my knitting is done on circular needles, so I thought it might be helpful to talk a little bit about interchangeable circular needles – the pros, cons, and how exactly you put them together! I also share a tip I have about how to untwist twisty circular cords (for interchangeables or fixed circulars!).
What are interchangeable needles?
So you know how with a “fixed” circular needle, you have the needle tip part which is in a particular needle size (say, a US 8), and then there’s the cord length, such as 24″ or 32″. In an interchangeable needle, the tip part and the cord part are each sold separately and you can mix and match different tip sizes and cord lengths. They are attached together by screwing in the needle tip to the cord tip and then reinforced together using a little tightening tool.
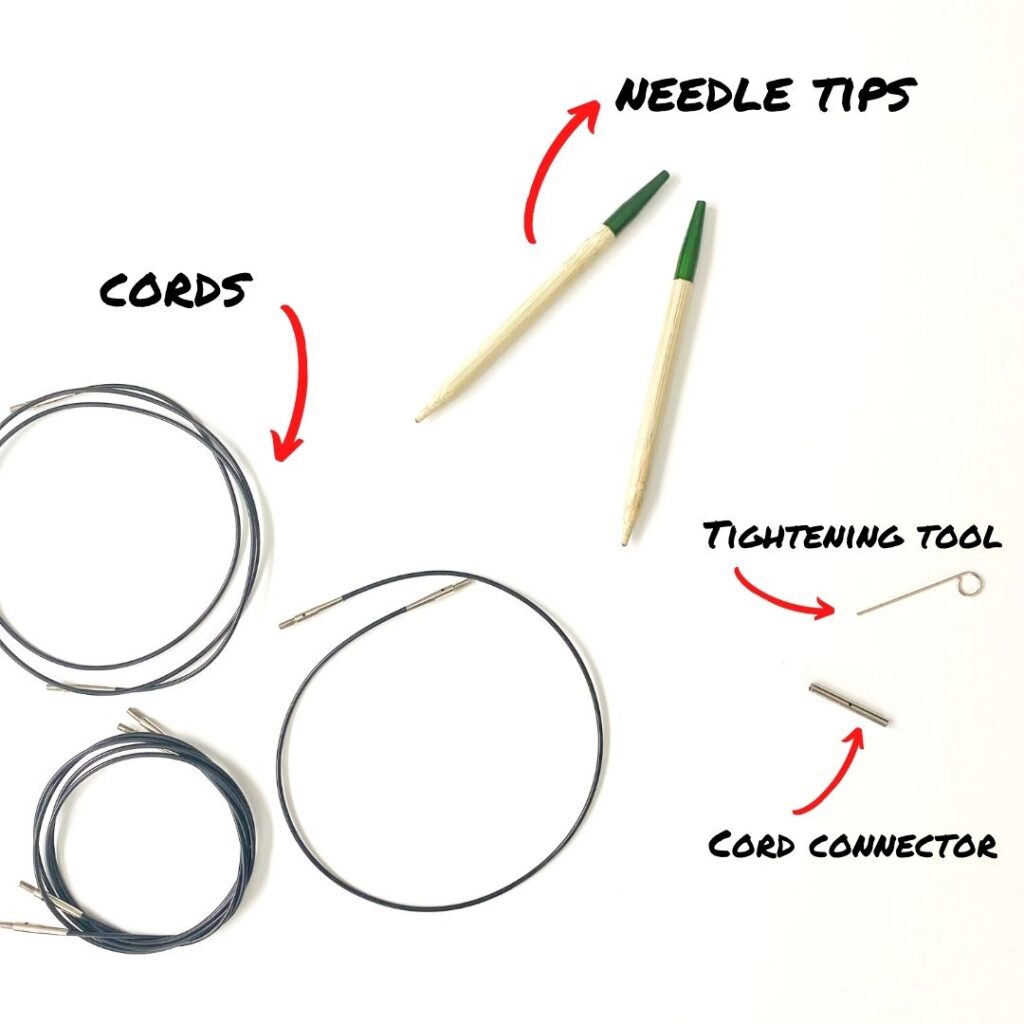
What are the different parts involved with interchangeable needles?
Needle tip: Available in almost all sizes, and in two lengths – short tips for 16″ cord length or less, and regular tips for 24″ cord length or higher.
Cords: Different length cords can be purchased individually or as part of a set. Note: often the cord length listed is what the final length will be once tips are attached (i.e, a 24″ cord will measure 24″ from tip-to-tip once the tips are attached).
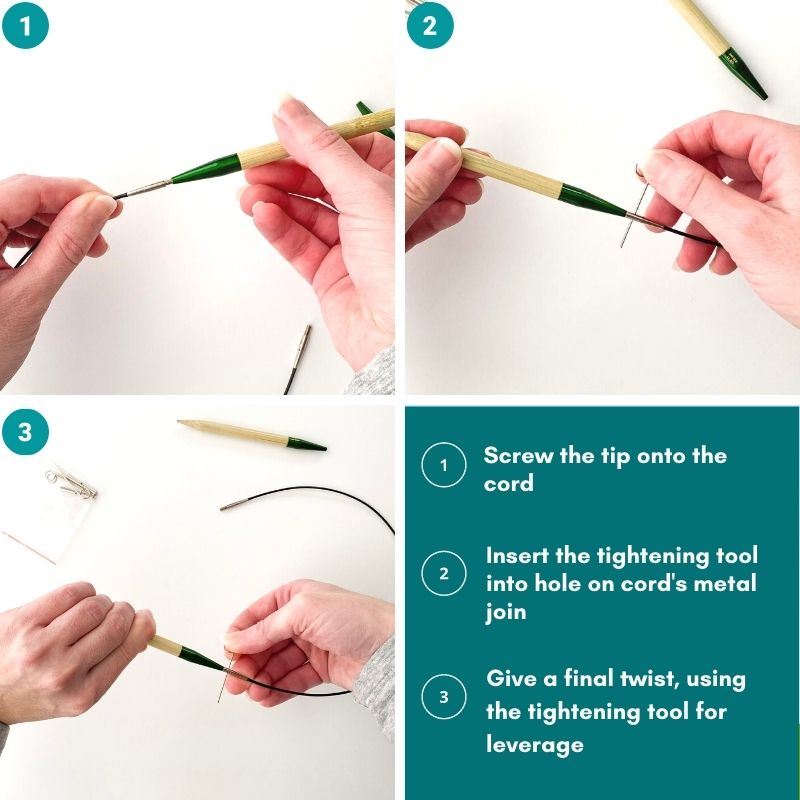
Tightening tool: This is inserted into the hole in the cord’s metal join and helps to give you leverage as you do your final twist to tighten the join.
Cord Connector: Need a super long circular, such as for a blanket? You can connect different cords together to create this by using this cord connector.
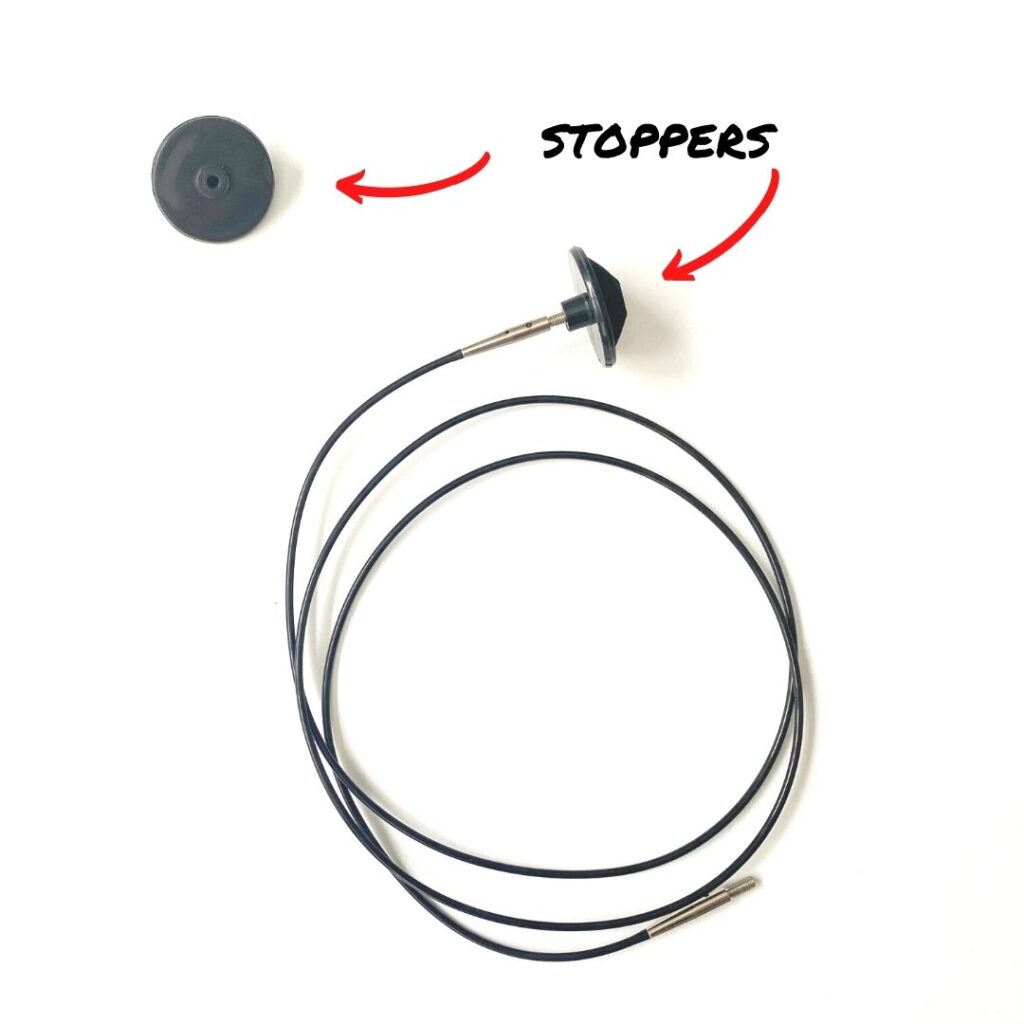
Stoppers: These allow you to remove needle tips from a project while keeping the project on the needles (if you want to use the needle tips for a different project temporarily). In the photo above I’ve just shown how they are put on the cords (but you would only use them if you actually had a project on the cord!).
What are the advantages?
Cost
First, there’s the cost factor. Instead of having to buy multiple fixed circular needles in different lengths, you just have to buy 1 needle tip (which is around the cost of 1 fixed needle) and multiple cord lengths (cords are inexpensive and can be used for any needle tip size). Interchangeable needle sets can be pricey (usually in the $75-$150 range depending on how many tips are included), but if you break it down by how many combinations you can make, it’s actually much less expensive than buying individual fixed circular needles.
Convenience
Especially if you buy an entire set, it’s super convenient to always know you have every possible needle size you may need. This is especially helpful when you’re swatching and perhaps unsure of what needle size you might need for a project. It’s also great if you travel a lot (at least in a post-Covid world!) – you just grab your set and you know you have all the possible needles you might need.
Versatile Use
One cool thing about interchangeables is that it allows you to put 2 different needle size tips on each end. Why on earth would you want to do this? When I am working seamless garments where the body is worked in the round but the yoke is worked flat, I often will work the flat section with 2 different needle sizes to account for gauge discrepancies. If you are using interchangeables, you can do this easily with 2 different tips – check out my blog post here for more details about this trick!
You can purchase tips individually or as a set
You don’t have to purchase an entire set to try out interchangeables – they sell the tips and cords separately too! So if you want to try it out, it can be a relatively inexpensive test to see if it’s something you want to invest more into.
What are the disadvantages?
Assembly
You can’t just grab a needle and get started – there is a little bit of assembly required. It’s not hard by any means – you just have to screw the tip in and then reinforce the join with a little tool – but it is an extra step. I do have a photo tutorial below that walks you through this assembly process.
Limitations
If you tend to knit with similar needle sizes for most of your projects (say you love bulky projects and are always on US 10’s), AND you tend to have multiple projects going on at the same time, then interchangeables lose their cost-saving advantage because you’ll likely need multiple tips of the same size. Sets do sell “stoppers” that allow you to take needle tips off a project while allowing the project to remain “resting” on the cord (so you can use the tips for another project).
Mechanical/Joining Issues
This is probably the biggest complaint I’ve experienced and heard about. There can sometimes be mechanical issues where something is off with the threads and it won’t screw in properly. Or, it screws in fine but the join between the cord and the tip is not as seamless as it should be and if it’s dramatic enough, the yarn can catch on it. I will say though that most brands are really good about replacing defective parts should you encounter these issues, and many brands have really improved these issues over the years as well (and issues such as catching joins can be found on fixed circulars as well, so there is no guarantee with that particular problem).
16″ Cord Length Issue
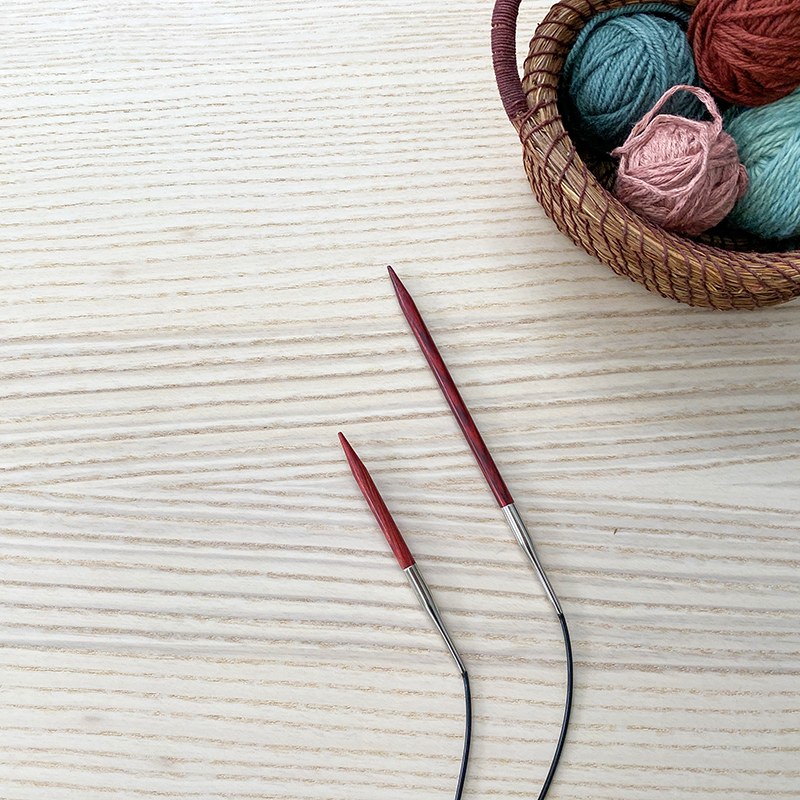
If you look at any of your fixed circulars, the needle tip on a 16″ length is always shorter than the other lengths. In my photo below, both of these tips are US 8 – but the shorter one is on a 16″ cord and the longer one is on a 24″ cord:
So, this means that if you want to use interchangeables for 16″ lengths, you need a completely different needle tip than for any of the other lengths. This is why there are separate sets sold for short tips.
So which option is best for you?
As you can see, there are pros and cons to interchangeables. Personally, I use both. I have a set that I will use from time to time and would often use when I traveled. But because I often knit multiple projects at the same time on similar needle sizes, I have found I more often use fixed circulars. But everyone’s knitting needs are different and you may find that at least purchasing a few individual interchangeables needle tips might work well for your knitting tool box. Trying one out as a test is always a great option to see how you like it – you never know, it may become your favorite type of needle!
How to Assemble an Interchangeable Needle
Below is how I typically will put it together. It’s always a good idea though to consult the instructions that come with your interchangeable just to be sure they don’t have a particular method they recommend based on their needle type.
Screw the tip onto the cord all the way. Then insert the tightening tool into the hole on the cord’s metal join and give the needle a final twist, using the tightening tool for leverage so that the final twist is nice and tight.
Tip: How to Untwist a Twisty Cord
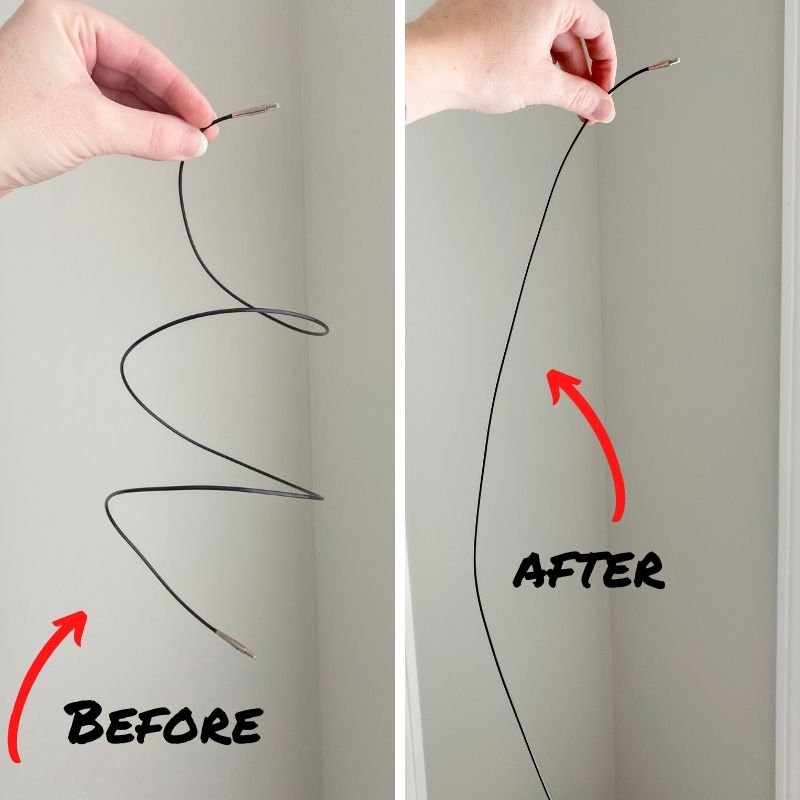
Have you ever had a way-too-twisty cord on your circular? I find it can be a common issue with interchangeable cords due to how they are packaged, but it can happen with fixed circulars as well. Regardless if it’s fixed or interchangeable, here’s how I got this twisty cord to go from the “before” photo to the “after”!
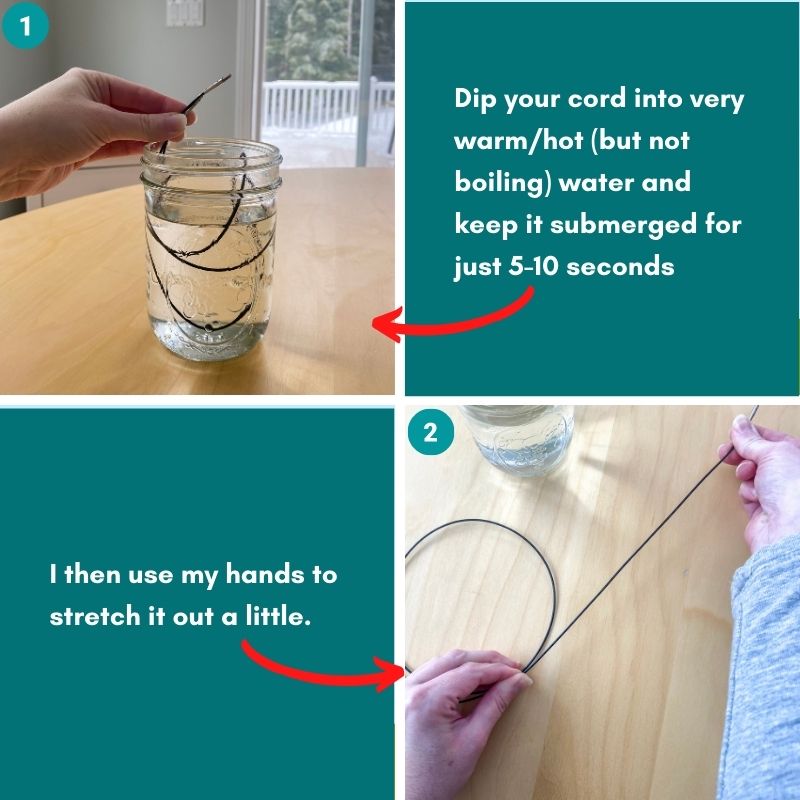
The trick is submerging the cord in hot water – the heat will relax the cord help get the kinks out.
I usually microwave a glass of water for about 1.5 minutes, or you can heat up water on your stove too – the key is just to make sure it’s hot but not boiling (as boiling water can potentially melt the cord!). I then submerge the cord for about 5-10 seconds, making sure not to dip the metal join (or if you are relaxing a fixed circular, I’d advise not to dip the needle tips either). Then I take it out of the water and use my hands to stretch the cord out a bit. You can repeat these steps a couple of times if it doesn’t seem to take the first time.
This may not work for all scenarios, but I have found it at least untwists the cord enough to make it easier to work with.
I hope this information and tips has been helpful! If you have any follow-up questions, feel free to reach out.

