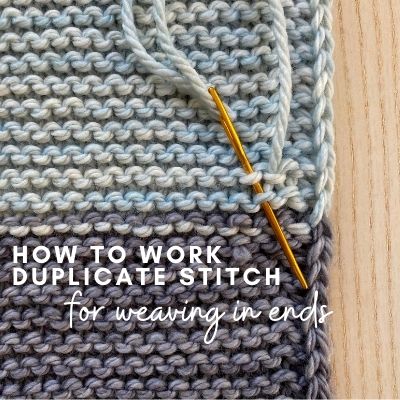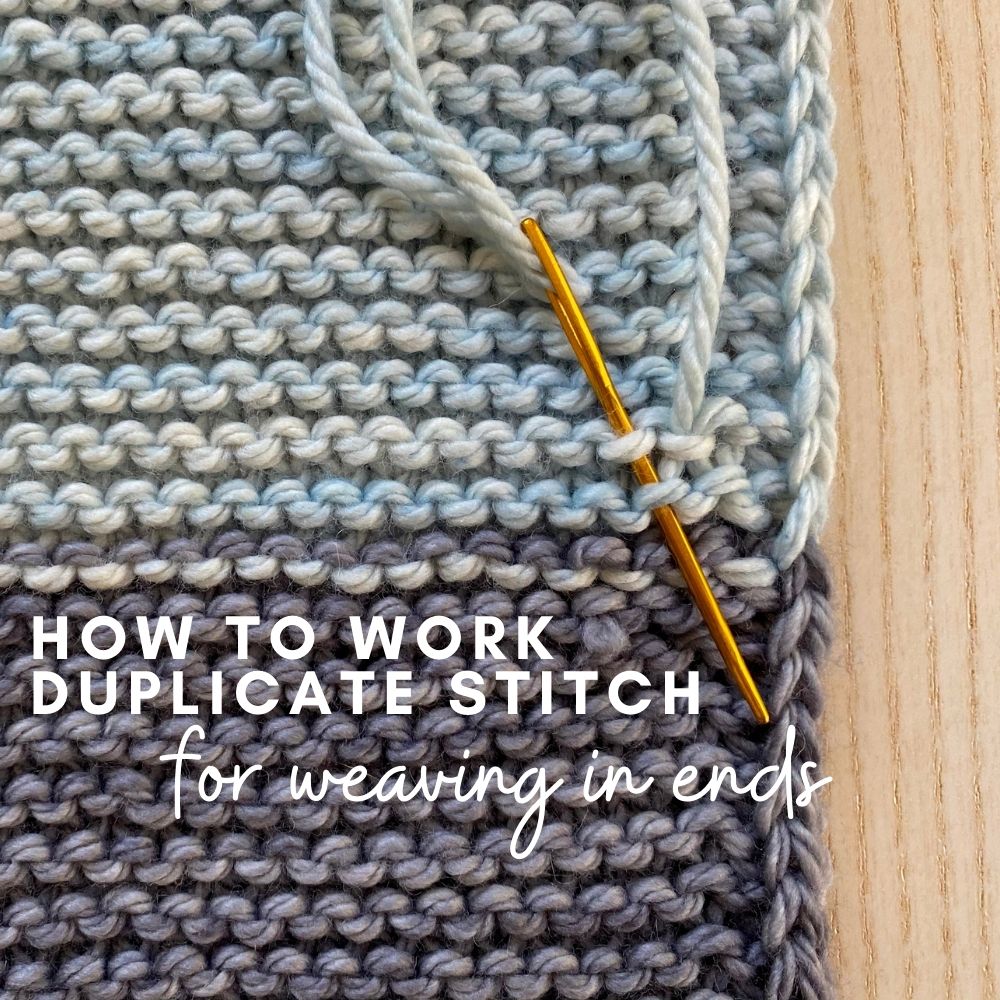
One of my favorite techniques for weaving in ends is the duplicate stitch. When using this method for weaving in ends, you are sewing your end in following the path of the stitches in your work. So I find that it’s one of the most invisible ways to weave in your ends!
Below is a photo tutorial of using this technique when weaving in an end in Garter stitch fabric
(and then below are photos that show it on the wrong-side of Stockinette stitch – the technique is the same for either type of stitch pattern).
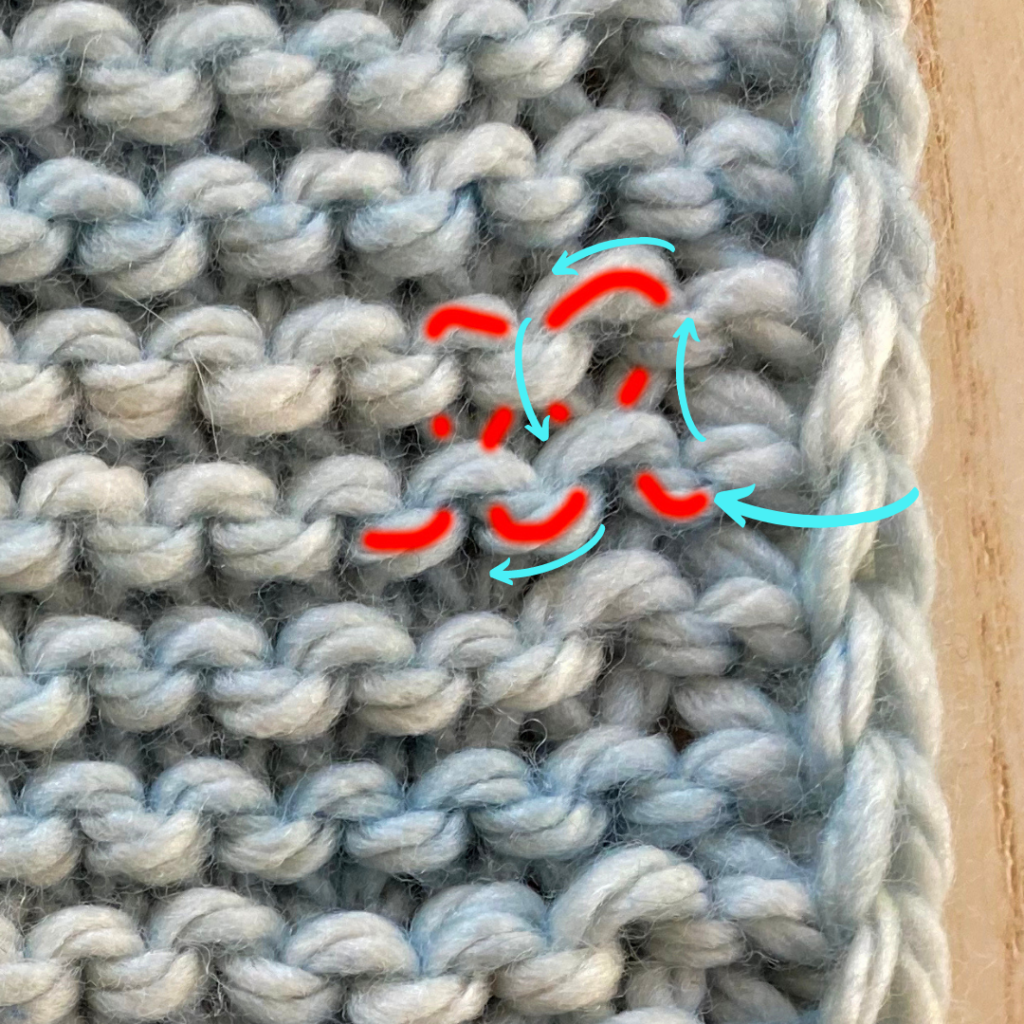
So what is the “path of the stitch“? In my image below, I’ve outlined the stitch I’ll be weaving my end into in red and the blue arrows show you the direction in which I’ll be going:
Now let me show you exactly how I do it! The only tool you’ll need is a tapestry needle and you will thread that through your end.
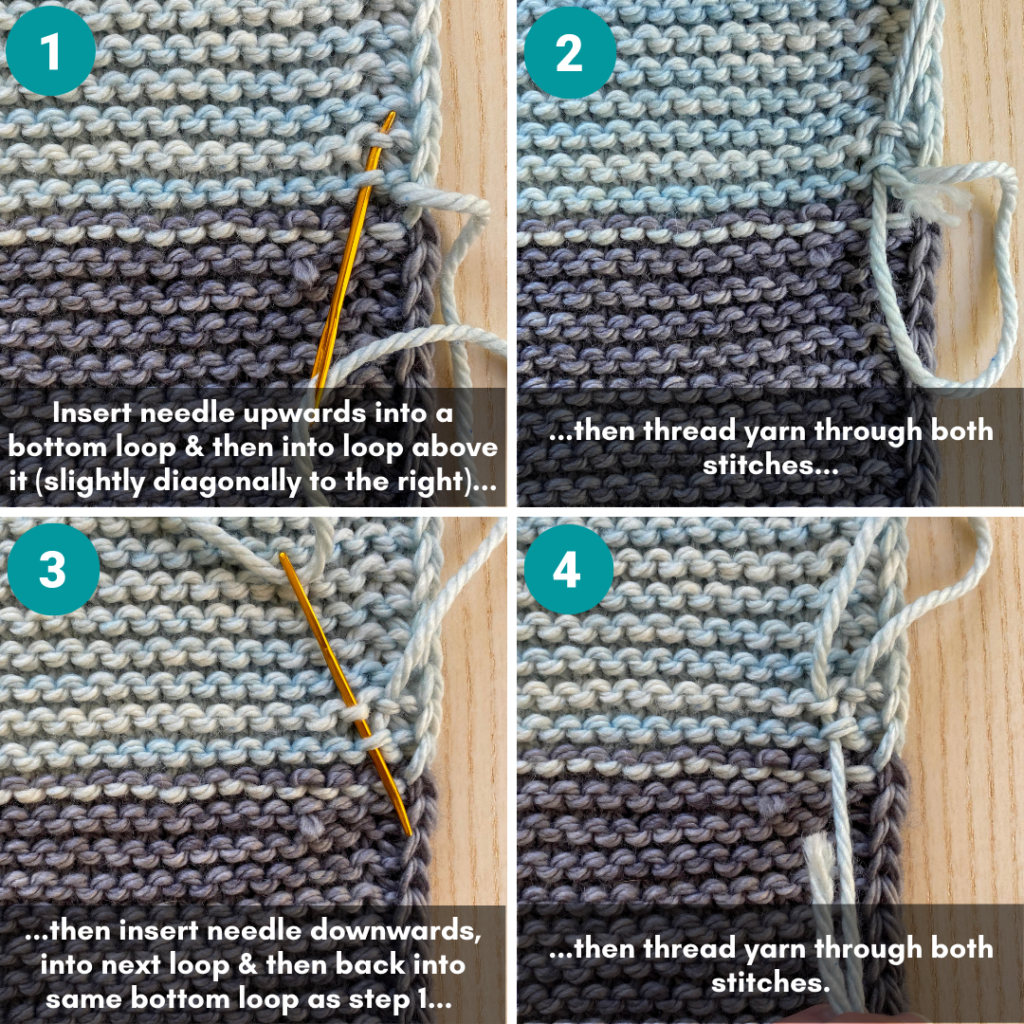
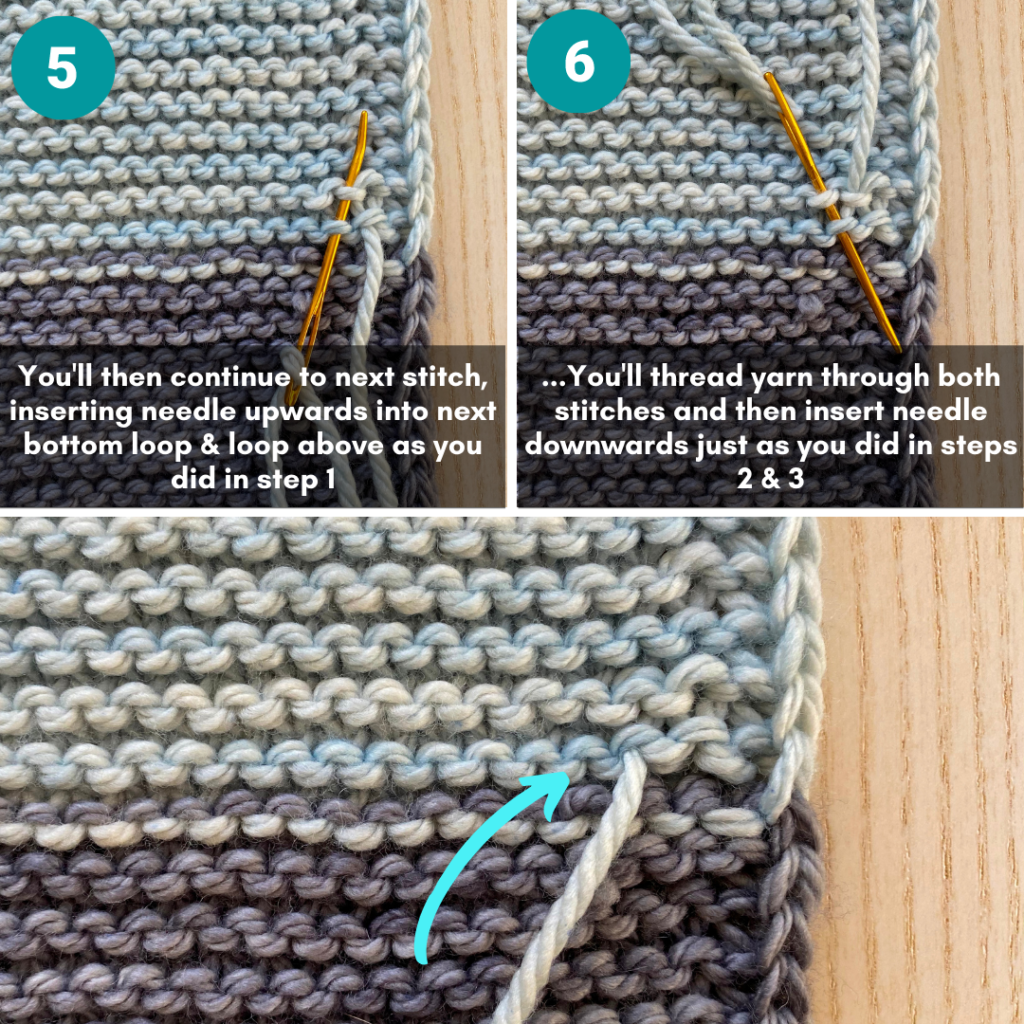
Description of above photos:
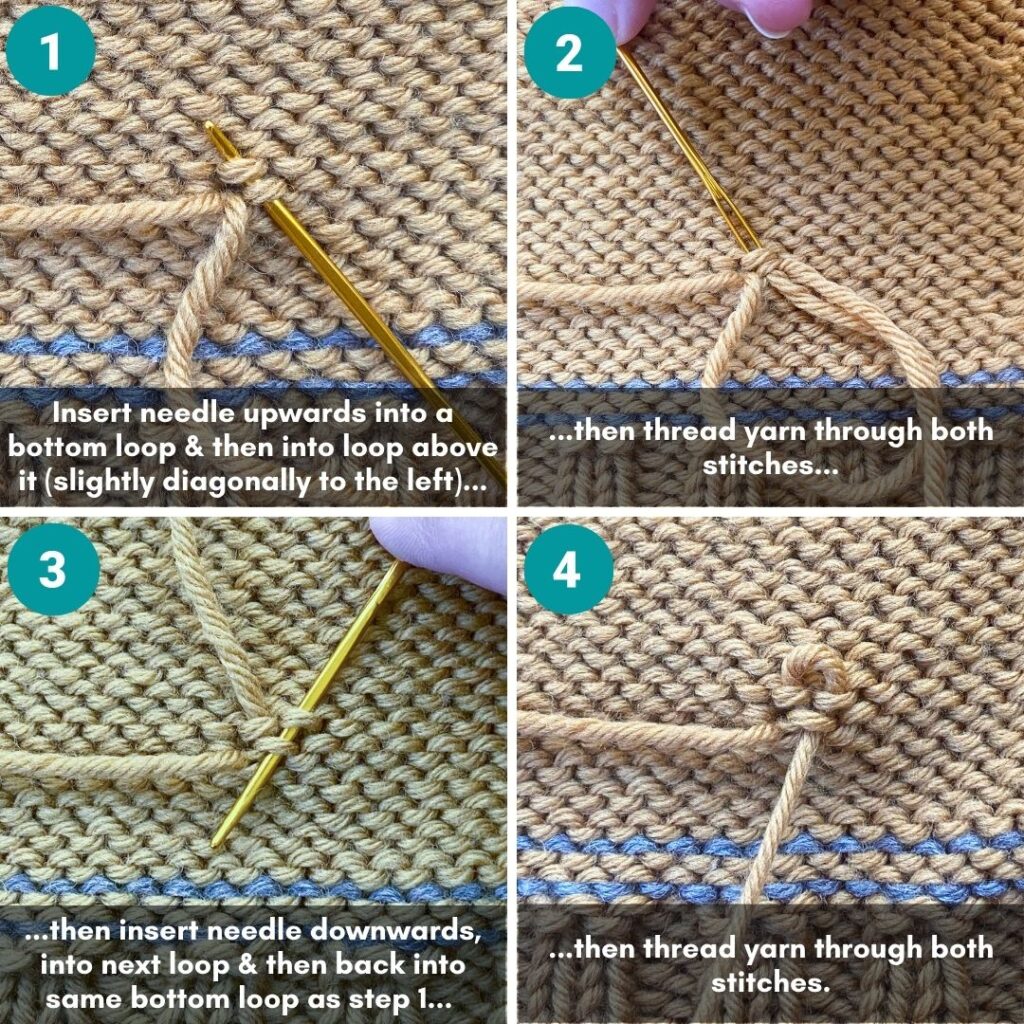
- Step 1: Insert needle upwards into a bottom loop and then into a loop above it (slightly diagonally to the right)
- Step 2: Then thread yarn through both stitches
- Step 3: Then insert needle downwards, into next loop and then back into same bottom loop as Step 1
- Step 4: Then thread yarn through both stitches
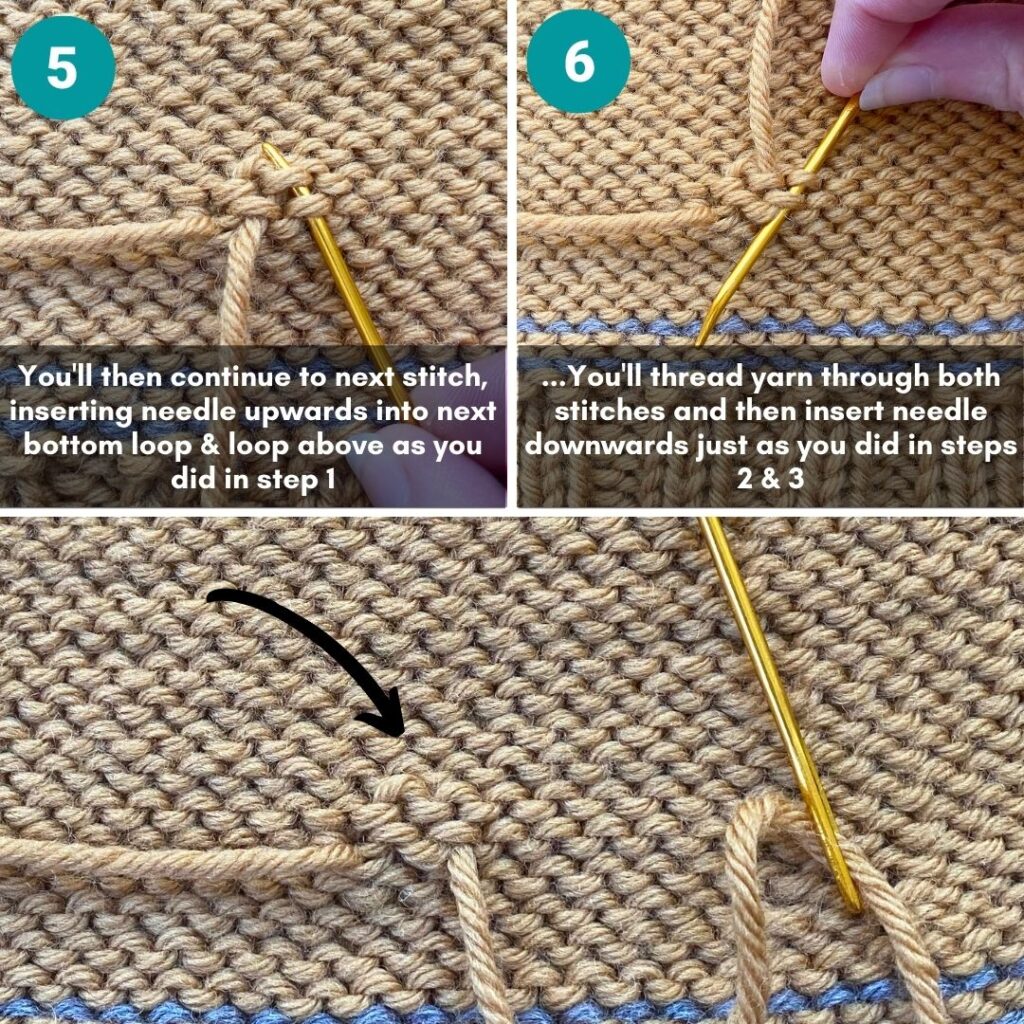
- Step 5: You’ll then continue to next stitch, inserting needle upwards into next bottom loop and loop above as you did in Step 1
- Step 6: You’ll thread yarn through both stitches and then insert needle downwards just as you did in step 2 and 3.
Last photo shows how well hidden your end is now! How many stitches I “duplicate” when weaving in an end depends on the type of fiber and thickness, but typically it’s anywhere between 2-4 stitches. Then I just snip my end!
Now let me show you show how this looks on the wrong-side of Stockinette stitch.
It’s the exact same technique, but it looks different because of the stitch pattern. Additionally, I’ll be showing it to you going in a different direction (going in the left direction instead of the right direction – either works in duplicate stitch).
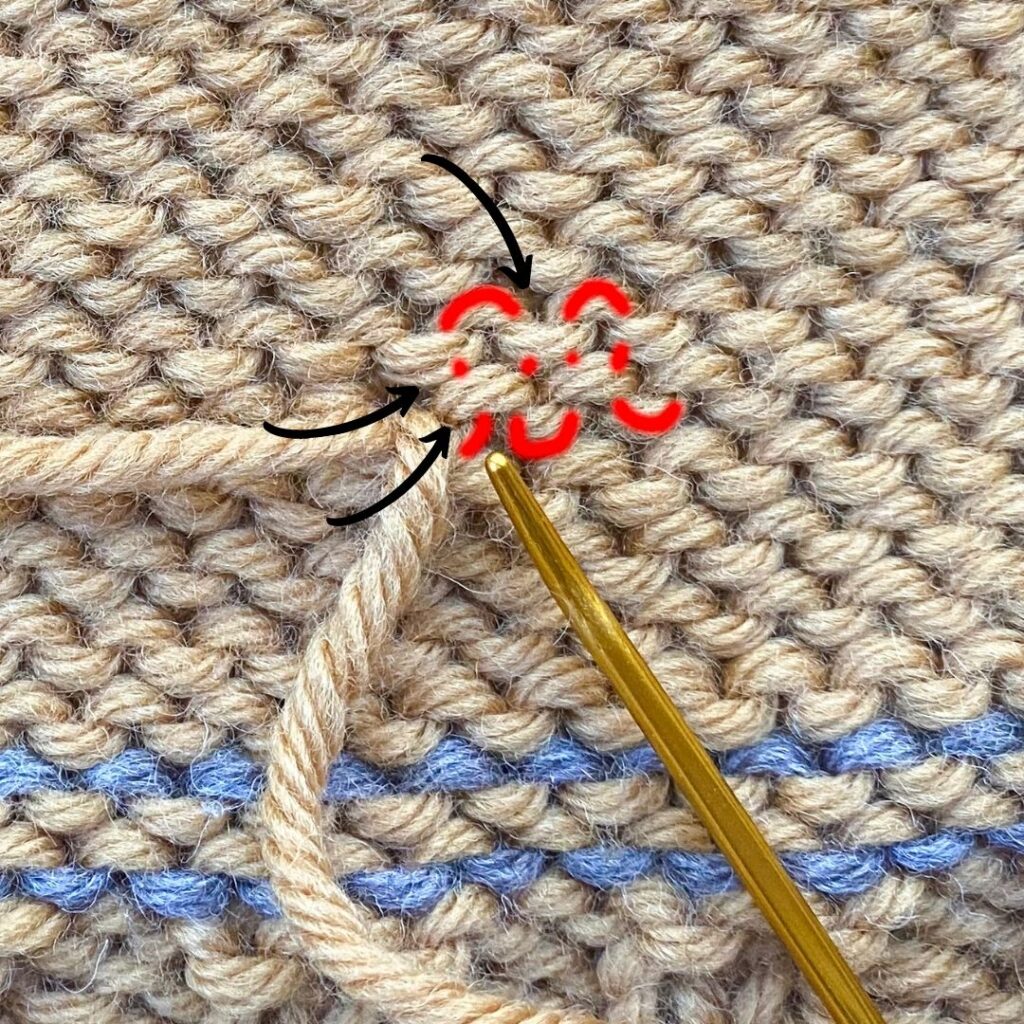
Just like in garter stitch, the “path of the stitch” is outlined in red above and the black arrows show you the direction in which I’ll be going. Below are the individual steps I will now work (they are the exact same as the above garter stitch version, just going in a different direction):
I hope this tutorial has been helpful! If you would like to see how I use this same technique in stockinette stitch, you can see my video here where I was doing so on my Audrey’s Cardigan (video starts at duplicate stitch part).

