Rosanna Tips
On this page you’ll find tips and tutorials for all the techniques used in my Rosanna cardigan! I review the following topics on this page:
- Picking a size
- Long-tail cast-on
- Top-down raglan construction
- m1-R and m1-L increases
- Eyelet Stitch Pattern
- Underarm Divide (including how to cable cast-on)
- Adjusting body shaping or adding body length
- Making your sweater long-sleeved instead of short-sleeved
- Picking up stitches for front bands
- Adding buttonholes
- Blocking
Picking a Size
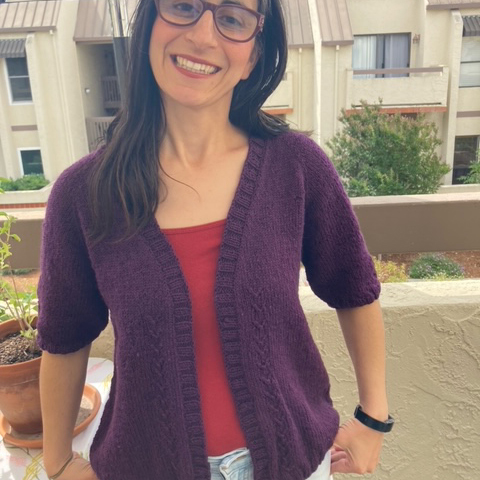
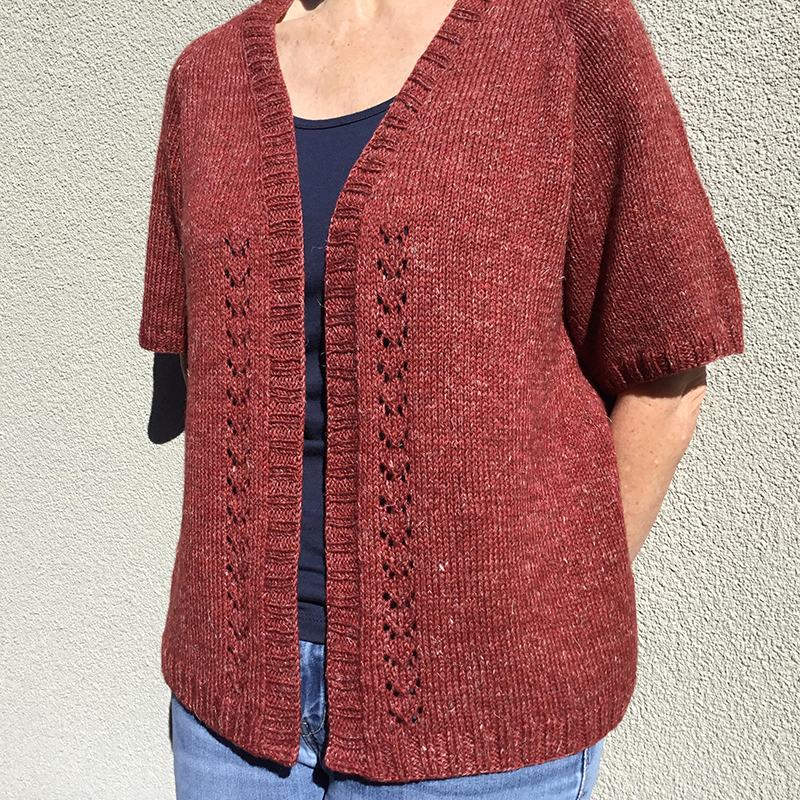
In the pattern I suggest picking a size whose listed finished bust circumference is 1-4″ larger than your actual bust circumference. One thing to keep in mind is that the listed finished bust circumference is measuring with the front bands overlapping. But there aren’t any button closures in Rosanna (unless you decide to add them), so when you wear the garment, it will be more of an open-style. This means you can get away with a little less positive ease than if the sweater did button (since it would need to have enough front coverage in order to close in the front).
If you’re curious what the actual front-edge-to-front-edge circumference is (so with no overlap), it’s: 33.5 (37, 40.25, 43.25, 46.25) (49.25, 52, 55, 58.5, 62)” (so it’s approx. 1″ more than the overlapped circumference, with some sizes being a little less and some being a little more).
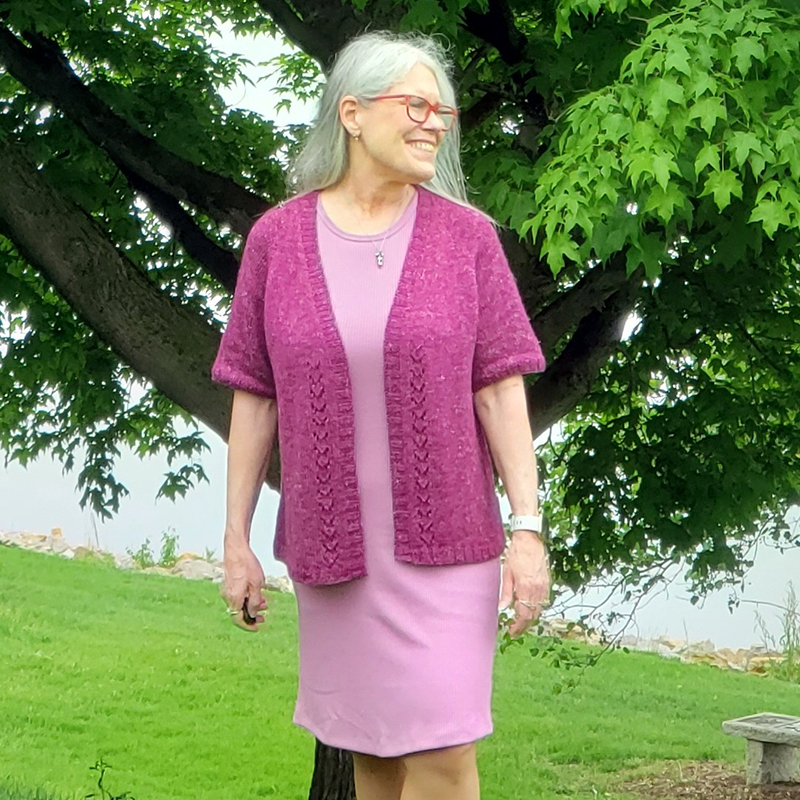
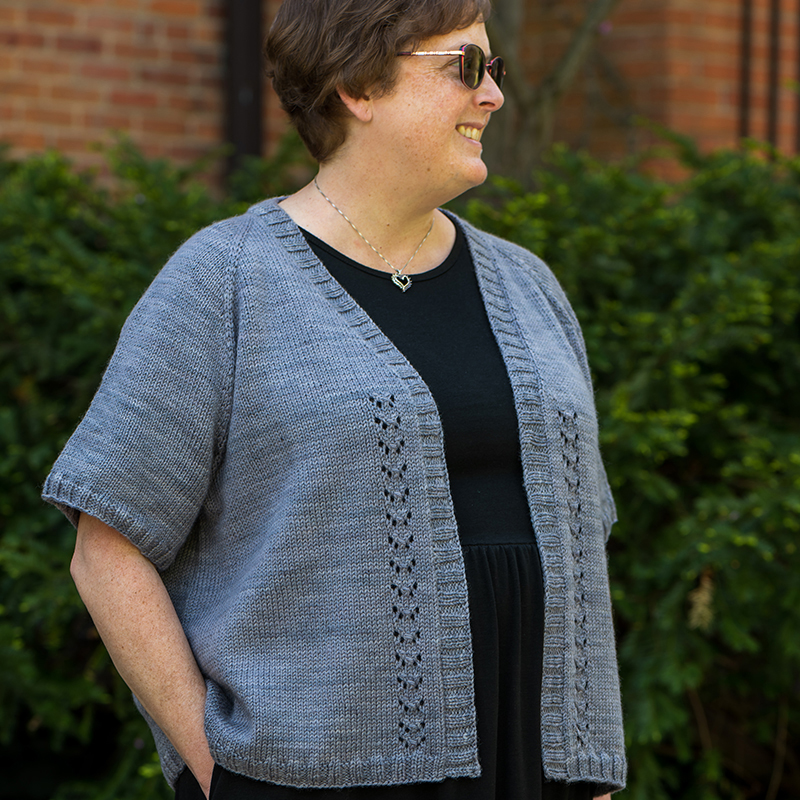
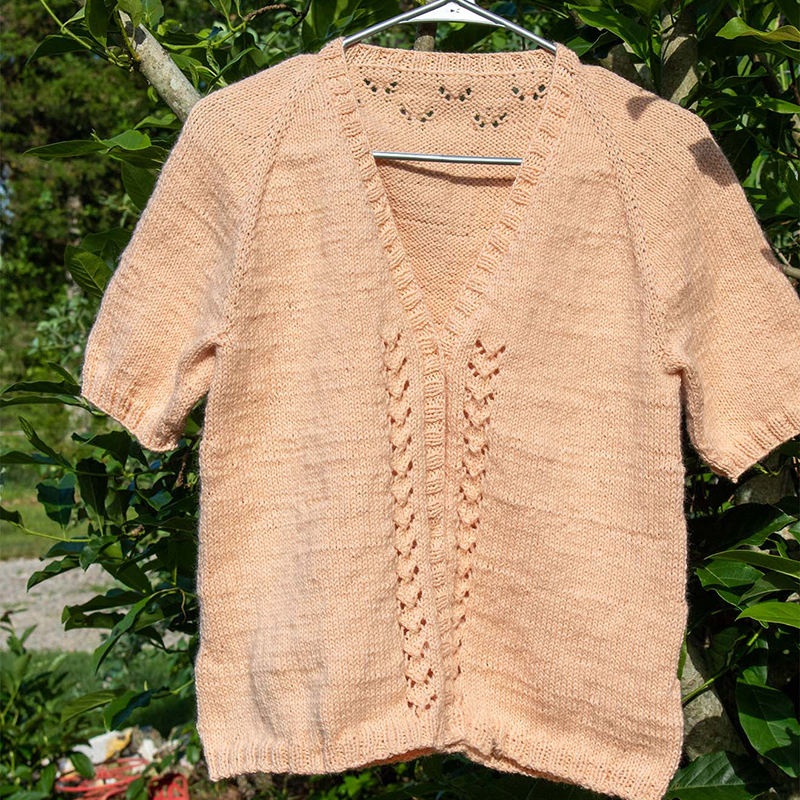
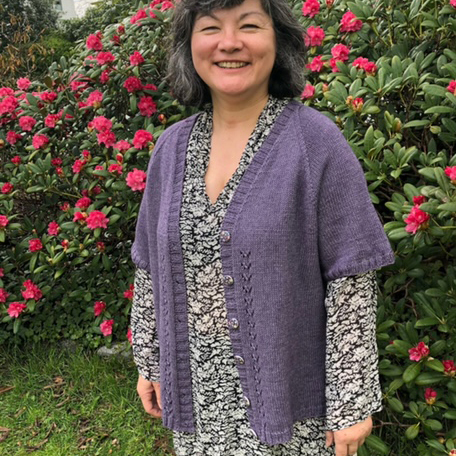
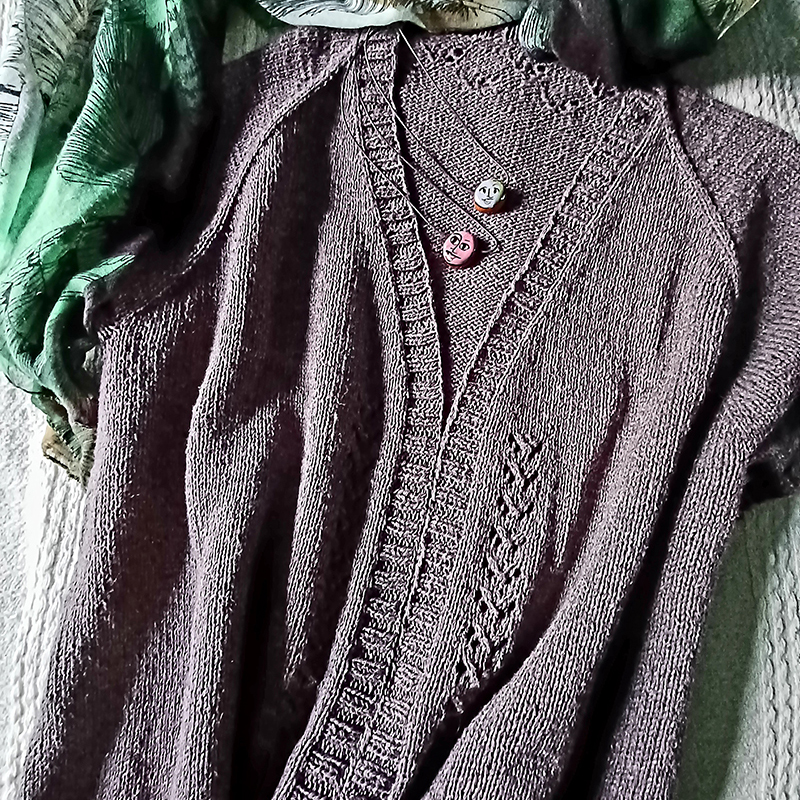
Below are my test/preview knitters and information about how much ease they are wearing their Rosanna’s with (and the yarn they used). For even more details about each of these projects, check out my blog post here.

Long-tail Cast-On
This type of cast-on is my preferred method, and although it’s not required for this pattern (you can use a different method if you prefer), if would like a video tutorial of how I cast-on this way, check out my video tutorial here.
Top-down Raglan Construction
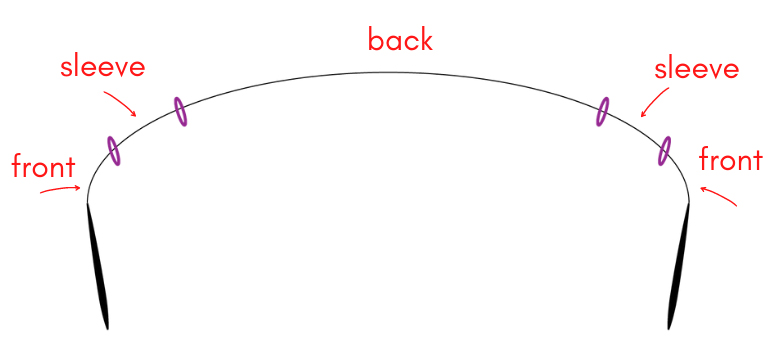
If you are new to top-down raglan sweaters, I recommend checking out this page. It provides an overview of top-down construction, including links to videos of every step of making a top-down raglan sweater (using my Audrey’s Cardigan as the example, but the techniques are the same regardless of design). Included on that page is a tutorial to the underarm divide which can be very helpful if this is your first top-down raglan sweater.
m1-R and m1-L increases
These types of increases are used both in the raglan shaping as well as in the A-line body shaping. Check out my video tutorial for these increases here.
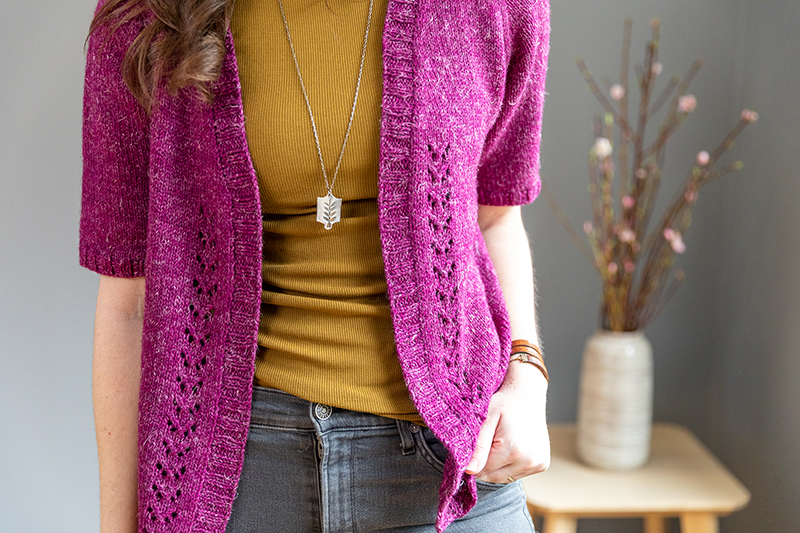
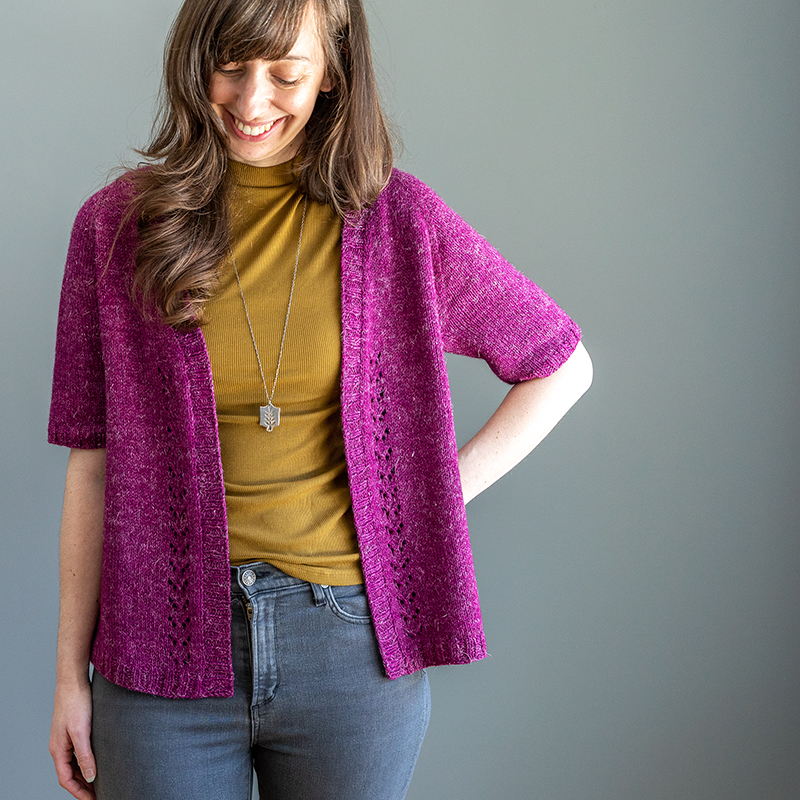
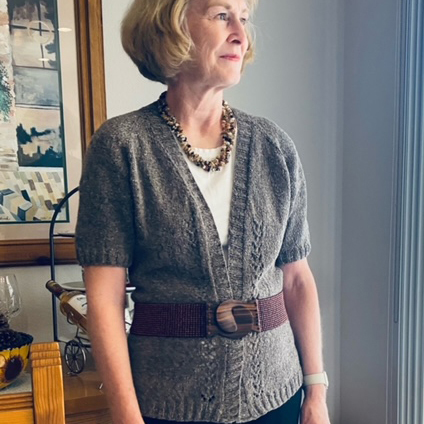
Eyelet Stitch Pattern

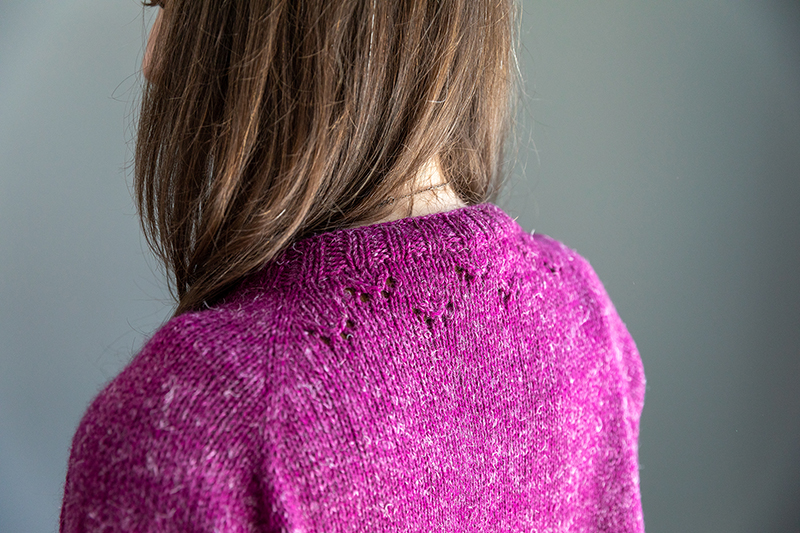
Along the top of the back neck as well as along the body fronts, you’ll find a little 4-row eyelet stitch pattern (and each motif is separated by 2 rows of plain stockinette stitch):
- Row 1 (RS): k1, YO, skp, k1, k2tog, YO, k1
- Row 2 (WS): purl
- Row 3 (RS): k2, YO, sk2p, YO, k2
- Row 4 (WS): purl
As you can see above, the only rows where you are working special stitches are rows 1 and 3. This is why you will see in the pattern that each RS eyelet row being identified as either an “Eyelet Row 1” or an “Eyelet Row 3”.
I demonstrate this stitch in the video tutorial below:
Eyelets Along the Back of the Neck:
The first place you’ll encounter the eyelets is along the back of the neck as pictured below:
When working the eyelet stitch in this area, you work the same eyelet stitch as above, but it’s written out a little differently due to the multiple motifs lined up horizontally. So, for example on row 1 of the back eyelets, it will say: “k1 [YO, skp, k1, k2tog, YO, k7] 2 times, then YO, skp, k1, k2tog, YO, k1”. If you aren’t used to seeing brackets in instructions, let me clarify what that line is saying:
- You’ll first k1
- Then the stitches that are in brackets are considered a sequence. And right after the brackets it says “2 times”. So this means you will repeat the sequence in the brackets a total of 2 times. So you’ll “YO, skp, k1, k2tog, YO, k7” and then do that one more time.
- Then you’ll just finish the rest of that instruction line which is “YO, skp, k1, k2tog, YO, k1”.
Underarm Divide
If you have never worked a top-down, seamless sweater before, then working the “Underarm Divide” section can seem a bit confusing. As part of my Audrey’s Cardigan knitalong, I created this video tutorial that walks you through the whole process (including working the cable cast-on). Although it’s a different pattern, the technique is the same so it will be very helpful as you work Rosanna as well. In addition, I had created this blog post many, many years ago that still remains quite popular and will also walk you though the Underarm Divide process using photos.
Adjusting Body Shaping or Adding Body Length
Rosanna features subtle A-line shaping in the body:
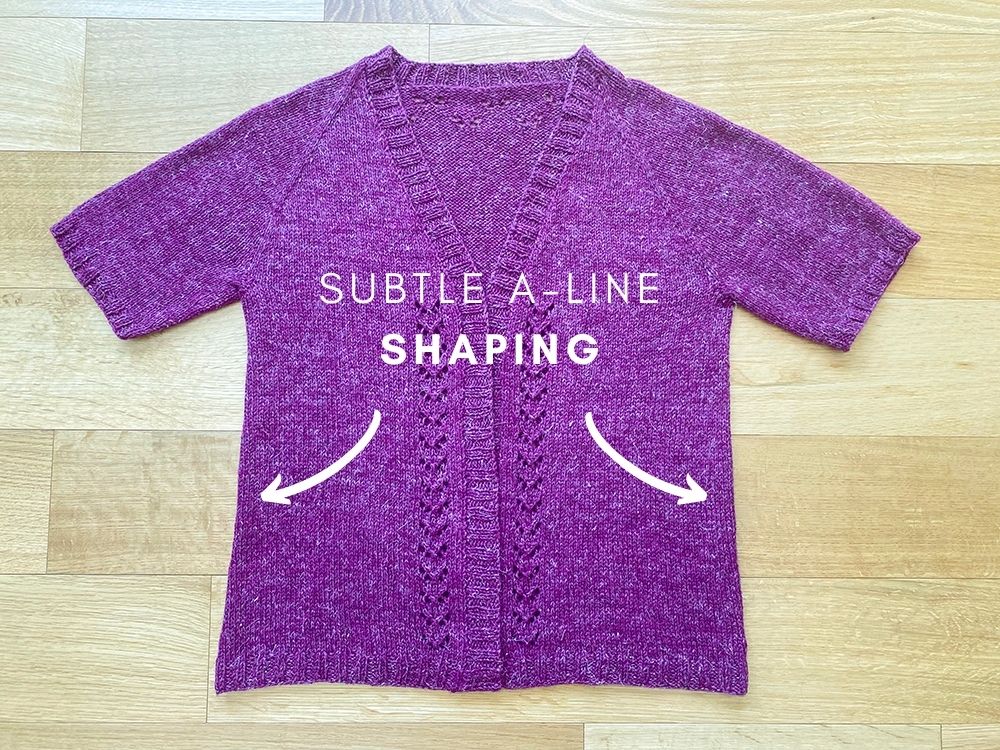
There is an approximate 3-3.5″ difference in circumference between the hem and the bust (so around 1.5-1.75″ each side). Below are tips if you would like to adjust the body shaping:.
- If you would like to omit the shaping all together: simply omit the m1-R and m1-L increases you see in the increase rows in “Body-Section 2” of the pattern.
- If you would like to keep the shaping but add more length: In “Body-Section 2”, after you repeat the entire section 3 more times, there is a note that explains which rows to repeat if you want to add additional length.
- If you would like to keep the shaping but remove some length: As written, the total underarm to hem length in this piece is approx 14″. If you would like to shorten your body but keep the A-line shaping, I recommend omitting rows 13-18 of Body-Section 2 in the last 2 repeats of that section (that will omit approx 1.5″ in length).
Making Rosanna Long-Sleeved (instead of short-sleeved)
A common alteration knitters want to make to Rosanna is making the sleeves long-sleeved. Check out my blog post here for instructions on exactly how to do this for Rosanaa!
Picking up stitches for Front Bands
The front bands of Rosanna are created by picking up and knitting stitches along each front edge and around the neck. It’s very similar to how the front bands are created in my Audrey’s Cardigan – check out this page for a video tutorial of how to do!
Adding buttonholes
If you would prefer some kind of closure(s) on your Rosanna, follow these tips:
- Decide how many buttonholes you want: Do you just want want 1 buttonhole at the top of the body (at the underarm level, right above the front eyelet panels)? Or do you want your top buttonhole to start there but have additional holes going all the way down to the bottom? In either case, follow these tips:
- On the Right Front (Right from perspective of wearing the garment), measure a horizontal line from the underarm to the ribbing and place a removable marker on the approx 1”/2.5 cm down from this point, between 2 purl sts. This is your top buttonhole.
- If you want buttonholes going all the way down, place additional removable markers approx 14-20 sts apart (always placing marker in-between 2 purl stitches). I’d recommend that your bottom buttonhole is placed 7 or 11 sts from the bottom (depending on how far down you want your last buttonhole).
- To see how I placed my removable markers for buttonholes in Audrey’s Cardigan, watch my video here.
- Then on the next row, you work in the established rib stitch pattern until you encounter a marker, then you remove it, YO, k2tog, k1, then continue in established rib stitch until you get to the next marker, etc. In the link above I also show you how I do this, if a visual is helpful.
Blocking
Are you new to blocking? I know it can be intimidating at first! I created this video tutorial that walks you though the whole process. It was for my Audrey’s Cardigan knitalong, but the process is the same for any sweater I block.