Putting Together Ponchetta
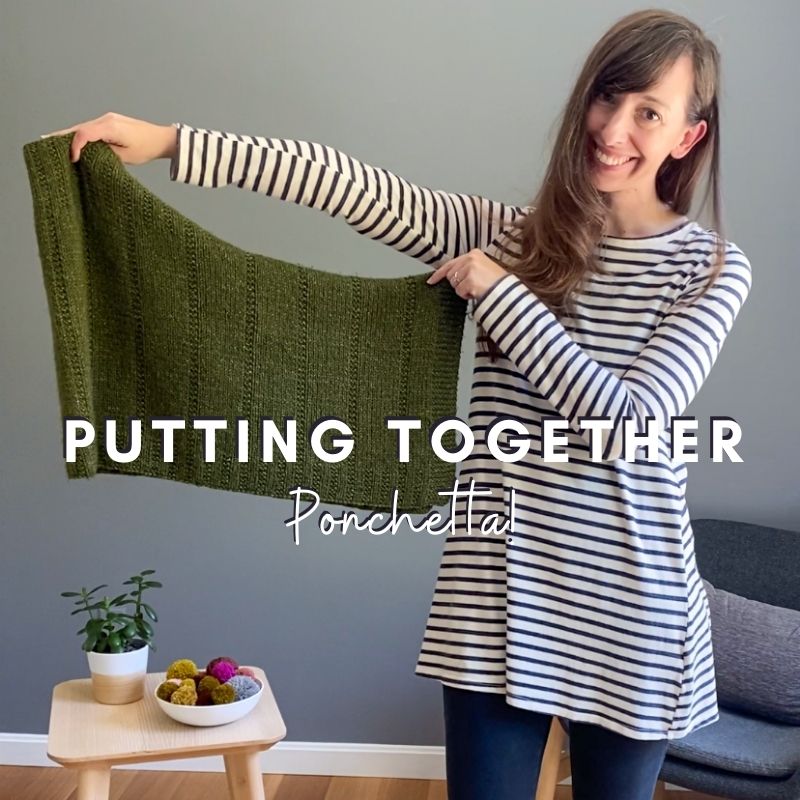
My Ponchetta pattern is knit like a big rectangle – the magic happens in the putting together part! It’s not a hard process, but as a visual learner myself, I thought it would be helpful to show some photographs of some of the the steps in this “putting together” process, as well as when you start the neck. In the photos below, I created a very mini version just for demo purposes. So your Ponchetta will look quite different when you get to the phase of putting together. But I hope but showing the techniques in this little demo example, it will help to illustrate things better so that you’ll be able to wear your Ponchetta in no time!
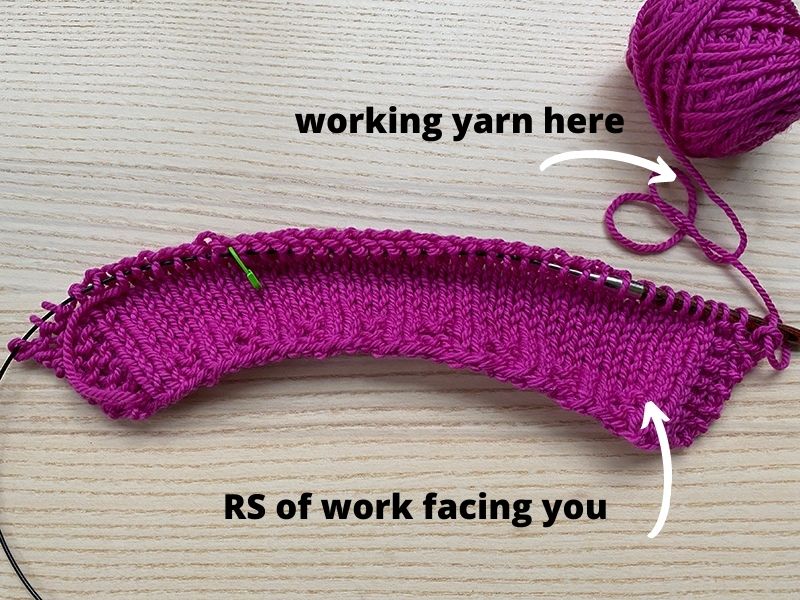
So here is is my demo, right after I have worked my last wrong-side row of the Body and I’m about to start the “Join Left Shoulder” section. In version 3 of Ponchetta (published in late September 2021), I had updated the instructions so that a neck marker is placed while working this last wrong-side row of the body, so that is why you see a marker placed here. Your working yarn is on the right edge like you see picture:
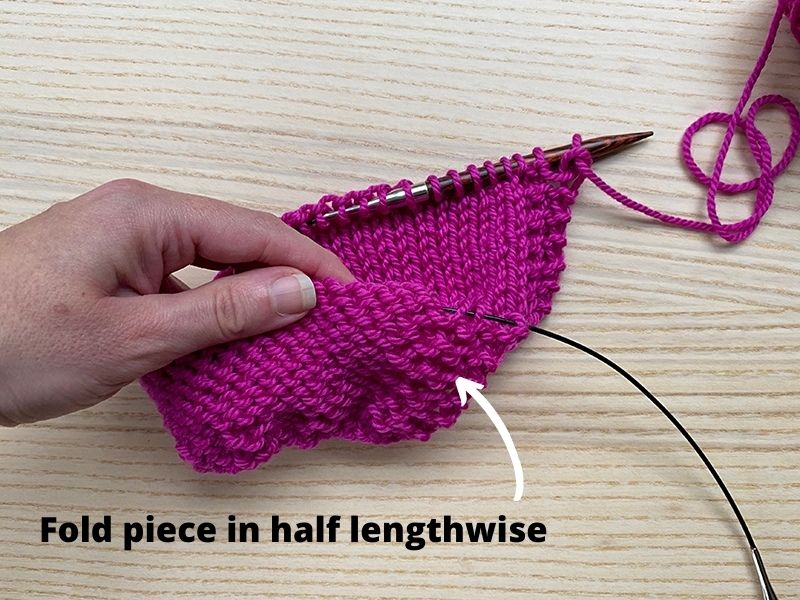
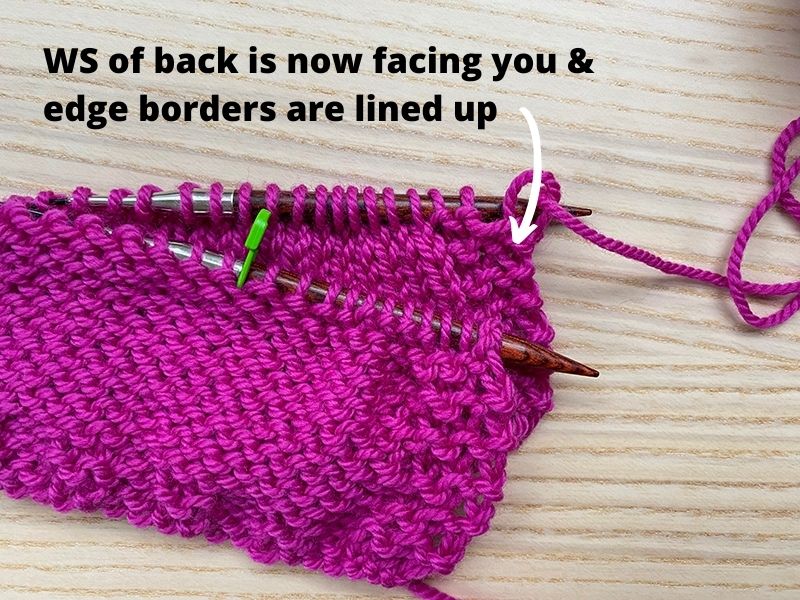
Step 1: In the “Join Left Shoulders” section, the first step is to fold the piece in half lengthwise, so that your Edge Borders are lined up and your needle tips are running parallel to each other. When you do this, the WS (wrong side) of the Back is facing you like in the photos below:
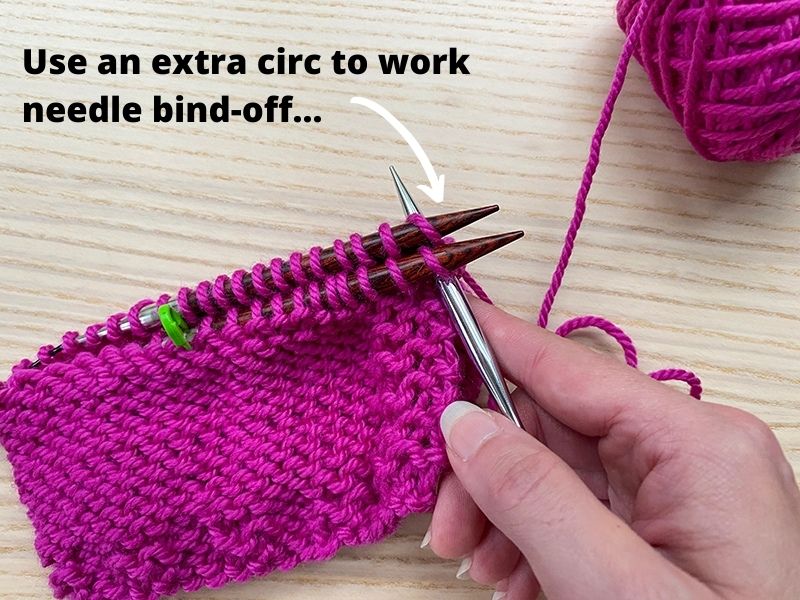
Step 2: You will use an extra circular needle to now work the Three Needle Bind-Off technique – it will look like this when you first start:
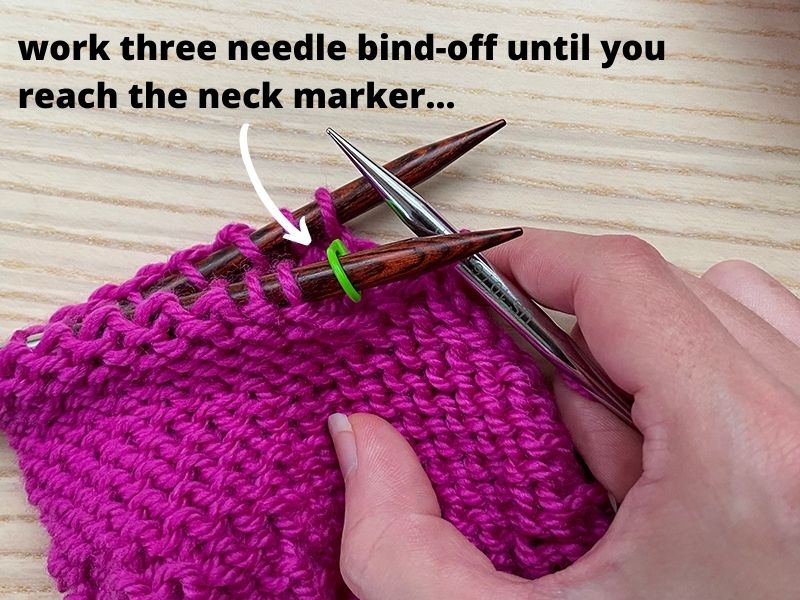
If you are new to the Three Needle Bind-Off technique, I promise it’s not hard at all! It just takes a little practice to get comfortable doing it. Check out this page for my photo and video tutorials all about the technique. In version 3 of the pattern, it instructs you to work this technique until you reach the marker (note: in older versions of the pattern, it provides a certain number of stitches to three needle bind-off – either is right, but I decided in this updated version that placing a marker was easier than having to count the number of stitches you are binding-off). When you reach the marker, it will look something like this:
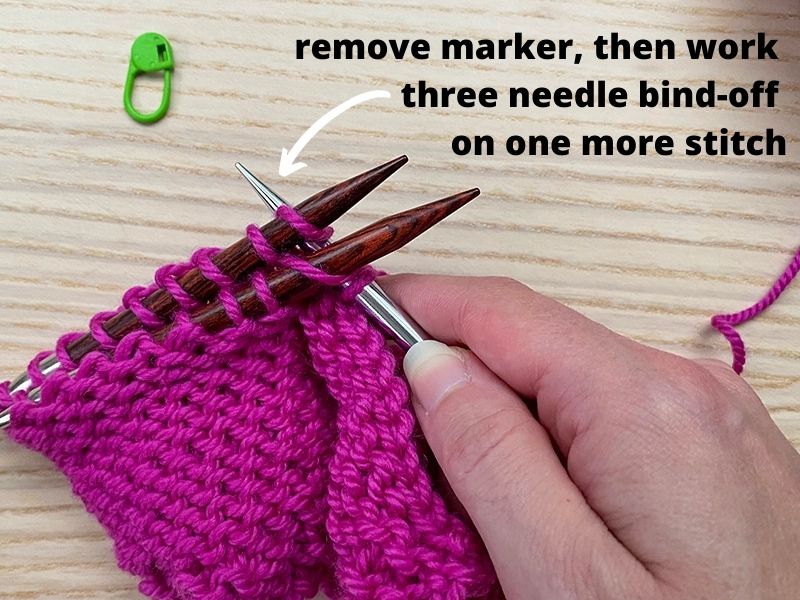
You will then remove the marker, and then Three Needle Bind-Off 1 more stitch:
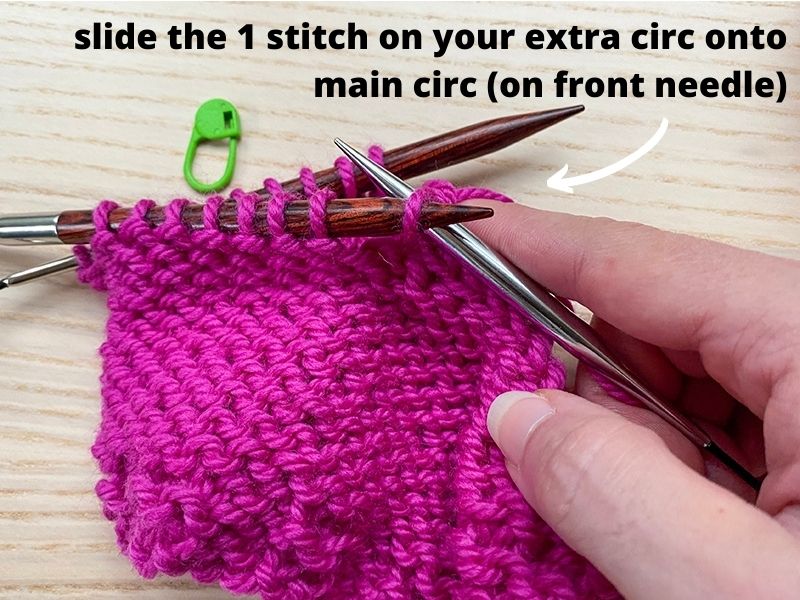
Step 3: The last step is to simply slip the 1 stitch you have left on your right needle onto the main circ – to slip it, just insert the front needle into the stitch on the extra circ and slide it over. Then you can put the extra circ down as you are now done with it!
The pattern will then tell you to turn the work right-side out again so that the RS is facing you again. Then it will tell you to transfer the remaining live stitches on the main circ onto a smaller circ. You will now be ready to start working on the neck!
Getting started on the Ponchetta Neck
Working on the neck is pretty straight-forward, but there is one step in the very beginning that can sometimes cause some confusion. On the very first round of the neck (the “Set-up Rnd”), it says to place marker for BOR (so you will place that on your right needle), join for working in the round and then to knit to 1 stitch before the end (before the BOR marker). It then says to pick up and knit 1 stitch in the gap that appears between the last 2 stitches before the BOR marker. Let me show you a picture of what this gap looks like:
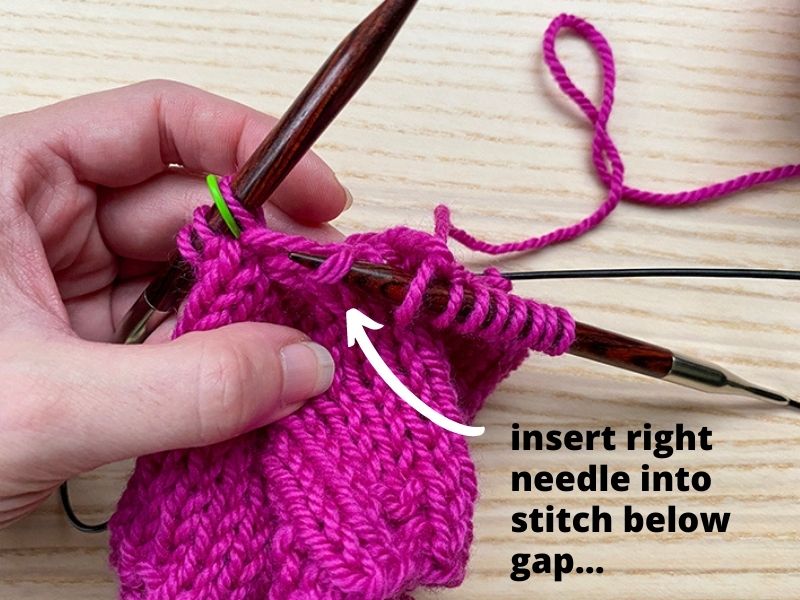
So all you will do is knit until 1 stitch before the BOR marker, and then insert your right needle tip into a stitch below the gap:
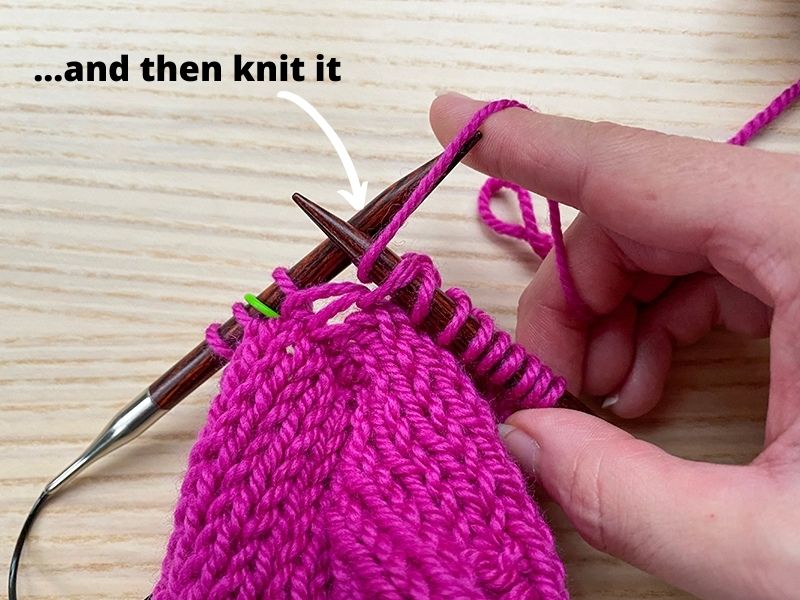
Then wrap your working yarn around the right needle and knit the stitch:
By doing this, you cinch up that gap a bit. After this step, you can then continue moving forward with the rest of the neck and finishing up your Ponchetta! Note: If you prefer not to have a cowl neck, you can always choose to work in pattern for just an inch or so and then bind-off – this will give you more of just a border instead of a cowl neck.
I hope these photos helped to illustrate these final steps in Ponchetta – if you have any follow-up questions, feel free to reach out!

