Mud Season Tips
On this page you will find tips & tutorials for making your own Mud Season sweater! I cover the following topics on this page:
- Working the sleeves (DPNs or Magic-Loop!)
- How to make sleeves longer
- Picking-up neckline stitches
- General Technique Tutorials:
- long-tail cast-on
- kfb
- cable cast-on
- ssk and k2tog
- m1-R and m1-L
- blocking
Picking a Size
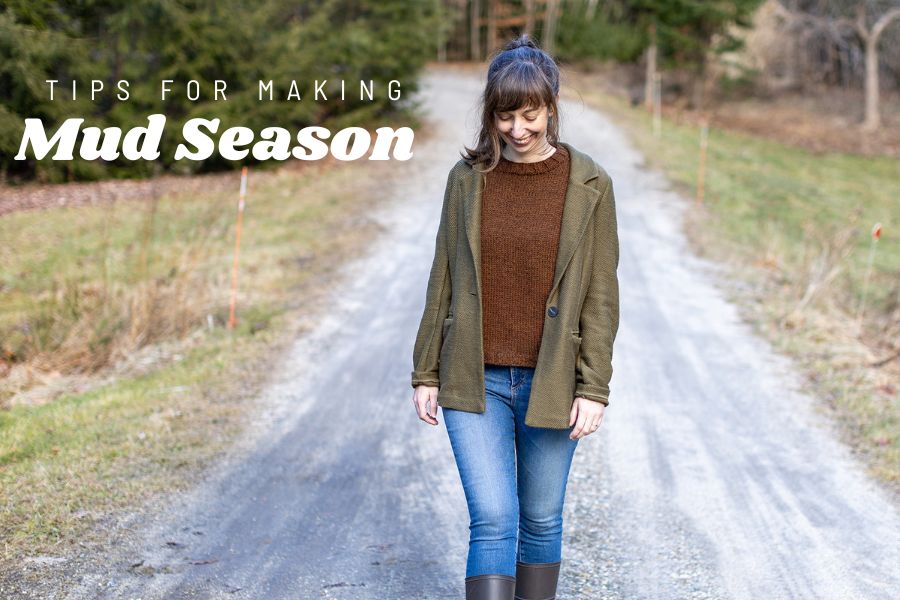
In most of my top-down sweater patterns I suggest picking a size that is approx. 1-5″ larger than your actual bust measurement. But it really comes down to your personal preference – if you want a more fitted look then go with less or for a more oversized look go with more! In the photos, I’m wearing mine with more positive ease (around 5″ at the bust) for 2 reasons:
- I wanted a looser fit and something that would allow to do a bit of a “front-tuck” look
- My hips are much larger than my bust so if I’m in-between sizes (I could have gone with a S or M in Mud Season), I typically size up so that it’s not too clingy at my hips (so that is why I went with the M). If your hips are also larger than your bust, make sure to check the Hip Measurement listed on the schematic page of the pattern.
I also talk a lot about ease in this blog post and so it may be helpful to you!
Yarn Ideas
Mud Season calls for chunky or bulky-weight yarn. I used Berroco Ultra Alpaca Chunky – a wool/alpaca blend that has lovely color and texture to it. I purchased mine from my LYS Mother of Purl here in Freeport, Maine. Another online store you can check out is Wool & Co.
Don’t want to use bulky-weight yarn? Here are some ideas to consider:
- Consider chainette-constructed bulky-weight yarns. Although technically the yarn is bulky, because of how the fiber is constructed it feels SO light & airy and not bulky at all. Some options for this are: Woolfolk Luft, Lang Yarns Amira, or Wool Addicts Honesty.
- You can double-strand DK! Because this is a plain sweater, it’s a great option for blending 2 colors together for a marled affect.
- You can use a worsted-weight double-stranded with lace-weight mohair. Check out my blog post here about one particular pairing that I tried out recently.
- You can use a yarn categorized as more of a worsted/aran-weight and the fabric will just be a bit looser/drapier. You could consider yarns like: Berroco Remix, Juniper Moon Cumulus, (both of those are good non-wool options) or Manos del Uruguay Maxima.
Gauge Swatching
It’s important to swatch before you start, because just because I used a US 10 needle to get the pattern gauge doesn’t mean that you will! Everyone’s tension can be a little different, and it also depends on your chosen yarn. Also, be sure to swatch in the round for this project. Although you start the pullover flat (to shape the neckline), most of the yoke and all of the body is worked in the round and so swatching in the round will provide you the most accurate gauge. Learn more about this (as well as a video tutorial) by clicking here.
Top-Down Raglan Basics
If you are new to top-down raglan sweaters, I recommend checking out this page. It provides an overview of top-down construction, including links to videos of every step of making a top-down raglan sweater (using my Audrey’s Cardigan as the example, but the techniques are the same regardless of design).
Joining Fronts (“Raglan Section 3”)
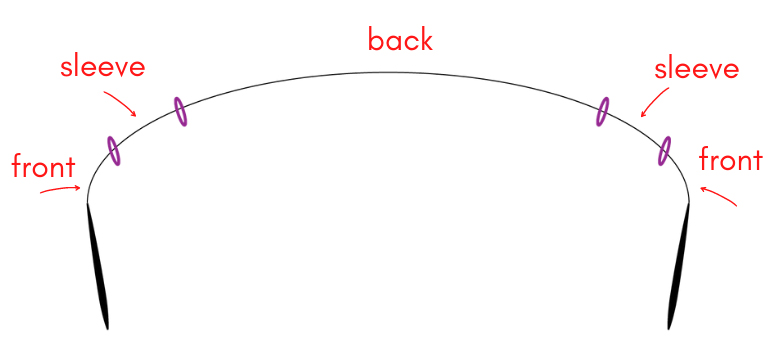
In “Raglan Section 3”, you are at the point in the sweater where you will start the process of joining to work in the round. Prior to this you had been working back-and-forth (even though it’s a pullover) in order to shape the neckline. But at this point in the pattern you will cast-on your center front stitches, realign your stitches so your beginning of round is at the back of the sweater, and then officially join your piece in the round. I walk you through this entire process in the video lesson below:
Underarm Divide Tips
In the Underarm Divide, you separate the sleeves from the body so that you can then work the body in one piece down to the hem. If you would like a tutorial of this whole process, check out my page here. I also have a video tutorial linked below – it was for my Audrey’s Cardigan pattern but the techniques I use are very similar to that of Mud Season.
Working the Sleeves (DPNs or Magic Loop)
New to top-down raglan construction? If so, then the process of starting the sleeves may be confusing. If so, I have two videos that may be helpful. Similar to the Underarm Divide, it’s for my Audrey’s Cardigan but since it’s the same type of construction the information will be the same as for Mud Season.
You’re instructed to use DPNs because a 16″ circular will, for most sizes, become too tight as you work your decreases. The video below shows you how to get started on the sleeves using DPNs:
Don’t want to use DPNs? You have options! You can try using a 9″ or 12″ length circular instead as one option. Personally I have found this length too uncomfortable for my hands, but I know many people who love working with them. So it’s just personal preference! Alternatively, you can try the Magic Loop method. This is my preferred method. And in the video below I show you how it’s worked (again, using my Audrey’s Cardigan as the example):
How to Make Sleeves Longer
Want to make your Mud Season long-sleeved instead of short-sleeved? I’d make sure to get an extra skein of yarn if you want to do this, and you can follow my instructions below, either for long-sleeves or 3/4-length sleeves:
Long Sleeve Option
- Follow pattern instructions as written for the sleeves through the first decrease round.
- After that first decrease round, work in Stockinette stitch in the rnd, repeating the decrease round every:
- 13 (10, 8, 10, 8) (7, 6, 5, 5, 5)th rnd: 2 (2, 4, 2, 4) (2, 9, 14, 6, 6) times; and then every
- 12 (9, 7, 9, 7) (6, 5, 4, 4, 4)th rnd: 4 (6, 6, 6, 6) (10, 4, 1, 11, 11) times
- You’ll have the following number of sts: 28 (28, 28, 33, 33) (33, 36, 36, 36, 40)
- Continue working in St st until measures approx. 16″, or 1″ less than desired sleeve length.
- Sizes L, XL & 2X Only: on last rnd before ribbing you will need to decrease 1 more stitch as follows: k to last 3 sts, k2tog, k1.
- Work “Sleeve Trim” as written in pattern.
3/4 Sleeve Option
- Follow pattern instructions as written for the sleeves through the first decrease round.
- After that first decrease round, work in Stockinette stitch in the rnd, repeating the decrease round every:
- 12 (8, 6, 8, 6) (5, 5, 4, 4, 4)th rnd: 2 (4, 6, 4, 6) (6, 2, 7, 7, 7) times; and then every
- 11 (7, 5, 7, 5) (4, 4, 3, 3, 3)th/rd rnd: 2 (2, 2, 2, 2) (4, 9, 6, 6, 6) times
- You’ll have the following number of sts: 32 (32, 32, 37, 37) (37, 40, 40, 44, 48)
- Continue working in St st until measures approx. 11.5″, or 1″ less than desired sleeve length.
- Sizes L, XL & 2X Only: on last rnd before ribbing you will need to decrease 1 more stitch as follows: k to last 3 sts, k2tog, k1.
- Work “Sleeve Trim” as written in pattern.
Picking Up Neckline Stitches
If you need some help picking up stitches around your neck, my tutorial below may be helpful. It was for my Soundtrack Top, but the steps involved are very similar:
Technique Tutorials
Below are tutorials for techniques used in Mud Season:

