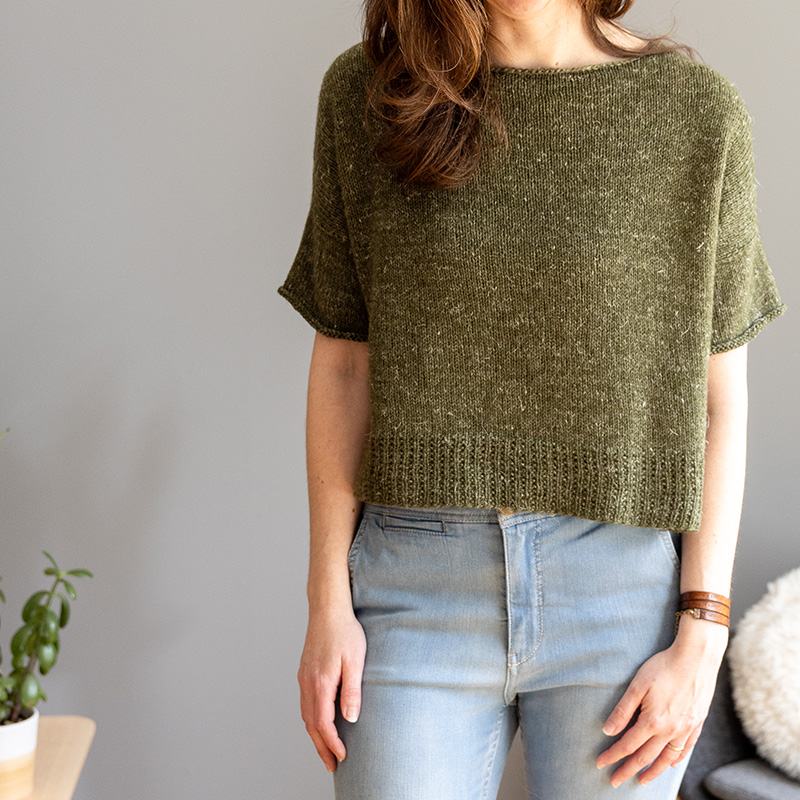
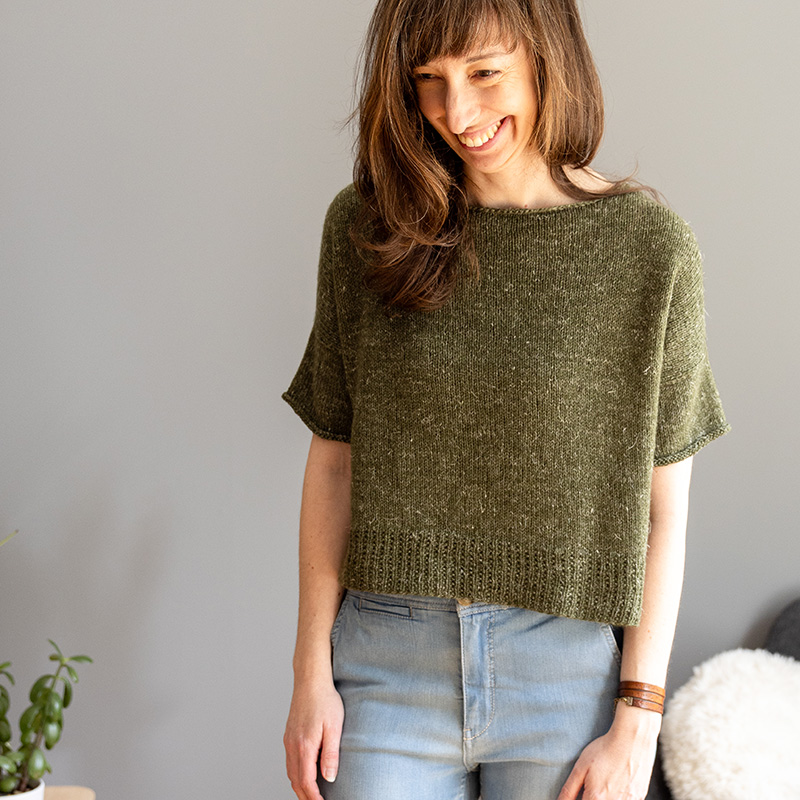
Castaway Tips
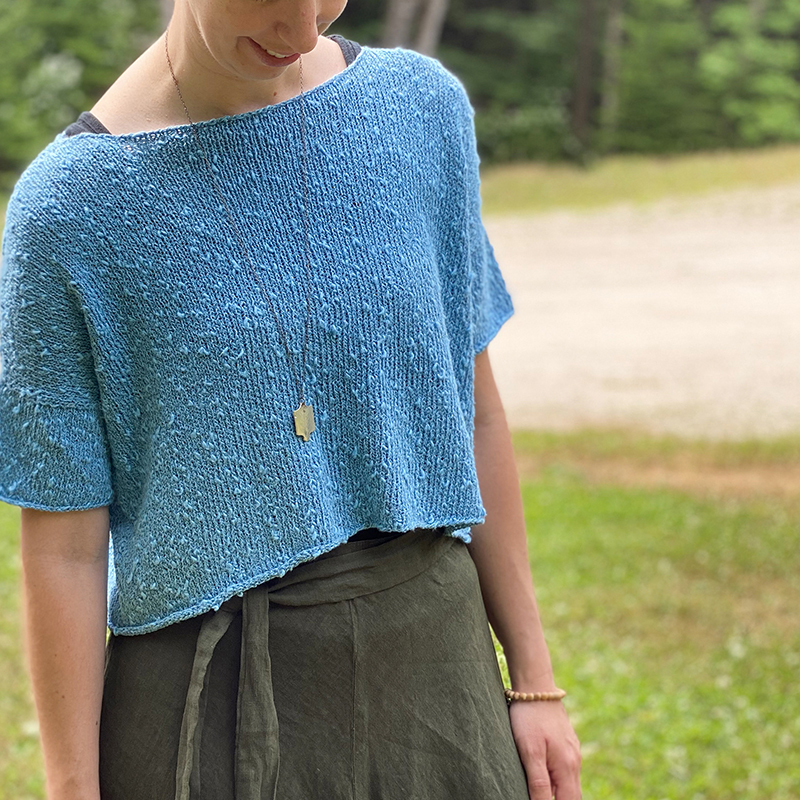
Welcome to the Castaway tips page! On this page you’ll find tips and tutorials for making your own Castaway top. Below are the list of tips and tutorials you’ll find here:
- Picking a size
- Picking a yarn
- Yarn substitution ideas
- Adding trim to your edges (if you don’t want to leave them ‘raw’)
- Adjusting for a slightly different gauge
- Making your sleeves longer
- Adding length or A-line shaping
- Video tutorials for the following techniques:
- Long-tail cast-on & joining to work in the round
- Cable cast-on
- Wrap & Turn short rows
- Sloped bind-off (for neck shaping)
- Back underarm pick-up
- Three Needle Bind-Off
- Picking up stitches around armhole
- Blocking
Picking a Size
Castaway is a drop-shoulder top and this means you typically want to pick a size whose finished circumference has more positive ease than you may typically have in a sweater (new to the term ‘positive ease’? Read my post here!). For this pattern, I generally recommend picking a size that is 6-10″ larger than your actual bust measurement. For example, if you are a 34″ bust, then I would recommend you knit the size small which has a finished circumference of 43″ as that will give you 9″ of positive ease.
However, if you prefer a closer-fit (or more oversized), feel free to pick a size that matches your desired finished look. Just one thing to keep in mind – if you pick a size with not a lot of positive ease (say, only 2-5″ of positive ease), you will want to add a bit more length to your armhole depth. For more information about this as well as other tips when it comes to picking a size in drop-shoulder tops, check out my blog post here!
Picking a Yarn (and importance of fiber content)
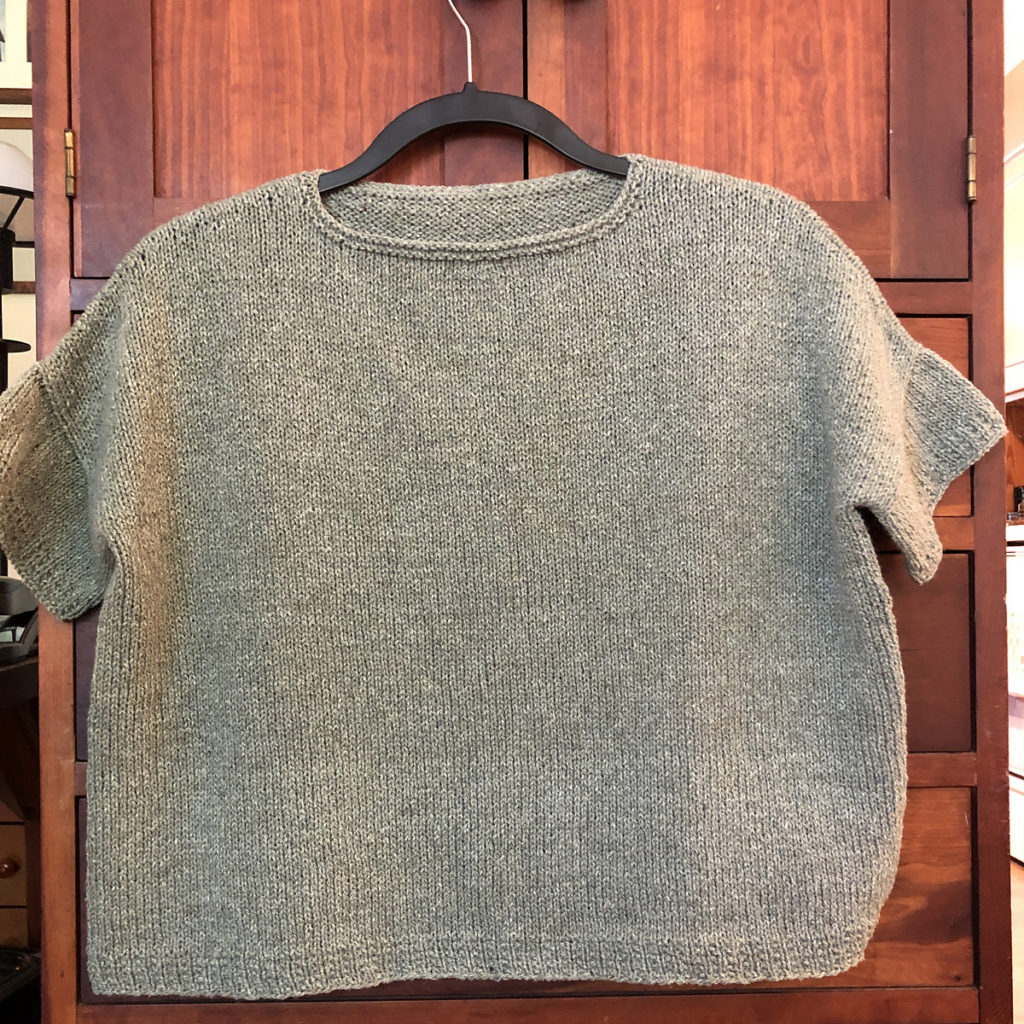
Picking a yarn is very important in this piece as the type of fiber you use will impact whether or not I recommend making some adjustments. I knit the original Castaway in Berroco Quinoa, a cotton/nylon DK-weight blend. Because it’s a cotton blend (with no wool), I was able to keep the edges “raw”. This means there is no kind of trim added on the hem, neckline or sleeve cuffs – it’s just plain stockinette stitch. When edges are left raw in a cotton/linen/hemp yarn it’s fine because it tends to stay pretty flat (or you can steam it flat and it stays that way).
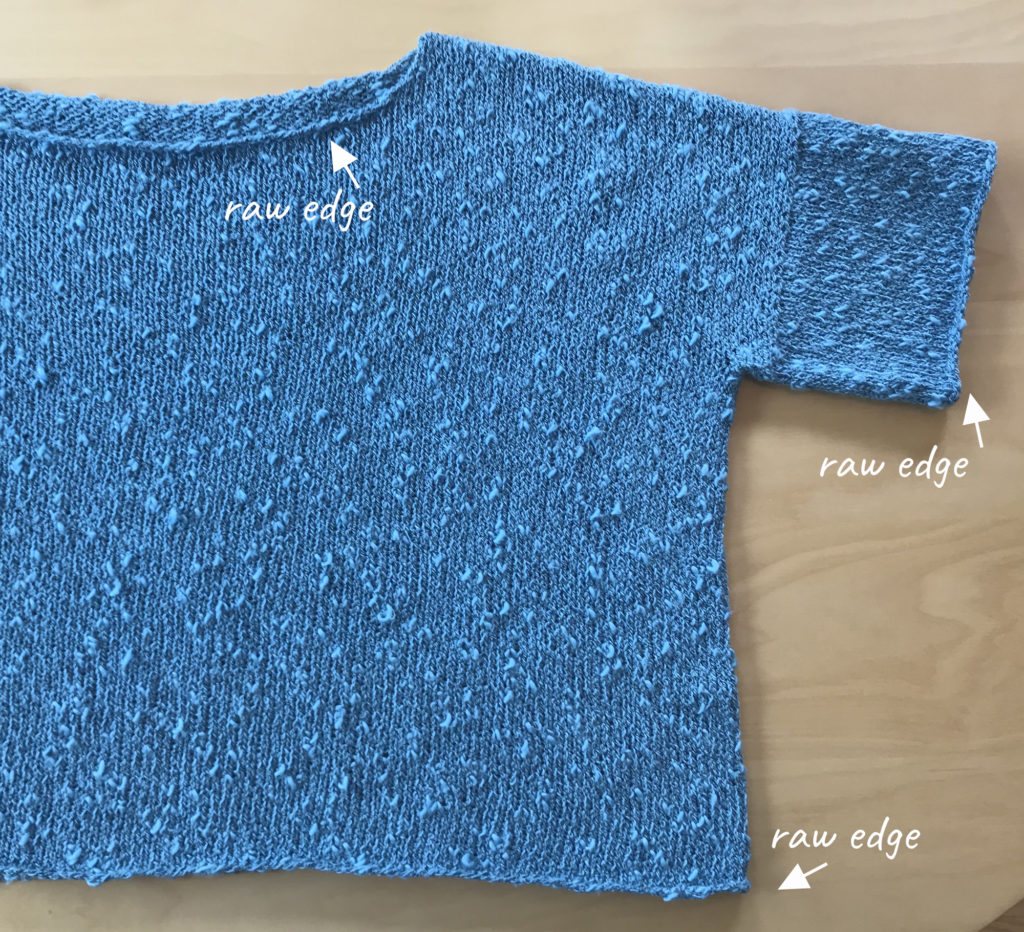
But if you were to use a yarn with wool in it, these raw edges wouldn’t stay flat, no matter what you do! Wool has a lot more elasticity to it than cotton or linen so when you work an edge in Stockinette Stitch with it, it gets all springy and just wants to roll. I also find that 100% cotton can have this tendency as well (vs a cotton mixed with nylon, polyester or linen, at least in my experience!). If you are using a yarn that will cause your edges to roll, or if you just prefer to not have your edges look unfinished, scroll down to the “Adding Trim” section on this page for tips on how to do this!
Yarn Substitution Ideas
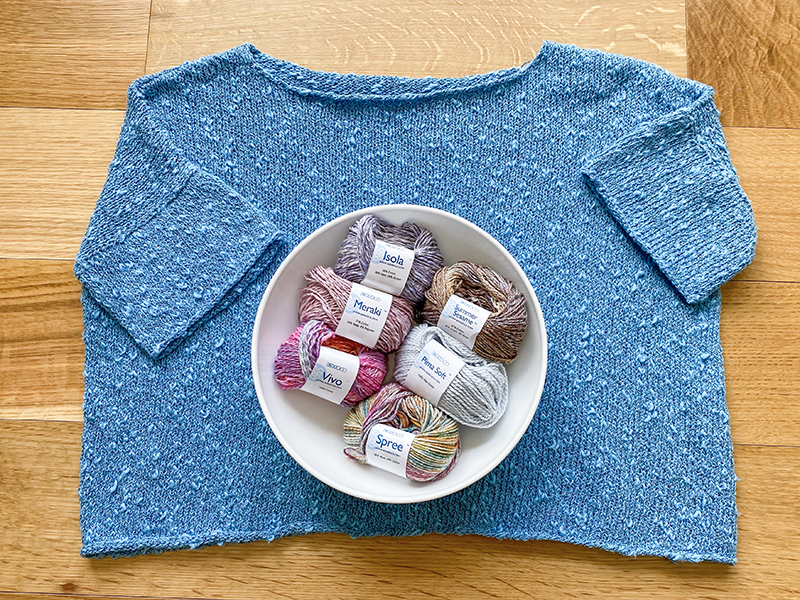
As of the last update of this page (February 2022), Berroco Quinoa has been discontinued. But, I have some other yarn substitution ideas that knit up similarly to Quinoa, including some new yarns that Berroco just came out with for Spring/Summer 2022:
- Berroco Meraki: this is a cotton/polyester/hemp blend that knits up so similiarly to Quinoa (even a similar thick/thin texture). In my swatching, the only difference was that in the Meraki I had to go down to a US 5 needle (instead of US 6). And like the Quinoa, the edges had minimal rolling
- Berroco Isola: this is a cotton/linen/viscose blend and is also a great option to consider. Similar to Meraki, I had to go down a needle size to get gauge and I also found in my swatching it had minimal rolling.
- Juniper Moon Farm Zooey DK: this is a cotton/linen blend that’s a great option to consider. It also has a similiar thick and thin texture like Quinoa, and I was able to get gauge on the same US 6 needle.
There are so many other DK yarn options out there to consider! Just keep in mind my notes above about fiber content and adding a trim stitch pattern if needed (with tips on how and where to add trim in the next section below).
Remember, swatching is important!
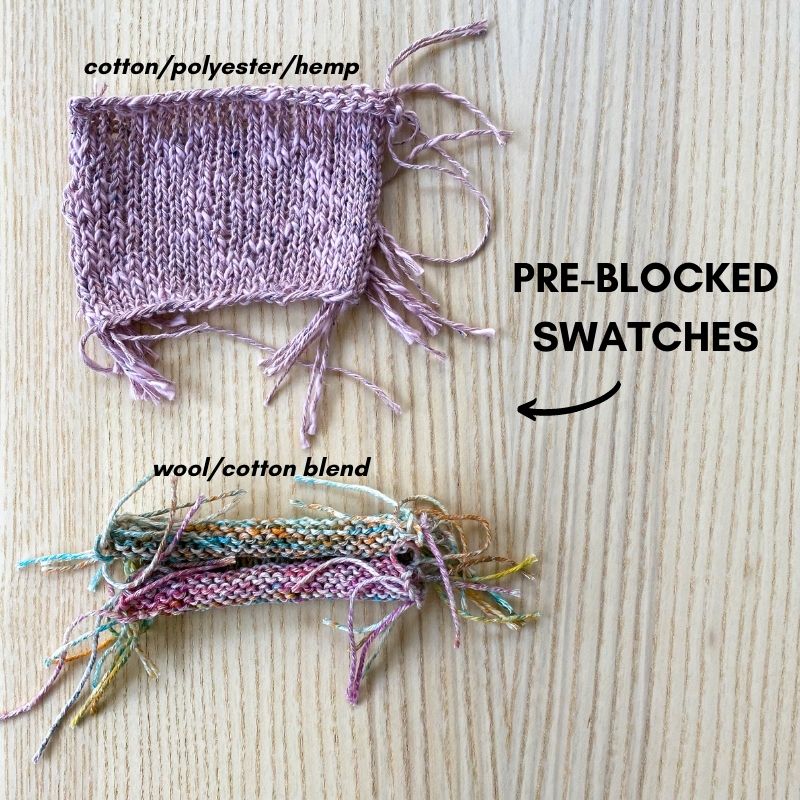
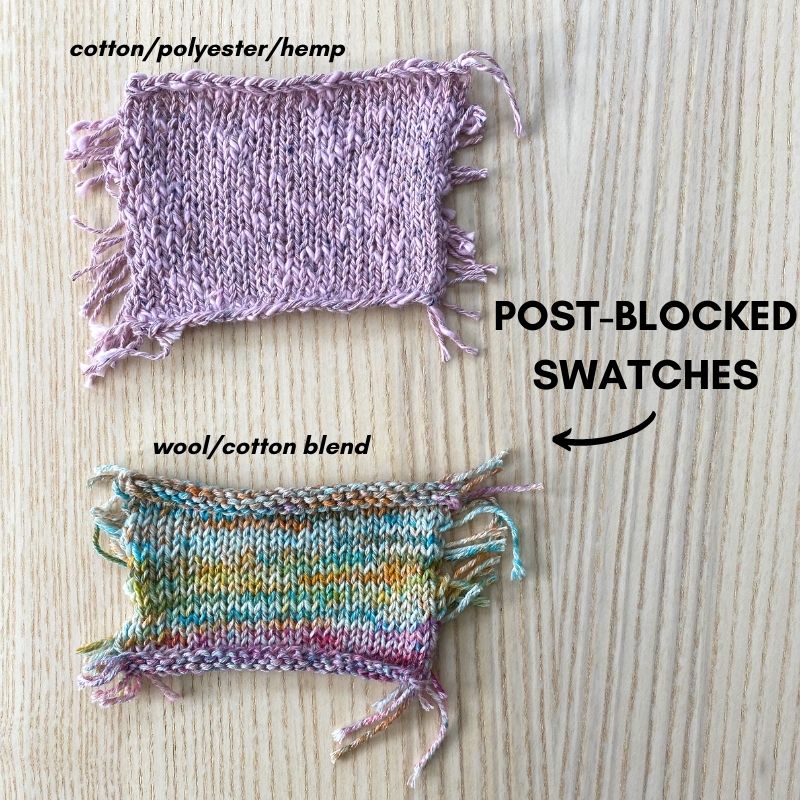
Regardless of what yarn you may choose to use, remember to swatch (and make sure to swatch in the round) because everyone’s tension can be a little bit different (and for more tips about gauge, read the next section). Plus, swatching will help to show you how much your raw edges may roll (and so it will tell you whether or not you should consider adding a trim to the hem and other edges!). Let me show you an example…
Below you will see a swatch I did in Berroco Meraki, a cotton/polyester/hemp blend (pink yarn) as well as a swatch in Berroco Spree, a wool/cotton blend (multi-color). In the pre-blocked picture, you can see how Meraki’s cast-on and bind-off edges (the top and bottom) have hardly any roll (even before blocking!) whereas Spree is rolling so much you can’t even tell it’s a little swatch. After blocking the Meraki looks similar to pre-blocked (perhaps a little flatter on the edges) and Spree has de-rolled a little bit, but you can still see it rolls and probably will continue to roll more.
So swatching will not only help you figure out what needle size you should be using (to make sure you are close to gauge) but it will also tell you whether or not your chosen yarn will work for the raw edge design. If your swatch looks like Spree’s did above, simply work my suggestions for adding trim and you’ll be good to go!
Adding trim to edges instead of leaving them “raw”
If you want to knit this design but use a yarn with wool in it (that will cause the edges to roll), I recommend using the following types of stitch patterns as your trim:
- Garter Stitch (when worked in the round as you would do in this design, that means knitting 1 round, then purling 1 round and repeating those 2 rounds for 1-2″).
- 1×1 Rib Stitch (working k1,p1 all across the round and then repeating that round for 1-2″)
- 1×1 Broken Rib Stitch (working k1,p1 all across the round, followed by a round where you knit across the round, then repeating these 2 rnds for 1-2″)
If you want to add a trim, I would suggest getting an extra skein of yarn (especially if using a yarn with only 50 grams per skein), just to be on the safe side. In my example below I didn’t wind up using much additional yarn but it’s always better to have that “insurance skein” just in case (and this way you can always lengthen your Castaway too if you prefer).
My Broken Rib Example:
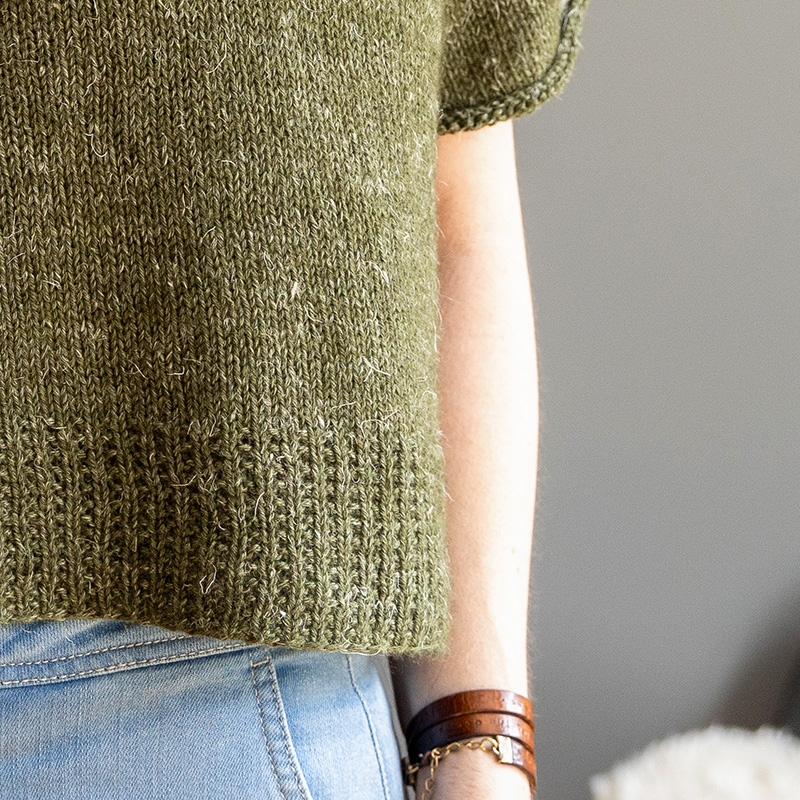
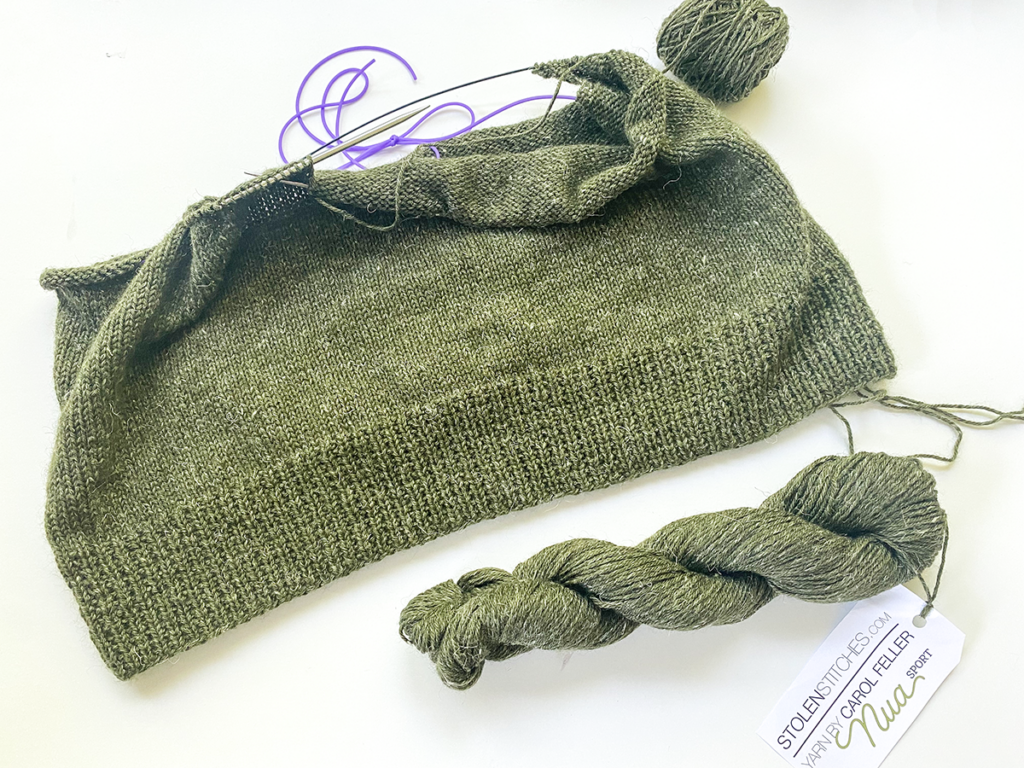
I knit up a sample of Castaway with a bottom edge trim in 1×1 Broken Rib Stitch (see pictures below). I used Stolen Stitches Nua Sport – a merino/linen blend. Here is exactly what I did in this sample:
- I cast-on with 1 needle size smaller (so a US 5 32″ instead of a US 6 32″), pm for BOR and joined to work in the round.
- Rnd 1: [k1, p1] to end.
- Rnd 2: knit to end.
- Repeat rnds 1-2: until hem measures approx. 3″ from CO edge, ending after working a rnd 1.
- Then I switched to my body needle of US 6 and worked the pattern as instructed for the Body.
- I opted to not add trim to my sleeve borders as I liked the rolled look, but you could repeat the same rib stitch at those edges as well if you prefer.
Other general tips if using other stitch patterns
BODY & SLEEVE EDGES:
This is pretty easy to do for the body hem and the sleeve hems. First, I suggest using 1 needle size smaller than the needle you got gauge with. Then, for the body, just work the beginning of the pattern in the trim pattern for 1-3″ (right after cast-on) and then switch to your gauge needle and transition to Stockinette stitch and work until measures the amount of inches specified in the pattern. For the sleeves it’s similar – work in Stockinette stitch until 1″ before your desired length (with your gauge needle) and then switch to 1 needle size smaller and transition to your trim pattern for the remaining length.
NECK EDGE:
Even with a wool yarn, I don’t think adding trim around the neckline is necessary (as it typically won’t roll as much as a hemline), but it’s definitely an option to consider. Or you can work a trim around the neckline if you want to cinch in the neck (if it’s too wide on you).Here is what you would do…
You would have to use a 16″ circular (and I suggest 1 needle size smaller than your gauge needle) and pick up and knit all of the stitches around the neck opening after the garment is all done. You would pick up and knit into each of the back neck stitches, and then along each front ‘curve’ you would pick up approx. 3 sts for every 4 rows, and then pick up and knit into each of the center front cast-on stitches. If you are doing a k1,p1 rib stitch pattern you would just need to make sure the total amount of stitches picked up was a multiple of 2. I’d also recommend that you use 1 needle size smaller than you used for the body of the garment.
And that’s it! Just a few modifications and your Castaway is ready for wool and a more cold-weather friendly top. To see another example of added trim, below is a photo shared with me from Charlene who added trim to her own Castaway because she knit it in Elsebeth Lavold Silky Wool, a wool/silk/nylon blend:
She added broken rib stitch to the bottom hem and sleeve edges, and then garter stitch the neck trim. I love how this came out and hopefully it helps you to envision what yours may look like as well should you add trim.
Adjusting for a slightly different gauge
In Castaway, the stitch gauge is more important than row gauge, so focus on trying to match that when you’re swatching. But, if your gauge is a bit off, not to worry. Castaway’s silhouette and construction is so simple that there are workarounds if you have a different gauge.
Option 1: Your sweater comes out a little bigger or smaller.
If let’s say you’re getting a gauge of 20 sts = 4″ instead of 21 sts = 4″, then your sweater will come out around 2″ larger in total circumference (or 1″ wider on either side). In some sweaters this may seem dramatic but in a drop-shoulder garment where you’re picking a size whose finished measurement is 6-10″ larger than your actual bust, 3″ isn’t super dramatic. Same goes if your gauge is a bit tighter. Let’s say you’re getting a gauge of 22 sts = 4″, then your sweater will be 2″ smaller in total circumference. So long as you were originally in the middle or upper part of that 6-10″ range, this shouldn’t be a problem. But if your gauge is more off or if you think the change will make your sweater too big or too small, read option 2 below.
Option 2: Follow the instructions for a different size.
You can simply knit a size smaller or size larger to accommodate a looser or tighter gauge. Let’s say your gauge is 20 sts = 4″. And let’s say you have an actual bust of 38″. You had originally wanted to make the Medium size which has a finished circumference of 47.5″, giving you 9.5″ of positive ease. You take the cast-on number for that size (which is 250) and divide it by your per inch stitch gauge which is 5, and you get a measurement of 50″. But for your bust size you feel that is too big – so then take the next size down’s cast-on number (which is 226) and divide that by 5 and you get a measurement of 45.25″. This is about 2″ less than the medium size you were originally aiming for, but for your bust size of 38″, it still gives you over 7″ of positive ease which is in the recommended range. So by knitting the size Small at your gauge, you’ll get a size that will work for you and not be too oversized.
Adding Length or A-Line Shaping:
As written, Castaway has no shaping (so a straight body style) and measures approximately 10 (10, 11, 11, 12, 12, 13)” from underarm to hem. If you want to make your Castaway longer, you can just keep knitting until you’re happy with the length.
If you want to add some A-line shaping (so that your hem circumference is wider than your bust circumference), then you’ll need to make that decision before you cast-on, as you’ll want to cast-on more stitches than what the pattern recommends. If you want to add A-line shaping, I also advise that you lengthen the piece a bit. Here are some tips on adding A-line shaping & lengthening a bit:
- Cast-on 24 more stitches than what the pattern states for your chosen bust size.
- Your BOR marker marks your BOR as well as one of your body’s sides. You’ll want to place another side marker on the other side, and the halfway mark (so if you cast-on 250 stitches, place your other side marker after 125 stitches).
- Work in Stockinette stitch in the round (St st) for about 1″ (note: If you are adding a trim, work your trim first, then work in St st until it measures 1″ from cast-on edge. If your trim is 1″ or longer, then just work a couple of rounds in St stafter trim is done).
- Work your first decrease round as follows: k1, k2tog, k to 3 sts before marker, ssk, k1, slip marker, k1, k2tog, k to 3 sts before marker, ssk, k1 – 4 stitches decreased total.
- Continue working in St st in the rnd, repeating above dec rnd every 14th rnd 5 more times (so knit 13 rnds, then work the dec rnd, and repeat that 5 more times). You’ll have decreased 24 stitches so you’ll now be at the stitch count listed for your chosen size in the pattern.
- Piece will measure approximately 10″ from CO edge at this point – continue working in St st in the round for another 2-4″ (so that your piece will measure 12-14″).
Adding Sleeves
As written, Castaway has short sleeves that have no shaping to them. You just pick up your stitches around each armhole and work in Stockinette stitch in the round for 4″ or desired short sleeve length. However, adding longer sleeves is easy to do! One option is to just keep knitting for longer than 4″ (around 8-10″ for 3/4 length sleeves). This will give you a more relaxed sleeve with no taper. If you want a bit of a taper, then here are some tips:
- Work in Stockinette stitch in the round (St st) for approximately 1-2″.
- Work your first decrease round as follows: k1, ssk, k to last 3 sts, k2tog, k1.
- Work in St st in the round, repeating above decrease round every 1″ or so* until you’re happy with the circumference, then continuing just knitting until you’re happy with the length (or want to add some trim).
*How much space you give in-between each decrease will depend on how tapered you want your sleeve and how long you want your sleeve. 1″ is a good starting point but feel free to space them closer or more far apart depending on your desired outcome.
Video Tutorials for Techniques:
Below you will find tutorial links (either photo or video) for all of the techniques used in Castaway.
Long-Tail Cast-on & Joining to Work in the Round
If you are new to this type of cast-on, check out my basic video tutorial here. Also, you can watch this video tutorial where I show you how I join to work in the round when I have a lot of stitches (like in a sweater body) – I was demo-ing a different sweater but the idea/technique is the same regardless of the designs.
Cable Cast-On
The cable cast-on is worked when you cast-on stitches for your Front underarms. Check out this video tutorial where I show you how to work this technique in a similar sweater design (please note that in this demo I cast-on less stitches than in Castaway, but the technique is the same).
Wrap & Turn Short Rows
Short rows are used to shape the shoulders. For the basics on how to work wrap and turn short rows, check out my video tutorial here. And then watch this video that shows you how to knit (and purl) the wraps as you reach them when you’re done working the short rows.
Note: if you’re interested in substituting German Short Rows, watch my video here.
Sloped Bind-Off for Neck Shaping
When shaping the neck, I use the “sloped bind-off” technique – the pattern walks you how to do this step by step but if you need a visual, you can watch this video tutorial – it’s for a different sweater but the technique is the same regardless of the specific design.
Back Underarm Pick-Up
When it comes time to work your upper back (starting at the underarm), you’ll be instructed to pick-up and knit into the base of the Front’s underarm cast-on stitches. Watch this video tutorial for a visual of this process (it was for a different sweater with a different number of stitches being picked-up, but the techniques is the same).
Three Needle Bind-Off
For a beginner’s video of how to work the three needle bind-off, watch this video tutorial here. You can also watch this video where I demonstrate it on a sweater very similar to Castaway.
Picking Up Stitches Around Armhole
To create your sleeves, stitches are picked-up around each armhole. You can watch this video tutorial that shows you how to do this in a similar sweater design using the ‘magic loop method’ (which involves using a long circular instead of DPNs). If you want to use DPNs, you can still refer to that video for how to pick-up and knit (you’ll just use DPNs instead of the circular).
Blocking
Are you new to blocking garments? If so, check out my video tutorial here – I use a different sweater as my example but the technique is the same. Using a hand-steamer for the edges can also be really helpful (as well as for touch-ups now and then). Check out this blog where I talk more about how I use my hand-steamer.

