Wharf Street Tips
On this page you’ll find tips and tutorials for all the techniques used in my Wharf Street vest! I review the following topics on this page:
- Adjusting armhole depth
- Adjusting neck depth
- Pick-up and knit armhole trim
- Pick-up and knit neckline trim
- The following knitting techniques:
- Long-tail cast-on
- Joining to work in the round
- k2tog & ssk decreases
- ssp decrease
- Three needle bind-off
- Errata (pattern corrections)
Picking a Size
The Wharf Street vest has 10 sizes to pick from, all numbered 1 through 10. The most important thing to look at is the finished circumference of each size which is:
33 (37, 41, 45, 49) (53, 57, 61, 65, 69)”
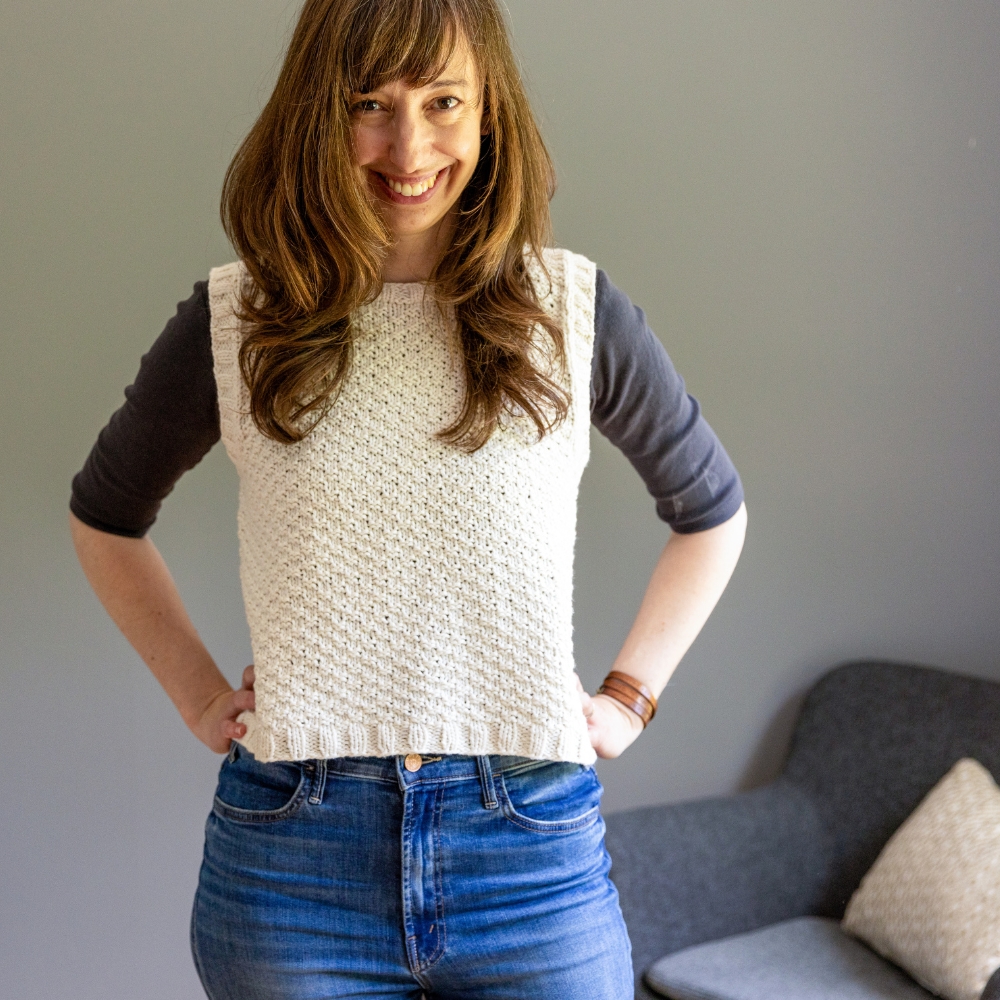
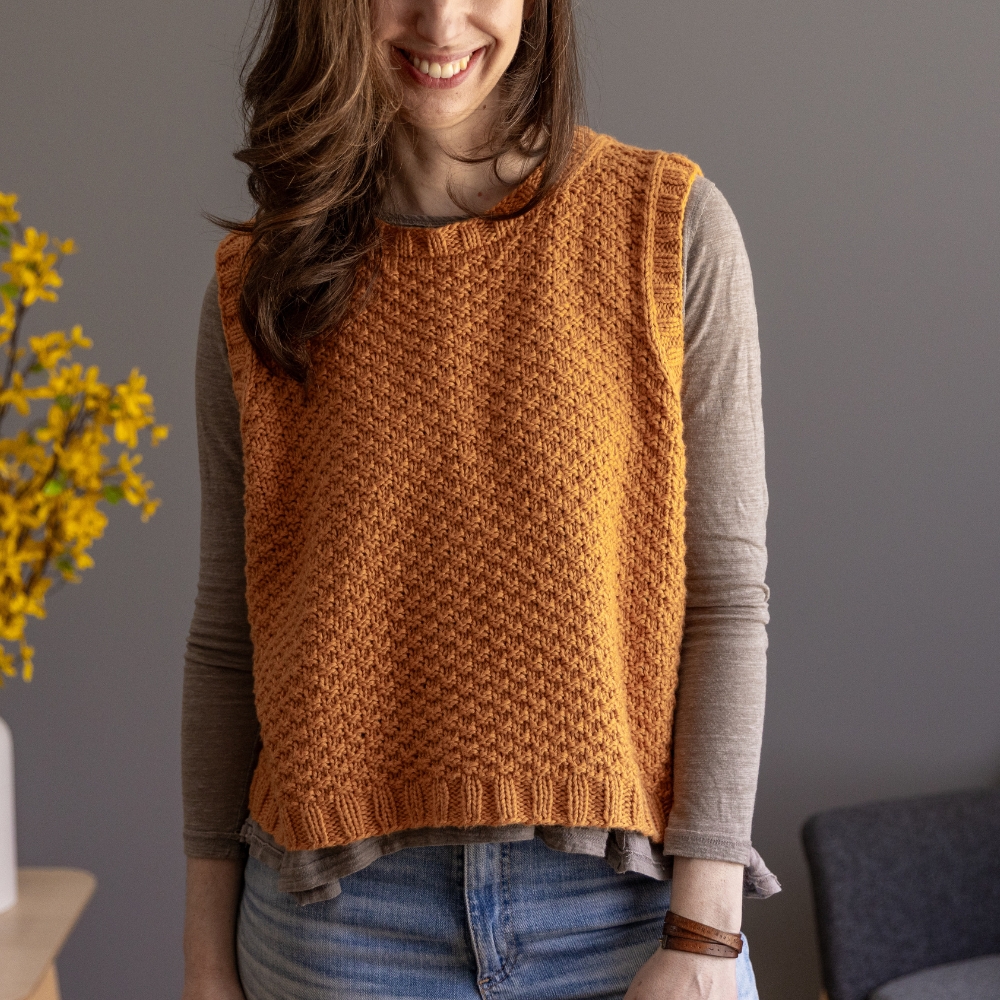
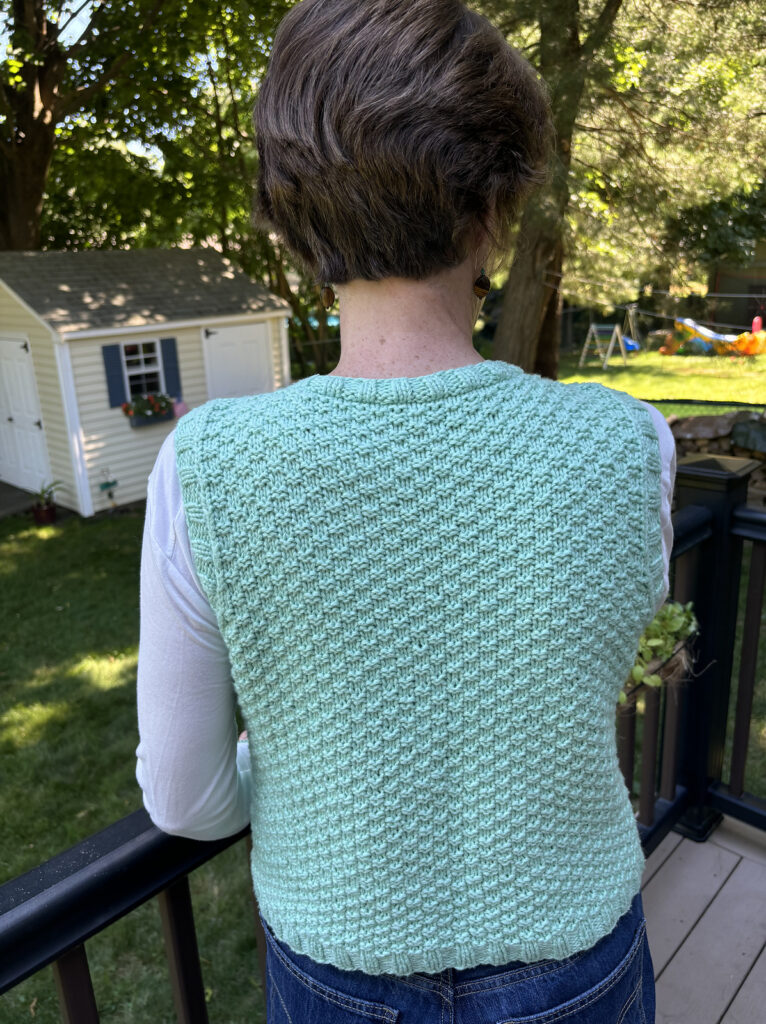
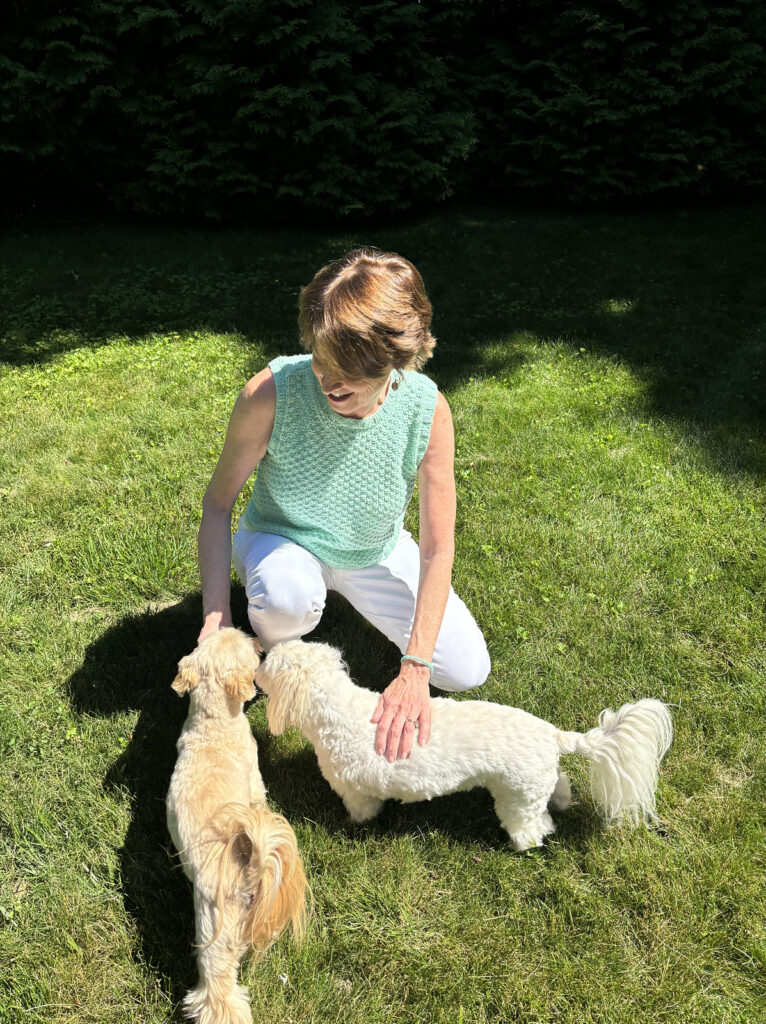
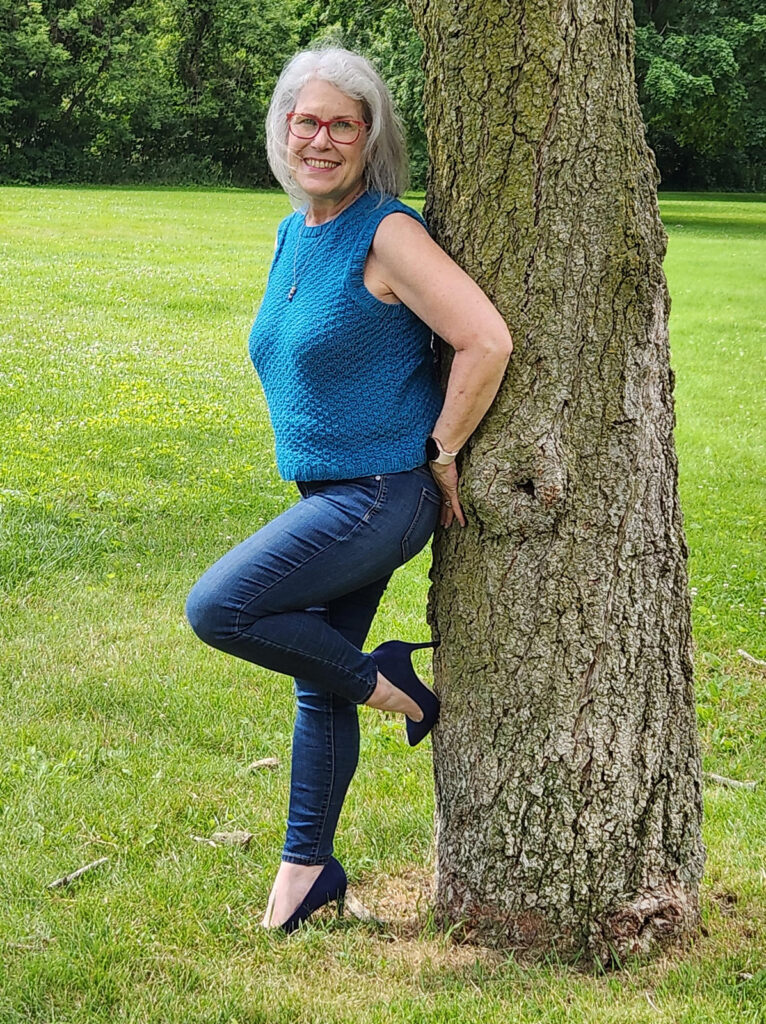
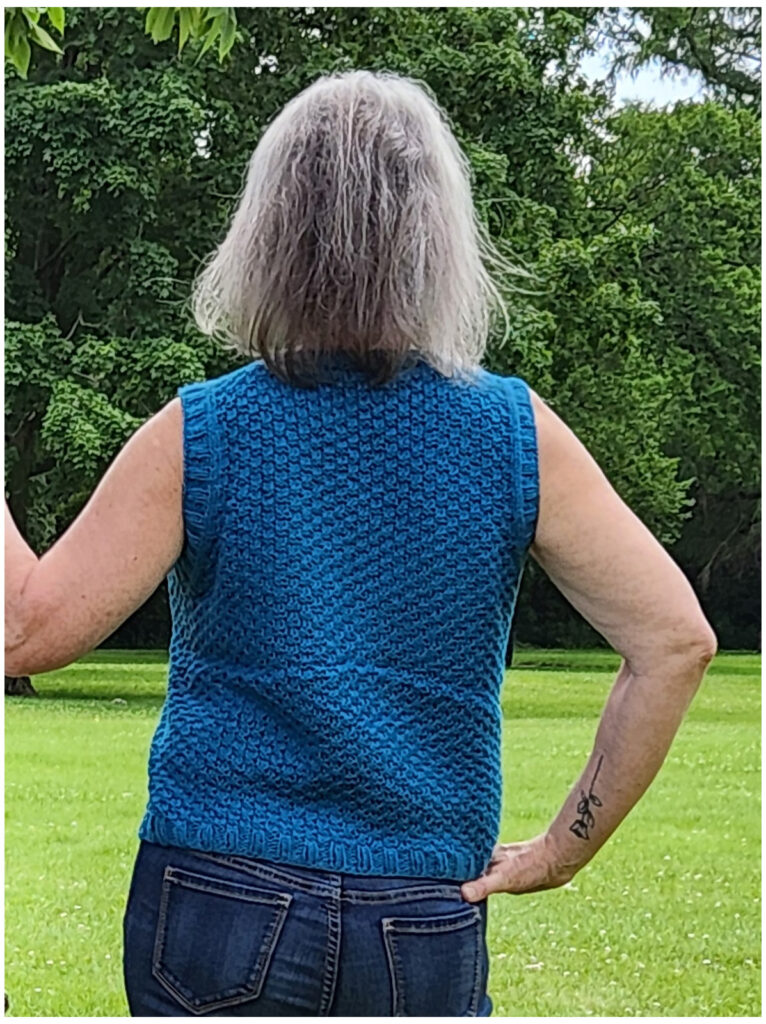
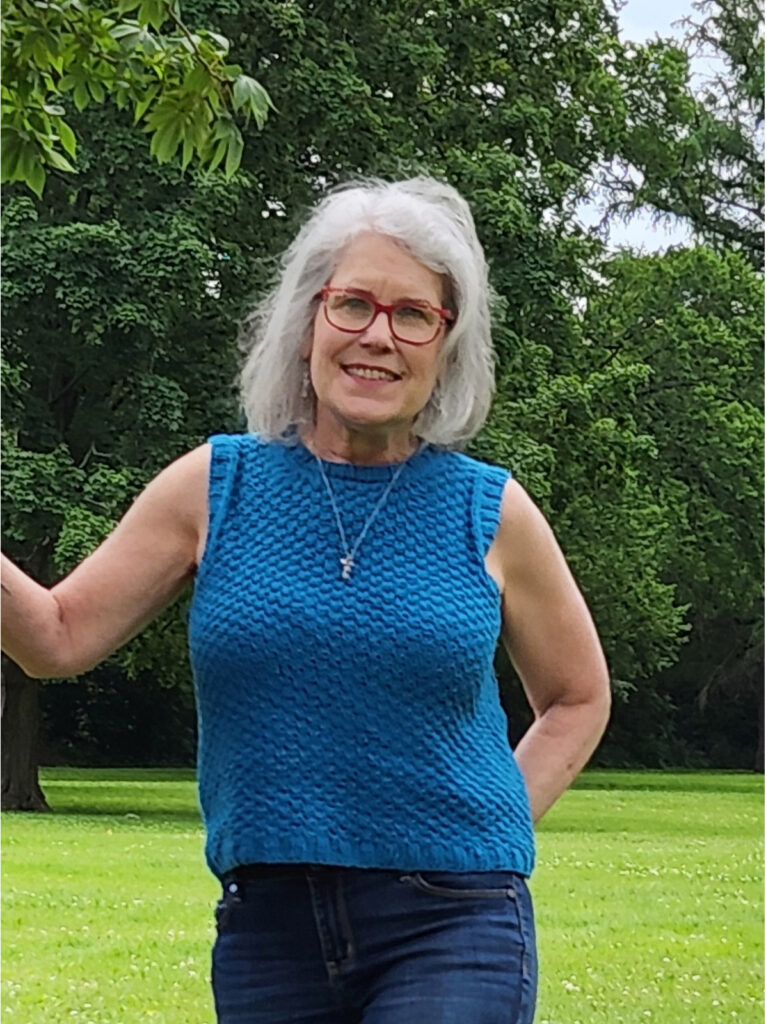
You should pick a size whose finished circumference is approx. 4-9″ larger than your actual bust circumference (note: to learn more about the concept of “ease”, check out my post here). Whether or not you choose a size on the lower end of that range vs the higher end just depends on how you prefer to wear the vest. In order to demonstrate how different amounts of ease are worn, I knit up 2 different sizes for the pattern photography. I’m wearing the white version with 4″ of positive ease at the bust and I’m wearing the orange version with 8″ of positive ease at the bust. Here are some additional photos:
As you can see, the 4″ positive ease version fits closer to my body (this is the 37″ circumference. The 8″ positive ease version is looser (this is the 41″ size). Here are a couple of important things to note about the fit difference:
- As you can see in the first photo, my hips are much wider than my bust. They measure somewhere in the 39-40″ circumference. So the 37″ size vest has to sit high enough above my hips in order for there not to be any “snugness” around my hips. To accommodate that, I actually made this version 1″ shorter in length. And because it’s a closer fit, I styled it over a close-fitting 3/4 length shirt.
- In the second photo, because the finished circumference (41″) is larger than my hip circumference, it allowed me to keep the length as written in the pattern. And it allowed me to style it over a more flowy top – as you can see, the underneath layer sort of flows out from below the vest. I wouldn’t have been able to do that with the 4″ positive ease version – it would have looked too bunchy.
- To sum up, deciding on the amount of ease will depend on a) how you want to wear/style it; and b) your other torso measurements, such as your hips or abdomen.
If you’re still unsure which size to pick, it may also be helpful to measure the width of some vests or sweaters you have in your closet that you like the fit of and compare that to the body width listed in the schematic on the pattern. And to learn more about sizing and ease, check out my blog post about the topic here.
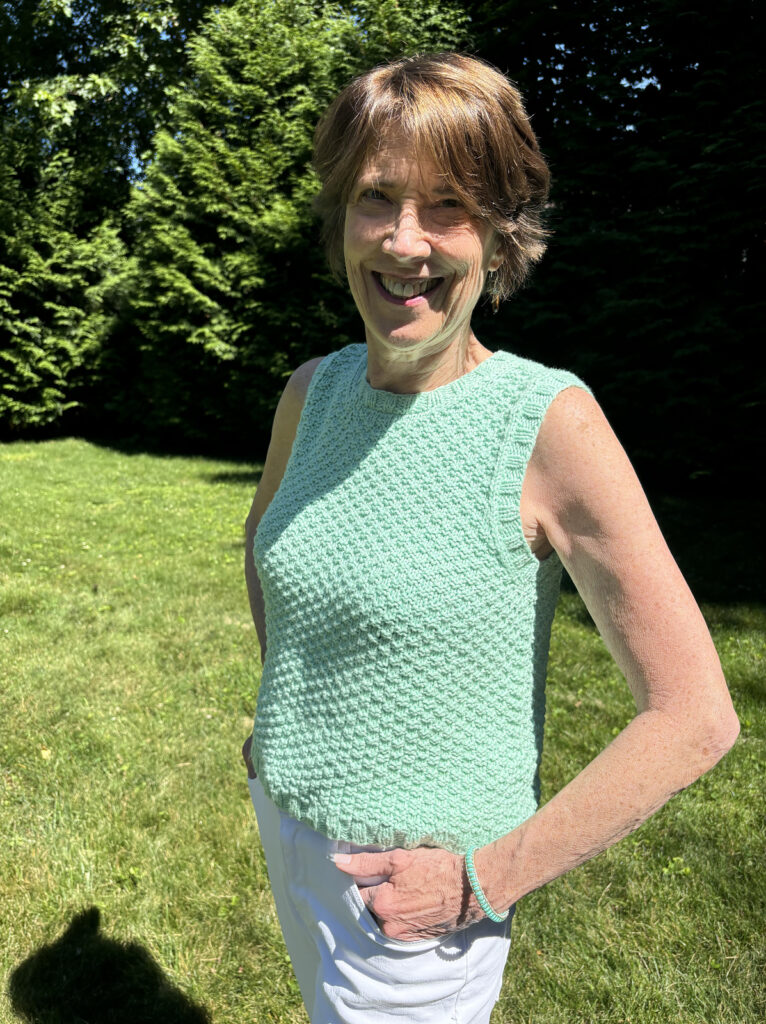
Also, check out some examples from a few of my test knitters below! To see all of my test knitters finished vests, check out this blog post.
Denise
Size: Wearing with approx 3″ of positive ease.
Susan
Size: Wearing with 8″ of positive ease
Denise
Size: Wearing with 4″ of positive ease
Yarn Options
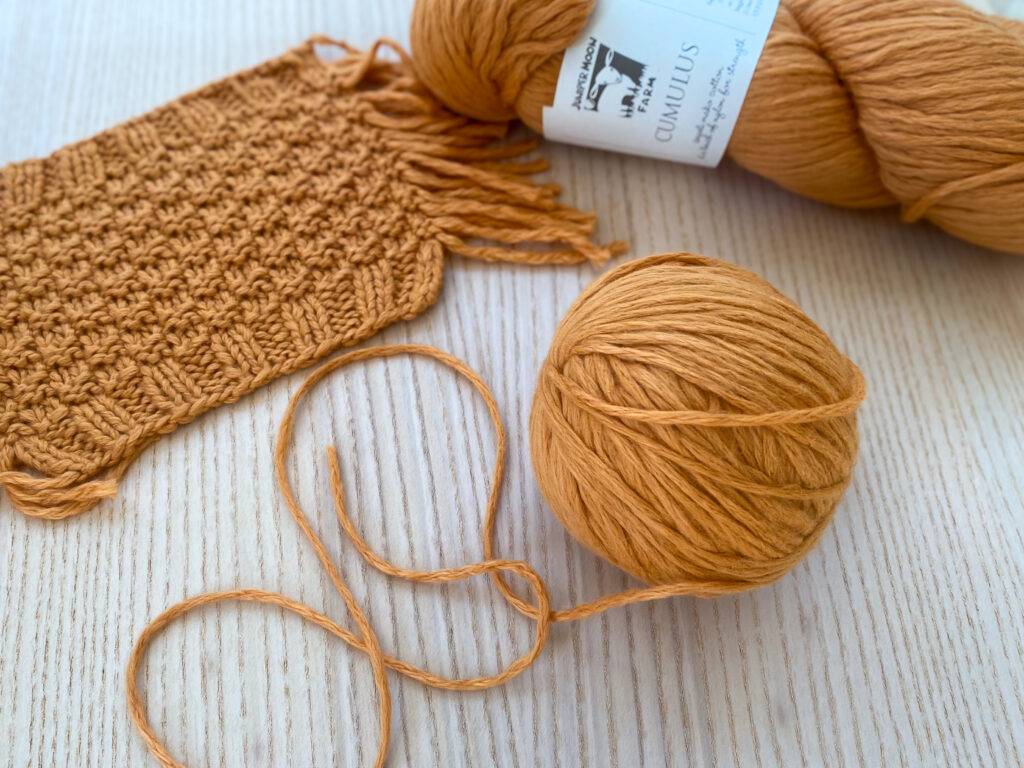
The pattern calls for worsted-weight yarn (although some aran-weight yarns can work as well). I used the yarn Cumulus by Juniper Moon Farm which is a chainette-constructed cotton/nylon blend. This type of construction makes the yarn feel SO light and airy and it’s velvety soft too. Often you think of worsted or aran-weight cotton as feeling heavy (especially if it’s cotton) but that is not the case at all with this yarn. The other benefit of this type of fiber construction is that it drapes beautifully in the box stitch pattern (sometimes also referred to as “double moss stitch”) and provides really clear stitch definition.
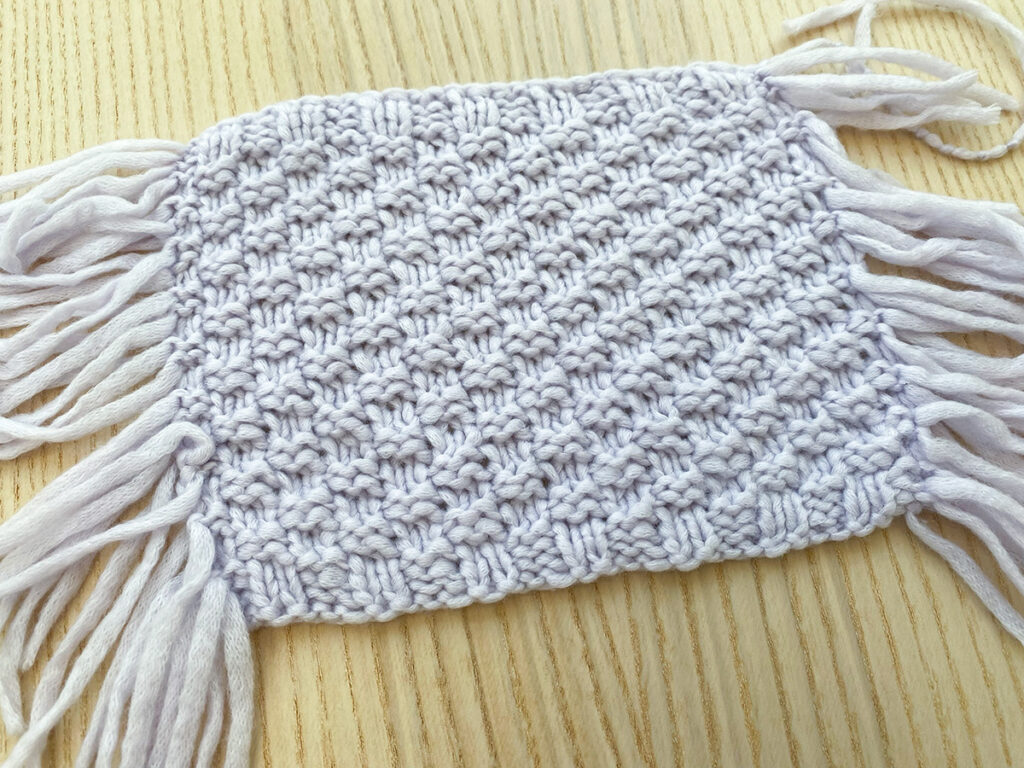
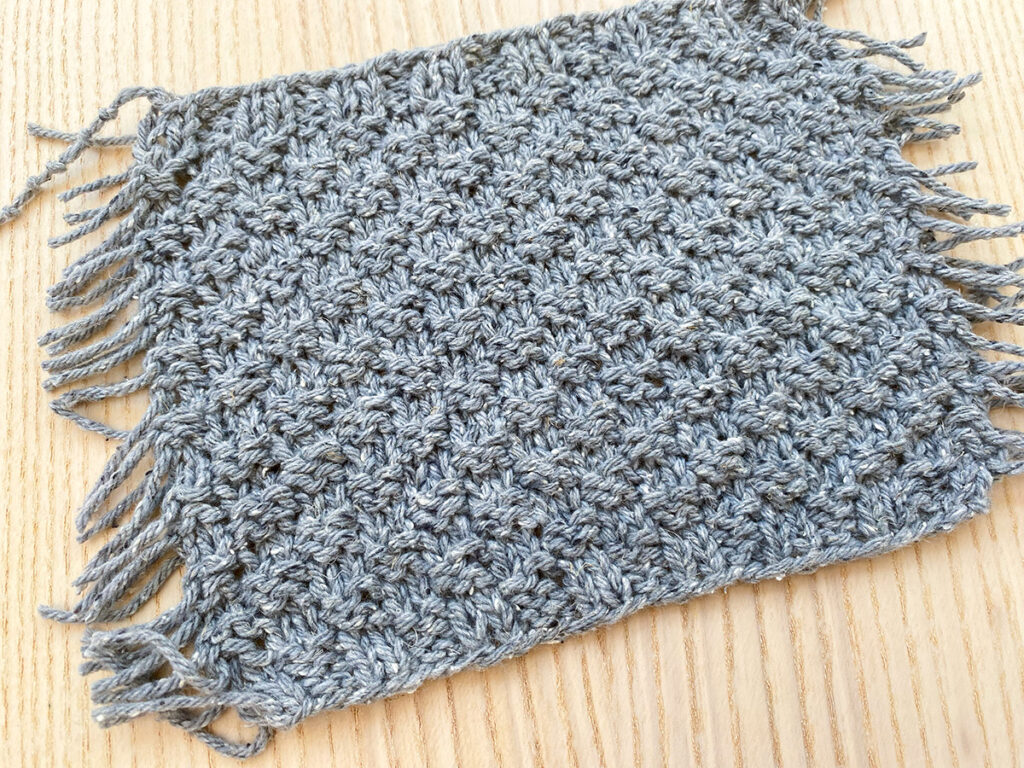
If you’re looking for similar, non-wool alternative, I swatched with 2 other yarns that I think could work well too:
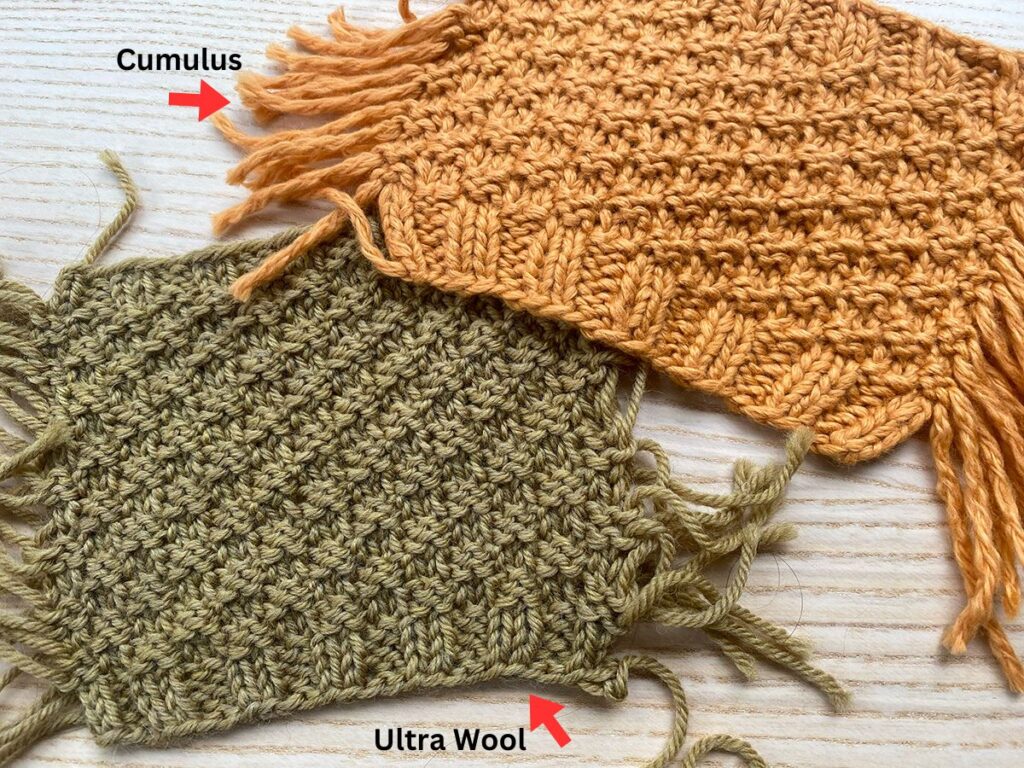
Of course other fiber types could work as well! Any type of yarn will work but the fabric created (and the look of the stitches) may just be a little different. For example, I also swatched with Berroco Ultra Wool (in green below). As you can see, the definition of the knit stitches (these are the flat stitches whereas the purl stitches are the bumpy ones) isn’t as strong as in the Cumulus yarn (in orange). Both yarns can work but the stitch definition just looks different in each.
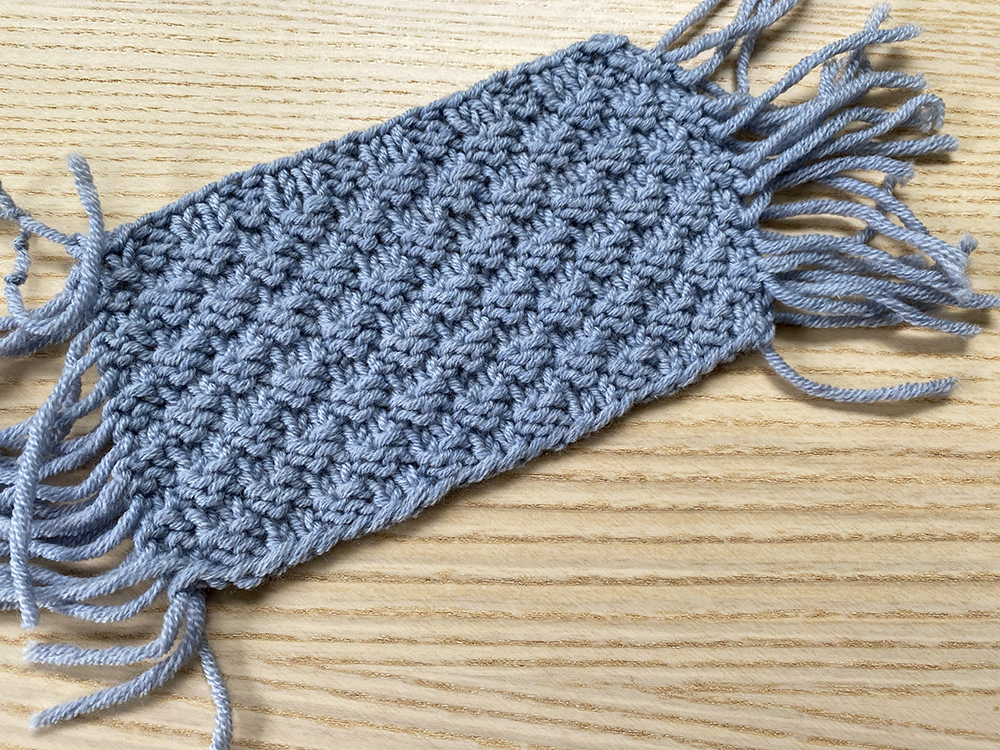
I also did some swatching in some other wool or wool blend yarns – all of these yarns worked well too gauge-wise and could be good options to consider as well!
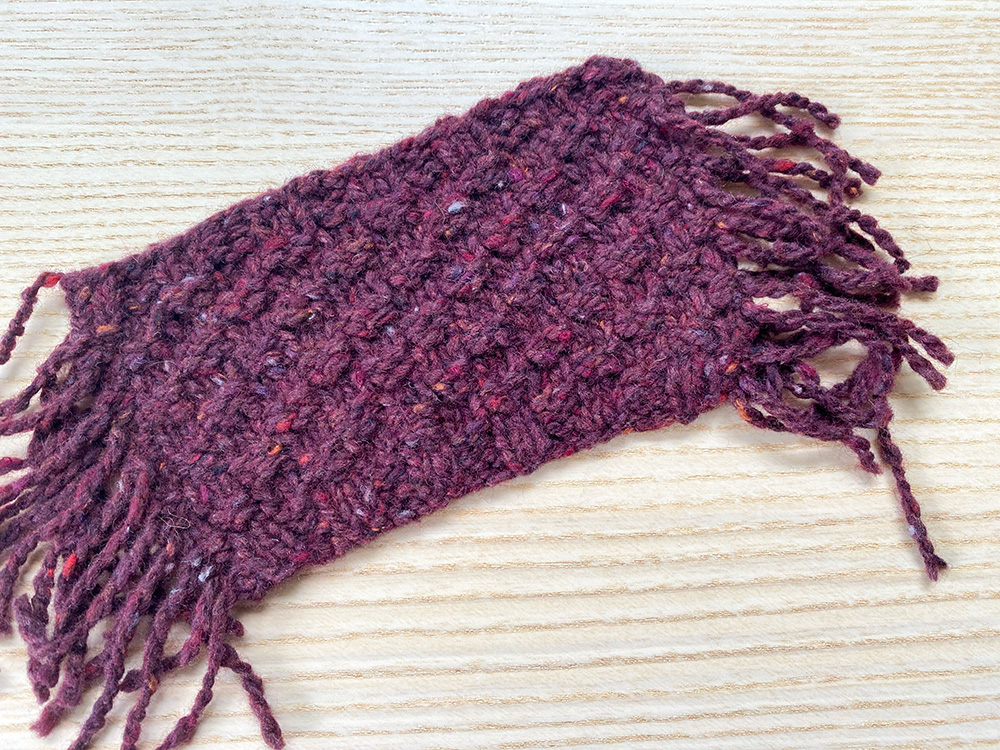
- Yarn: Berroco Millstone Tweed (new for Fall 2024!) A wool/viscose/polymide blend – love the tweedy look and it feels very light too.
- Needle I used to get gauge: US 8
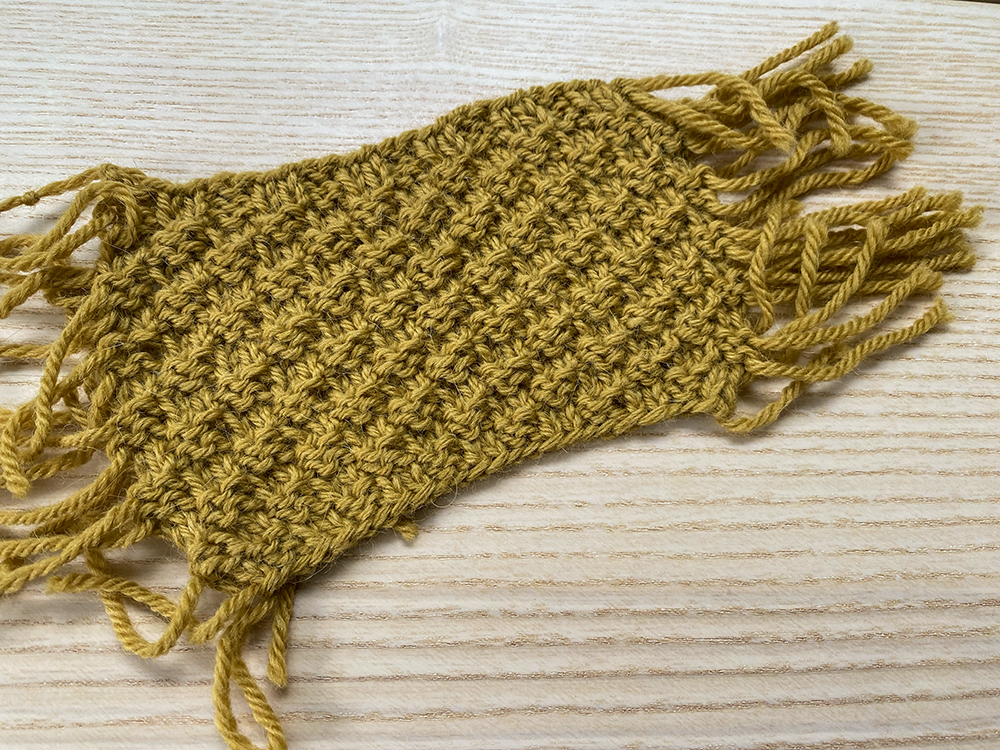
As you may notice, my swatches all above have strands on each side – that’s because they were worked in the round! Learn more in the below section.
Yardage requirements
In the pattern I list suggested yarn requirements for each size, and they are: 550 (600, 650, 700, 775) (825, 875, 950, 1000, 1075) yds of worsted-weight yarn.
Included in this is enough yarn to do a couple of swatches. But if you want to alter the length of your Wharf Street, you should plan on getting some extra yardage. Below is approximately how much extra yardage you’ll need for every 1″ of length you may want to add: 35 (35, 40, 45, 45) (50, 55, 60, 60, 65) yds.
Gauge swatching in the round
Because the body of this vest is worked in the round, then it’s important to do your swatch in the round. If you’re new to swatching in the round, check out my tutorial here. In it, I show how to swatch in the round in stockinette stitch whereas in this vest pattern you’ll want to swatch in the box stitch pattern, but the technique I work for swatching in the round is the same regardless of stitch pattern.
Specific to Wharf Street, I suggest casting-on 30 stitches (you could do more if you prefer – just make sure it’s a multiple of 4+2) and then working the swatch as follows:
- Work a k2, p2 ribbing border on the bottom for a few rounds.
- Then work the Box Stitch pattern in the round as follows:
- Rnd 1: *p2, k2; rep from * to last 2 sts, p2.
- Rnd 2: rep rnd 1.
- Rnd 3: *k2, p2; rep from * to last 2 sts, k2.
- Rnd 4: rep rnd 3.
- Rep rnds 1-4 for 5″ or so.
- Then work the same k2, p2 ribbing border at the top for a few rounds.
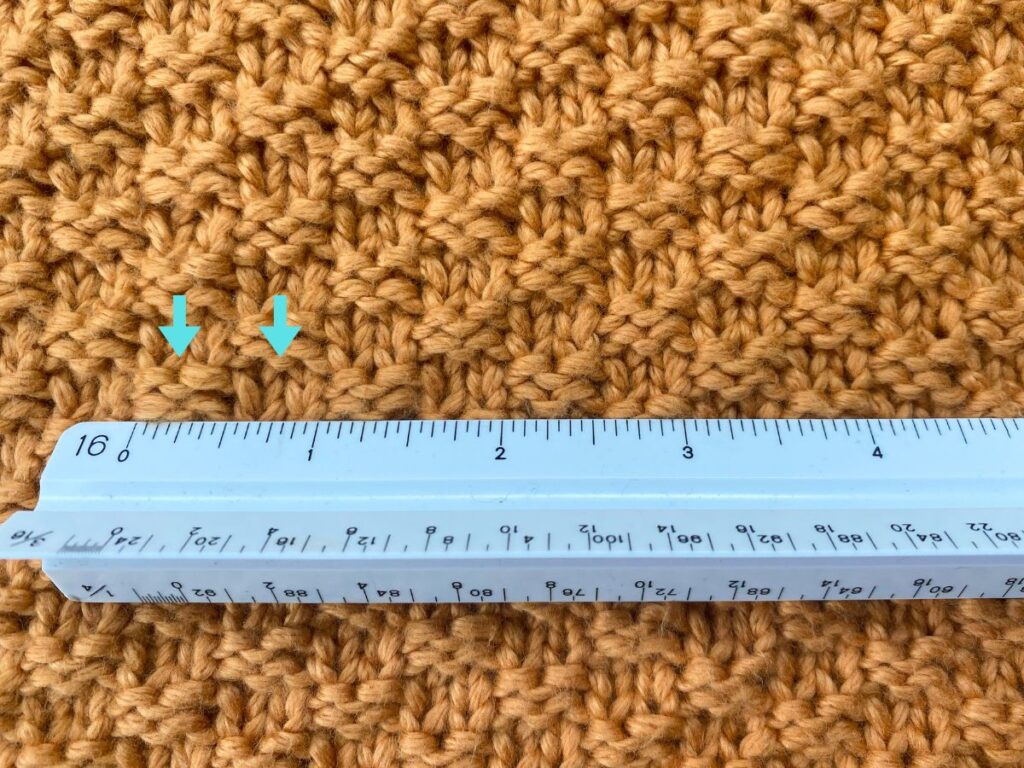
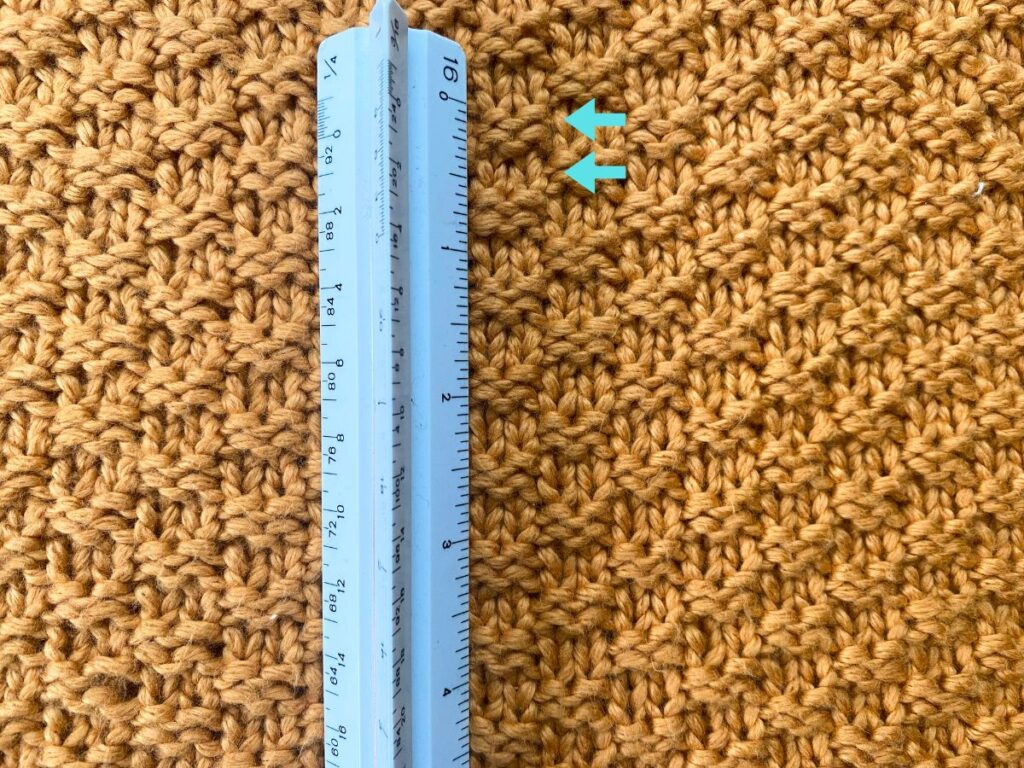
When measuring your swatch, the great thing with this stitch pattern is that you know the box stitch is made up of 2 stitch stitch repeats, so each ‘box’ is 2 stitches. As you measure you can just count “2, 4, 6…” etc. And the same goes for measuring your rounds – it’s a 4 round repeat where 2 of the rounds are purl stitches and 2 are knit stitches, so you just count each ‘box’ as 2 rounds.
Important Gauge Tip:
Although pattern gauge is in the round (and so that is what you’ll be swatching to determine needle size), I would suggest also doing a small swatch of the stitch pattern flat. The reason for this is because at the underarms the body is split into front/back and then the stitch pattern is worked flat as you work up to the shoulders. If your gauge changes from working in the round to flat, this could impact your armhole and neck depth. So it would be good for you to know ahead of time if your gauge does change (especially if your row gauge changes as that is what will affect your depths). If it does, here is what you can do:
If your row gauge loosens when working flat (i.e, you get less rows per inch): Work your WS rows with 1 needle size smaller.
If your row gauge tightens when working flat (i.e, you get more rows per inch): Work your WS rows with 1 needle size larger.
Personally I didn’t encounter a gauge-change in this stitch pattern when switching to flat knitting but I did have some test knitters who did, so it’s a good thing to keep in mind.
Pattern reading tip
In the instructions for this pattern, the use of brackets is found throughout. For example, a row might state: [k2, p2] to last 2 sts, then k2.
Whatever is listed in the brackets is considered a repeat sequence. So in the above example, that should be read as: “repeat the sequence of k2, p2 over and over again until you reach the last 2 sts, then k2”.
Here’s another example from the pattern: p4, k2, [p2, k2] to last 4 sts, p4
This should be read as: “p4, then k2, then repeat the sequence of p2, k2 over and over again until you reach the last 4 sts, then p4.” So the only thing being repeated over and over again in that line is what’s in the brackets – the p2, k2.
“Reading your Knitting” with the Box Stitch
When working the body of Wharf Street, you’re just repeating the same 4 rounds over and over again. It’s helpful to know how to “read” this stitch pattern as you knit it up so that you don’t have to mark down which round you are on – you’ll just know by looking at the stitches on your needles. Let me explain a bit more.
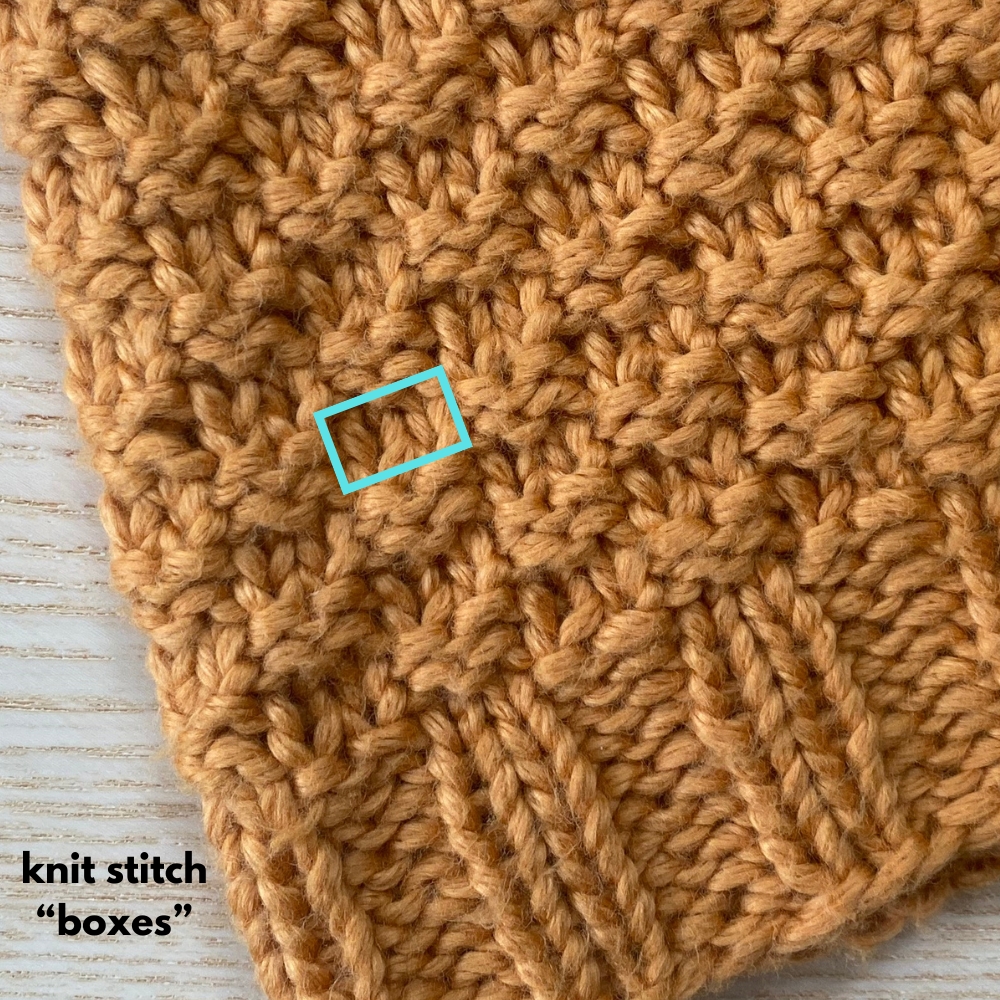
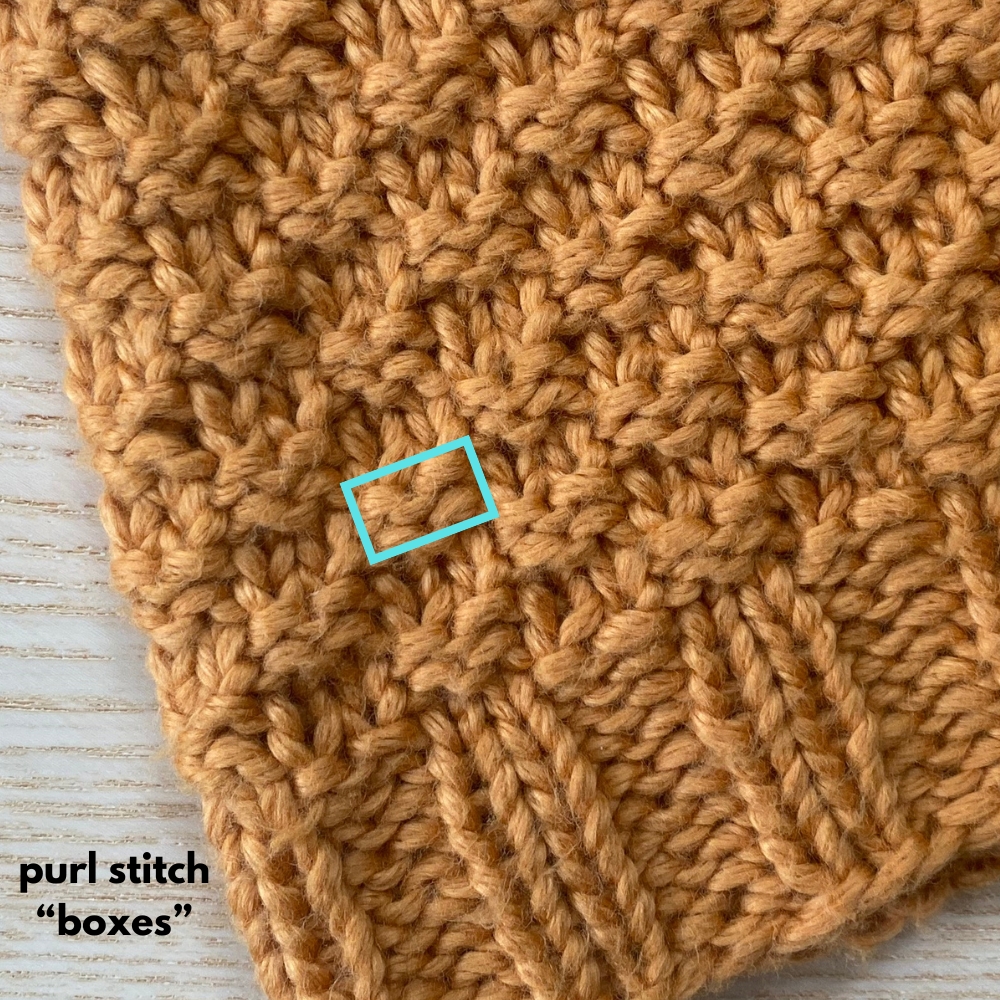
The stitch pattern is made of “boxes” and, when working in the round, each box is either 2 rounds of knit stitches or 2 rounds of purl stitches. The knit stitches the flat boxes and the purl stitches are the bumpy boxes. Every 2 rounds you switch the alignment of these boxes and this is what creates the basketweave-like appearance.
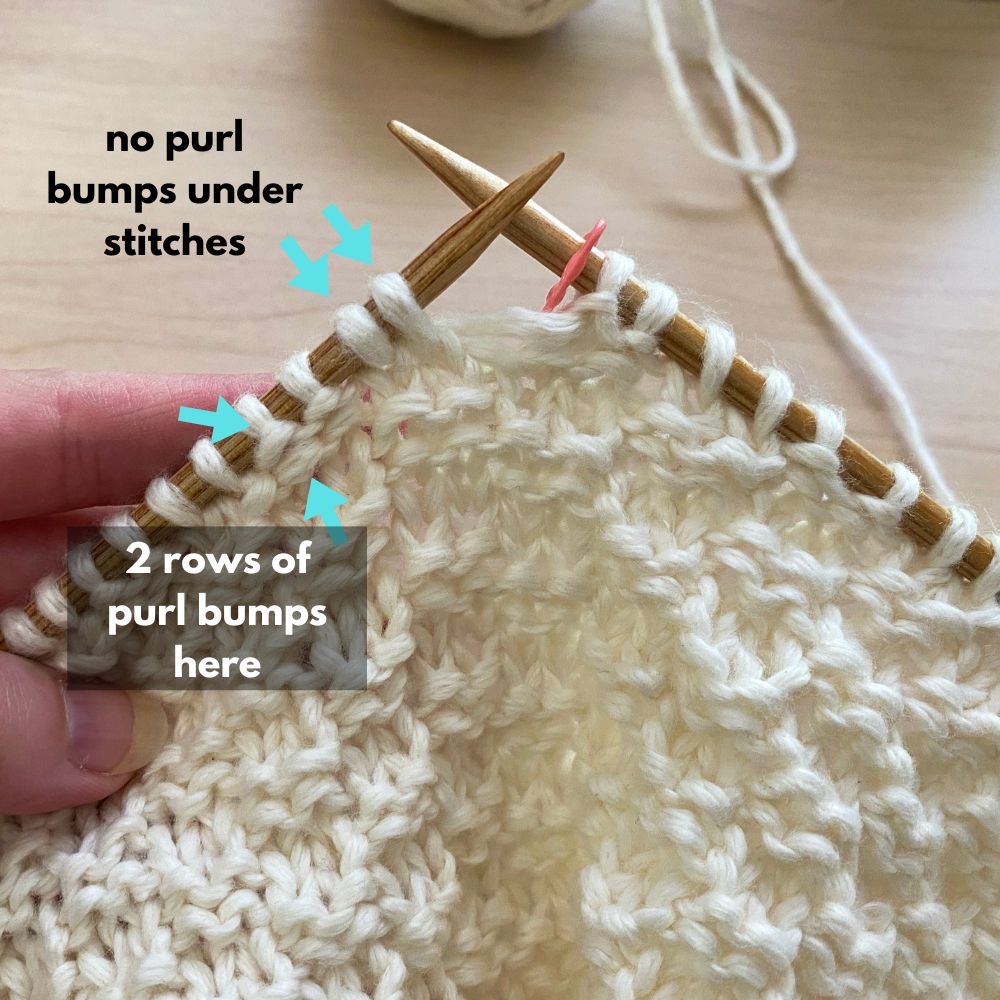
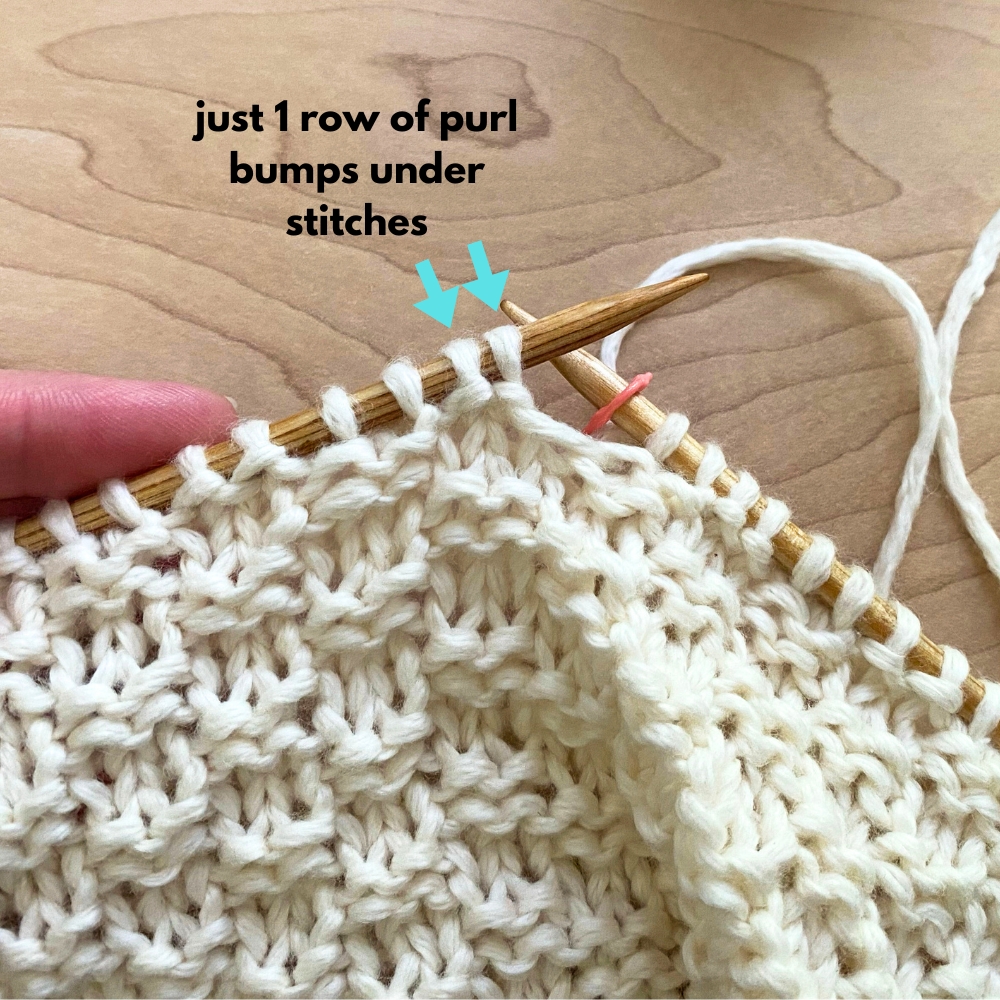
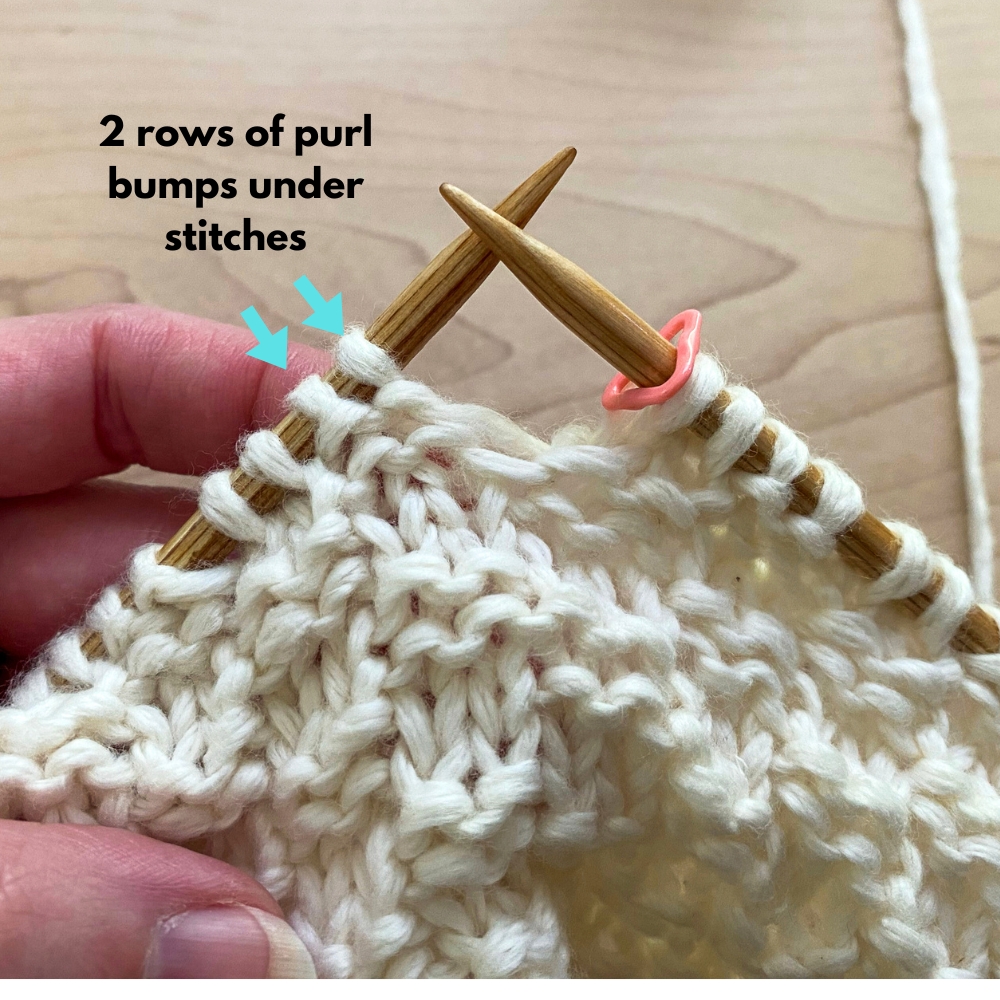
So when just looking at your work on the needles, the easiest thing to do is identify your purl bump stitches and whether or not you have 1 rounds of them or 2 rounds of them. Let me explain further…
In the image above, my next 2 stitches to work have no purl bumps underneath them. And I can also see that the 2 stitches to the left of them have 2 rows of purl bumps. So this tells me that my next round is one that starts with “p2, k2”. Because we only ever work 2 rounds in a row of the same sequence. I don’t want 3 rows of purl bumps on top of each other – we only ever want 2 rows. So by seeing 2 existing rows of purl bumps already, that tells me it’s time to change the sequence and I’m now ready to work “p2, k2”.
In the image above, my next 2 stitches have 1 row of purl bumps underneath them. But again, before we change the sequence, we need 2 rows of purl bumps. So since I can see I already have the 1 row, that tells me I need to continue with “p2, k2” for that round.
In the image above, my next 2 stitches have 2 rows of purl bumps underneath them. And again, since we only want our boxes to have 2 rows of bumps, that means it’s time to change the sequence and I’ll now start this round with a “k2, p2”.
How to lengthen body of Wharf Street
Lengthening the body of Wharf Street is super easy! You just work more or less rounds in the “Body” section of the pattern. You just need to make sure to end after working a round 4 of the stitch pattern.
Not sure what length you may want? If you’re unsure, the best thing to do is measure the full garment length (from top of shoulder down to hem) of an existing garment you love the length of on your body. Then compare it to the “Total Garment Length” measurement listed in the schematic (on page 11) for the size you plan to knit. If the schematic measurement is less than your desired overall length, add that difference to your “underarm-to-hem” length. If it’s more, then take that amount out. It’s important to look at things from the “total garment length” perspective but your underarm in this piece is not necessarily right at your armpit – it will sit lower. So it’s best to look at things from an overall garment length, from the top of your shoulder.
Adjusting armhole depth
If you would like to change your armhole depth whether it’s due to personal preference or because your row gauge may be different when working the stitch pattern in the yoke area, here are some tips:
To add length: Simply repeat rows 1-4 in “Front – Section 4″ more times until you are around 3” less than your overall desired armhole depth. Just make sure to end after working a row 4. And, very importantly, track how many extra rows you have worked. Then, when it comes time to work the Back, you’ll add these extra rows to the “Back – Section 4” section.
To subtract length: Do the same as above, but instead of adding rows to that section just take them away (again, making sure to end after working a row 4 and taking notes on how many repeats you take out so you can replicate on the Back).
Important note: If you are adjusting because your row gauge is tighter, this means you will also have to adjust your neck depth. So see the section below if this is the case for you. If you wind up adding length to both the armhole depth AND the neck depth, you will need to add the total of these additional rows to the number of rows worked for the Back in “Back – Section 4”.
Adjusting neck depth
The neckline of Wharf Street sits relatively high on the neck. It measures approx. 2.75″ down from the top of shoulder before ribbing. And so once you add the ribbing, the depth is approx. 1″ less than this. If you would like to make your Wharf Street neckline a bit lower, the easiest option is this:
- In the “Left Front” section, after you’ve worked the 18 rows, repeat rows 13-16 until you’re happy with the depth, but make sure you end after working a row 14. Take notes on how many extra rows you worked so you can then replicate on the “Right Front”.
- You’ll want to also add this length to the Back. Even though you’ve adjusted the front neck depth, this adds rows the overall shoulder to armhole depth so you’ll want to make sure to add these rows to the Back armhole depth as well. So whatever number of extra rows you worked for the Front length, add this number of rows to the “Back – Section 4” section.
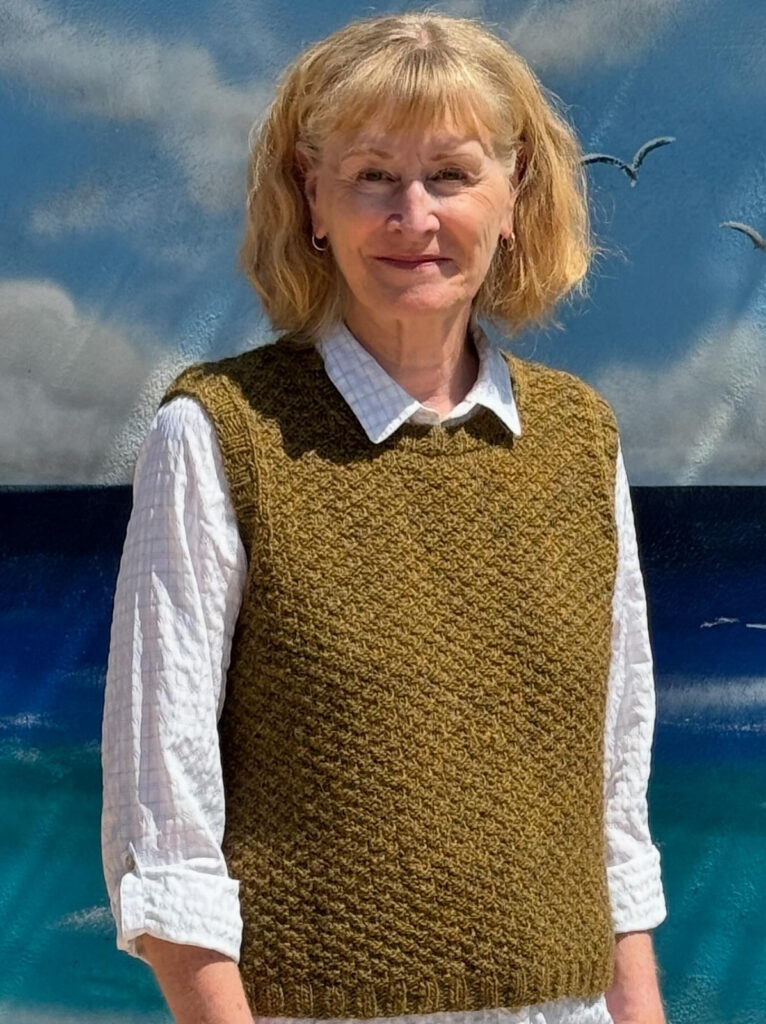
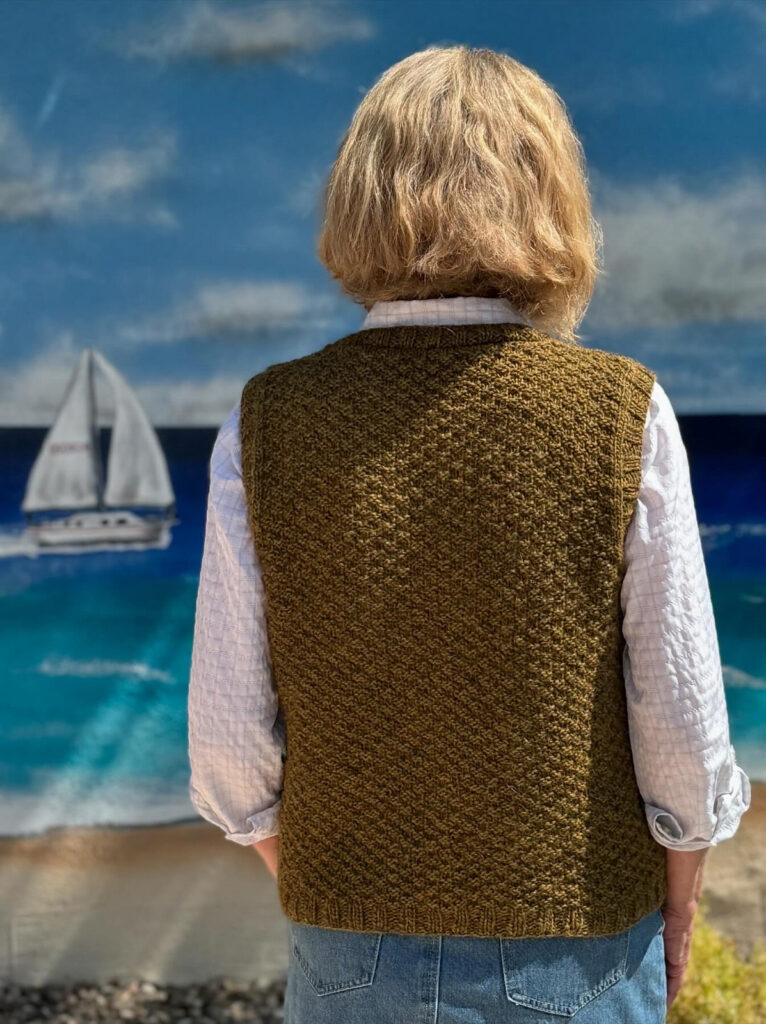
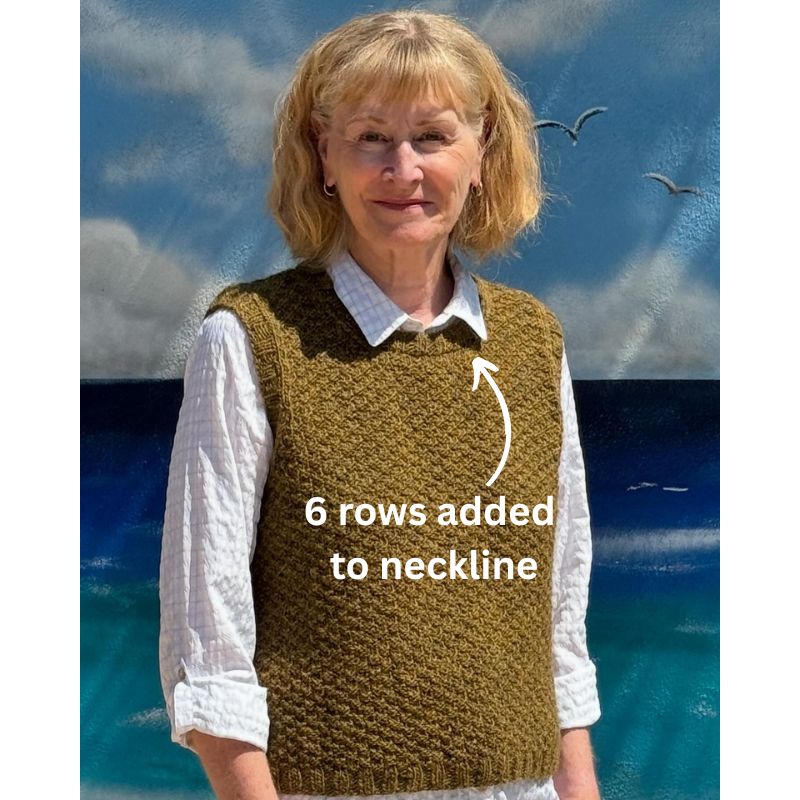
As an example, my test/preview knitter Susan added 6 rows to her neckline so she could more comfortably wear a collared shirt underneath – below is her photo:
This simple alteration also adds rows to your overall armhole depth. But as you can see in Susan’s example, the longer armhole depth still provides a nice fit.
However, if you want to add a longer neck depth but have your armhole depth stay the same as the pattern’s schematic, you can make one additional alteration: However number of rows you want to add to your neckline depth, take this number of rows out of the “Front – Section 4” section. You just need to make sure in this case that the number of rows you’re taking out is a multiple of 4 (so likely either 4 or 8 rows). FYI – if you go this route, you’ll need to make this decision earlier on since Front – Section 4 occurs before the neck shaping begins.
What if you don’t realize the neckline is deep enough until after you’ve tried it on?
If after you have attached the shoulders and try it on you decide that the neckline is not deep enough, don’t worry – you can make the adjustment after the fact! Just make sure this is done before you do the neck ribbing – otherwise you’ll have to rip that out first.
- Step 1: Un-do your three needle bind-off on each side, placing your Right Front Shoulder sts onto a holder and your Back sts onto holders. Place your Left Front Shoulder sts onto your needle (if it’s easiest, you tink back 1 row in order to get them onto the needle).
- Step 2: Work the additional rows you want to work on the Left Front, by repeating the rows 15-18 from the “Left Front” section of the pattern. Note how many additions you make so you can replicate on the other shoulders. Once done, place those stitches onto a holder.
- Step 3: Replicate what you did on the Left Front on the Right Front.
- Step 4: Transfer Back sts onto the circular, tinking-back the last row so you un-do the Back Neck bind-off. Then however many rows you added in the Front you will want to add on the Back, repeating the rows listed in “Back – Section 4”.
- Step 5: Then work “Back – Section 5” and the “Joining Shoulders” section again.
Pick-up and knit armhole stitches
Similar to the neckline, the armhole trim is created by working the ‘pick-up and knit’ technique around the entire armhole. You’ll first pick-up and knit stitches on the left side of your underarm and then you’re instructed to pick-up and knit 3 stitches for every 4 rows around the entire armhole until you’re back at the underarm. Then you’ll pick-up and knit your rightside underarm stitches and then you’ll be done!
I have a video lesson that walks you through this entire process, plus I show you how I bind-off in pattern and weave in ends at my underarm area.
Pick-up and knit neckline stitches
The neckline ribbing in Wharf Street is created by working the ‘pick-up and knit’ technique around the neckline, and then working in rib stitch. If you’ve never done a pick-up and knit around a neckline, you can watch my video lesson below where I walk you through how I picked-up and knit for my vest sample.
Important note: In this video, when picking-up stitches along each front curve, I pick-up and knit 3 sts for every 4 rows (for a total of 14 sts). However, some people have found that this ratio and this amount creates a too tight neckline especially if using a cotton yarn (that doesn’t have much elasticity). So I would highly recommend that instead of picking-up only 14 stitches that you pick-up 16 or 18 stitches – this would be more like picking-up 4 sts for every 5 rows or just picking-up into each stitch along these curves. In a more recent version of this pattern I have specified this.
Other knitting techniques
Below are links to different knitting techniques that are used in Wharf Street:
Errata
In version 1.2 of the pattern, there is a typo in the “Underarm Divide” section that applies to sizes 7-10. Step 1 of that section should read:
ERRATA: In version 1.2, for sizes 7-10, there is step 1 of the Underarm Divide. Step 1 should read as follows (the bolded numbers are the corrected ones):
BO the first 2 (2, 2, 2, 2) (2, 6, 6, 6, 6) sts kwise, then k1, [p2, k2] until you have 62 (70, 78, 86, 94) (102, 102, 110, 118, 126) sts on RN since bind-off at beg of rnd, then k 2 (2, 2, 2, 2) (2, 6, 6, 6, 6) – these sts just worked are your Front sts.

