Swatching your Soundtrack
Ah swatching…I know you really just want to get started knitting your Soundtrack but I promise swatching is totally worth it! Here are some tips for swatching for the Soundtrack project:
Tip #1: Swatch in the round!
For the Top, the whole body is worked in the round (and so is the cowl) and so if you don’t do your gauge swatch in the round, you may wind up with a smaller or bigger circumference than you have hoped for. A lot of people tend to have a tighter gauge when they work in the round vs working flat (I do!). If you have never swatched in the round before, check out my video tutorial below:
And for a visual of how you work the stitch pattern, you can check out my page here.
Tip #2: Start and end your swatch with some ribbing (not worked in the round)
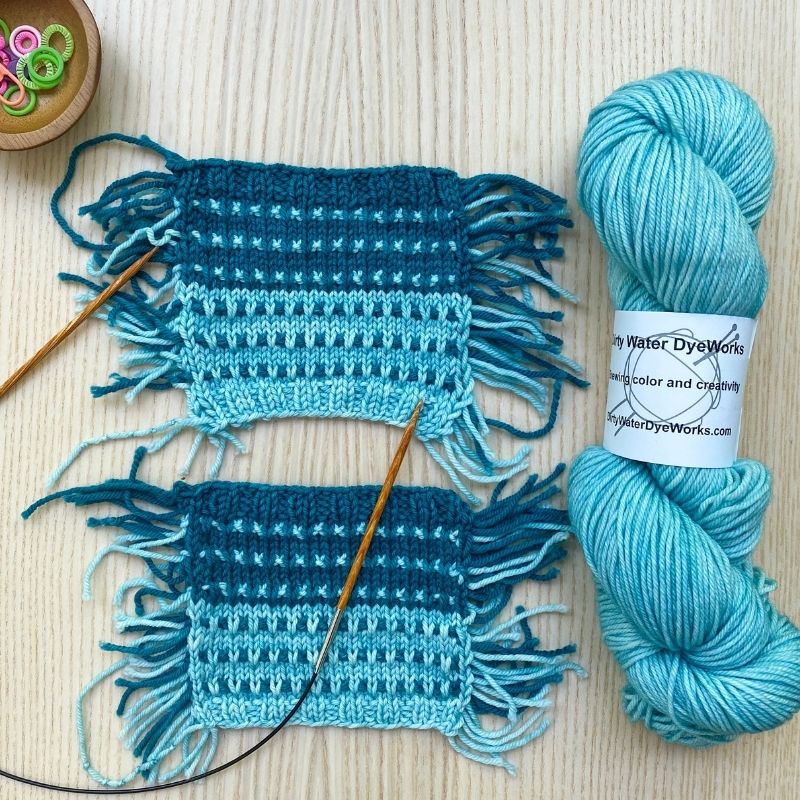
As you can see in the first image on this page, I started my swatch with some k2, p2 ribbing that was worked flat (so just back and forth). Once I had about .5-.75″ of ribbing, I then knit 2 rows in the round with the same color, and then I began the 6 rounds of stitch pattern in the round. I also ended my swatch with this ribbing. This just helps to prevent the swatch from curling too much on either end.
Tip #3: Measure your swatch before and after blocking
Because blocking can have a big impact on your gauge, it’s important to block your swatch. But make sure to measure your swatch before you block as well as after – this way you’ll know how much you can expect your fabric to grow! For more swatching basics, check out my tutorial here.
Important thing to keep in mind with this stitch pattern: Measuring rows/rounds can be a little deceiving! One of the rounds becomes practically hidden due to the slip stitch patterning. So here is how I recommend measuring (both rounds and stitches) – see images below along with my explanations:
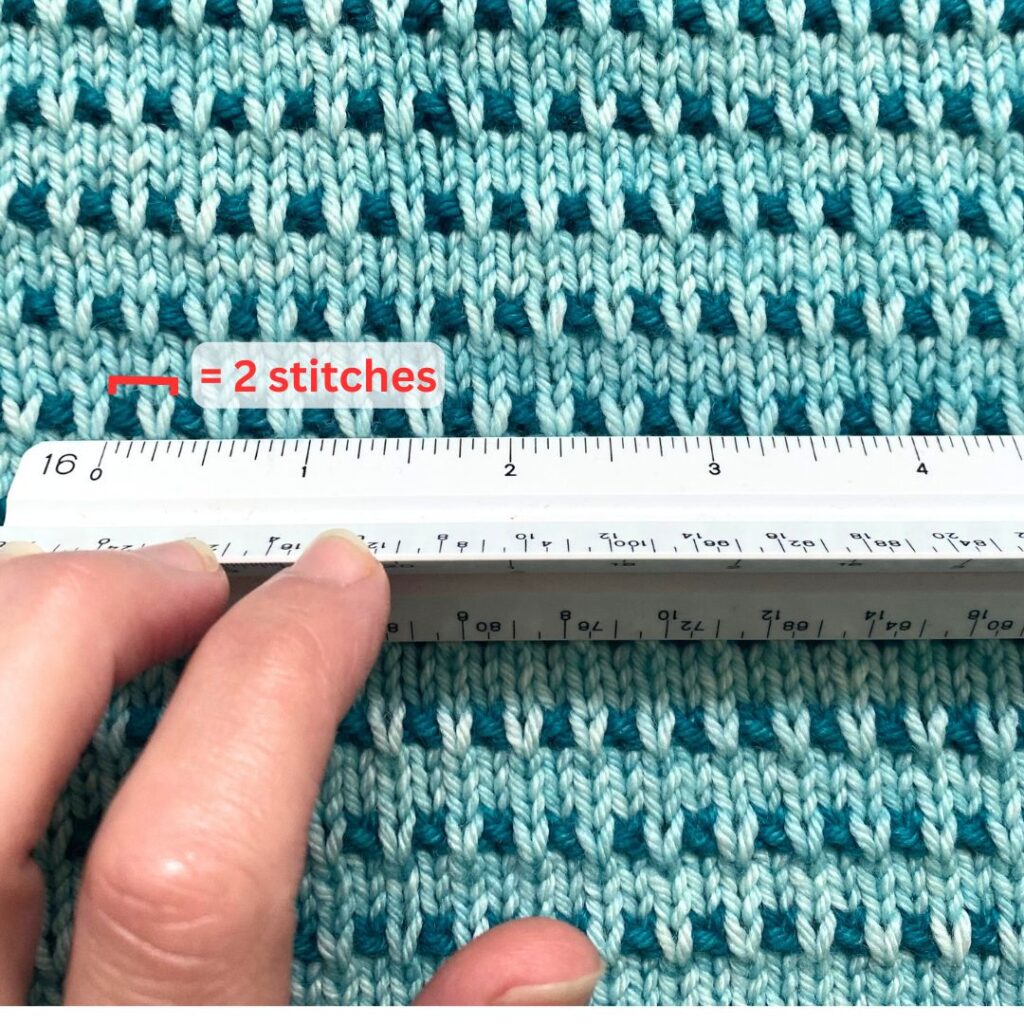
Measuring stitches

Line up your ruler horizontally with the edge of a “dot” stitch. The dot is one stitch. And then the “V” next to it is another stitch. So count your dots and V’s over the 4″. In the above, it’s my Summer Soundtrack so I measure 24 stitches over 4″.
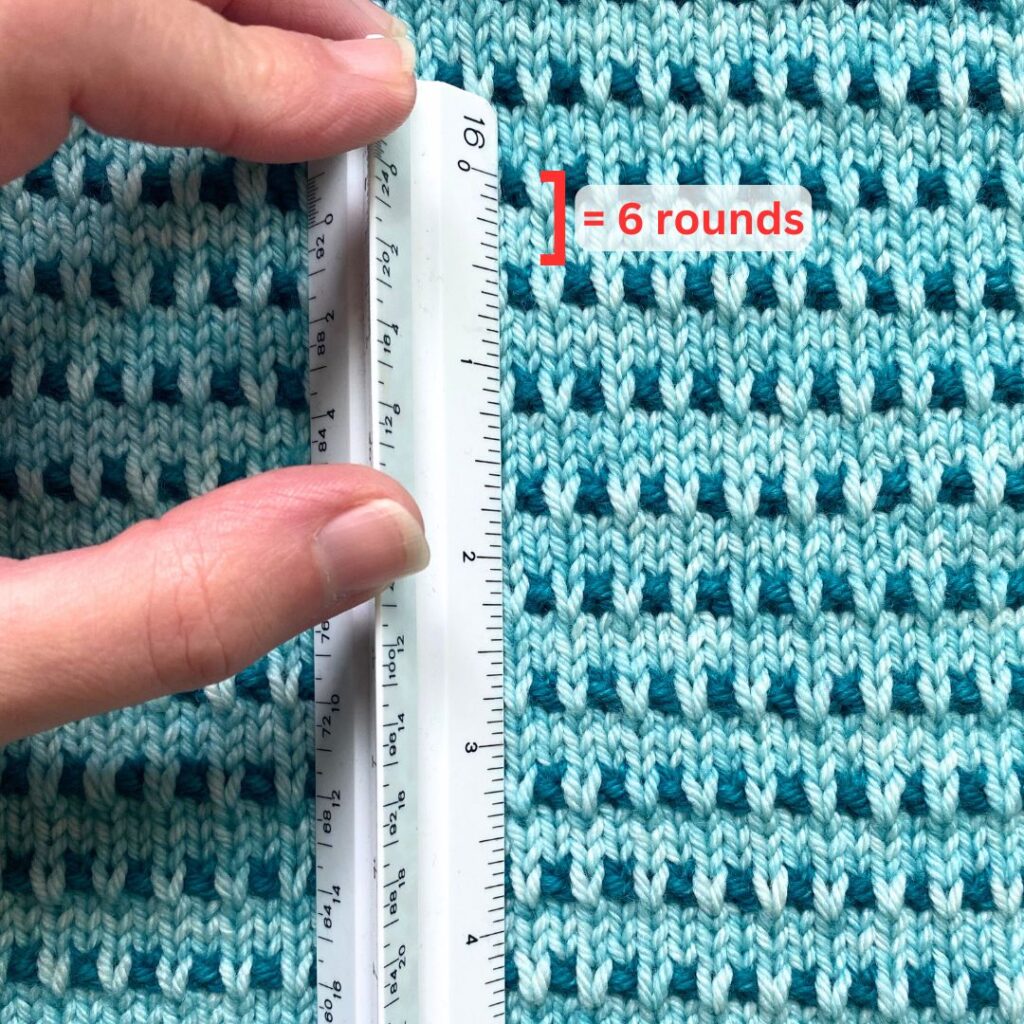
Measuring Rows/Rounds

Line up your ruler vertically so that you’re starting at the top of a “dot” stitch. The rounds between there and to right above the next dot are considered a stitch pattern repeat, and so that equals 6 rounds. Count from dot-to-dot (only including 1 dot per repeat) to figure out how many repeats you have that fit into 4″. In the above, I have 7 repeats that within within the 4″, and then I have an extra 4-ish rounds under that. So 7 repeats = 42 rounds, plus 4 rounds = 46 rounds.
Tip #4: Stitch gauge is more important that row gauge
It’s best to try to match the stitch gauge first, and if your row/round gauge isn’t exact then you can make pattern adjustments to accommodate it. The biggest impact row gauge will have is on your armhole depth. So when working the armhole depth, instead of going by number of rows listed in the pattern, go by the measurement that the pattern lists (and in the pattern I explain where this is).

