Runaround Pond Tips
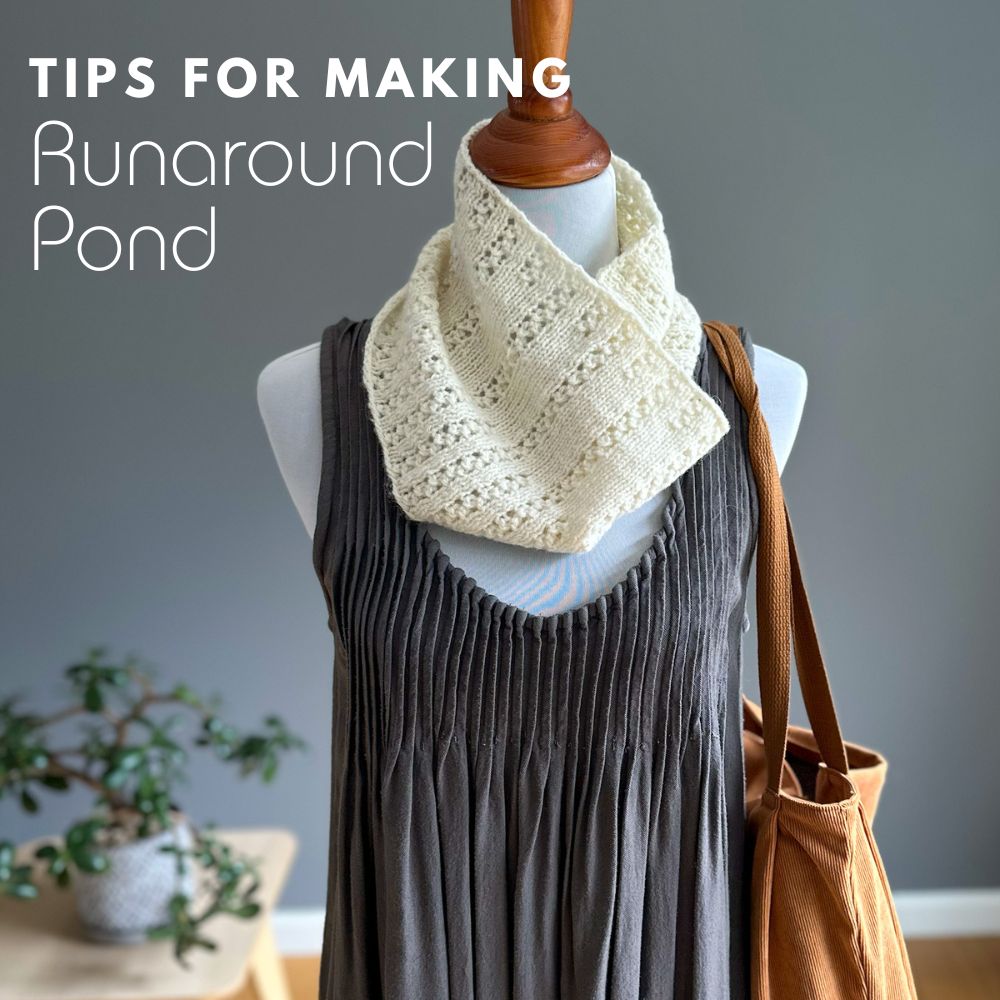
On this page you’ll find tips and tutorials for making your own Runaround Pond cowl! I named this cowl after Runaround Pond in Durham, Maine – a scenic pond/preserve/trail in my area. One of the first times we went there we did some canoeing, and there were lots of beautiful lily pads – this lacy stitch pattern plus the color of the yarn reminded me of that beautiful landscape!
Here are the topics I cover on this tips page:
- Yarn Options
- Adjusting the Pattern for Different Weight Yarn
- Long-tail Cast-On & Joining to Work in the Round
- Working a YO, p2tog stitch (and tips about this stitch)
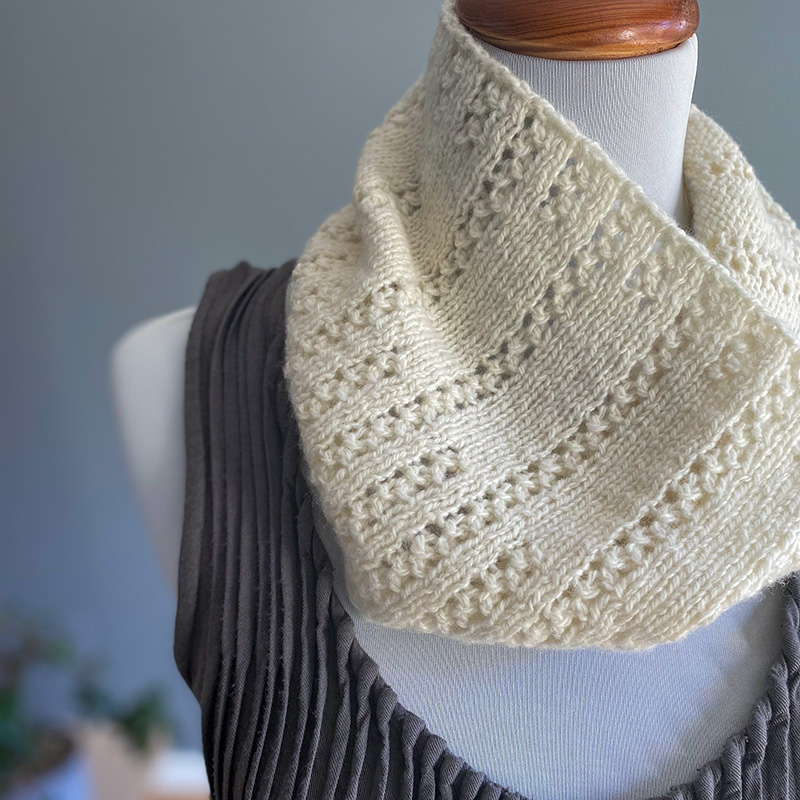
Yarn Options
I originally knit the long version (shown in green) in Dirty Water Dyework’s Bertha Sport, a merino/cashmere/nylon blend. The yarn has since been discontinued, but she now has Lillian Sport which has a similar gauge and also has the same great “pondscum” green color! The short version was knit in Myak Tibetan Cloud, a 100% wool yarn.

This pattern is very versatile though and any sport/dk-weight yarn will work well for it. Below are some additional suggestions:
- Manos del Uruguay Milo or Silk Blend
- Stolen Stitches Nua Sport
- Madeline Tosh Pashmina
- Rowan Alpaca Soft DK
- Lang Yarns Cashmere
Adjusting for a different weight yarn
Want to use a much thinner or much thicker yarn that sport/dk-weight? It’s easy to do – simply cast-on more or less stitches. The key is that the cast-on must be a multiple of 8. Below are some estimates based on typical gauges of other yarn-weights:
- fingering (6 sts per inch): long: 288 sts; short: 144 sts.
- worsted (4.25 sts per inch): long: 208 sts; short: 104 sts.
- bulky (3.5 sts per inch): long: 168 sts; short: 88 sts
Long-tail cast-on & Joining to work in the round
I recommend using the long-tail cast-on, although you can use a different cast-on if you prefer. For a video tutorial of the way I work the long-tail cast-on, click here. And if you would like to see how to join in the round, especially when it comes to a lot of stitches, you can refer to this video tutorial here.
Working YO, p2tog stitch
In this pattern you’ll be working a “YO” (yarn-over) and sometimes it will be placed before the “p2tog” (purl 2 together) and sometimes it will be placed after. If you are new to YO’s, check out my video tutorial below – I show you not only how to work a YO but also how it’s worked when the next stitch is a purl stitch (or in this case, a p2tog).
Additionally, I show you specifically how to work a “YO, p2tog” in this video – it’s for a different design, but the technique of working the YO, p2tog is the same so it may be helpful if you’ve never done this before.
And one more tip about this stitch pattern – sometimes people find that their YO eyelets may look slightly different depending on if the p2tog is worked before or after it – this just has to do with the tension. I don’t mind the slight difference in eyelet size, but if it bothers you, can try to tighten up the tension around the larger YO by either tugging the yarn a bit more after working the next stitch, or working the next stitch through the back loop.