Mainer Cowl Tips
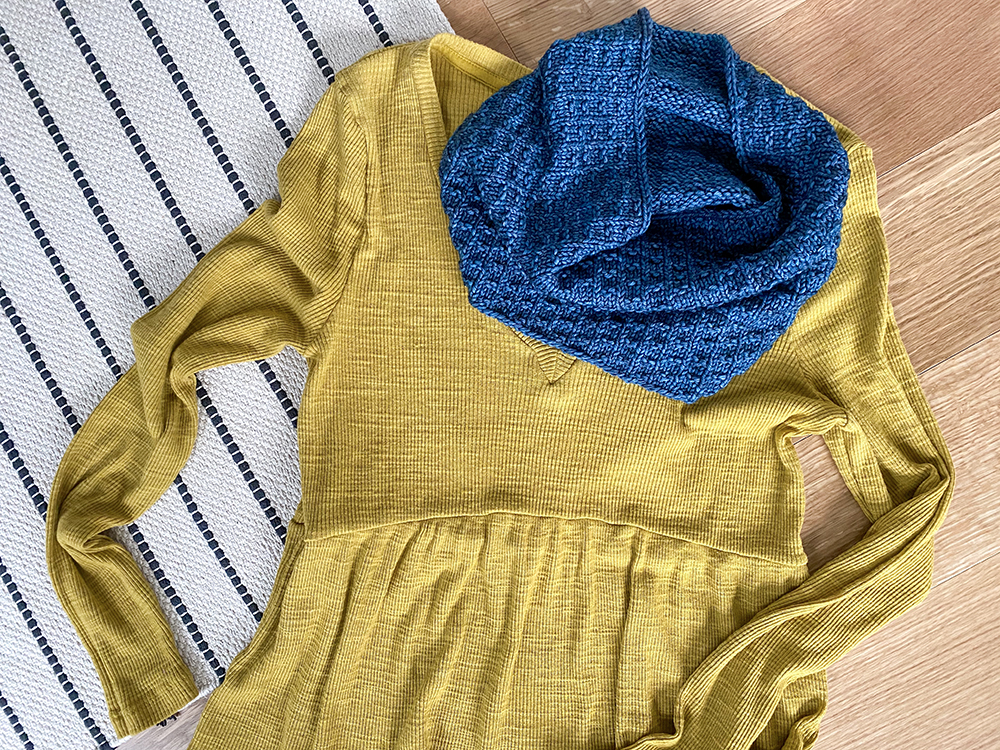
One of my favorite simple cowl patterns is my Mainer Cowl. I recently revisited it, after needing a simple travel project. And one of the reasons I realized I loved it so much is because it’s an easy project to “read” your knitting, so you don’t need to use paper/pencil to keep track what round you are on. This is super helpful when you are traveling, or when you just want a project you can mindlessly knit away on.

Tips on Reading Your Knitting in Mainer Cowl:
#1: KNOW YOUR PURL STITCHES
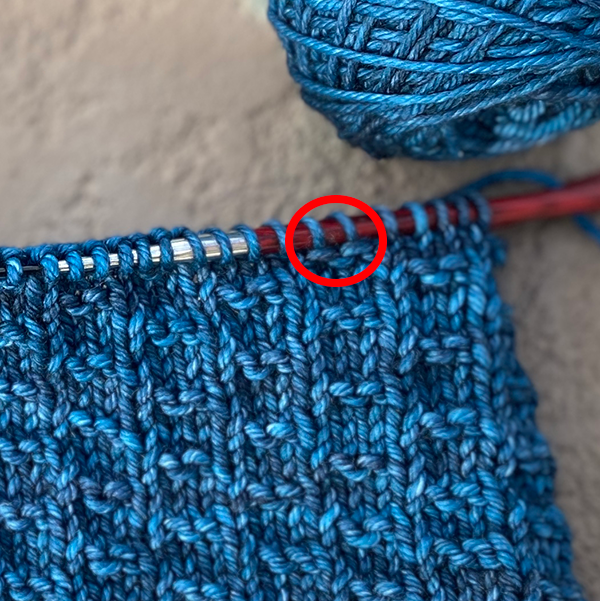
The stitch pattern used in Mainer Cowl is just knits and purls. The most important part of reading your knitting in this pattern is to know what a purl stitch looks like. In case you’re not sure, purl stitches have bumps that show on the right side of your work. In the image below I have circled in red the 2 purl stitches. You can see how, opposed to the stitches on either side of it, these 2 stitches have bumps showing on the right side of the work:

#2: KNOW IF YOU ARE ON AN ODD ROUND OR EVEN ROUND
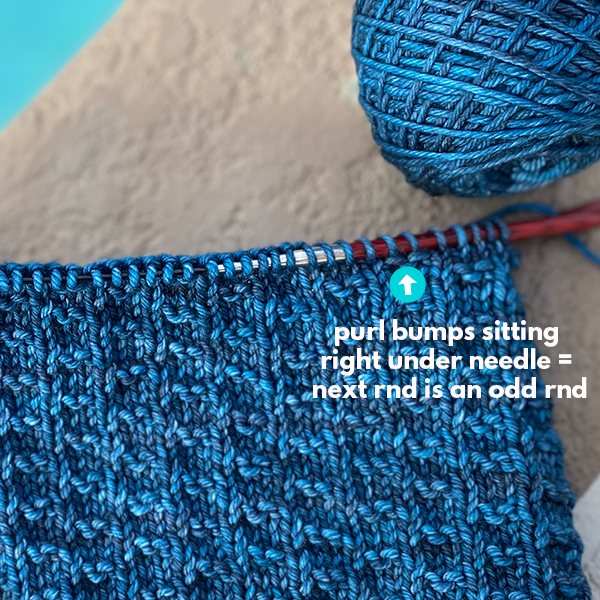
This stitch pattern is a 4-round-repeat (i.e., you repeat 4 rounds over and over again). The odd rounds (rounds 1 and 3) are always just knit rounds (so you knit every stitch). The even rounds (rounds 2 & 4) are the ones where you are creating the texture, so you’re working knits and purls. So how can you tell if the round you are about to start is an odd round or an even round? Look for those purl bumps! If you see purl bumps sitting right under the needle, that means the last round had some purls in it and so it must have been an even round – and that would mean the next round is an odd round (one where you just knit every stitch). See image below for an example of this:

Now if you don’t see any purl bumps sitting right underneath the needle, that means that round you just worked must have been an odd round (where you knit every stitch), and so the next round must be one of the even rounds. Which brings up the next tip…how do you know if you should work a Round 2 or a Round 4??
#3: TELL THE DIFFERENCE BETWEEN A ROUND 2 AND A ROUND 4
As we’ve already established, in this stitch pattern the ‘texture rounds’ (the ones where you work both knit and purl stitches) are Round 2 and Round 4. From Tip #2 we already know how to tell if we need to work an even round. So if we know we need to work an even round, how do you know if it’s a Round 2 or a Round 4? It’s all about the purl bump placement!!
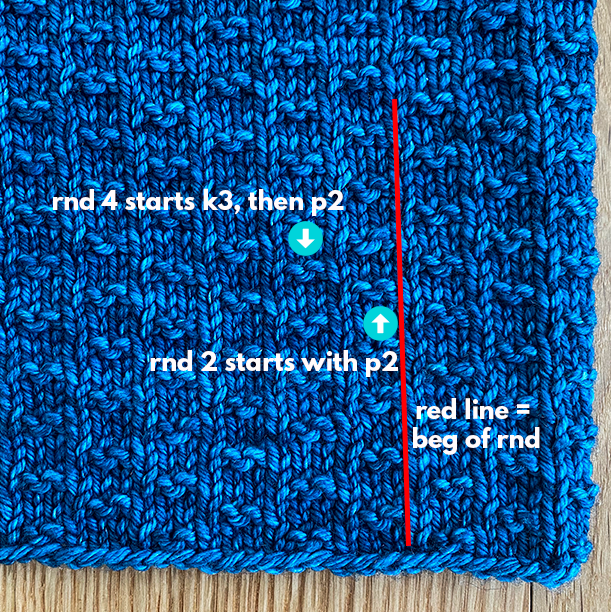
So to review: Round 2 starts with a “p2, k4” and Round 4 starts with a “k3, p2“. So you will either start with 2 purl bumps or start with 3 flat knit stitches and then have your 2 purl bumps. Let’s call these purl bumps “dashes” since that’s kind of what they look like.
Now look at your fabric and see where you worked your last “dash” at the beginning of the last even round. So look 2 rows down, right at the beginning of the round – is your dash right at the beginning of the round, or is it more to the left? If the last dash is right at the beginning of the round, then the last even round you must have worked was a Round 2 since that one starts with p2. If the dash is more to the left of the beginning of round, then you must have worked a Round 4 since that one starts with k3, then you p2. See my image below for a visual of this (note that the red line marks the beginning of the round):

So if you see that in your last even round that your dash is at the very beginning of the round, that means your next round should be a Round 4. And vice versa – if the last dash is more to the left of the beginning of the round, then your next round should be a Round 2.
With these 3 tips, once you get the pattern established you’ll be able to know exactly what round you are on without having to keep track with paper and pencil. You’ll be “reading” your knitting instead!
