Lilac Trail Tips

On this page you’ll find links to tutorials for many of the techniques used in my Lilac Trail vest pattern. This page reviews the following techniques:
- Picking a size & yarn
- Long-tail cast-on
- Lace panel stitch
- m1p
- Decrease stitches: skp, k2tog, sk2p, k3tog, ssk
- Three needle bind-off
- Picking up stitches
- Blocking
Picking a Size & Yarn:
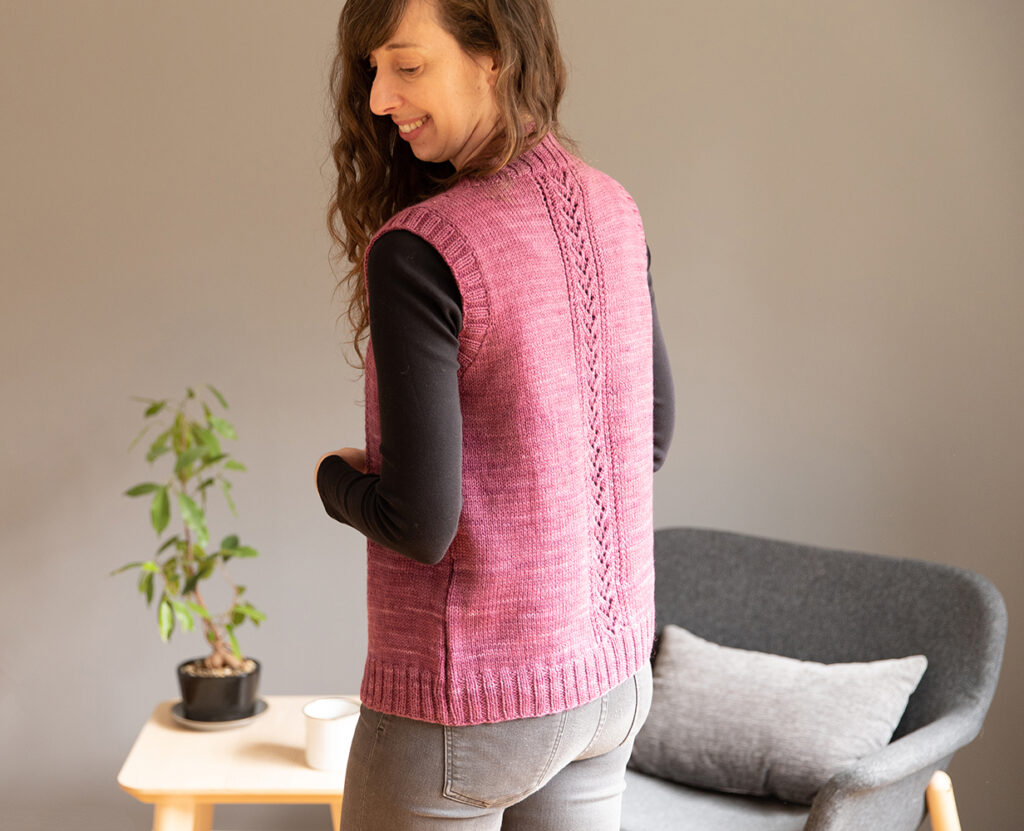
My recommended amount of ease for this pattern is between 2-4″ (so picking a size whose finished measurements are approx. 2-4″ larger than your actual bust measurement), although you can pick more ease if you would like a more oversized look. I’m wearing size 2 (finished circumference 35.5″), which on me is approx. 2.5″ of positive ease at the bust. There are 11 different sizes to pick from ranging in finished circumference of 32.5″-64.5″. If you would like to learn more about ease, click here to read my blog post about it.
I knit this sample in Dirty Water Dyework’s Edna yarn – a beautiful wool/silk blend. You only need between 2-4 skeins depending on size.
If you would like yarn substitution ideas (that are in a different fiber or price point), check out a few ideas below (feel free to reach out to me too if you have a DK yarn you’re wondering will work or not):
- Berroco Modern Cotton DK, Vintage DK or Ultra Wool DK
- Manos del Uruguay Milo, Silk Blend or Feliz
- Malabrigo Arroyo
- Knitpicks Gloss DK or Swish DK
Long-tail Cast-On:
I like using the thumb method of this cast-on. I have a video tutorial below!
How to work the m1p (make 1 purlwise):
Here’s a great video from Purl Soho. Note: in Lilac Trail I just use the right-leaning version (this video shows both right and left).
Back Lace Panel (vandyke stitch):
In the below video tutorial, I walk you through exactly how to work the 17-stitch, 6-row lace stitch pattern that’s featured on the back of this piece (also called the “Vandyke Lace Stitch.” You’ll learn how to: k2tog, YO and skp, and how these stitches are worked on each RS row in this panel:
Decrease Stitches:
There are several different types of decreases used in Lilac Trail – some are used as part of the back lace panel (so see video above for those). Decreases are also used in the armhole shaping and the v-neck shaping – tutorials for these can be found below:
sk2p (slip 1, k2tog, slipped stitch over): Click here for my video tutorial.
k2tog and k3tog (knit 2 together and knit 3 together): My video here is for k2tog but the concept is the same for k3tog – you’ll just insert the right needle into the next 3 stitches instead of the next 2 stitches):
ssk (slip, slip, knit): Click here for my video tutorial.
Three Needle Bind-Off:
Each shoulder is “seamed” together using the three needle bind-off technique. My below video shows you how this technique is worked:
Picking Up Stitches:
You’ll be instructed to pick up stitches around each armhole (to create trim) and up each of the Fronts/Back Neck (to create Front Bands). If you have never picked up stitches before, you can refer to my tutorial page here.
Blocking:
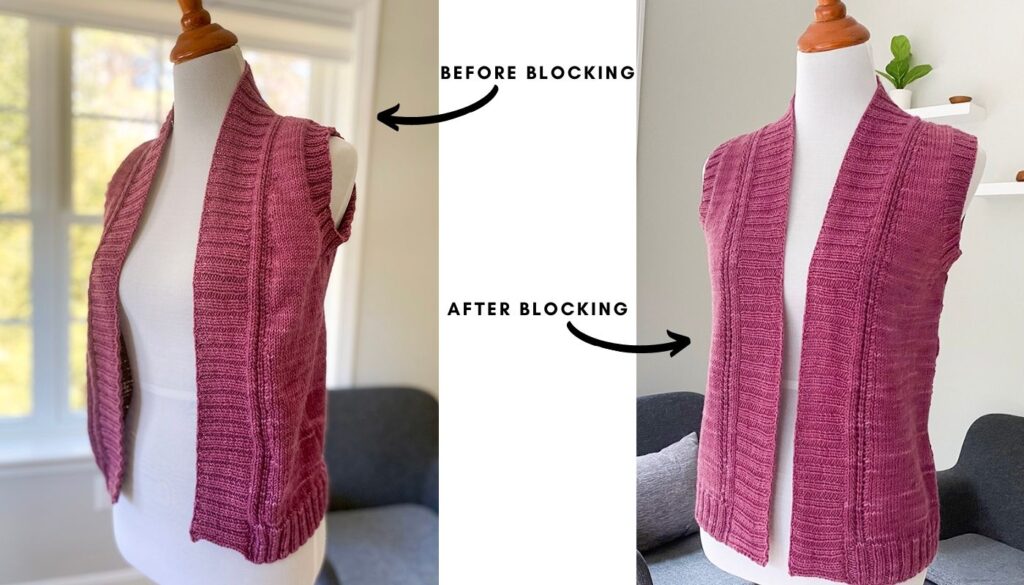
Blocking does wonders for a garment, especially when lace is involved – check out my before-blocking and after-blocking photos below:

Blocking evens out the stitches, relaxes the fabric, opens up the lace stitches and just gives the piece a more finished look. If you need a blocking tutorial, check out my blog post here where I go over my top ten blocking tips and, at the bottom, have a video tutorial of my whole process.
