Farro Tips
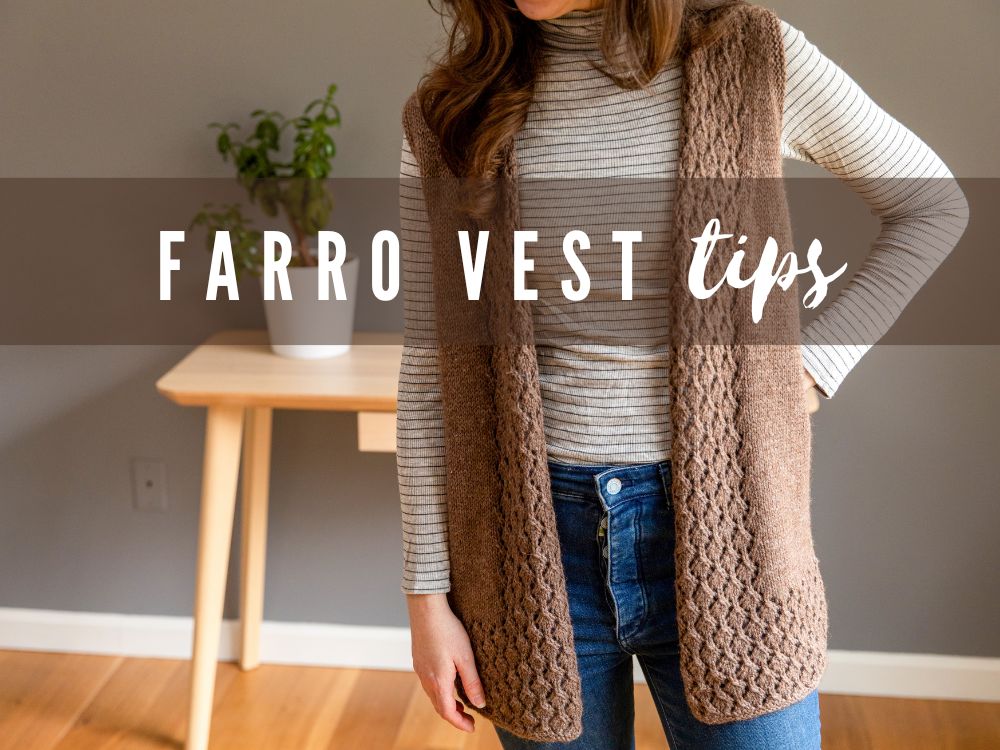
On this page you’ll find links to tutorials for all of the techniques used in my Farro vest pattern. This page reviews the following topics/techniques:
- Picking a size
- Long-tail cast-on
- Working lace pattern (and how to use stitch markers to keep track of repeated sequences)
- Additional videos on how to YO, skp, sk2p, ssk & k2tog
- How to make your vest shorter
- Three Needle Bind-Off
- Blocking your Farro
Picking a Size:
In Farro, I suggest picking a size whose finished circumference is approx. 3-5″ larger than your actual chest measurement. To learn more about “positive ease”, check out my blog post here.
However, one thing to keep in mind is that Farro doesn’t have included closures (like buttons) as I intended it to be a more open-style. Because of this, you can also opt to choose a size that either matches your actual chest measurement or is just an inch or two larger, if you want a ore fitted look. This will just mean that your Farro will be more open-style and you likely won’t be able to add any after-thought closures such as shawl pins.
Long-Tail Cast-On
In this pattern I suggest using the long-tail cast-on. Below is my video tutorial on how to do this, using the “thumb method”:
Working lace pattern (and how to use stitch markers to keep track of repeated sequences)
I created a video lesson that not only walks you through the 8-row lace stitch pattern but also explains how you can utilize stitch markers to help you keep track of your repeated sequences. It’s important to watch to the end because I explain how on row 7 you need to realign your markers! In the video’s description I also provide timestamps should you not want to watch the lesson in it’s entirety and just skip ahead to certain parts.
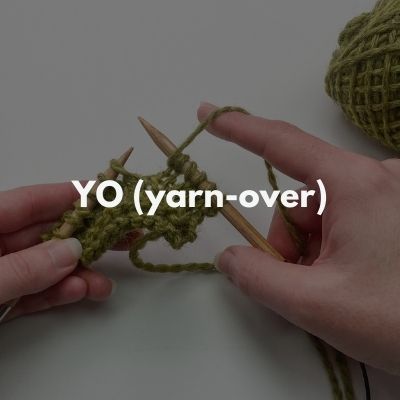
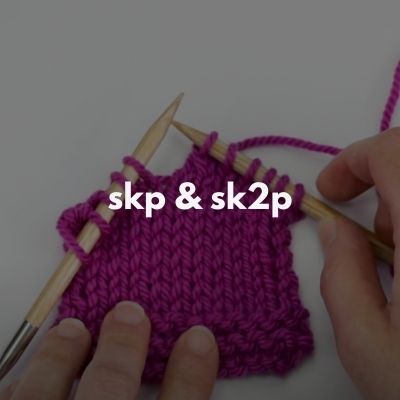
Additional videos on how to YO, skp, sk2p, ssk & k2tog
I review how to work all of the increases/decreases in the Farro lace pattern in the above lesson, but if you would like a more beginner-friendly, slower version of each of these stitches, you can review to my individual tutorials below:

How to work the vest shorter
Interested in making your Farro Vest shorter? As written, the underarm to hem length is 20″ and the total garment length from top of shoulder to bottom hem is: 28 (28, 28, 29.25, 29.25) (30.5, 30.5, 30.5)”. So first, to determine if you want to make it shorter, measure from the top of your shoulder down and compare that to the total garment length measurement listed (also available on the pattern schematic). If you do want to make it shorter, you just have to determine by how much.
If you just want to make it 1-3″ shorter: I advise following the pattern as written, but in the last paragraph of the “Body” section where it says to “Continue working as est for 21 more rows”, you can work less rows (work until you’re happy with the length), just making sure you end after working a row 2 of the lace stitch pattern for the front panels.
If you want to make it 4-6″ shorter: Then I suggest taking out 8 rows in-between each side decrease row. This eliminates 32 rows which translates to approx 5.25″ of length. It would work like this:
- After decrease row #1, work 10 rows as established (instead of 18)
- After decrease row #2, work 13 rows as established (instead of 21)
- After decrease row #3, work 11 rows as established (instead of 19)
- After decrease row #4, work 13 rows as established (instead of 21)
If you want a bit more length taken out, then you could work a few less rows after decrease #4 (before underarm divide).
Three Needle Bind-Off
This techique is used to attach Front and Back shoulders together:
Blocking your Farro
I created a photo tutorial of how I wet blocked my Farro vest – check it out here! If you prefer to see a video, you can check out my blocking video here. I use a different pattern, but the techniques are the same regardless of the pattern.
