Azalea Swatching
Once you have your yarn picked out for Azalea, it’s time to swatch! Even if you are using the same Manos del Uruguay Feliz yarn as I used in the pattern, you still have to swatch. This is because every knitter’s tension can be a little bit different and so you may need to be on a needle size higher or lower than I used to get the pattern gauge. Going through the swatching process is important because it determines what the finished measurements of your garment will be. Here are my 5 tips for Azalea swatching:
Tip #1: Swatch in the round
The body of Azalea is knit in the round, so the overall circumference of the piece is determined by your “in the round” gauge. Can there be a difference between your “flat” (i.e, knitting back and forth) gauge and your “in the round (i.e, knitting in a circle) gauge? Yes! Not for everyone, but for some people this is the case. I go into lots of details about the importance of swatching in the round on this tutorial page, so if you are new to blocking, I highly recommend giving it a read. It also includes a video tutorial of exactly how to swatch in the round which might be super helpful if you’re new to it.
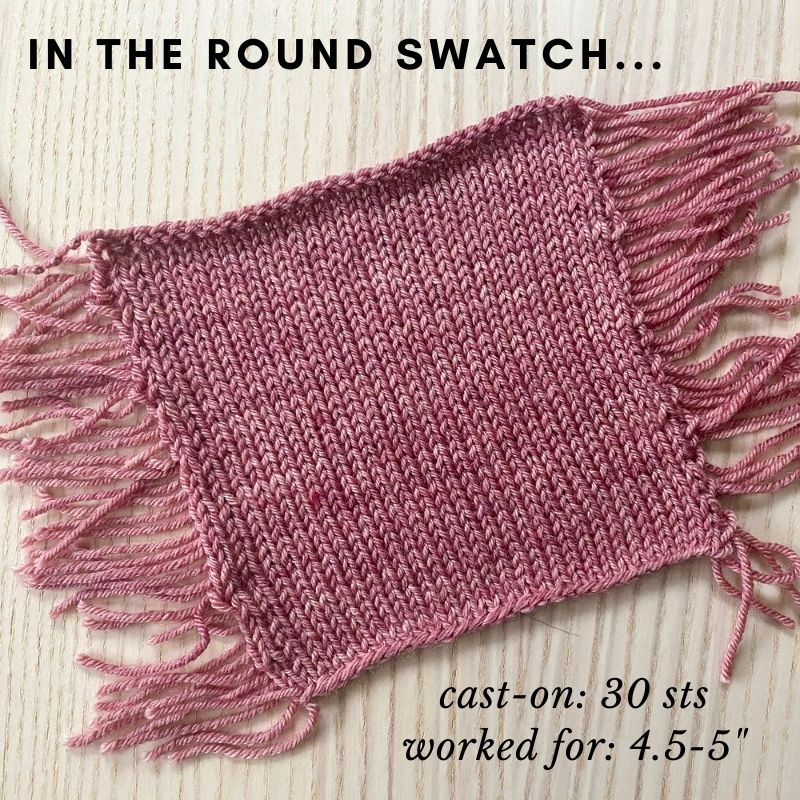
Tip #2: Make sure to cast-on enough stitches in your swatch
As I mention in the tutorial page linked above, it’s important to cast-on more stitches for an in-the-round swatch than you would for a flat swatch, because the sides of an in-the-round swatch can be distorted and shouldn’t be included in the area measured. In my swatch example below, I cast-on 30 stitches. I estimated that I wanted at a minimum 4 stitches on either side of my measuring area that wouldn’t be included. And since I’m aiming for a gauge of 22 sts = 4″, that meant casting on 30 stitches. But this is the minimum – I wanted to at least show you what the minimum looked like but more is always better. I always account for “swatching yardage” in my pattern’s yardage requirements so you don’t have to worry if you have enough yarn. Also make sure to knit for at least 4″ so you have a nice bit of fabric to measure both your stitches and rounds (but read tip #5 regarding your rounds…).
Tip #3: Measure your gauge before blocking AND after blocking
I can’t stress enough the importance of measuring your swatch before you block and after. Why is that? Because I always recommend blocking your finished garment (it makes all the difference – check out my post here for more info about it). And so, if you are going to block your finished garment, you’ll want to make sure that your gauge is based on your blocked swatch. This way you’ll also be aware as you are knitting your garment what kind of growth you can expect. I have a video tutorial here about how to measure a swatch (it’s a flat swatch instead of an in-the-round swatch but the measuring process is the same regardless) – so if you are new to the process, it might be helpful to watch!
Below is a picture of the different steps I took in my swatching process for Azalea:
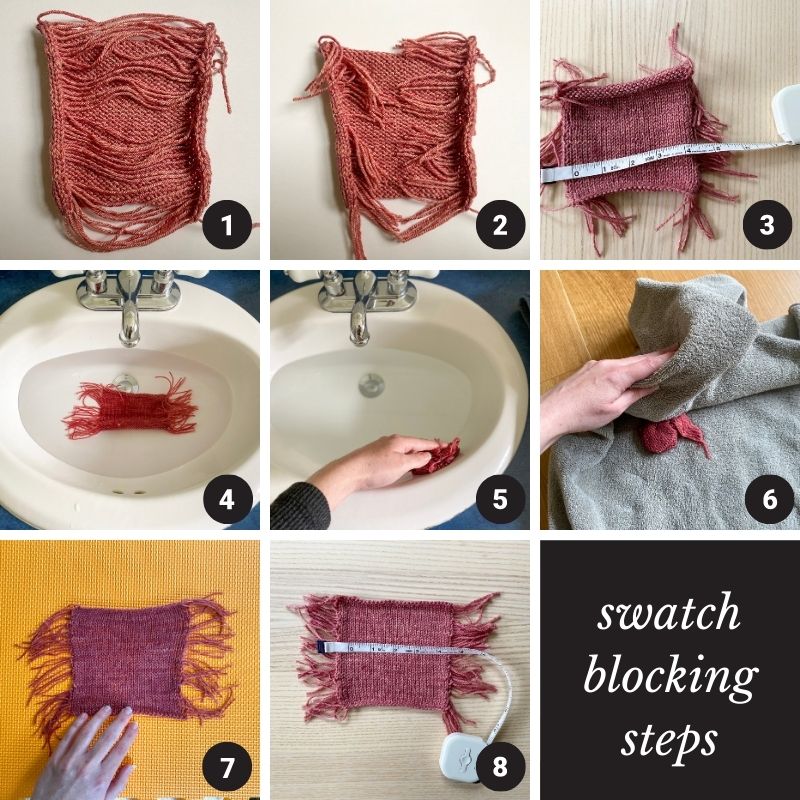
- Swatch in the round (picture of the back of the swatch before I cut the strands).
- Swatch after the strands were cut.
- Measuring the swatch pre-blocked.
- Soaking my swatch in the sink for 15 minutes.
- Before taking it out of the sink, press against side of sink to get bulk of water out.
- Lay swatch in towel and press it to get more water out (should just be damp when lay it flat to dry).
- Lay swatch flat to dry (I use a blocking tile to lay it out on).
- After it’s dry, measure your swatch post-blocked.
Tip #4: Sometimes not getting gauge is a good thing
You didn’t expect me to say that, did you!? In a top like Azalea that is boxy and has super simple construction, you can easily change the finished dimensions of the top simply by knitting your yarn at a different gauge. Let me give you an example. Say you want a slightly larger size. You can aim for a slightly looser gauge (so 20 sts or 21 sts over 4″ instead of 22 sts over 4″), knit the size that was just a bit too small, and with your looser gauge it will turn out just the size you want! This tactic doesn’t work with all designs but because of how simple Azalea’s silhouette and construction is, you can totally do this.
Alternatively, you can pick a size based on your particular gauge. So let’s say you pick your yarn, swatch it up, love the fabric but it’s not 22 stitches over 4″ – let’s say it’s 20 stitches over 4″. You can follow instructions for a size smaller than you would typically knit and it will end up just the size you want! If you want to do this, please reach out to me and I’ll be happy to help guide you on what size you should make based on your particular gauge.
Tip #5: Focus on stitches, not rounds
Here’s another great thing about Azalea – you can adjust the length as you go. The only thing you can’t adjust as you go is the circumference – you’re committed to that after you cast-on. So when swatching and trying to get gauge, focus on the number of stitches over 4″. If your row gauge doesn’t match what the pattern says exactly, it’s totally fine! You’ll just be knitting to a certain number of inches for both the body as well as for the armhole depth so not having the right row gauge is no issue at all. Just know from your blocking process whether or not your row gauge changes after blocking or not so you can keep that in mind as your knitting your garment.
I hope these tips are helpful as you begin your swatching process! If you have any questions just reach out and as I mentioned above, if you struggle to get the exact gauge it’s ok – we can figure out which size you should make based on your particular gauge.