Casting-on and Raglan Sections

Let’s get started knitting Audrey’s Cardigan! In the below video, I show you my cast-on, raglan setup row and I start on Raglan Section 1. I also provide a little background about what the raglan sections are all about. But I also thought it would be helpful to provide a bit more detail about all of this, which you’ll find below!
The Cast-On
I recommend the long-tail cast-on for Audrey’s Cardigan. The reason is because I find it an easier cast-on to pick up into afterwards (which you’ll need to do when creating the front bands. However, if you have a different cast-on you prefer, it’s totally fine to do something different. In the above video, I do show you how I do my long tail cast-on, but if you need instructions that are a bit more step-by-step and for the true beginner, check out my long-tail cast-on video by clicking here.
Raglan Shaping
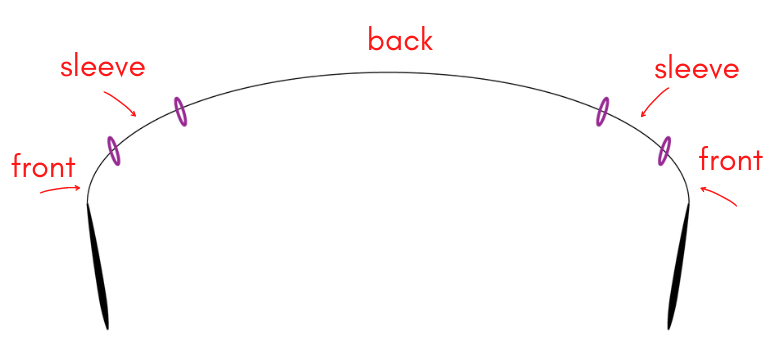
With a top-down sweater like Audrey’s Cardigan, you place 4 markers after casting-on. These markers divide up your yoke into 5 parts: Left Front, Left Sleeve, Back, Right Sleeve, Right Front – here’s a diagram that shows this:

The yoke grows by working raglan increases in each of the above 5 sections – in Audrey’s Cardigan I utilize “m1-R” and “m1-L” increases. In the above video I do show you how these are worked in this pattern, but if you have never made a “m1” before, check out my beginner video by clicking here.
On some rows, these m1 increases are worked 1 stitch in from each of the above 4 markers. For example, in Raglan Section 1, row 3 is such a row and it says: *k to 1 st before marker, m1-R, k1, sm, k1, m1-L; rep from * 3 more times, k to end.
Then on some rows, there are also additional m1 increases on each Front, 1 stitch in from each edge, such as in Raglan Section 2, row 3 (on these rows, the row starts with the verbiage “Neck Inc”). This row says: k1, m1-L, *k to 1 st before marker, m1-R, k1, sm, k1,m1-L; rep from * 3 more times, k to 1 st before end, m1-R, k1.
And then on some rows, you may work m1’s in some sections, but not all. For example, in Raglan Section 4, row 1, you are only working m1 increases on the Fronts and the Back and not on the sleeves (on this row, the row starts with the verbiage “Front/Back Inc Only”).
So as you can see, the stitches stay the same in all of these Raglan Sections, it’s just the sequence of where these m1’s are located that changes.
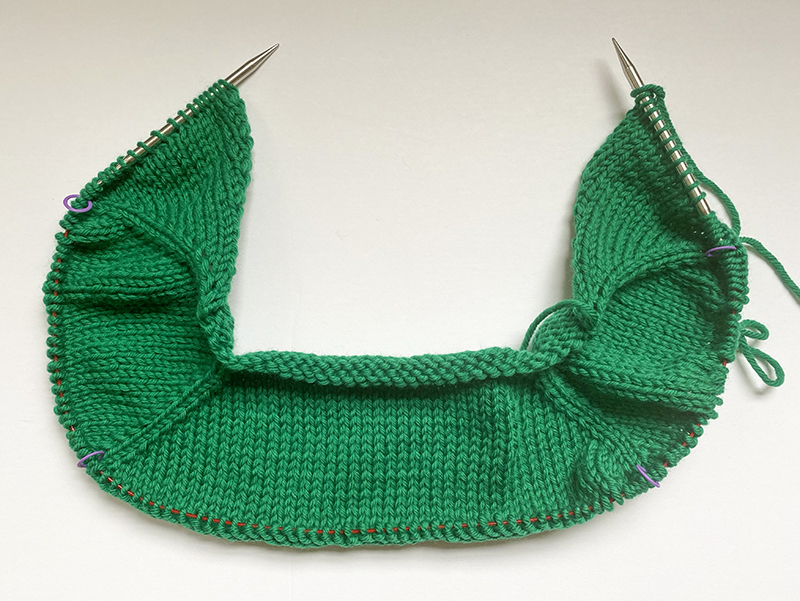
After a few inches worth of shaping, your work will start to look like this:

As you make your way through the Raglan Sections your work will start to look more and more like an actual sweater! Let me know if you have any questions along the way.
