Zester Tips
On this page you’ll find tips and tutorials for making your own Zester Cowl! The main tips are:
- Gauge tips
- Joining to work in the round
- Working a “YO, k2tog” stitch pattern
- How to tell if you are on a “knit round” or a “YO, k2tog” round
- Other YO tips
- Tips for using a different weight yarn
- Tip for changing length
Gauge Tips
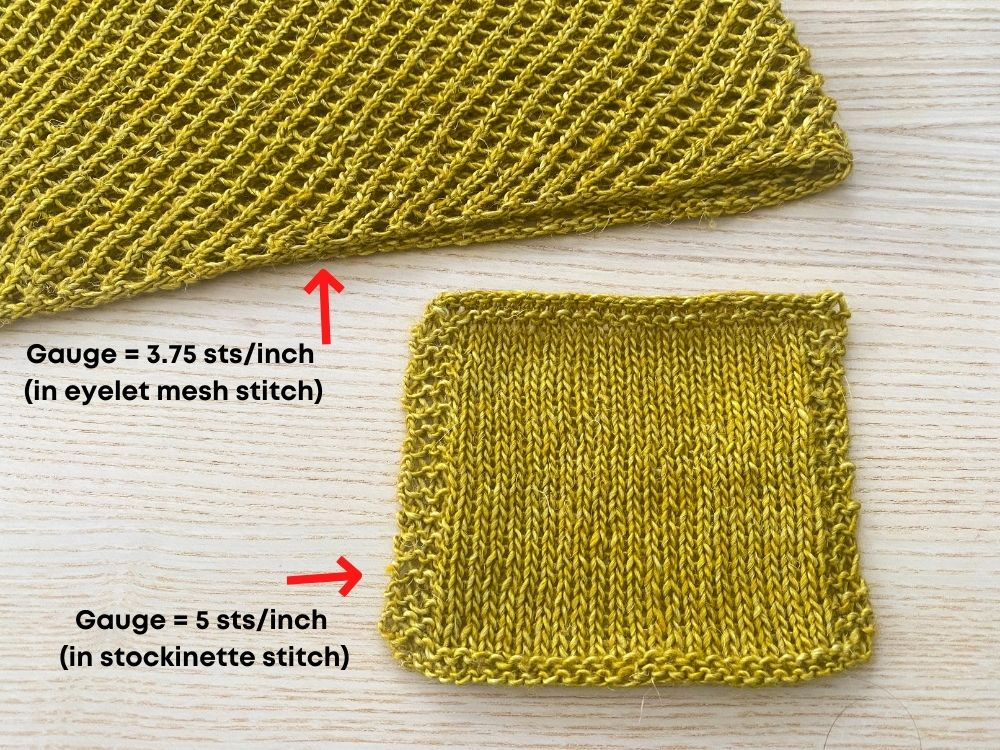
You might look at the gauge of this cowl and be confused because it uses sport-weight yarn (that typically would have a gauge of around 5-6 sts per inch) but the gauge number is Zester cowl is 3.75 sts per inch (a gauge you would typically encounter with bulky-weight yarn). Why is that? It’s all because of the needle size and the stitch pattern! The eyelet mesh stitch pattern is very open and when you combine that with being on a slightly larger needle size than you typically might be with sport-weight yarn you get an unusually loose gauge. As reference, in the same yarn and on the same needle size, when I knit a swatch in Stockinette stitch my gauge was 5 sts per inch. So this shows how much looser the stitch gauge becomes when working the eyelet mesh stitch pattern!
Gauge is not critical in this piece though, so don’t stress if you don’t get exact gauge. If you are curious though how to count your stitches in the eyelet mesh stitch pattern, check out my visual below – each arrow is 1 stitch count and, as you’ll see, the hole actually counts as 1 stitch:
If you’re curious how to adapt the pattern for a totally different weight yarn/gauge, keep scrolling to the bottom of this page!
Joining to work in the round
If you’re new to circular knitting and need some help joining to work in the round, check out my video tutorial below:
Working the “YO, k2tog” stitch pattern
To create the eyelet mesh stitch pattern in Zester Cowl, every-other-round you work the stitch pattern: YO, k2tog. For help in how this is worked, check out my YO video tutorial below (during the video I also show you how you would work a k2tog after a YO, like in this design):
How to tell if you are on a “knit round” or a “YO, k2tog” round
The trick with making this pattern a more ‘mindless’ knit is to be able to easily identify if the round you are on is a “YO, k2tog” round or if it’s a “knit” round. The key is reading your knitting!
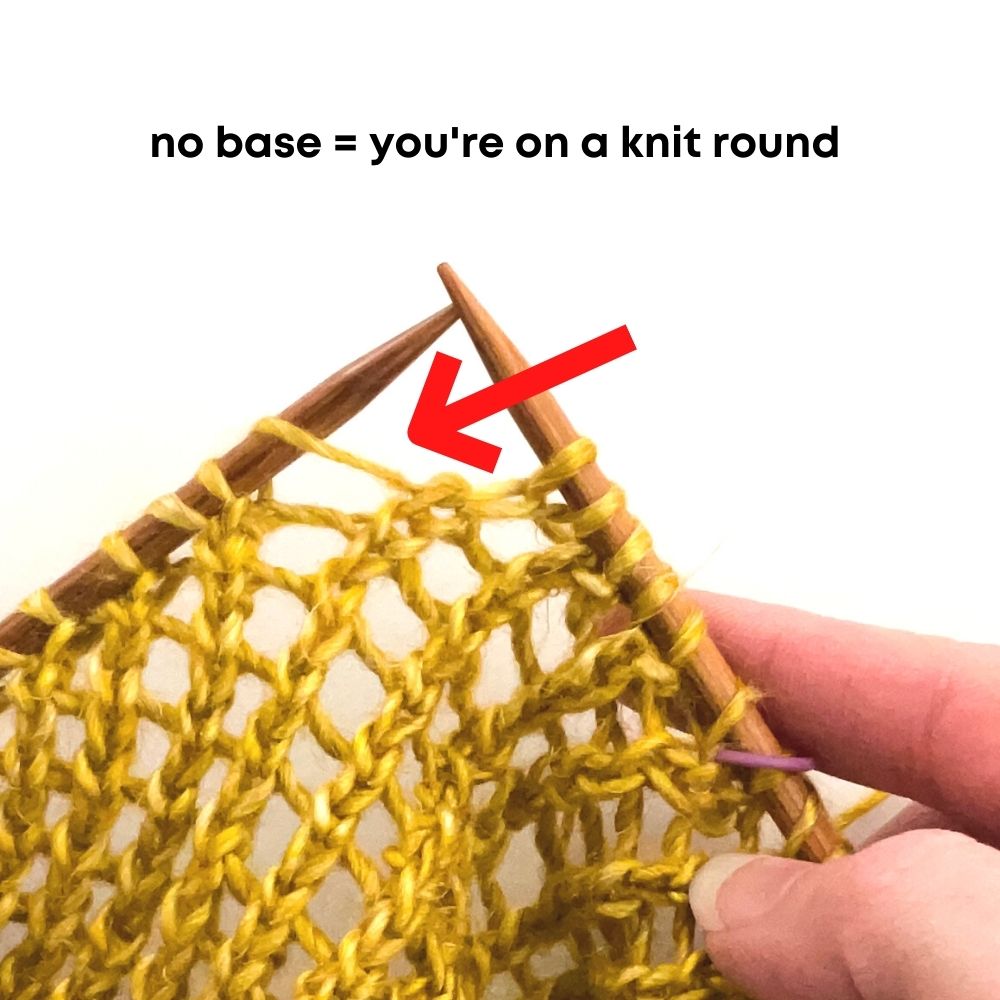
You know you are working a “knit round”: if you see stitches like this on your current round – a strand over the left needle like you see below, with no stitch base. This is the yarn-over you had created on the previous round. So if you see this, that means that round you are on right now is a knit round:
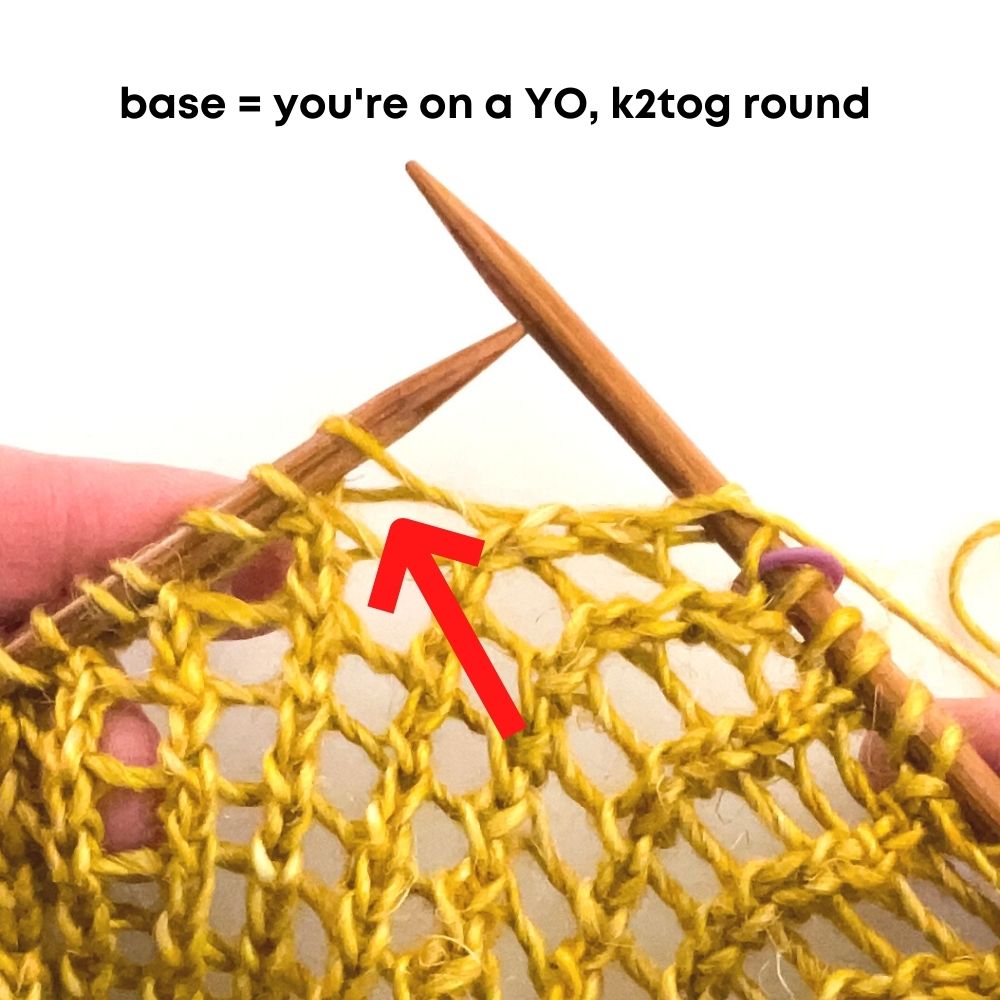
You know you are working a “YO, k2tog round”: if you see a base under that loop – it will look like the below. This means the last round had been knit so you’re now on a “YO, k2tog” round:
Other YO Tips
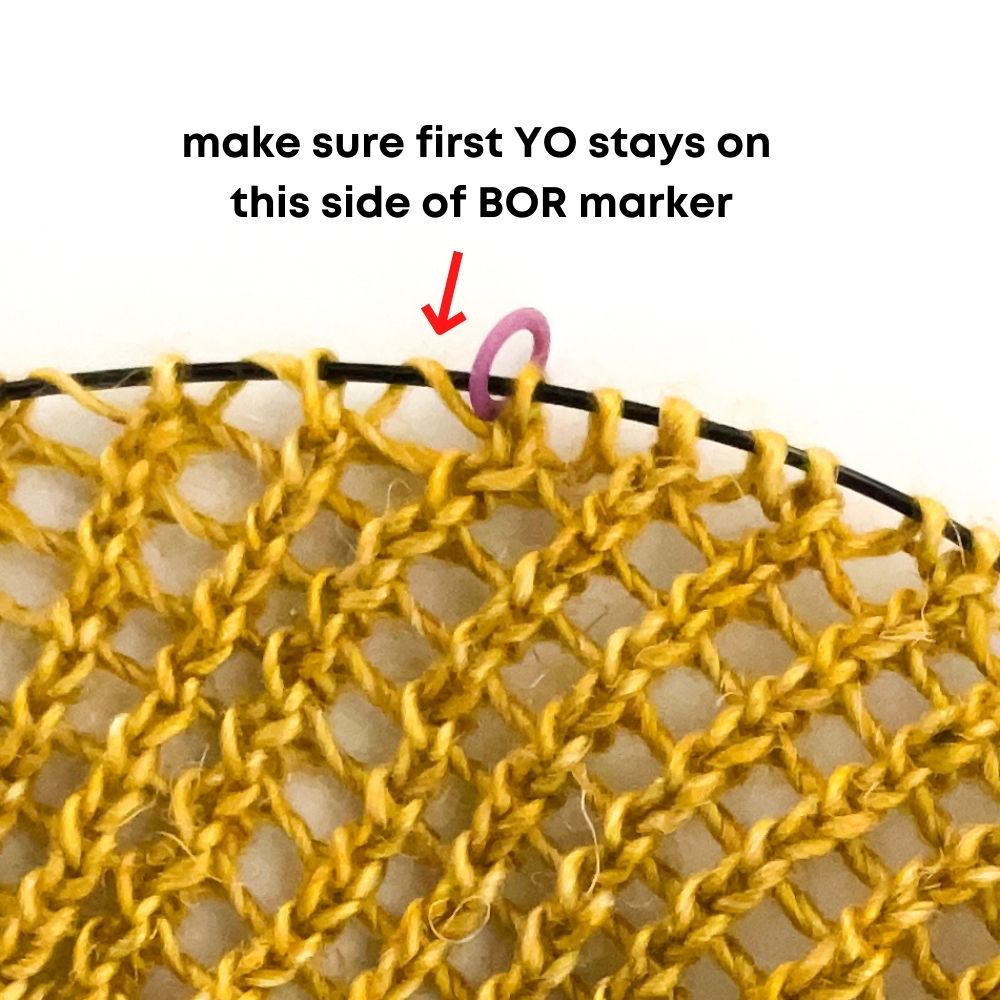
One other tip related to the YO’s is that the first YO in a round may slip under the BOR marker. So after you have worked a bunch of stitches at the start of a “YO, k2tog” round, double check that that first YO is indeed staying to the left of your BOR marker, like pictured below. If it does wind up sliding under the marker, simply move the marker when you return to the BOR.
Tips for using a different weight yarn
Zester Cowl was written for sport-weight yarn (I used Malabrigo Susurro). But the pattern is easily adapted to a different weight yarn as well! In the below table I’ve provided different yarn-weights, recommended needle size for that weight, number of stitches I recommend to cast-on for those weights and approximate yardage needed for each weight. You can also adjust the cast-on as desired – just make sure it’s an even number. You can also adjust the needle size as you experiment with different yarn options. The below table is to serve as a ballpark estimate/starting point.
| YARN-WEIGHT | NEEDLE SIZE | # OF STS TO CO | APPROX YARDAGE |
|---|---|---|---|
| fingering | US 5 | 120 | 300 |
| dk | US 8 | 96 | 250 |
| worsted | US 10 | 84 | 215 |
| bulky | US 11 | 70 | 180 |
Tip for changing length
Would you like your Zester Cowl to be more of an infinity, long-style where you can wrap it around your neck twice? If so, simply cast-on double the stitches than that listed in the pattern! And instead of knitting to the length listed in the pattern, you can probably cut that in half, or just make it as deep as you like! How much extra yardage you’ll need will just depend on how deep you do make it – feel free to reach out to me if you need help figuring this out.

